Table of Contents
With Elementor's Custom Code, adding code to a page or area in your site is as easy as pie! 🥧
Helping you create professional sites is our biggest priority and that means providing you with the tools you need to save time and focus on the work that matters to you most. To help streamline your work and reduce your dependency on other plugins, we’ve added the ability to include Custom Code in your site and manage all of your code snippets from one place in Elementor.
Up until now adding Custom Code in Elementor was not possible without the use of a third-party plugin or complicated code adjustments to your theme files. All that changes today.
With the new Custom Code feature you’ll be able to include tracking codes (Google Analytics, Facebook Pixel, etc) meta tags, and other external services in various areas in the page like the head and body tag.
All that beautiful custom code will be accessible in one place – Elementor. Plus, you’ll be able to decide exactly which code runs on which pages.
Easily Embed Code
How Custom Code Works
Custom code can now be easily added and managed under the Elementor menu in the WordPress dashboard. Once you add your code, you’ll be able to select the location (head, body start, body end), and set your priority. If you register two scripts in the same location like Google Analytics for Facebook Pixel you’ll be able to set the priority to determine which one of them will load first. If you want your Google Analytics scripts to load first you can set the priority to 1.
You can edit your code using a code editor with a comprehensive autocomplete, and set up your display conditions just as you would for every Elementor site part (Header, Footer, etc). Once you’ve finished, publish your code and it will be live on your site. You can manage and organize all of your code snippets in the Custom Code section under the Elementor Tab.
Improved Asset Loading
Get Faster Page Load Times
We recently added an Improved Asset Loading Experiment which focuses on optimizing site speed and scoring. Improved Asset Loading optimizes the performance on the front-end, saving loading time per each page by loading the widgets JS code only when needed on the page, which can result in up to ~100 KB of JS files size reduction.
Basically, we will load the specific widgets only if they are used on the page. No Pro widgets = no Pro widget JS files.
To experience this performance improvement, you’ll need to manually activate the Improved Asset Loading experiment found in your Experiments tab.
We plan on making many more improvements to performance in versions to come. In the meantime, learn more about how this experiment works here.
Beautify Your Code Boxes
Say Hello to Our New Code Highlight Widget
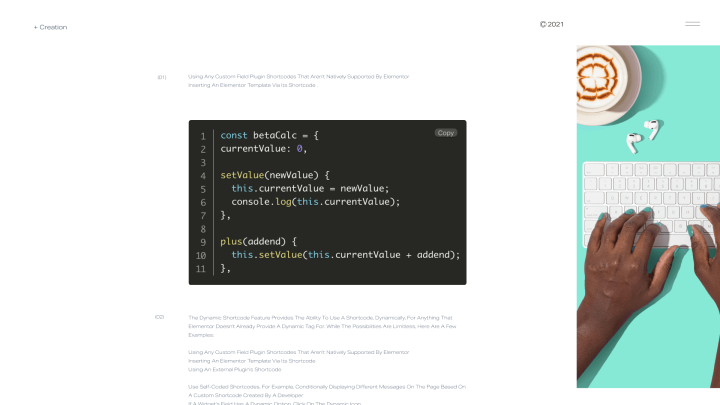
At Elementor, we love to educate and inspire with coding and styling examples (that’s right, we’re geeks and proud of it! 🤓). Many of our designer and developer users asked for the same, and that’s why we developed the new Code Highlight widget.
Using a code highlighter or syntax highlighting is especially beneficial for those of you who have a development blog or often use code examples in your content. If you’re looking for ways to make your code more readable and visually consistent with your site without the need for an additional plugin, you’ll want to use our new Code Highlight Widget.
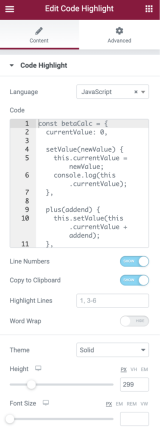
There are various things you can do with the new Code Highlight Widget. For starters, you can select your syntax (coding language) to optimize your highlighted code. You can also copy your code to your clipboard in a click and customize your design. Choose from six different design themes and find the style that works for your site. Display inline color visualization in code (in supported languages like CSS), and highlight specific lines you want to put a spotlight on in your code.
Animated Headline
Create More Engaging Headlines With Control Loop Play, Timing, and More
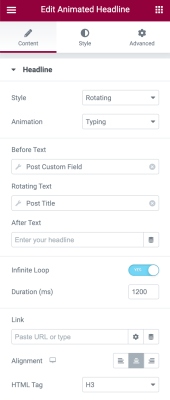
Even when releasing new features, we don’t forget to update our existing, popular widgets. A while back, we launched the Animated Headline Widget to allow you to create animated and highlighted headlines that can further draw the attention of your visitors.
Today we’re introducing some improvements you’ve been waiting for:
- Timing options – we’ve given you more control by allowing you to set the animation duration and delay between each animation loop.
- Loop option – many of you asked us to allow you to “Freeze” the animation when it finishes its loop. Now, you can set the widget to play only once, emphasize a specific message (example – underline effect), and keep it like this, so your visitors will see only the animation once.
- Set a selected color for typing effect – customize and control your typing effects by changing the color/background color and mixing and matching your colors to achieve your desired outcome.
- Dynamic content for Rotating effect – Create a beautiful Single Post template that shows your dynamic messaging with animated capabilities.
We hope you enjoy all the updates Elementor Pro 3.1 has to offer! Not a member of Elementor Pro yet? Sign up now to get started.
Looking for fresh content?
By entering your email, you agree to receive Elementor emails, including marketing emails,
and agree to our Terms & Conditions and Privacy Policy.
