Today, I am eager to show you a brand new set of capabilities that will allow you to create a wide range of visual effects, all using Filter Effects and Blend modes.
Table of Contents
Loading...
Using Filter Effects & Blend Modes, you can turn your experience as a designer into a limitless playground, allowing you to produce a broader spectrum of designs. Instead of switching back and forth between Photoshop and Elementor, you can accomplish amazing results – all on one platform.
CSS Filter Effects & Blend Modes were already available for the Call to Action widget. Now you can also use them on background overlays and with image & heading widgets.
These effects don’t just reduce the need for Photoshop. In fact, by playing with different filters & blend modes settings for normal and hover states, you can create interactive designs that would only be otherwise possible using complex CSS coding.
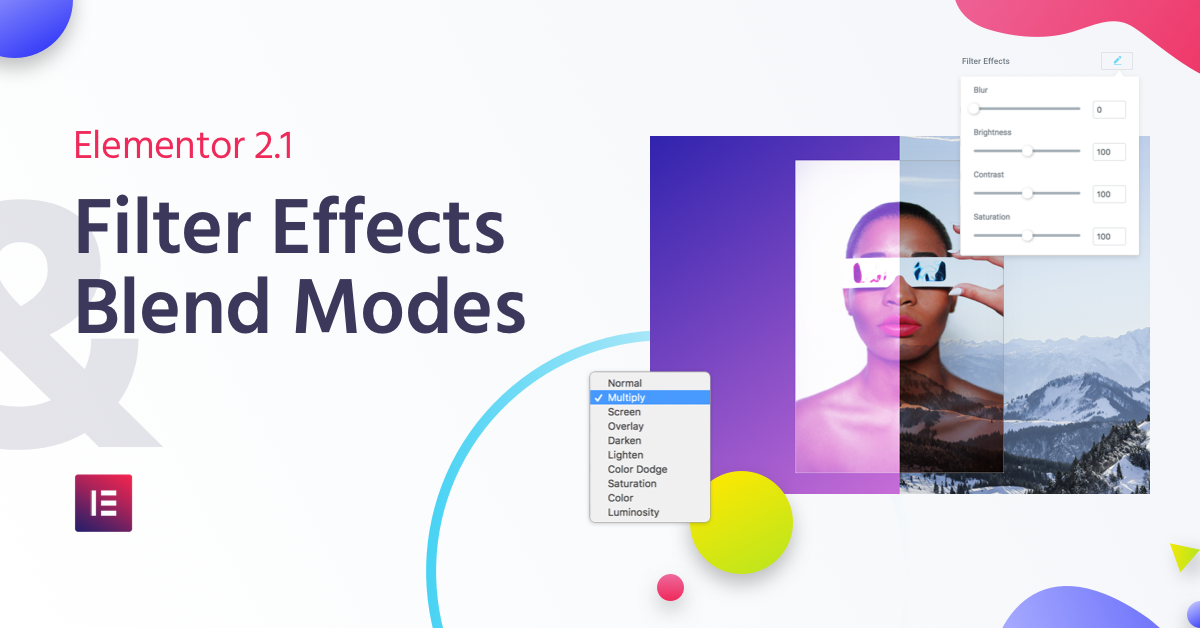
The new Filter Effects include scales for Blur, Brightness, Contrast and Saturation settings.
The new Blend Modes include: Normal, Multiply, Screen, Overlay, Darken, Lighten, Color Dodge, Saturation, Color and Luminosity.
I’ll show you a handful of stylish scenes to inspire you to explore these settings further on your own.
Luminosity Blend Mode - For a Richer Look & Feel
Using the Luminosity Blend Mode, you can create a stylish design that runs consistently throughout your blog, or assign a different color per blog category.
Black & White Maps Using Saturation
Before, you had to deal with Google’s API code to create this black & white color layout for your maps. Now, achieve the same result using one sole effect: the Saturation Filter.
Filter Effects Accentuate Your Imagery
In this example, we created a nice hover effect for the image box using a combination of Blur, Brightness, Contrast, and Saturation Filters. This draws attention to the image when visitors hover over the team members.
Instantly create spectacular visuals, using Filter Effects & Blend Modes. All effects are 100% made in Elementor, no CSS or Photoshop needed.
Color Blend Mode + Gradients = Love
After adding gradient colors as the overlay to the background image, you can easily combine the gradient with the background using the Color Blend Mode. This produces a consistent color palette for the entire website’s visual assets.
Double Exposure Effects Without Photoshop
This design introduces two superimposed images. The image of the athlete is a fixed background, and the New York skyline is set on top as a background overlay, using the Screen Blend Mode. Rendering the dark colors transparent produces a double exposure effect. Top it off with a heading, apply the Multiply Blend Mode – and the result is a spectacular layout.
Colorful Compilations Using Simple Settings
Combining images and text in creative ways allows you to attain really interesting results. The effect is sophisticated, yet the process is simple. Here, a fixed black and white background, with a gradient color on top is set to the Overlay Blend Mode. The R&B heading, using the Saturation Blend Mode, creates a hinted effect, revealing the text in full only on scroll.
Create Breath-Taking Effects Using Videos
Images are not the only visuals you can blend. In this example, we devise a cool experience that can be used to showcase your logo, creating a transparent stencil using the Screen Blend Mode.
Conclusion
We’ve seen just a glimpse of the broad possibilities that CSS Blend Modes and Filter Effects offer. I invite you to play around with the various settings.
It takes a while to get familiar with all the modes, filters and how they interact, but once you get the hang of it, they will become an integral part of your toolbox. Again, don’t forget to try out these effects on hover states as well, to create even more imaginative interactions. Experiment and run wild, you’ll be surprised by what you end up with time and time again.
Did you create a beautiful landing page using these filters and blend modes? Send it over in the comments below and be listed on our Elementor Sites of the Month!
Share
Looking for fresh content?
Get articles and insights from our weekly newsletter.
By entering your email, you agree to receive Elementor emails, including marketing emails, and agree to our Terms & Conditions and Privacy Policy.
Building websites seems like the dream job, and it is, but you have to know much more than technical skills. My mission at Elementor is to teach web creators how to build a successful business they love.