Table of Contents
Key Takeaways
- Platform Models Differ Fundamental: Shopify operates as a “closed garden” SaaS (Software as a Service) where you rent the infrastructure, whereas the Elementor ecosystem on WordPress provides an “open web” model where you own your data and code.
- Customization Limits: The Shopify builder relies on a theme-based section system that often requires Liquid coding for deep customization. In contrast, Elementor offers pixel-perfect, drag-and-drop control over every aspect of the store without code.
- Cost Implications: Closed platforms often utilize a tiered pricing model where costs scale with transaction fees and third-party app subscriptions. Open platforms typically offer a more predictable, resource-based cost structure.
- The Power of Integration: Professional workflows now demand integrated ecosystems. Tools like Elementor Hosting combine managed infrastructure with the builder, eliminating the fragmentation previously associated with open-source solutions.
- AI as a Differentiator: While many platforms offer basic text generation, advanced solutions like Elementor AI and the AI Site Planner now integrate structural planning and code generation directly into the workflow.
Section 1: The Shopify Website Builder Explained (The “Closed” Model)
To understand the eCommerce landscape, one must first master the mechanics of the most prominent SaaS player. Shopify provides a structured, streamlined environment for launching an online store. It handles the hosting, security, and checkout process, allowing users to focus primarily on product management and basic front-end design.
Step 1: Account Setup and Store Configuration
The process begins with creating an account. You enter your email, password, and store name. Shopify then asks a series of questions regarding your business type and revenue to tailor the dashboard experience. Once inside, you face the admin dashboard—the command center for your store.
Before touching the builder, you must configure the backend settings. This involves navigating to the “Settings” tab to define your store details, including your legal business name, address, and contact information. You then set up your “Payments” provider. Shopify Payments is the default, integrated option, though you can connect third-party gateways. Finally, you configure “Shipping and Delivery” zones, determining where you ship and how much you charge.
Step 2: Selecting a Theme
The visual identity of a Shopify store relies entirely on the theme you select. The platform provides a “Theme Store” containing a mix of free and paid options.
- Navigate to Online Store > Themes.
- Browse the collection. Paid themes often offer more built-in features like countdown timers or color swatches, which might otherwise require separate apps.
- Click “Add” to install the theme to your library.
- Click “Customize” to enter the page builder interface.
Step 3: Navigating the Visual Editor (Sections and Blocks)
Shopify’s “Online Store 2.0” architecture uses a section-based approach. The editor divides the page into horizontal strips called “Sections.”
- The Left Sidebar: This panel displays the hierarchy of the page. You see the Header, the Main Content area (containing various sections), and the Footer.
- Sections: You add sections like “Image Banner,” “Featured Collection,” or “Rich Text” to build the layout. You can reorder these vertically by dragging them up or down in the sidebar.
- Blocks: Inside each section, you have “Blocks.” For example, a “Rich Text” section might contain a Heading block, a Text block, and a Button block.
- The Right Sidebar: When you click on a section or block, the right panel reveals its specific settings. You can toggle options like “Full Width,” change background colors, or adjust text alignment.
Step 4: Adding Products and Collections
The builder itself does not manage inventory. You must return to the main dashboard and click Products.
- Click Add Product.
- Enter the title, description, and price.
- Upload media files (images and videos).
- Assign the product to a “Collection” (e.g., “Men’s Shoes” or “Summer Sale”).
- Set the inventory levels and shipping weight.
Once products exist in the database, you return to the builder (Online Store > Themes > Customize) and add a “Featured Collection” section. You then link that section to the specific collection you created, and the builder automatically pulls in the product images and prices.
Step 5: Customization Limitations and the Liquid “Glass Ceiling”
While the section-based editor is user-friendly, it has distinct boundaries. You are largely confined to the layout options provided by the theme developer. If a theme’s “Image Banner” section only allows for center-aligned text and you want it left-aligned, and there is no setting for it, you cannot simply drag the text to the left.
To break these boundaries, you must edit the code. Shopify uses a proprietary templating language called Liquid.
- You click the three dots next to your theme and select Edit code.
- You navigate the directory of files (e.g., theme.liquid, header.liquid).
- You must write custom HTML, CSS, and Liquid to achieve the desired design change.
This requirement for coding knowledge to achieve precise design control is a significant friction point for designers accustomed to visual freedom.
Step 6: Extending Functionality with Apps
The core Shopify platform provides essential commerce features. For anything beyond that—product reviews, advanced popups, loyalty programs, or complex form builders—you must visit the Shopify App Store.
- Installation: You search for the feature, select an app, and install it.
- Cost Accumulation: Many apps follow a freemium or subscription model. A store might require five or six paid apps to achieve the desired functionality, which increases the monthly operating cost.
- Performance Impact: Each app injects its own JavaScript into the storefront. Overloading a store with multiple third-party scripts can negatively impact page load speeds and Core Web Vitals.
Section 2: The Strategic Pivot — Why Creators Choose the Open Web
While the closed SaaS model offers convenience, many professional creators, agencies, and growing businesses eventually encounter a “glass ceiling.” The inability to modify the checkout flow, the reliance on proprietary coding languages, and the lack of full data ownership can hinder long-term growth and brand differentiation.
This realization drives a strategic shift toward the “Open Web” model—specifically, the WordPress platform empowered by Elementor.
The Philosophy of Ownership
In an open ecosystem, you own the asset. You are not renting a storefront; you own the building. You have direct access to the database, the server files, and the code. This portability ensures that you can move your site to any hosting environment you choose, protecting your business from platform lock-in.
The “Website Builder Platform” Evolution
Historically, WordPress was viewed as a fragmented ecosystem requiring users to stitch together hosting, themes, and plugins from different vendors. Elementor has fundamentally altered this landscape by evolving from a simple page builder into a comprehensive Website Builder Platform.
By integrating Elementor Hosting (managed infrastructure), the Elementor Website Builder (visual creation), and specialized tools for AI and marketing, Elementor now offers the cohesive, streamlined experience of a SaaS platform while retaining the limitless freedom of open-source software.
Section 3: Building a Store with the Elementor Platform (The “Open” Model)
For those who demand pixel-perfect design control and a modular, scalable tech stack, the Elementor ecosystem provides a powerful alternative. Here is a strategic guide to building a professional eCommerce presence using this open platform.
Step 1: Establishing the Foundation with Elementor Hosting
The foundation of any high-performance online store is its hosting infrastructure. Generic shared hosting often struggles with the dynamic database queries required by WooCommerce. Elementor Hosting solves this by providing a managed environment specifically engineered for the Elementor builder.
- Cloud Architecture: It utilizes the Google Cloud Platform (C2 machines) and integrates Cloudflare Enterprise CDN. This ensures that assets are delivered from servers closest to the shopper, significantly reducing latency.
- Security: The platform includes enterprise-grade security features, such as a Web Application Firewall (WAF) and DDoS protection, which are essential for protecting customer data and transaction integrity.
- Unified Support: One of the historic pain points of WordPress was the “blame game” between hosts and plugin developers. Elementor Hosting unifies this, providing a single point of contact for both the infrastructure and the builder.
Step 2: The Thematic Canvas — Hello Theme
Unlike the “Theme Store” model where you hunt for a template that mostly fits your needs, the Elementor approach starts with a blank canvas. The Hello Theme is a lightweight, minimalist framework designed specifically for Elementor. It carries almost no styling of its own. It loads efficiently and acts as the perfect foundation for the builder.
- For Professionals: The Hello Theme grants total freedom. You build the header, footer, and product archives from scratch.
- For Beginners: The new “Hello Biz” theme provides a more guided entry point, offering pre-configured structures for those who need a faster launchpad.
Step 3: Strategic Planning with the AI Site Planner
Before placing a single pixel, professional workflows begin with strategy. The Elementor AI Site Planner accelerates this phase. Instead of manually sketching wireframes, you engage with the AI:
- Prompt: You describe your business (e.g., “A boutique selling sustainable hiking gear for women”).
- Generation: The AI generates a comprehensive sitemap, suggesting essential pages like “Sustainability Mission,” “Technology,” and “Shop.”
- Wireframing: It creates a low-fidelity wireframe of the site structure directly within the Elementor environment. This tool transforms the planning process from days to minutes, ensuring your store structure follows industry best practices.
Step 4: The Creative Engine — WooCommerce Builder
This is the core differentiator. The Elementor Pro plugin includes the WooCommerce Builder, which unlocks the ability to visually design every part of your store without writing code.
designing the Single Product Template
In a standard theme, the product page layout is fixed. With Elementor, you design it dynamically.
- Go to Templates > Theme Builder > Single Product.
- Click Add New.
- You are presented with a canvas. You drag in the “Product Title” widget, “Product Image” widget, “Add to Cart” widget, and “Product Price” widget.
- Customization: You can place the price above the title. You can create a sticky right-hand column for the “Add to Cart” button. You can insert a “Related Products” grid at the bottom.
- Conditions: You hit “Publish” and set the condition to “Include: All Products” or specific categories (e.g., a different layout for “Shoes” vs. “Gift Cards”).
Customizing the Cart and Checkout
Cart abandonment is a critical metric. The Elementor WooCommerce Builder allows you to optimize the Cart and Checkout pages to reduce friction.
- Cart Customization: You can design a “Mini Cart” that slides out from the side, allowing users to view their items without leaving the shopping experience.
- Checkout Optimization: You can simplify the checkout form, hide unnecessary fields, and style the “Place Order” button to be prominent and brand-aligned.
- Trust Signals: You can easily insert trust badges or testimonials directly next to the payment form to reassure customers at the moment of purchase.
Read more about the specific features here: Elementor WooCommerce Builder.
Step 5: Accelerating Content and Code with Elementor AI
Content creation is often a bottleneck. Elementor AI is integrated directly into the editor to resolve this.
- Text Generation: Highlight a text widget and ask the AI to “Write a punchy product description for a waterproof hiking boot.” You can adjust the tone to be “Adventurous” or “Technical.”
- Image Generation: Need a background image for a seasonal banner? Use the AI image generator to create unique visuals royalty-free.
- Code Assistant: If you need a specific CSS animation that isn’t in the controls, you can ask the AI to “Write CSS to rotate this image on hover,” and it will insert the code into the Custom CSS field.
For a deeper look at these capabilities, watch this video: https://www.youtube.com/watch?v=cmx5_uThbrM&pp=0gcJCcYJAYcqIYzv
Step 6: Ensuring Accessibility with Ally
In 2025, web accessibility is not optional; it is a legal and ethical imperative. Ally by Elementor is a plugin that integrates directly into the workflow.
- Scanning: It automatically scans your site for accessibility violations (e.g., low contrast, missing alt text).
- Remediation: It provides actionable tools to fix these issues directly in the editor.
- Frontend Widget: It adds an accessibility menu to your live site, allowing visitors to adjust text size, contrast, and animations to suit their needs.
See how Ally works in practice: https://www.youtube.com/watch?v=-2ig5D348vo
Step 7: The Growth Suite — Marketing and Optimization
A store is useless without traffic and conversion mechanisms. The Elementor ecosystem includes native tools to drive growth.
- Image Optimizer: High-resolution product photos can slow down a site. This tool automatically compresses and converts images to WebP format upon upload, ensuring lightning-fast load times.
- Site Mailer: Transactional emails (receipts, password resets) often fail in standard WordPress setups. Site Mailer reconfigures the sending method to ensure these critical messages reach the customer’s inbox.
- Send by Elementor: This is a complete marketing automation solution. You can create lead capture forms, manage contacts, and design email marketing campaigns directly within the dashboard.
Section 4: Detailed Comparison (Deep Dive)
To make an informed decision, we must rigorously compare the two approaches across four critical dimensions: Design Freedom, Cost Structure, Data Ownership, and Performance.
1. Design Freedom: Liquid vs. The Visual Canvas
The fundamental difference lies in the editing paradigm.
- Shopify: Uses a “modify” paradigm. You start with a finished structure (the theme) and modify the parameters exposed by the developer. Breaking the grid requires writing Liquid code.
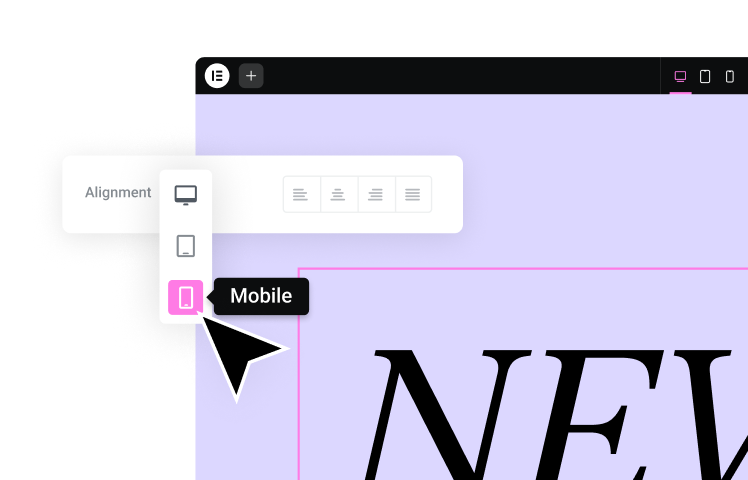
- Elementor: Uses a “construct” paradigm. You have granular control over every pixel. You define the margin, padding, motion effects, and responsive behavior for every element. You can hide specific sections on mobile, reverse column ordering for tablets, and create complex, multi-layered layouts without writing a single line of code.
2. Cost Structure: The Tiered vs. Resource Model
- Shopify: The pricing is tiered. As you grow, you likely move to higher plans to reduce transaction fees. Furthermore, the cost of third-party apps is significant. A store with advanced reviews, a loyalty program, a page builder app, and an SEO manager can easily accumulate hundreds of dollars in monthly app fees.
- Elementor Ecosystem: The cost structure is typically more predictable. The Elementor Hosting plans are resource-based (bandwidth and visitors). The Elementor Pro license is a fixed annual fee. Many features that are paid apps in other ecosystems (popups, form builders, dynamic content) are native to Elementor Pro, reducing the need for external subscriptions.
3. Data Ownership and Portability
- Shopify: You can export your product data (CSV) and customer lists, but you cannot export the website design or the underlying code. If you leave the platform, you must rebuild the front end from scratch.
- Elementor/WordPress: You own the database and the files. You can download a complete backup of your entire site—design, content, and settings—and move it to any server in the world. This sovereignty is crucial for businesses building long-term equity in their digital assets.
4. SEO and Performance
- Shopify: Offers solid, standardized SEO features. The URL structure is somewhat rigid (e.g., you cannot remove /products/ or /collections/ from the URL string), which can be a minor annoyance for advanced SEO strategies.
- Elementor: Running on WordPress, the Elementor platform benefits from the world’s most mature SEO ecosystem. You have total control over URL structures, schema markup, and metadata. With Elementor Hosting, the infrastructure is pre-optimized with advanced caching and Cloudflare integration to ensure high Core Web Vitals scores.
Conclusion: Making the Professional Choice
The question “How to use Shopify website builder?” ultimately leads to a broader question about your business strategy.
If your priority is a rapid launch with a standardized template and you are willing to accept design limitations and transaction fees in exchange for a hands-off infrastructure, the closed SaaS model serves a clear purpose.
However, if your vision requires a unique, pixel-perfect brand experience, total ownership of your assets, and a scalable cost structure, the Elementor Website Builder Platform stands as the superior professional choice. By combining the power of WooCommerce with the visual freedom of Elementor and the reliability of managed hosting, you build not just a store, but a digital flagship that you truly own.
For those ready to start building on the open web, you can download Elementor or explore the comprehensive Elementor Library for inspiration.
Frequently Asked Questions
1. Can I use Elementor with Shopify? No, Elementor is a plugin exclusively for WordPress. It cannot be installed on Shopify. However, you can use Elementor to build your main website on WordPress and link to a Shopify store (using a “Buy Button”), or—more commonly—replace Shopify entirely with WooCommerce and Elementor for a fully integrated experience.
2. Is Elementor harder to learn than the Shopify builder? Elementor has a slightly steeper learning curve initially because it offers significantly more power. Shopify hides complexity by limiting your options. Elementor gives you all the options. However, features like the AI Site Planner and pre-designed Kits significantly lower the barrier to entry for beginners.
3. Do I need to know code to use Elementor’s WooCommerce Builder? Absolutely not. The entire purpose of the WooCommerce Builder is to replace PHP coding with a visual drag-and-drop interface. You can design complex product pages, archives, and checkout flows entirely visually.
4. How does the cost of Elementor compare to Shopify over time? Generally, Elementor is more cost-effective at scale. With Shopify, you pay transaction fees (unless using their payment gateway) and recurring monthly fees for apps. With Elementor, the core features (forms, popups, custom headers) are included in the Elementor Pro license, and you do not pay platform transaction fees.
5. Is Elementor Hosting fast enough for eCommerce? Yes. Elementor Hosting is built on Google Cloud Platform’s C2 instances and includes Cloudflare Enterprise CDN. It is specifically optimized for the dynamic database queries that eCommerce sites generate.
6. Can I migrate my products from Shopify to Elementor? Yes. You can export your Shopify products as a CSV file and import them directly into WooCommerce. Several plugins also automate this migration process, transferring images, descriptions, and variants.
7. What happens if I want to switch hosts later? This is a key advantage of the open web. If you build with Elementor and WordPress, you can package your entire site and move it to any hosting provider. You are never locked into a single vendor.
8. Does Elementor support dropshipping? Yes. Since Elementor works with WooCommerce, you can use any dropshipping plugin available for WordPress (such as AliDropship or Spocket) to manage your inventory and fulfillment.
9. How does Elementor handle mobile responsiveness? Elementor provides granular mobile controls. You can adjust font sizes, margins, and layouts specifically for mobile, tablet, and desktop views. You can even reverse column orders or hide specific elements on mobile devices to optimize the user experience.
10. Is Elementor secure for payments? Elementor acts as the design layer. The transaction security is handled by WooCommerce and your payment gateway (like Stripe or PayPal) and secured by the SSL certificate provided by Elementor Hosting. It meets the same industry standards for security as any major eCommerce platform.
Looking for fresh content?
By entering your email, you agree to receive Elementor emails, including marketing emails,
and agree to our Terms & Conditions and Privacy Policy.