Setting up privacy compliance on your WordPress site sounds like a headache, but it’s more approachable than it looks. Google Consent Mode V2 keeps your tracking and advertising running correctly, especially with visitors from Europe or California. And you don’t need to be a developer for most of it, since much of the work happens through a dashboard. Let’s walk through the ten best ways to get this set up on your site in 2026.
Key Takeaways
- Consent Mode V2 is mandatory for sites using Google services like Google Analytics and Google Ads with European traffic.
- WordPress-native tools like Cookie Consent keep you compliant without juggling external dashboards.
- The implementation sends signals (like ad_user_data and ad_personalization) to Google based on what each visitor chooses.
- Testing your setup with Google Tag Assistant confirms everything works as it should.
- Both manual and automated options exist, so you can pick what fits your comfort level.
What is Google Consent Mode V2 and Why Does It Matter in 2026?
If you run a WordPress site, you’ve probably heard plenty about privacy regulations lately. Regulators keep issuing fines for improper tracking, and browsers are phasing out third-party cookies. Google built Consent Mode V2 for that shift, a framework that tells your Google tags how to behave based on what visitors choose on your cookie consent banner.
In 2026, this isn’t optional if you want to keep using Google Ads, Analytics, or remarketing in the European Economic Area. Skip it, and your analytics data comes back incomplete while your ad campaigns struggle to measure conversions. Think of it as a translator between your visitors’ privacy choices and Google’s servers. You don’t need to be a senior developer for this; there’s a path that fits your workflow, whether you’d rather click through a dashboard or write your own code.
How Google Consent Mode V2 Works
Before we look at the methods, it helps to know what’s happening under the hood. When a visitor lands on your site, Consent Mode V2 sends specific signals, called states, to Google’s servers, each one set to either “granted” or “denied.”
The framework relies on four primary consent parameters:
- analytics_storage: Controls whether Google Analytics can store cookies on the visitor’s device.
- ad_storage: Controls whether Google can store cookies for advertising purposes.
- ad_user_data: Sets consent for sending user data to Google for advertising purposes.
- ad_personalization: Controls whether Google can use data for personalized remarketing.
When a visitor says “No” to advertising cookies, Consent Mode V2 tells Google Ads to skip storing cookies. Google switches to cookieless pings instead, modeling conversions so you still get useful data without stepping on anyone’s privacy.
Comparative Table of the 10 Best Methods
Here’s a quick overview of the top ten methods, so you can pick what fits your skill level and workflow.
| Method Name | Type of Tool | Dashboard Location | Implementation Effort | Best For |
|---|---|---|---|---|
| Cookie Consent | WordPress-Native Tool | WordPress Admin | Very Low (Under 5 mins) | WordPress and Elementor users who want an easy, complete solution. |
| Cookiebot | SaaS Platform | External SaaS Dashboard | Medium | Sites needing an established, multi-platform consent system. |
| CookieYes | SaaS / Plugin Hybrid | External & WordPress Admin | Medium | Users who want a popular, cloud-managed approach. |
| Complianz | WordPress Plugin | WordPress Admin | Medium | Sites that prefer guided, wizard-based privacy configuration. |
| iubenda | SaaS Platform | External SaaS Dashboard | Medium to High | Businesses needing a complete legal suite including policy drafting. |
| Google Tag Manager (GTM) | Tag Manager Manual | Google Tag Manager | High | Developers and advanced marketers who want granular control. |
| Manual Theme Integration | Custom Theme Code | Theme File Editor / Git | Very High | Developers who prefer zero dependency on third-party tools. |
| OneTrust | Enterprise SaaS | External SaaS Dashboard | High | Large enterprise websites with strict compliance departments. |
| Termly | SaaS Platform | External SaaS Dashboard | Medium | Small businesses wanting simple, external template management. |
| Osano | Enterprise SaaS | External SaaS Dashboard | High | Enterprise teams needing high-level data privacy monitoring. |
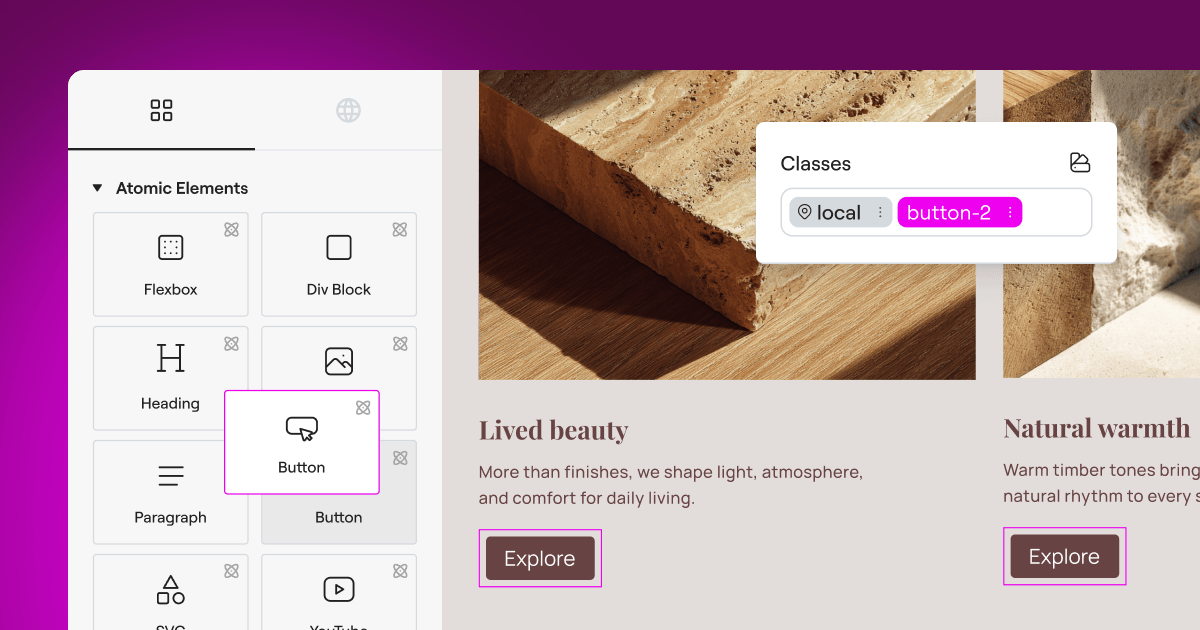
Method 1: Elementor Cookie Consent (The Native WordPress Way)
If you want a simple, direct way to handle privacy, the native Cookie Consent capability built into the Elementor ecosystem is a strong choice, skipping external dashboards, separate logins, and complicated API keys.
This tool fits WordPress sites that need privacy compliance without leaving the dashboard. Setup takes under five minutes, covering your consent banner, automatic scans, script management, and detailed consent logs.

Core capabilities include:
- WordPress-Native Dashboard: Manages everything inside your WordPress admin area.
- Automatic Scanning: Scans and sorts your site’s cookies and scripts on its own.
- Google Consent Mode V2 Support: Sends the correct signals with a single toggle.
- Geo-Targeting: Shows the banner only to visitors from regions that require it, like the EU or California.
- Consent Logs: Keeps an audit trail of user choices for regulatory review.
- Design Customization: Matches your banner’s colors and style to your brand.
Cookie Consent comes with an entry-level plan and is also included in the complete Elementor One package.
Method 2: Cookiebot
Cookiebot is a widely recognized software-as-a-service compliance tool with a WordPress integration. It runs mainly through an external cloud dashboard, where you set up your banners and categorization before connecting to WordPress with a helper plugin or script snippet.
Cookiebot scans your site monthly, builds a report, and updates your consent settings automatically. It supports Consent Mode V2, though your Google Tag Manager tags need to listen to Cookiebot’s consent states. It’s reliable if you’re comfortable managing settings on an external platform.
Method 3: CookieYes
CookieYes offers both a cloud dashboard and a WordPress integration, with pre-built templates and a straightforward setup wizard. You can manage banners from your WordPress backend or their web app, whichever suits you.
CookieYes has built-in support for Consent Mode V2. Enable the setting in their dashboard, and the banner handles the background communication with Google’s tags. It also scans cookies automatically, supports multiple languages, and stays popular among developers who want a mix of cloud service and WordPress-friendly workflow.
Method 4: Complianz
Complianz is a dedicated privacy plugin built for WordPress. Unlike SaaS-first tools, it runs on your server and manages your compliance policies through a detailed, step-by-step wizard covering the legal and technical questions that shape your banner.
For Consent Mode V2, Complianz integrates directly with your Google Analytics and Ads scripts, pausing them until consent is given or sending the right signals once consent mode is active. It suits guided, wizard-based setups, though the number of options can feel like a lot at first.
Method 5: iubenda
iubenda is a complete compliance platform that goes beyond cookie banners, with auto-updating privacy policies, cookie policies, and terms documents. If your legal needs span multiple apps and sites, it gives you one dashboard for all of it.
To implement Consent Mode V2, you’ll use iubenda’s cookie solution through their WordPress plugin or custom code, then configure your tracking scripts to match their integration options. It’s thorough and professional, though it takes more technical comfort than native WordPress tools.
Method 6: Google Tag Manager (GTM) Manual Integration
For developers and advanced marketers, implementing Consent Mode V2 directly through Google Tag Manager is often the preferred route: you build the logic yourself inside your GTM container.
You’ll need a consent template from the GTM Community Template Gallery, or custom HTML tags that fire consent default states before your main Google tags load:
- Set Default Consent States: Create a tag setting default states for
ad_storage,analytics_storage, etc., to “denied” (or “granted,” depending on your regional legal requirements). - Listen for Consent Changes: Set your banner to push an event to the GTM DataLayer when a visitor updates preferences.
- Update Consent States: Build a trigger in GTM that reads this event and updates the consent states.
This gives you a lot of flexibility, but it takes a solid grasp of variables, triggers, and the DataLayer, so double-check your work before going live.
Method 7: Manual Theme Code Integration
If you’re a developer who wants full control and no outside tools, you can write the Consent Mode V2 script directly into your WordPress theme. Use a child theme so your changes survive updates.
This means injecting a script block into your theme’s header.php file, or hooking into wp_head via functions.php. The code must load before Google’s gtag.js script. Here’s a basic example:
<script>
window.dataLayer = window.dataLayer || [];
function gtag(){dataLayer.push(arguments);}
// Set default consent states
gtag('consent', 'default', {
  'ad_storage': 'denied',
  'analytics_storage': 'denied',
  'ad_user_data': 'denied',
  'ad_personalization': 'denied'
});
</script>
After setting the defaults, you’ll write custom JavaScript that fires an update command using gtag('consent', 'update', { .. }) when a visitor interacts with your banner. It’s lightweight with zero overhead, but needs upkeep whenever privacy rules change.
Method 8: OneTrust
OneTrust is an enterprise-level compliance platform for large organizations managing privacy across many sites, apps, and databases, with detailed auditing, vendor risk assessments, and data mapping.
For Consent Mode V2, OneTrust provides a script you embed on your WordPress site, which manages your Google tags and passes consent states to Google’s API. It’s built for enterprise use, so setup is thorough, best suited to teams with dedicated compliance resources.
Method 9: Termly
Termly targets small businesses and startups with a consent manager, terms generators, and privacy policy templates. You set up your banner in their SaaS dashboard and connect it to WordPress with a simple script or helper integration.
Termly supports Consent Mode V2 natively. Once enabled, it manages visitor choices and passes the right parameters to Google Analytics and Ads. It’s straightforward and beginner-friendly, though it lacks the tight dashboard integration of a native WordPress tool.
Method 10: Osano
Osano is a B-Corporation compliance platform focused on data privacy, with a consent banner, cookie discovery scans, and privacy policy tracking, built to help companies keep up with obligations across multiple regulations.
Setting up Consent Mode V2 with Osano happens through their cloud platform: configure your banner, enable Consent Mode V2, and paste their JavaScript snippet into your header. Osano sorts scripts into categories and keeps the right signals reaching your Google tracking setup.
Step-by-Step Guide: How to Implement Consent Mode V2 Using Cookie Consent
Let’s walk through the easiest, most practical approach: the native Cookie Consent capability from Elementor, which keeps your whole workflow inside your WordPress admin area. Before you begin, have your GA4 measurement ID or Google Ads conversion ID ready so you can test everything once setup is complete.
Step 1: Open the Consent Dashboard
Log in to your WordPress dashboard and open the compliance section. If you’re using Elementor, you’ll find it under your dashboard settings, where you’ll manage everything from scanning to banner styling.
Step 2: Run an Automatic Cookie Scan
To make sure your banner knows what scripts your site runs, kick off an automatic scan:
- Click Scan Cookies in your settings panel.
- The tool crawls your pages to find active tracking scripts and cookies.
- Review the categorized list (Necessary, Analytics, Marketing) and confirm it looks right.
This way the system knows exactly which scripts to block when a visitor opts out.

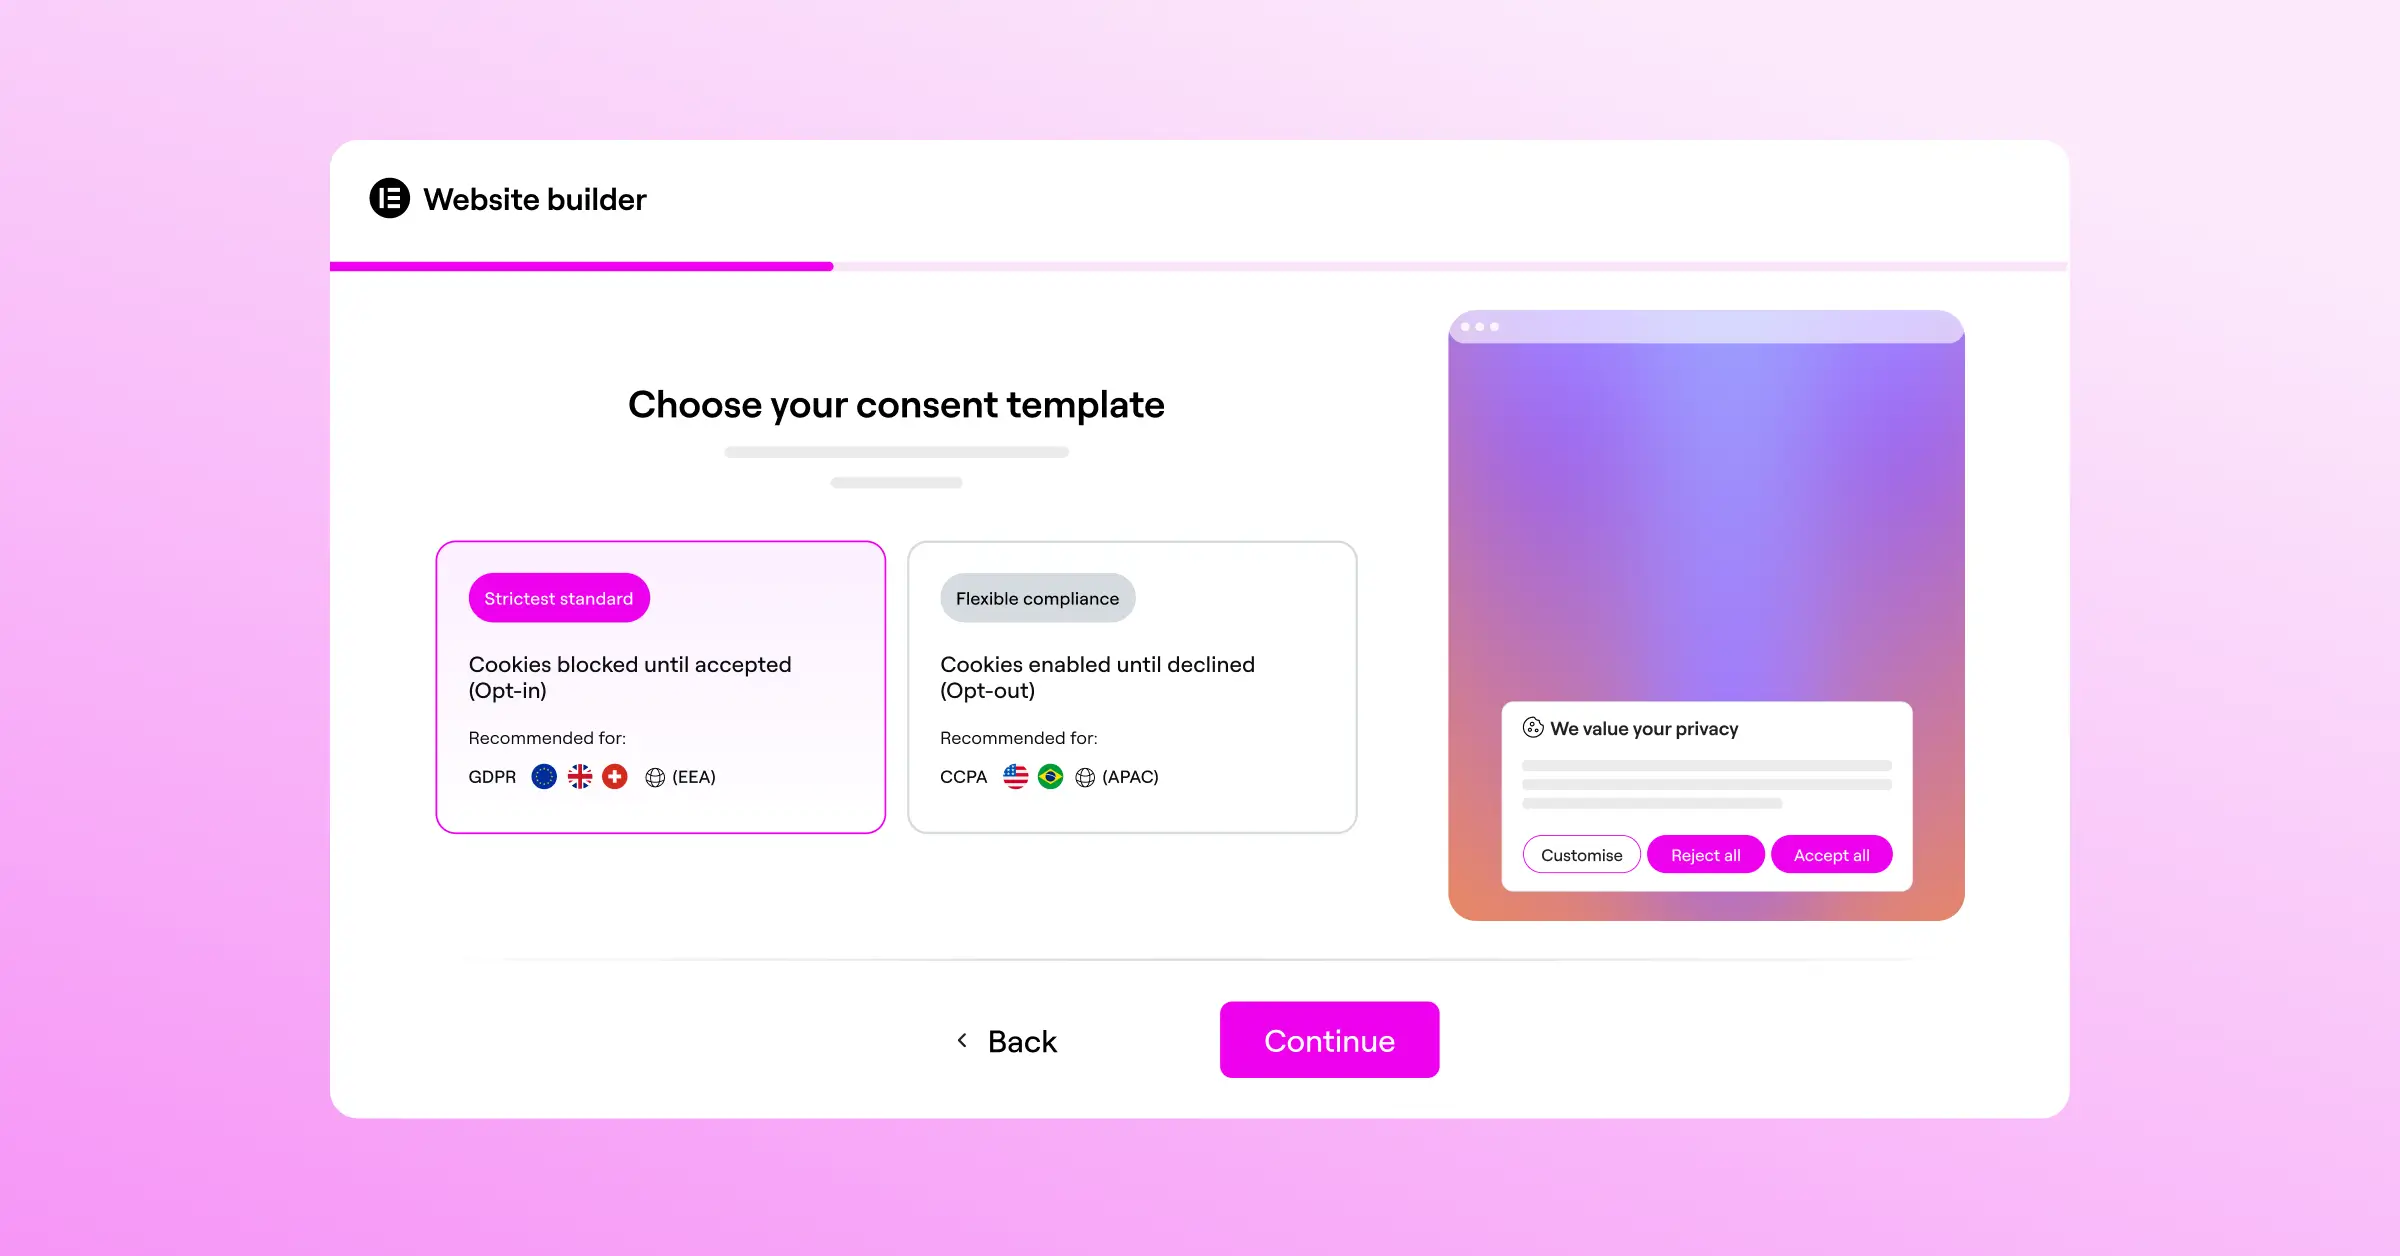
Step 3: Enable Google Consent Mode V2
Next, turn on Google Consent Mode V2 compatibility, so your site sends the right signals to Google’s servers:
- Find the Google Consent Mode V2 toggle in your dashboard.
- Switch it to Enabled.
- Choose your default behavior. For European visitors, set it to “denied” until they opt in.
- Save your changes.
Once enabled, the tool outputs the code headers on its own, no manual coding needed.
Step 4: Design and Customize Your Banner
Now make your banner look like it belongs on your site, since a well-styled banner gets better opt-in rates:
- Open the design settings in the compliance panel.
- Choose your layout (bottom bar, box modal, slide-in, etc.).
- Adjust colors, typography, and button styles to match your brand.
- Set up multilingual support if your site needs it.
- Preview it on both mobile and desktop.
Step 5: Publish and Keep Logs
Once you’re happy with it, click Publish. Your banner goes live, and the tool starts recording consent logs behind the scenes, building an audit trail in case a regulator asks for proof.
How to Verify and Test Your Consent Mode V2 Setup
Once your banner is live, confirm the tracking signals send correctly. Don’t skip this step.
The easiest way to test is with Google Tag Assistant:
- Go to the Google Tag Assistant website and enter your site’s URL.
- Your site opens in a new window with a debugging pane.
- Check the initial events in the timeline on the left.
- Click the Consent tab at the top.
- Confirm the default states for
ad_storage,ad_user_data, andad_personalizationread “denied” (if testing from an EU region). - Accept the cookies on your live site, then check the timeline again.
- You should see a new Consent event updated to “granted.”
“Implementing consent mode correctly isn’t just about avoiding regulatory penalties; it’s about building sustainable, transparent relationships with your visitors.”
– Itamar Haim, Web Compliance Specialist
You can also check your browser’s inspect tool: open the console, type window.dataLayer, and look for the consent entries to confirm your banner updates them correctly.
Frequently Asked Questions
What happens if I do not implement Google Consent Mode V2?
Skip Consent Mode V2, and GA4 can’t model conversions for users who decline cookies. Remarketing and conversion tracking for European traffic stop working too.
Is Google Consent Mode V2 required outside the European Union?
The EEA drives most of this, but the UK and California have strict standards too. It’s worth setting up Consent Mode V2 for any global traffic.
Do I have to use a paid compliance service?
Not at all. Native capabilities like Cookie Consent offer solid compliance on an entry-level plan, no extra software budget needed.
Can I implement this directly in my theme code?
Yes, you can write the code manually in your theme’s head section, with custom JavaScript to update consent states on banner interaction. A dedicated tool is usually safer and faster, but manual works if you want full control.
What is the difference between basic and advanced consent mode?
In basic consent mode, Google tags stay blocked until the user consents. In advanced mode, tags load before the banner but send cookieless pings if the user declines. Modern tools support both.
Does Consent Mode V2 slow down my website?
With a native WordPress capability, speed impact is negligible since scripts run directly from your server. Heavier cloud platforms can add a small delay, which is why native tools are often preferred for performance-conscious sites.
How often should I scan my site for new cookies?
Once a month is a good baseline, or whenever you install a new plugin or tracking script. Cookie Consent’s automatic scanning handles new scripts without manual work.


