Table of Contents
In this step-by-step guide, we’ll learn how to set up SSO authentication with Redshift and AWS IAM Identity Center in order to boost security and make user access easier.

Used Sources:
- https://aws.amazon.com/blogs/big-data/federated-authentication-to-amazon-redshift-using-aws-single-sign-on/
- https://aws.amazon.com/blogs/big-data/amazon-redshift-identity-federation-with-multi-factor-authentication/
Terms Dictionary:
| Term | Meaning |
|---|---|
| Identity Center Account | The account where the IAM Identity Center is configured. |
| Redshift Account | The child account of the Identity Center account which contains the Redshift Cluster we want to connect to. |
| IDP | Identity Provider |
What’s Redshift?
AWS Redshift is a fully-managed data warehousing service provided by Amazon Web Services (AWS).
It is designed to handle large-scale data analytics workloads and enables organizations to analyze vast amounts of data quickly and cost-effectively.
What’s IAM Identity Center?
IAM Identity Center provides one place where you can create or connect workforce users and centrally manage their access across all their AWS accounts and applications.
You can use multi-account permissions to assign your workforce users access to AWS accounts.
Why SSO?
SSO reduces the number of attack surfaces because users only log in once each day and only use one set of credentials.
Reducing login to one set of credentials improves enterprise security. When employees have to use separate passwords for each app, they usually don’t.
Prerequisites
- Preconfigured IAM Identity Center → Getting started – AWS IAM Identity Center.
- Preconfigured Redshift Cluster with an administrative access.
- Identity Source user & password (Okta, PingOne, etc.).
- JetBrains DataGrip installed (can be free tier).
Step by Step:
Configure Identity Center application
Our first step will be to create a new AWS Identity Center application in the Identity Center account to be used as the main channel between users and the Redshift cluster.
- In the IAM Identity Center side panel, click “Applications”.

- In the top right corner, click “Add application”.

- Check “add custom SAML 2.0 application” and click “Next”.

- Set an appropriate display name, we’ll call our application “Redshift-ReadOnly”, as this application will be used to gain Read-Only access to the cluster data.

- Download the Identity Center SAML metadata file, we’ll use it later to configure our Redshift account application.
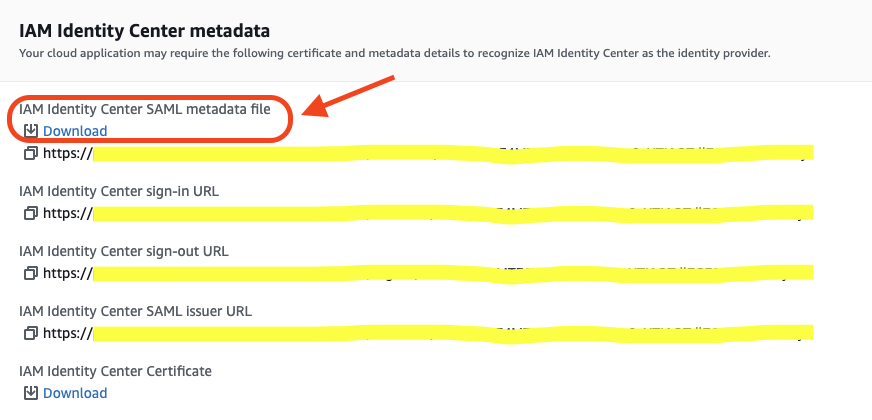
- Copy the application sign-in URL as we’ll need it for later.
- Next, we’ll configure the SAML application ACS (aka Assertion Consumer Service).
Briefly, ACS is the location where the SAML application response will be sent to.
As we’ll be using the AWS Redshift JDBC driver to connect to our Redshift cluster, we’ll need to set the application ACS tohttp://localhost:7890/redshift/– as the JDBC driver starts a server listening on port 7890 by default.
- In order to restrict the SAML application assertion to redshift alone, we’ll configure the “Application SAML audience” field to
urn:amazon:webservices:redshift.
Create Identity Provider
After we created our Redshift-ReadOnly application in the Identity Center account, we need to configure an identity provider to be used by the Redshift-ReadOnly application to connect to the Redshift account Redshift cluster.
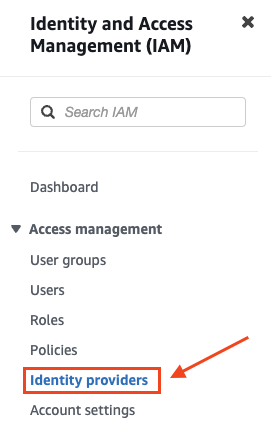
- In the IAM Dashboard side panel of your Redshift account, click Identity Providers.
- In the top right corner, click “Add provider”.

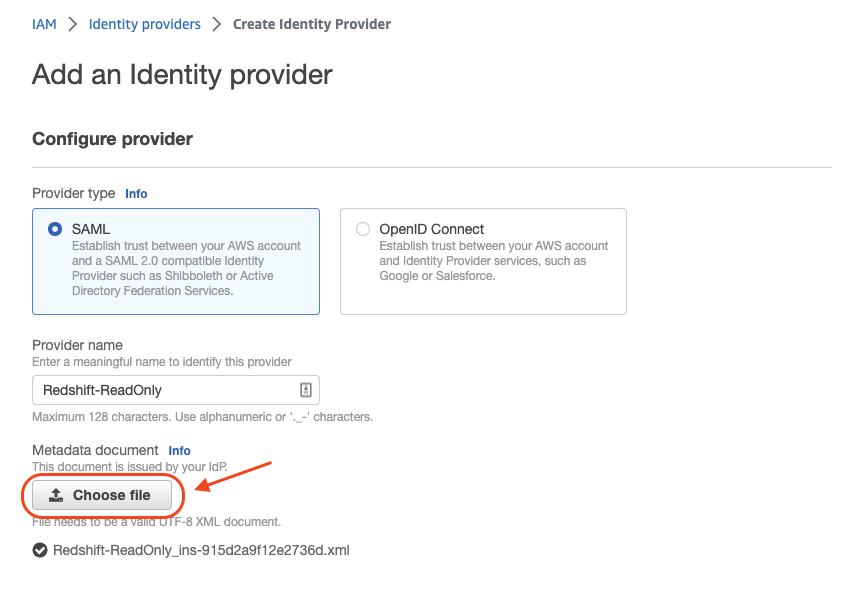
- Fill in the details for the new IDP:
- Set the “Provider name” to Redshift-ReadOnly (same as our previously configured application).
- Upload the metadata file we download during the configuration process of our IAM Identity Center application.
Click “Add provider” and finish.
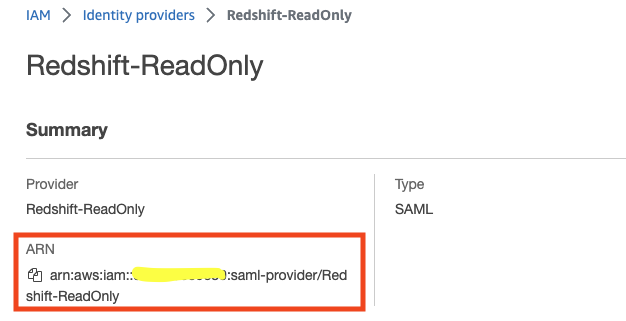
- Go to the IDP description page and copy the IDP ARN, we’ll use it later on.
Create IAM Role & Policy
Now that we’ve created the Identity Provider to be used by our IAM Identity Center application, we can create the role that will be used to connect to the Redshift cluster itself.
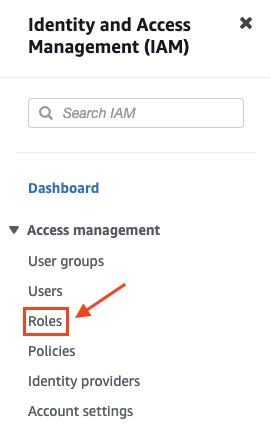
- In the IAM Dashboard side panel of your Redshift account, click Roles.
- In the top right corner, click “Create Role”.

- Create a trusted entity of type SAML 2.0 federation and set the following:
- Set the IDP to the “Redshift-ReadOnly” IDP we created earlier.
- Check the “Allow programmatic access only” radio button and set:
Attribute: “SAML:aud” → setting which audience can assume this role.
Value: “http://localhost:7890/redshift/” → Setting the audience to our local Redshift JDBC driver server (as explained in the first section).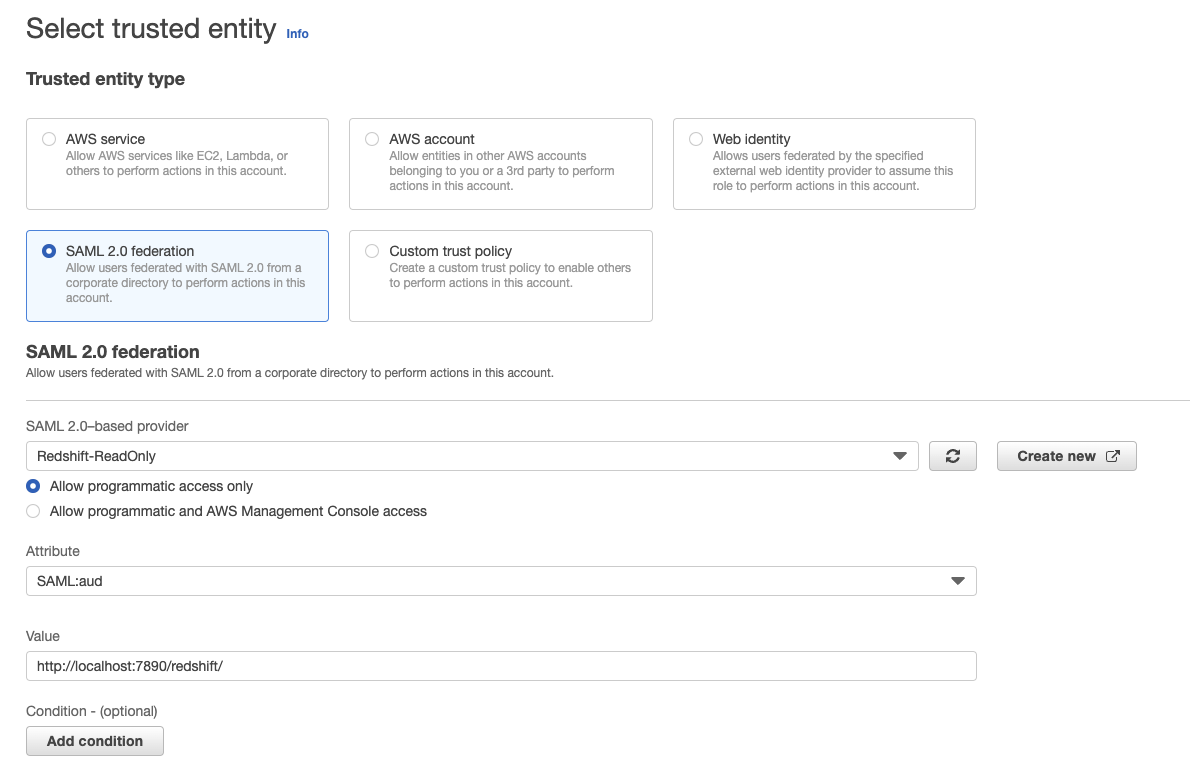
Click “Next”.
- Click “Create policy” and a new tab will open.
- Select “JSON”.
- In the Policy editor panel, paste the following policy statement and edit the following values in the “Resource” scope to match your own:
<region>, <account>, <clusterName>.
{ "Version": "2012-10-17", "Statement": [ { "Effect": "Allow", "Action": [ "redshift:CreateClusterUser", "redshift:JoinGroup", "redshift:GetClusterCredentials", "redshift:ListSchemas", "redshift:ListTables", "redshift:ListDatabases", "redshift:ExecuteQuery", "redshift:FetchResults", "redshift:CancelQuery", "redshift:DescribeClusters", "redshift:DescribeQuery", "redshift:DescribeTable" ], "Resource": [ "arn:aws:redshift:<region>:<account>:cluster:<clusterName>", "arn:aws:redshift:<region>:<account>:dbuser:<clusterName>/${redshift:DbUser}", "arn:aws:redshift:<region>:<account>:dbname:<clusterName>/${redshift:DbName}", "arn:aws:redshift:<region>:<account>:dbgroup:<clusterName>/bi_users_group", ] } ] } - Name the policy “Redshift-ReadOnly-policy” and click “Create policy”.

- Go back to the origin tab where we started creating our IAM role
→ click refresh → type “Redshift-ReadOnly-policy” in the search-bar → check the “Redshift-ReadOnly-policy” policy → click “Next”.
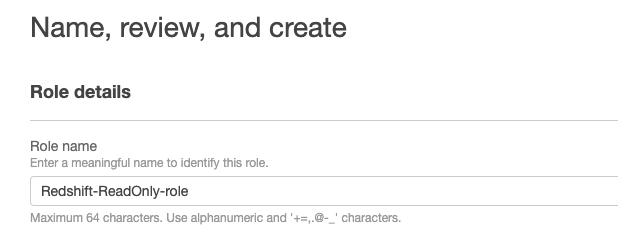
- Name the role “Redshift-ReadOnly-role” and click “Create role” in the lower right corner.
- Now that we’ve created the IAM role, go to its description page and copy the role ARN, we’ll use it later on.

Configure the IAM Identity Center Application Attributes
In order to configure our application to work against Redshift, we need to configure some application attributes that will guide it “how to connect” to it.
- In the IAM Identity Center, go to the Applications panel and choose the application we created earlier.
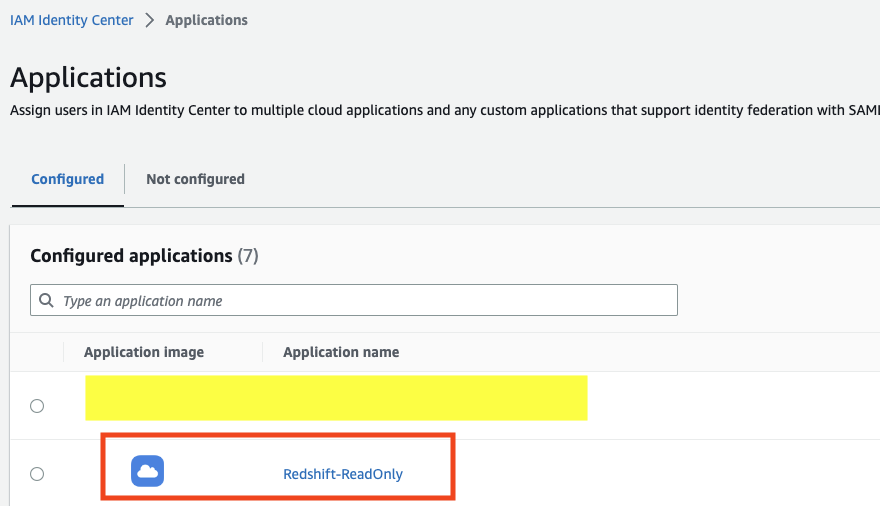
- Assign users and group you’d like to have permissions to this application → Assign user access to applications in the IAM Identity Center console – AWS IAM Identity Center (successor to AWS Single Sign-On).

- Click “attribute mappings”.

- Set the attributes according to the following table and replace the
<role_arn>&<idp_arn>placeholder with the ARNs you copied in the previous steps:
| Attribute | Value | Explanation |
|---|---|---|
| Subject (default attribute) | ${user:email} | The subject used. |
| https://aws.amazon.com/SAML/Attributes/RoleSessionName | ${user:email} | The session name created against the cluster. |
| https://redshift.amazon.com/SAML/Attributes/AutoCreate | true | Configure the application to create the Redshift user automatically on authentication. |
| https://aws.amazon.com/SAML/Attributes/Role | <role_arn>,<idp_arn> | The IAM role and IDP to be used to connect to Redshift. |
| https://redshift.amazon.com/SAML/Attributes/DbUser | ${user:email} | The DB User name to create. |
| https://redshift.amazon.com/SAML/Attributes/DbGroups | readonly | The DB Group to assign the newly created user to. |
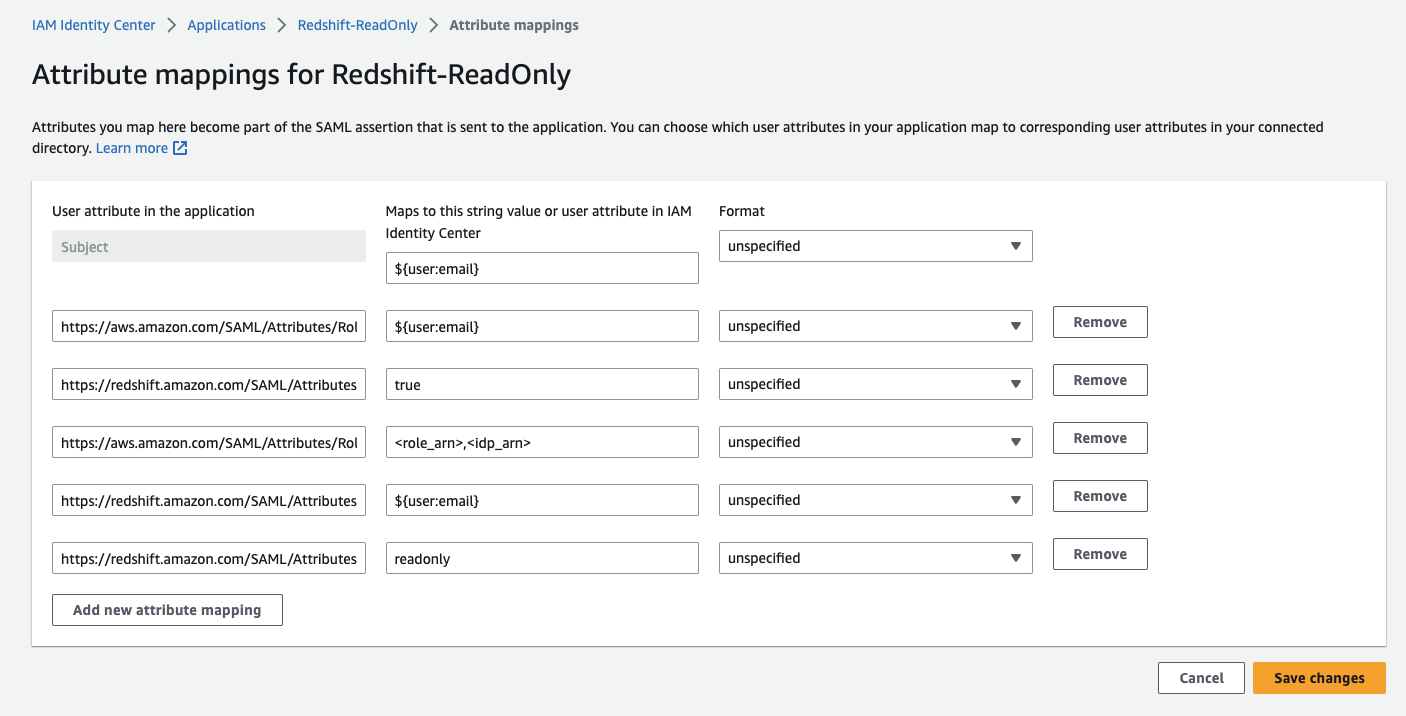
Click “Save changes”.
Create Redshift group & Grant permissions
In this stage, we’ll configure the readonly Redshift group (as defined in the Application attributes in the previous stage) that each user will be assigned to when connecting via the application.
- Connect to your Redshift cluster with a privileged user (superuser).
- Execute the following SQL script to create the
readonlygroup and assign itreadpermissions to the public schema (the default schema).
					create group readonly;
grant usage on schema public to group readonly;
grant select on all tables in schema public to group readonly;
Configure the DataGrip client Data Source
We’re all set up and finally about to harvest our fruits!
In this step, we’ll configure a DataGrip data source that will be used as the connection between us and the Redshift cluster.
- Open DataGrip and create a new Redshift data source.

- A data source wizard will open for you to configure the connection in, set the following attributes:
- Name: Redshift ReadOnly SSO.
- Host: your Redshift server endpoint.
- User: your email identifier (will be used as the Redshift DB User).
- Password: the password you’ve configured in your Identity Source (Okta, PingOne, etc.)
- Database: the database you want to connect to.
- URL: the url will be mostly configured at this point (because of the DataGrip auto-fill), all that is left for you to do is to change the JDBC url prefix from
jdbc:redshift://tojdbc:redshift:iam://.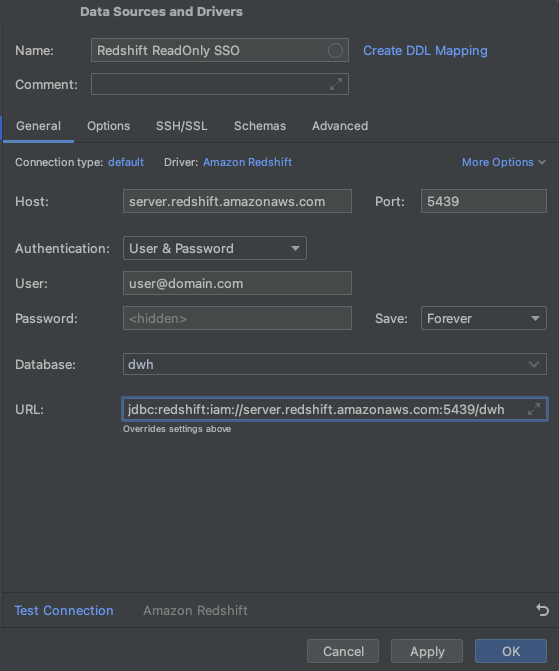
- Go to the
Advancedtab and configure this 3 attributes:- plugin_name:
com.amazon.redshift.plugin.BrowserSamlCredentialsProvider– already defined, so edit it. - idp_reponse_timeout: 60 – create a new value.
- login_url: <your previously copied SAML application login url> – create a new value.
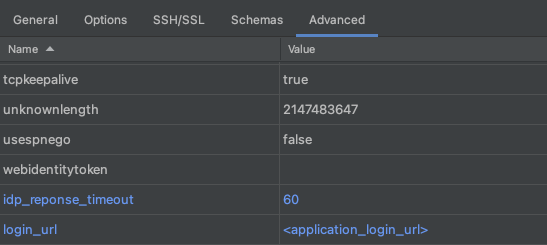
- plugin_name:
- In the bottom of the data source configuration wizard, click “test connection”.

Once clicked, your browser will open and display the following screen:
If everything is configured properly, you should see the following pop up in DataGrip: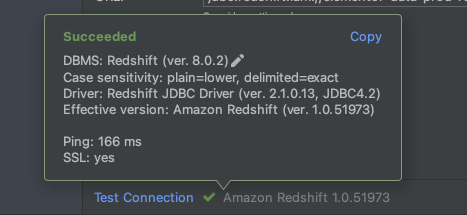
Click OK.
That’s it! Thank you for reading 🙂
Looking for fresh content?
By entering your email, you agree to receive Elementor emails, including marketing emails,
and agree to our Terms & Conditions and Privacy Policy.
