When building a website, especially a landing page, it’s essential to make it stand out—not just visually, but in how it engages and interacts with visitors. Adding unique elements like custom CSS and code can make your site more dynamic and memorable. The best part? These customizations are easier than you might think. With tools like Elementor AI, you can create these elements in minutes without writing the code from scratch.
In this blog, we’ll explore how to transform your landing page from ‘good’ to ‘unforgettable’ with custom interactions. Whether you’re a seasoned professional or an aspiring web creator, these tips will help you boost your portfolio and attract more clients with skills that go beyond templates. Plus, your clients will love the increased engagement these custom elements bring to their websites.
Why Customization Matters: The Business Case
With information overload, there’s tough competition to maintain the visitors’ attention. By adding custom code and unique design elements, you can transform a generic template into something that reflects your client’s brand and identity, making their site—and your portfolio—truly one of a kind.
Here’s why customization is a win-win:
- Boost Engagement: Interactive content, like hover effects and animations, captures attention and keeps visitors on your site longer.
- Elevate Your Portfolio: Showcase your coding skills and creativity to attract clients seeking unique web experiences.
- Impress Clients: Exceed expectations by tailoring features and design elements to their brand, leading to happy referrals.
Let’s dive in.
Snazzy Ticker Bars with Scrolling Text
Scrolling ticker bars capture attention, boost visibility for key messages, and can drive clicks to important promotions or announcements. Inject a touch of excitement to your landing page with a captivating scrolling text ticker – all without writing a single line of code.
In the demo video, I’ve crafted a ticker that serves as a mini-billboard for a band’s latest news and promotions:
- “New city added for concert tickets! Grab yours now!”
- “Follow us on Instagram”
- “Limited-edition merch drop on [Date]!”
- “Summer merch sale 72 hrs only!”
- “Stream our new album!”
Each item can be linked to a specific page, maximizing interaction and potential conversions.
Inspire Action on Your Landing Page
Beyond the music scene, here’s some ideas for you on how you can add scrolling text to elevate your landing page:
- E-commerce: Highlight flash sales, limited edition drops, new arrivals, or limited-time discounts.
- SaaS: Announce new features, showcase user testimonials, or promote free trials.
- Non-profits: Share impact stories, upcoming events, or urgent calls for donations.
- Educational Institutions: Advertise open enrollment periods, new courses, or scholarship opportunities.
- Real Estate: Showcase featured listings, open house dates, or recent sales.
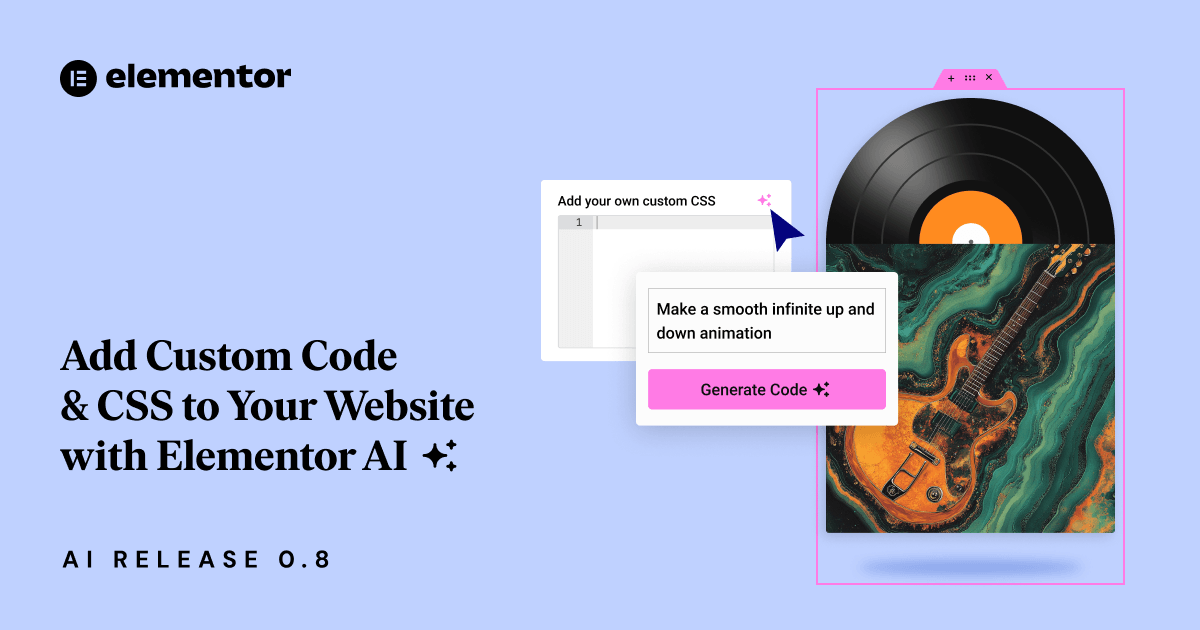
Once you’ve assembled all your ticker bar components, it’s time to infuse it with life. When you are editing the container, head over to “Advanced” and click on the AI icon in the Custom CSS tab. Head over to Elementor AI and enter this prompt to achieve a smooth and infinitely looping animation: “Apply a smooth and infinite loop animation”. Now all you have to do is click “generate code” and “insert” and you will notice the code is added to the Custom CSS tab.
All Eyes on Merch: Enticing Shoppers with Dynamic Effects
To boost sales in the merchandise section, I wanted to draw extra attention to the product cards. By adding a gentle grow-and-shrink scale animation on hover, each item becomes more prominent and invites users to take a closer look. It’s a visual cue that says, “Hey, check me out!”
I started by adding my prompt to the parent container. In my prompt, I’m targeting the hover effect on the child elements with the class .e-child. This way, we’re essentially “future-proofing” the design, so we don’t have to manually update the CSS every time we expand the product range.
Here’s the prompt I used: “On hover over a child container (.e-child), make the hovered container grow and shift the other child containers and bring it to the front to see the entire card”
These custom interactions, achieved without writing a single line of code, exemplify the power of Elementor AI in transforming a standard landing page into an engaging and memorable experience. It’s these small, creative touches that can set your website apart and leave a lasting impression on your visitors.
Try Adding a Custom Cursor for a Touch of Whimsy
Sometimes, it’s the little touches that make a big difference. To add a playful element to my landing page, I decided to replace the standard cursor with a miniature vinyl record. It’s a subtle nod to the band’s musical identity and a fun way to surprise and delight visitors as they navigate the site.
Here’s the prompt I used: “Change the mouse cursor to my own image on this section”. I then can add the URL or the relevant image file inside the CSS code window.
Floating animations
With Elementor AI, you can easily generate the code you need, even if you’re not a seasoned coder. Hover animations are a fantastic way to inject life into your landing page. Instead of simple color changes, I wanted to create interactions that truly surprise and delight visitors.
Use Case: The Floating Vinyl Record
Imagine this: a vinyl record image on your page. It’s cute but I want to add an eye-catching effect that is sure to leave a lasting impression. I want for the vinyl to appear that it is moving into and out of the vinyl sleeve. At the same time, I want to add a floating animation. I am able to do this with a shadow and adding more Custom CSS on the shadow so that it appears it is growing and shrinking in sync.
To create the floating animation effect, I used 3 prompts.
First, I applied a smooth vertical translation animation to the vinyl image itself, creating the illusion of it sliding. Here’s the prompt I used making sure that the animation first moves down before moving back up: Make an infinity animation that moves down and up smoothly. With a distance of 50px
Next, I created a prompt to generate CSS for a subtle floating effect to the record sleeve. This is what worked for me “Make an infinity animation that moves up and down smoothly. With a distance of 50px”.
To add that extra touch, I wanted to animate the shadow beneath the image, making it grow and shrink horizontally in sync with the vinyl’s movement, further enhancing the floating illusion. Here’s what I used “Create a subtle horizontal shrink animation, 50% reduction”.
These small interactions draw attention to my call-to-action buttons “Listen now” and promote the band’s album. It encourages users to click, which can increase conversion rates. Remember, AI is a creative partner, so feel free to experiment with prompts or, as in this case, multiple prompts, to achieve your desired effect. With it being so easy to generate custom CSS you can let your creativity soar without dedicating hours to coding from scratch.
Tip: As with other AI-generated tools, the results can vary, even when using the same or similar prompts. Embrace the unique variations that emerge and don’t hesitate to experiment with the prompt until you achieve the perfect effect for your design.
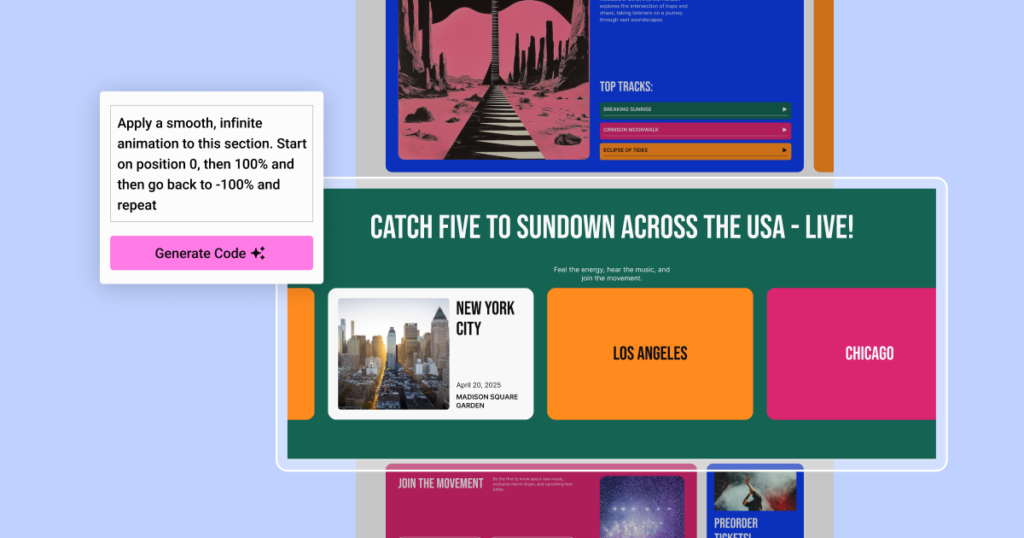
Unveiling Concert Details with Interactive Scrolling
Instead of creating a carousel with navigation arrows, I decided to create a horizontal scrolling animation effect that effortlessly guides visitors through the band’s tour schedule. I paired this with Elementor Flipbox and added a captivating 3D effect to reveal hidden details on the reverse side of the card showcasing the concert date, venue, and other essential information.
You can also take it a step further and link each card to different web pages! It’s a seamless user journey designed to boost conversions.
Of course, this technique can be adapted for various purposes:
- Product Showcases: Display product images on the front, with features and pricing revealed on hover.
- Team Member Profiles: Introduce team members with photos on the front, and their bios or skills on the back.
- Portfolio Highlights: Showcase project thumbnails on the front, and detailed descriptions or case studies on the back.
Final Thoughts
In the world of web design, the ability to add custom elements is your superpower. It not only elevates your portfolio but also transforms the user experience, leading to greater engagement and conversions. Interactive features and unique design elements are the key to capturing attention, reducing bounce rates, and ultimately achieving your clients’ goals.
Experience the Magic: Try Elementor AI Today
Want to try it for yourself and build landing pages that stand out? Click here to learn how to start your free Elementor AI trial today and explore the full range of AI-powered features, including custom CSS and so much more.


