
Running a WordPress site is rewarding, and it comes with a few responsibilities worth getting right. If your site welcomes visitors from the European Union, privacy compliance isn’t optional, though it’s nowhere near as complicated as it looks at first glance. You’ve probably heard of the GDPR and wondered how to stay compliant without disrupting your workflow or cluttering up your pages. Take a breath, because this is more manageable than it sounds, and we’ll walk through it together.
Key Takeaways
- Active Consent Required – EU visitors must explicitly opt in before you can store any non-essential tracking cookies on their devices.
- Granular Control Matters – Your visitors need the ability to accept some cookie types, like analytics, while rejecting others, like marketing.
- Native Dashboard Simplicity – Using a native WordPress tool keeps your compliance management simple and fast without relying on external SaaS platforms.
- Google Consent Mode v2 Ready – Modern compliance requires sending real-time consent signals to Google services if you use ads or analytics.
- Withdrawal Must Be Easy – Visitors must be able to change their privacy preferences at any time with a simple, accessible button.
Understanding Cookie Consent for EU Visitors
It helps to understand why these rules exist before you set anything up. The European Union has some of the strongest privacy laws in the world, mainly governed by the GDPR and the ePrivacy Directive, and they’re designed to give people real control over their personal data. When someone visits your WordPress site, their browser stores small pieces of data called cookies. Some are harmless and necessary, while others track behavior across the web.
Under EU law, you can’t place non-essential cookies on a visitor’s browser unless they give clear, active consent first. You can’t pre-tick consent boxes, and you can’t assume scrolling past the banner counts as agreement. Getting this wrong can lead to regulatory warnings, but more importantly, it can chip away at the trust you’ve worked hard to build with your audience. A clear, friendly banner tells visitors you respect their privacy and value their time on your site.
Another big shift in the privacy space is the widespread adoption of Google Consent Mode v2. If your site serves EU traffic and uses Google Analytics or Google Ads, this system is now required. It acts as a bridge, passing consent choices straight to Google services so they can adjust tracking behavior accordingly. Global Privacy Control (GPC) is worth knowing about too. It lets browsers send automated opt-out signals that your site needs to honor automatically.
The Essential Components of a Compliant Consent Banner
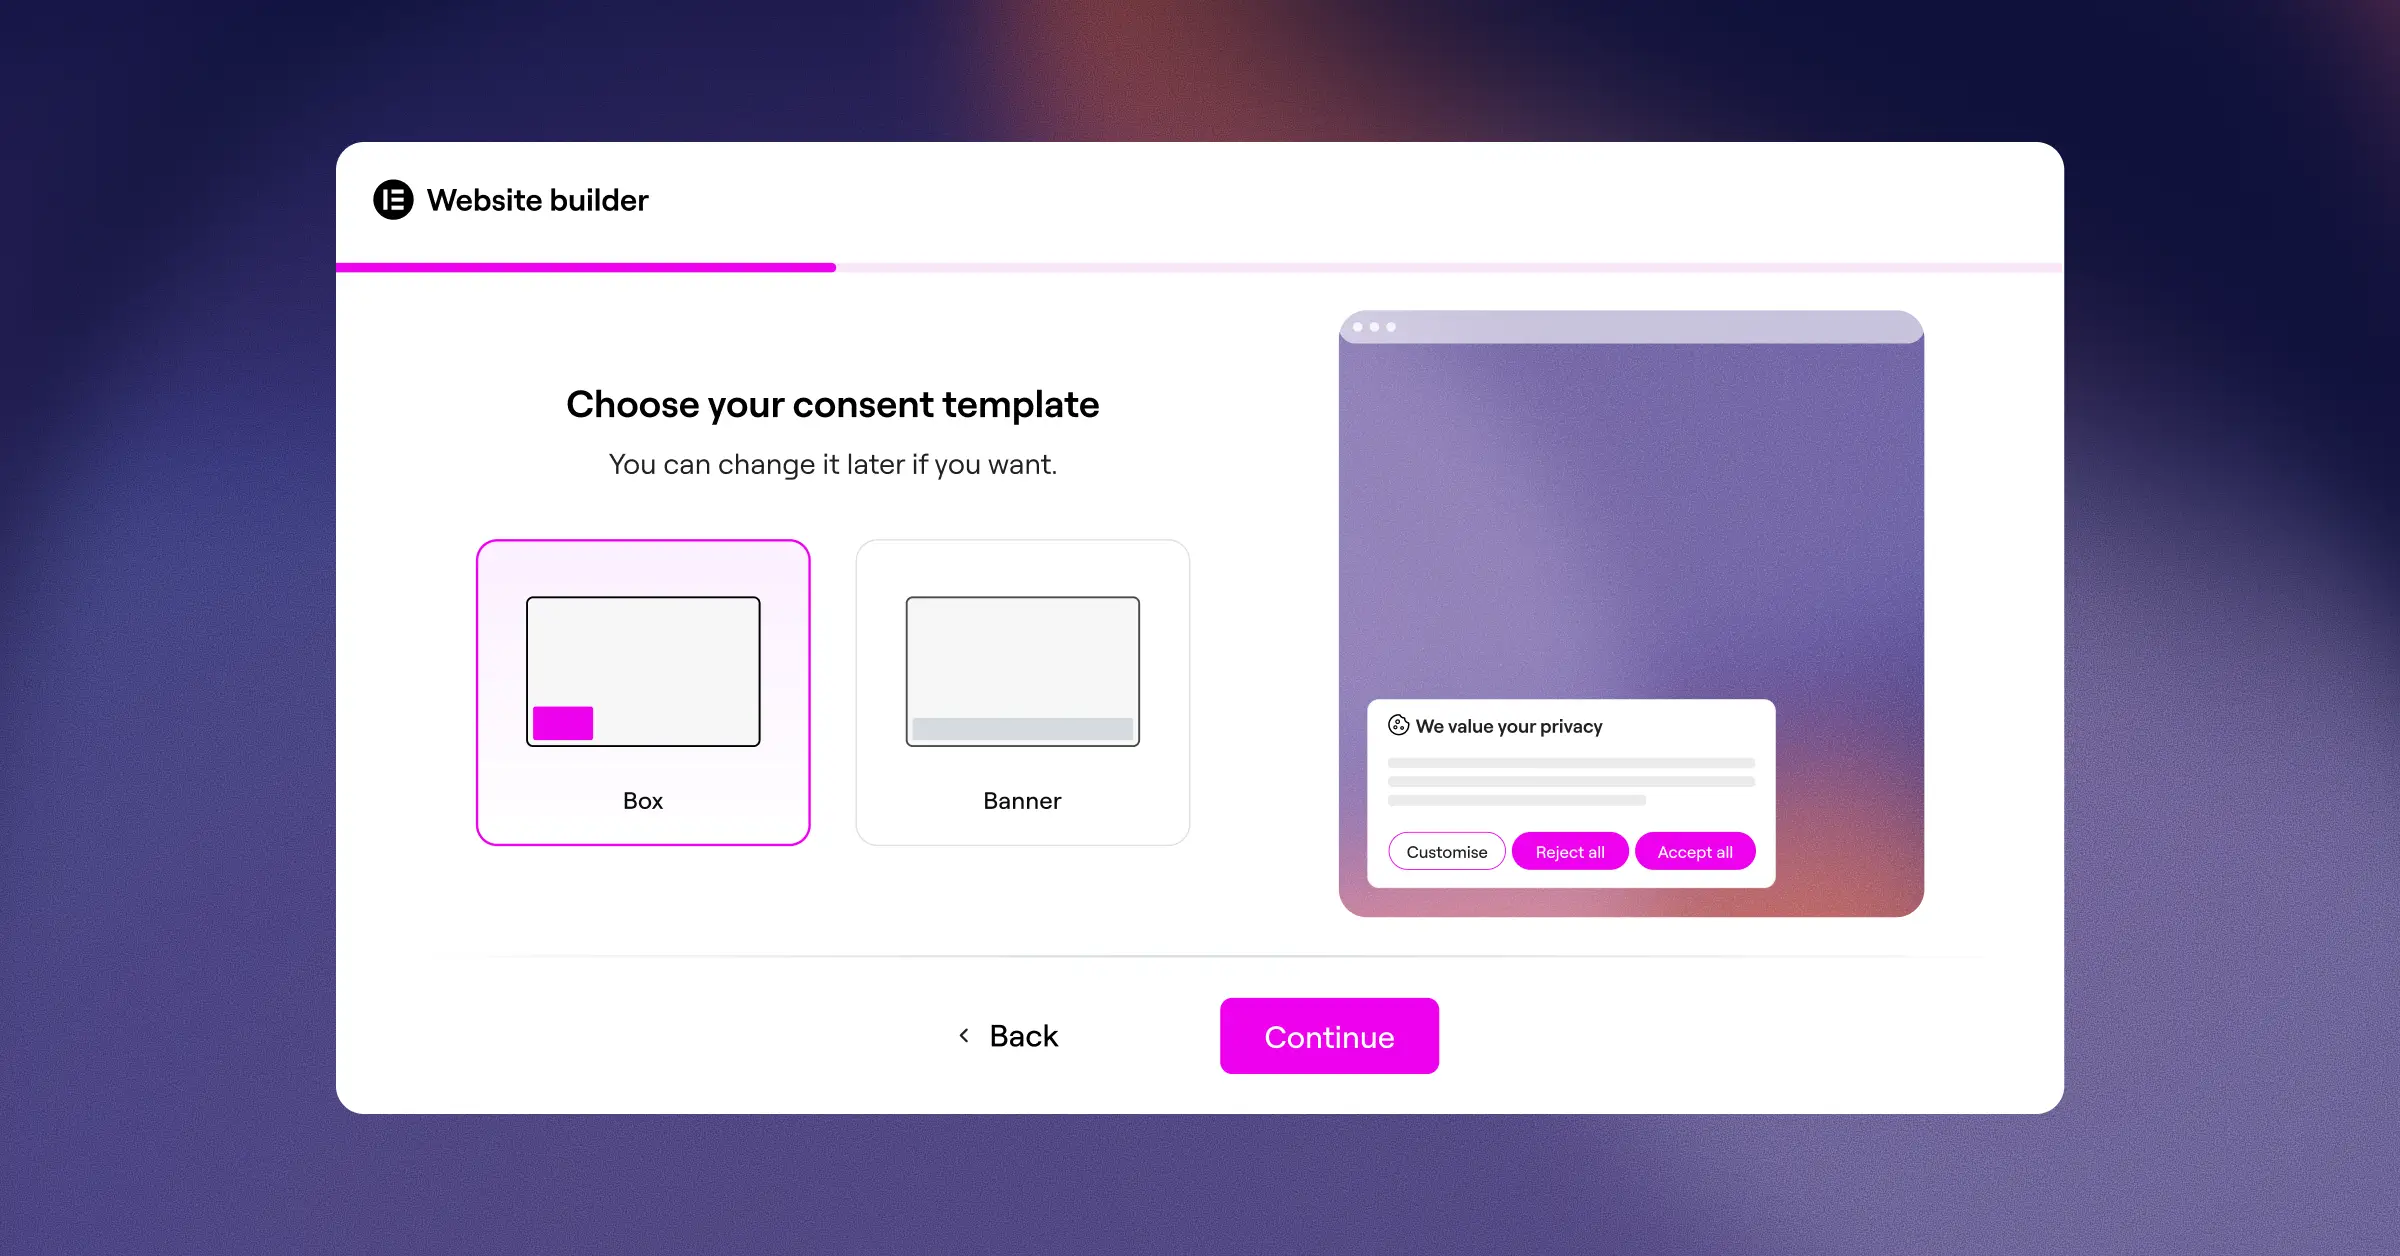
Before the technical setup, it’s worth thinking about what actually makes a consent banner compliant under EU regulations. A simple banner that says “We use cookies, click OK” isn’t enough anymore. Your banner needs to be transparent, informative, and easy to interact with. The good news? A great visitor experience and solid legal compliance go hand in hand.
To hit the right standards, your banner should include these core pieces:
- Clear Choice Buttons – Your banner must feature highly visible buttons of equal visual weight, letting visitors “Accept All” or “Reject All” with a single click.
- Granular Categories – Visitors must have the option to open a settings panel to toggle specific cookie groups, such as functional, analytical, and marketing scripts.
- A Link to Your Privacy Policy – Your banner should point directly to your full privacy policy, written in plain language that anyone can understand.
- No Dark Patterns – Avoid deceptive colors or tiny text designed to steer visitors toward the accept button. Both choices should look equally accessible.
- Easy Opt-Out Options – Once consent is given, a small floating button should remain visible on the page so visitors can update their preferences whenever they like.
Categorizing cookies correctly is the foundation of this whole setup. Cookies generally fall into four main groups, and managing them thoughtfully keeps your site running smoothly while respecting user choices.
- Strictly Necessary Cookies – These are essential for your website to load, handle security, or keep items in a shopping cart. They don’t require consent, but you should still list them in your policy.
- Preference Cookies – These remember settings like language choices or regional configurations. They improve the experience but aren’t strictly essential.
- Analytical Cookies – These collect anonymous data about how visitors use your website, helping you understand which pages are popular and where people might get stuck.
- Marketing Cookies – These track visitor behavior across different websites to serve relevant ads. They require explicit opt-in consent before firing.
Introducing Cookie Consent: The Native WordPress Solution
Many WordPress site owners feel overwhelmed because traditional consent managers require external dashboards, copied script codes, and hefty monthly fees. That’s where Cookie Consent comes in. Built natively for WordPress by the team at Elementor, this capability lets you handle GDPR and CCPA compliance directly from your dashboard, with no external platforms to connect and no separate accounts to manage.
Cookie Consent is built to keep things simple, for you and for your visitors. It fits right into your existing workflow, giving you a smooth path to building trust with your audience. It’s included in Elementor One and also available on a free tier, so it works for projects of any size.
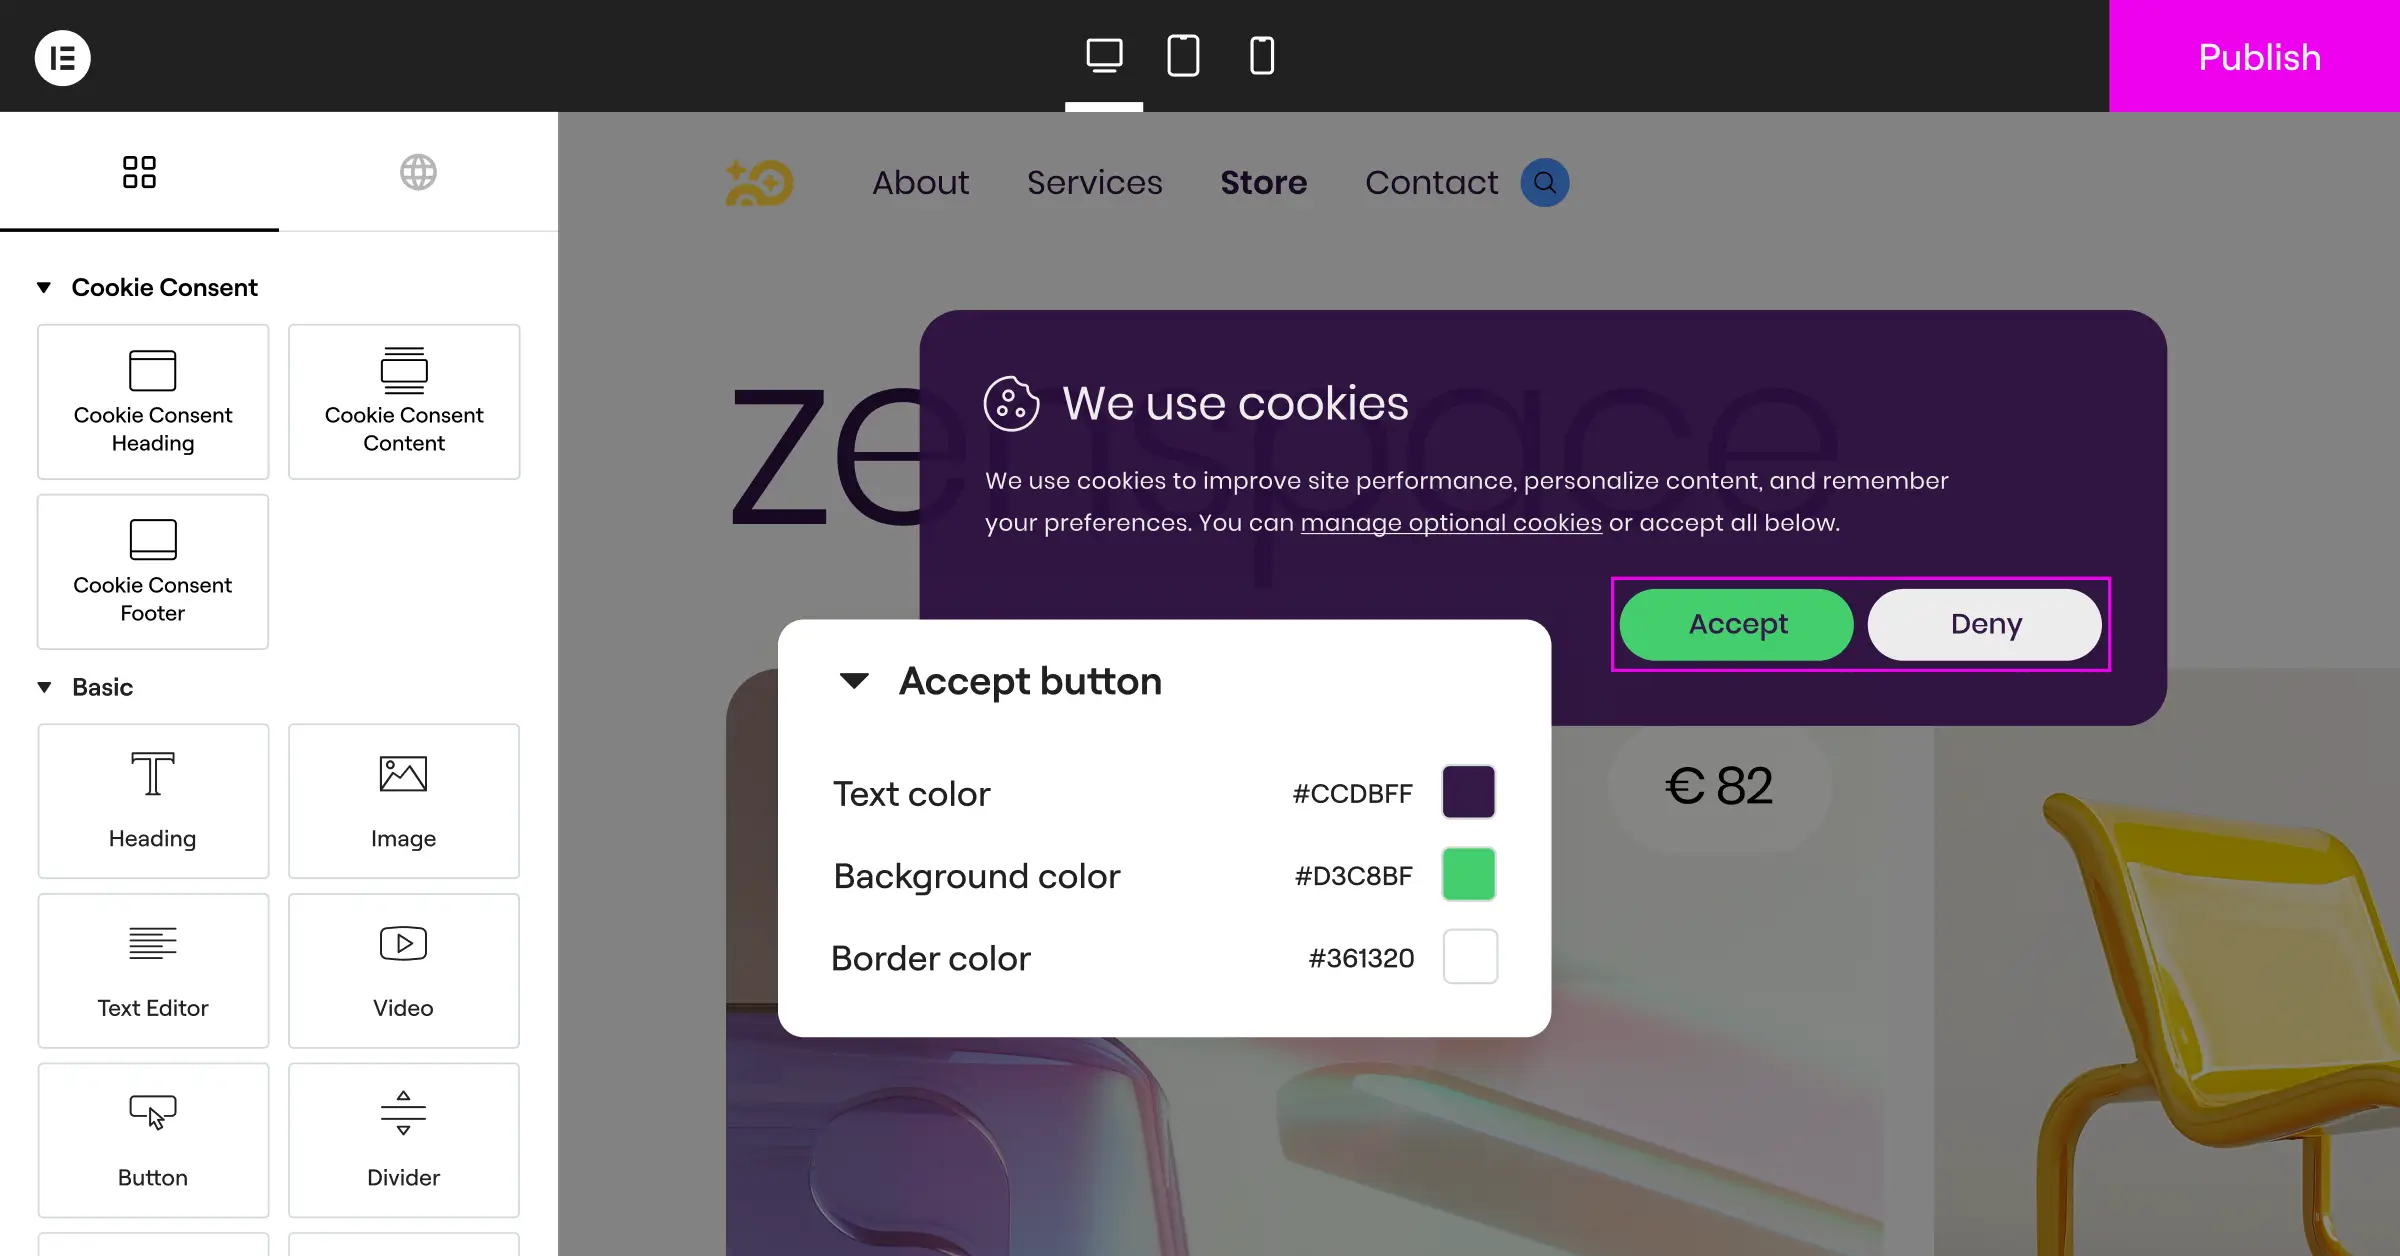
Here’s what this tool does to keep your site compliant and visitor-friendly:
- Scans your site automatically to find and categorize hidden tracking cookies and scripts.
- Builds beautiful, customizable banner designs that match your brand’s typography and color palette.
- Blocks tracking scripts dynamically until your visitor gives consent.
- Targets visitors by geographic location so only your EU and California users see the legal prompts.
- Generates draft privacy policies to give your legal documentation a head start.
- Stores consent logs on your server to keep your business ready for any compliance audit.
Because Cookie Consent runs natively inside WordPress, it doesn’t carry the performance overhead that third-party cloud scripts often bring. Page speed matters for search engine optimization, so handling consent locally is a smart way to protect your load times.
How to Configure Cookie Consent Step-by-Step
With that foundation in place, let’s walk through the actual setup. You can have this running in under five minutes (it’s simpler than it sounds). Follow these steps to configure your banner and cover your EU traffic.
Step 1: Activate the Capability and Run Your First Scan
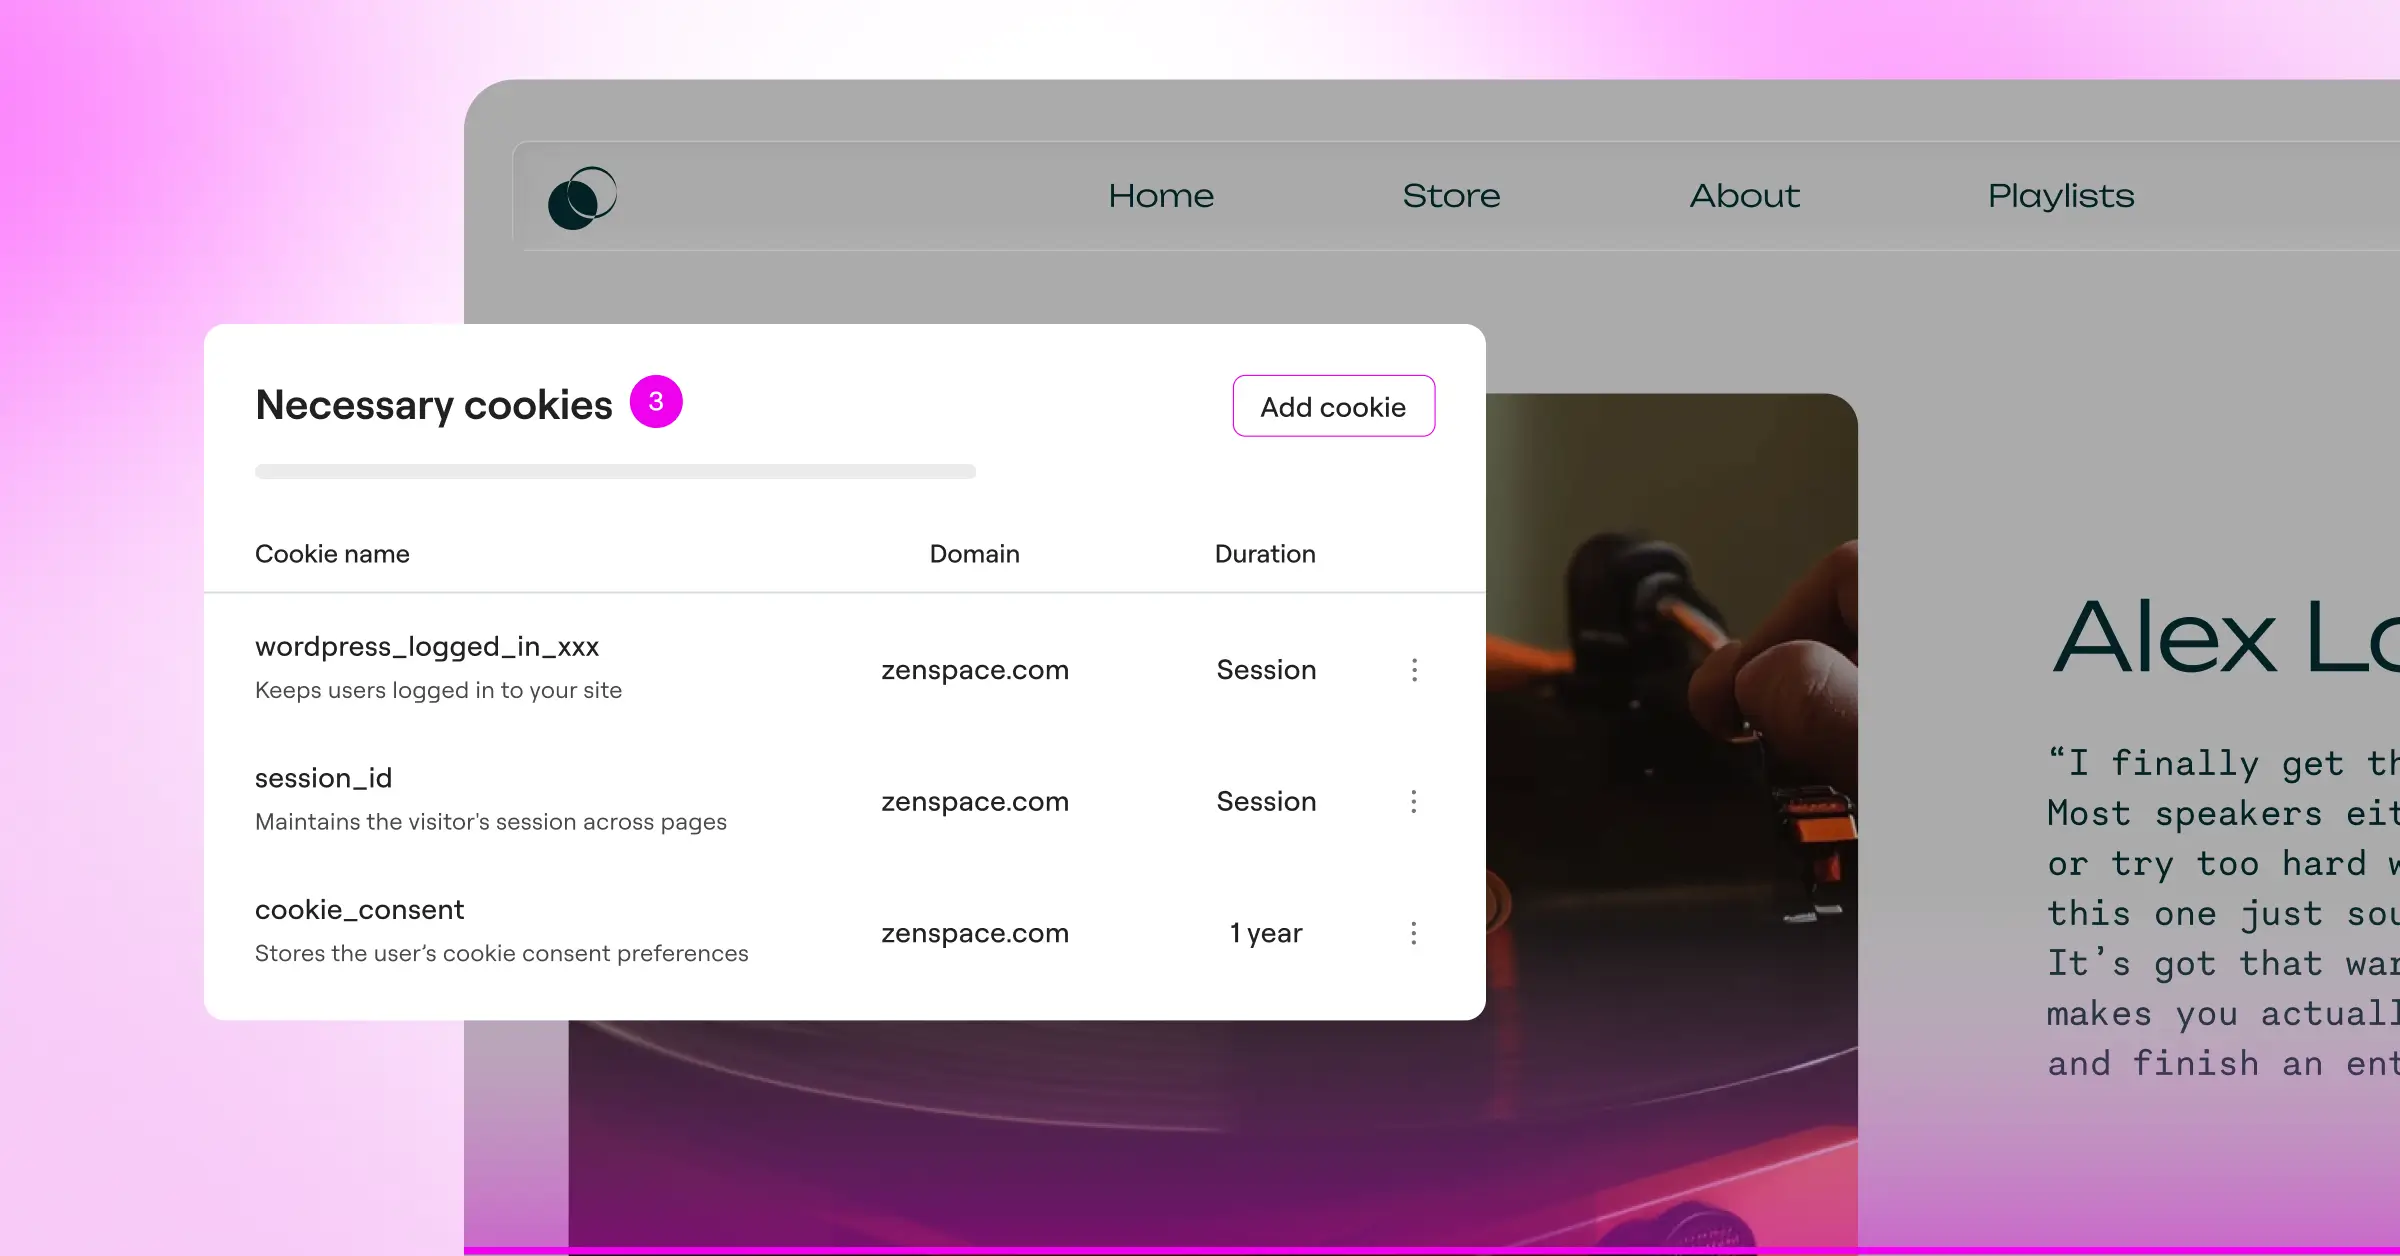
Start in your WordPress dashboard. If you use Elementor, you’ll find Cookie Consent within your site settings or compliance panel. Once it’s activated, run an automatic cookie scan first. This feature crawls your site for tracking pixels, analytics scripts, and third-party resources that set cookies, then groups them into clear categories for you, saving hours of manual work.
Step 2: Customize Your Banner Design
The look of your banner matters more than you’d think. If it feels disconnected from your brand, visitors might leave before they even read it. Use the visual editor to choose placement (a footer bar, a floating box, or a centered modal), then adjust colors, button styles, and fonts to match your theme. Keep the “Accept” and “Reject” buttons equally visible and easy to click (this one trips a lot of people up, but it’s an easy fix).
Step 3: Enable Geo-Targeting
Not every visitor needs to see a cookie banner, and showing one to people from countries without strict cookie laws can disrupt a perfectly good reading experience. Toggle on geo-targeting and the tool uses the visitor’s IP address to detect whether they’re in the European Union, the United Kingdom, or California, showing the prompt only when it’s legally required. Everyone else gets a clean, uninterrupted view of your site.
Step 4: Configure Google Consent Mode v2 and GPC
To keep your marketing running smoothly while respecting privacy, check the box to enable Google Consent Mode v2. This tells your Google tags how to behave based on each visitor’s choice. If someone declines, Google Analytics still receives basic, non-identifying signals, so you can measure conversions without tracking personal details. At the same time, turn on Global Privacy Control support so your site automatically honors browser-level privacy preferences.
Step 5: Publish and Test Your Banner
Once you’re happy with the styling and settings, publish your banner, and take a minute to verify everything works as expected. Here are three quick testing steps:
- Open a new incognito or private browsing window.
- Visit your website and confirm the cookie consent banner appears right away.
- Right-click anywhere on the page, choose “Inspect,” go to the “Application” tab, and check the “Cookies” section. Confirm that no tracking cookies (like Google Analytics `_ga` tags) are stored before you click “Accept.” Once you do accept, check that they populate correctly.
“Managing cookie consent natively within WordPress is a significant step forward for web creators. It removes the friction of managing compliance across separate platforms while keeping website performance strong and search-engine friendly.”
– Itamar Haim, Web Compliance Specialist
Comparing Consent Management Tools
Here’s a factual comparison of some popular compliance tools. Every site has different needs, so finding the right match for your setup is what matters most.
| Compliance Tool | Native WordPress Dashboard | Google Consent Mode v2 | Setup Location | Main Advantage |
|---|---|---|---|---|
| Cookie Consent | Yes | Yes | Inside WordPress Admin | Fast setup, matches brand styling natively, no external subscriptions. |
| Cookiebot | No | Yes | External Cloud Dashboard | Highly automated scanning suitable for large multi-language enterprise sites. |
| CookieYes | No | Yes | External Cloud Dashboard | Broad cloud management panel for multi-platform website portfolios. |
| Complianz | Yes | Yes | Inside WordPress Admin | Highly customizable legal configurations for local EU laws. |
| iubenda | No | Yes | External Cloud Dashboard | Complete legal document generation alongside consent features. |
Maintaining Audit-Ready Consent Logs
Under the GDPR, the burden of proof sits with you as the site owner. If a regulator ever asks for evidence of compliance, you need to show visitors actively consented to tracking, which is why organized, reliable consent logs matter so much.
A compliant consent log should capture specific data points without violating anyone’s privacy itself. Make sure your logging system records the following:
- Anonymized IP Address – Partially masked to protect user identity while confirming location.
- Consent Date and Time – A clear timestamp showing exactly when the visitor made their choice.
- Consent Decisions – A record of which cookie categories the user accepted and which ones they declined.
- Consent Token – A unique identifier tied to that specific session, linking back to the log if needed.
- Active Banner Version – The specific policy version that was live when the visitor gave consent.
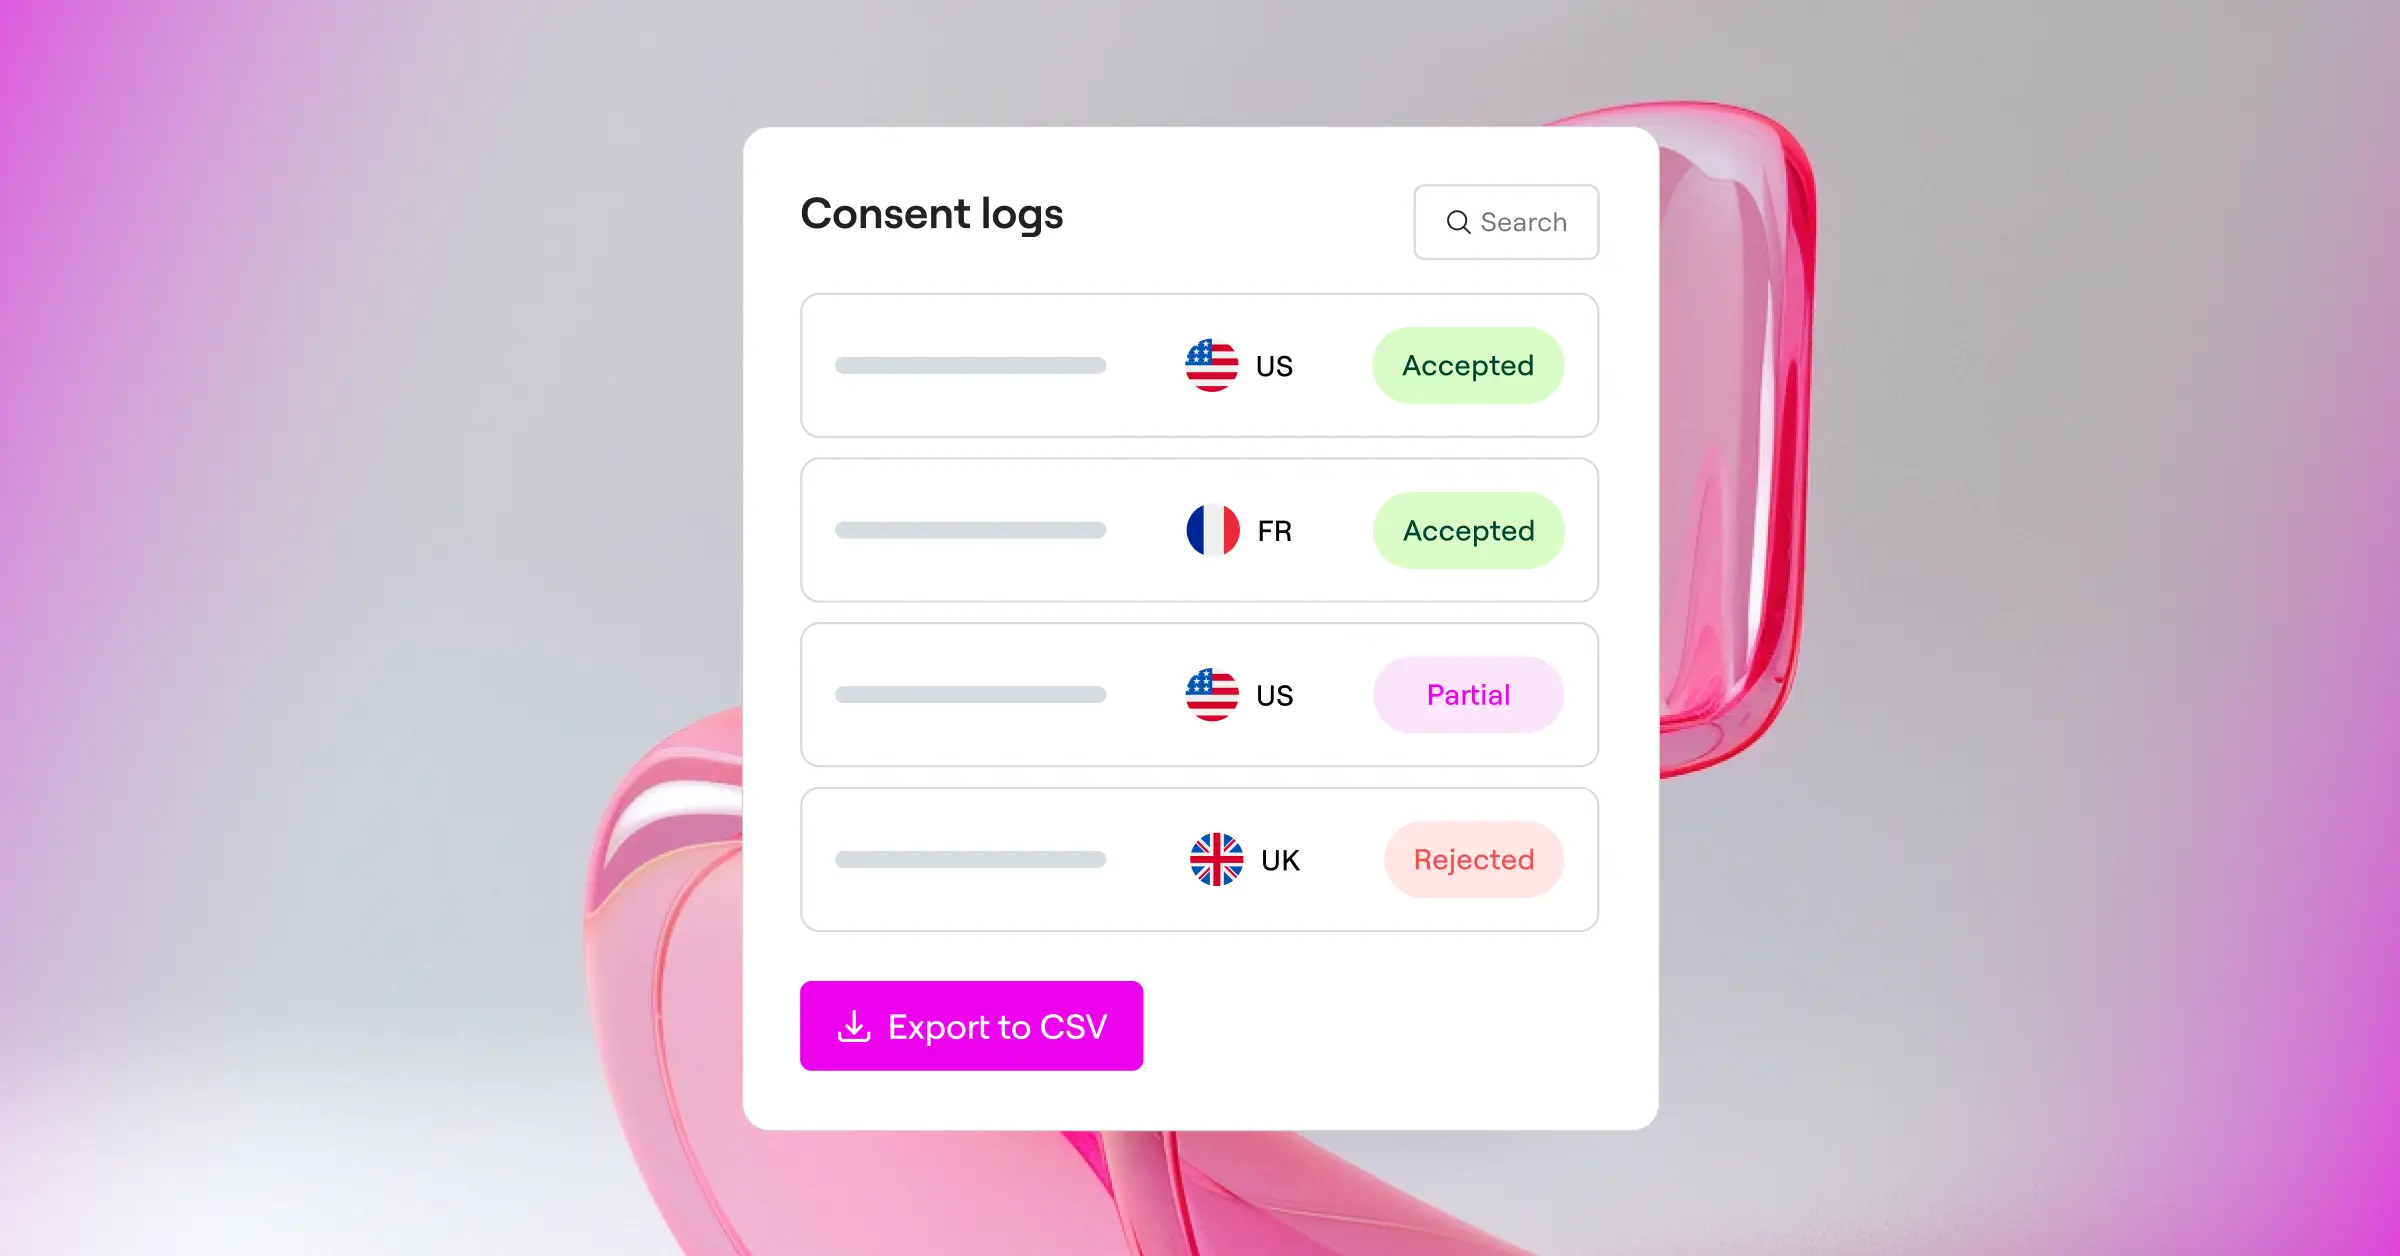
Storing these logs directly in your WordPress database means no third-party storage fees and no API connection worries. Your legal proof stays safe and exportable whenever you need it.
Troubleshooting Common Cookie Consent Issues
Even with the best tools in place, you might hit a few snags. Here are the most common issues and how to fix them quickly:
- Tracking Scripts Are Still Firing Before Consent – This usually happens because of hardcoded scripts in your theme’s `header.php` file. Load your tracking tags through a manager that respects consent signals, or register them directly inside your cookie consent settings so they’re blocked automatically.
- The Banner Doesn’t Appear for EU Visitors – If geo-targeting is enabled, the banner only shows to users with EU IP addresses. To test this yourself, use a VPN set to an EU country like Germany or France, then reload your site in a private browser window.
- Page Speed Scores Drop – External consent scripts sometimes block the main browser thread and slow down your page. Switching to a native WordPress compliance capability that serves scripts locally from your own server is the cleanest fix.
Frequently Asked Questions
Do I really need a cookie consent banner if my business is located outside the EU?
Yes, you do. The GDPR applies to any website that collects personal data from individuals inside the European Union, regardless of where your business is based. If your WordPress site gets EU traffic and uses analytics, contact forms, or ad tracking, you must show a compliant banner to those visitors.
What is the difference between essential and non-essential cookies?
Essential cookies are strictly necessary for your website to function, things like managing user sessions, handling security, or keeping shopping cart states. You don’t need consent for these. Non-essential cookies include analytical tracking, social media pixels, and marketing scripts that build visitor profiles. These require explicit opt-in consent before they load.
Can I just block all cookies for EU visitors instead of showing a banner?
You can, but it might break parts of your website or limit your ability to understand user behavior. Blocking all cookies means logins, shopping carts, and custom settings won’t work. A modern compliance tool lets you keep essential cookies running while blocking tracking scripts until the user opts in.
How does Google Consent Mode v2 work with my consent banner?
Google Consent Mode v2 passes your visitor’s choice from the consent banner directly to Google tags. If someone declines tracking, your analytics tools switch to a restricted state, collecting anonymous data without saving tracking identifiers. Your reporting stays active while privacy is protected.
Is a free tier enough to manage cookie compliance for a small website?
For many personal blogs, small local businesses, and portfolio sites, the free tier of a dedicated cookie consent capability is perfectly sufficient. It gives you the banner configurations, script blocking, and basic customization you need to meet legal standards without adding to your monthly expenses.
Will a cookie consent banner hurt my search engine rankings?
No, it won’t, as long as it’s implemented correctly. Search engines understand that compliance banners are a legal requirement. To keep your SEO healthy, make sure your banner doesn’t block search crawlers from reading your page content, and use a lightweight tool that doesn’t slow down load times.
Can I write my own cookie policy or should I use a generator?
While you can write your own policy, using a built-in policy generator is the smarter move. These generators are designed by compliance experts to cover all the necessary legal bases, including listing your cookie categories, explaining how visitors can opt out, and detailing how their data is handled.
How often should I scan my website for new cookies?
Scanning once a month is a solid habit, and you should also run a scan whenever you install new features or marketing tools. Updates can introduce hidden tracking scripts that weren’t there before. Keeping your scans current means your banner always reflects your actual site activity (worth bookmarking this reminder).
What happens if I do not comply with EU cookie regulations?
Non-compliance can result in formal warnings, audits, and monetary fines from EU data protection authorities. Beyond the financial side, failing to respect user privacy can seriously damage your brand’s reputation and erode the trust of your audience, which takes a long time to rebuild.

