Ever felt a little nervous about poking around your website’s backend? That’s completely normal, honestly, most site owners feel exactly the same way the first time they open up a system file. When it comes to telling search engines which parts of your site to crawl, the robots.txt file is one of the most useful tools you have. It might look like some kind of complex technical document, but editing it is a lot easier than it sounds (don’t worry, it really is). We’ll walk you through exactly how to view, edit, and fine-tune your robots.txt file safely, step by step. You don’t need to be a coding wizard to get this right, so let’s jump in and make your site more search-friendly together.
Key Takeaways
- The robots.txt file works like a guide for search engine bots, letting them know which parts of your site they should, and shouldn’t, crawl.
- WordPress automatically creates a virtual robots.txt file for you, but you can override it with a physical file, or use a plugin to set your own directives.
- Popular SEO tools like Yoast and Rank Math come with built-in file editors, so you can make changes right from your WordPress dashboard.
- Never block your CSS, JavaScript, or theme asset folders. Search engines need to load these files to see your site the way visitors do.
- Testing your edited robots.txt file with a validation tool is a vital step. It’s the easiest way to avoid accidentally blocking search engines from indexing your pages.
What is a Robots.txt File and Why Does It Matter?
Let’s start with a simple picture. Think of your website as a big library, and search engine crawlers as visitors trying to map out every single book on the shelves. A robots.txt file is basically a friendly sign at the front door with a short list of instructions. It tells search bots which rooms they’re welcome to explore and which private archives they should just skip. This simple text file lives in your site’s root directory, and it plays a real role in how search engines see and rank your content.
You might be wondering why you’d ever want to keep search engines away from parts of your own site. Isn’t the whole point of SEO to get as many pages indexed as possible? That’s true for your public articles, landing pages, and product listings. But your WordPress site also holds plenty of files that don’t need to show up in search results at all. Your backend admin files, your login page, and your internal search result pages, for instance, don’t need to be crawled.
Managing this crawl path also helps protect your crawl budget. Search engines only give each website a limited amount of time and resources to crawl. So if Googlebot spends its budget crawling hundreds of duplicate search pages or backend folders, it might run out of time before it even reaches your newest, high-value blog post. Setting clear boundaries with robots.txt keeps search engine spiders focused on the content that actually matters.
How WordPress Generates Your Robots.txt File Automatically
By default, WordPress doesn’t create an actual physical robots.txt file sitting in your server directory. Instead, it generates a virtual robots.txt file on the fly, every time a search engine bot asks for it. This is pretty convenient, because it means even a brand-new website has a basic set of rules ready to guide search spiders right from day one.
Want to see your current virtual file? Open your favorite browser, type your domain name into the address bar, and add /robots.txt to the end. So your query would look something like https://yourdomain.com/robots.txt. When the page loads, you’ll probably see something like this:
User-agent: *Disallow: /wp-admin/Allow: /wp-admin/admin-ajax.phpThis simple setup tells us two things. First, the asterisk next to User-agent means the rule applies to every crawler out there. Second, the Disallow rule tells crawlers to stay out of your core WordPress admin dashboard, while the Allow rule makes an exception for one specific file the browser needs to run dynamic scripts properly. This default file is a solid starting point, but it’s often not specific enough once your site grows and you start using specialized tools to shape your design and organize your content.
Prerequisites Before You Edit Your Robots.txt File
Before you dive into editing, there are a few basic things worth doing first to keep your site completely safe and accessible the whole way through. Don’t worry, none of these steps are complicated. They just give you a helpful safety net in case of an accidental typo.
1. Is Your Site Actually Visible to Search Engines?
First things first: make sure your WordPress site is actually set up to let search engines crawl it in the first place. Sometimes owners of brand-new sites accidentally leave a default setting turned on that blocks all traffic. Here’s how to check:
- Log in to your WordPress admin dashboard.
- Look at the left-hand menu, hover over Settings, then click Reading.
- Scroll down to the bottom of the page and find the section labeled Search Engine Visibility.
- Make sure the checkbox next to “Discourage search engines from indexing this site” is unchecked.
- If you had to uncheck it, click the blue Save Changes button.
2. Perform a Complete Website Backup
Whenever you’re editing a system-level file on your site, it’s smart practice to grab a fresh backup first. A robots.txt file is just a simple text document, so it can’t crash your server. But an incorrect setup can accidentally hide your whole site from search engines. Having a backup or a quick restore point on hand gives you real peace of mind while you work.
3. Create a Google Search Console Account
To keep an eye on how search engines actually read your rules, it’s worth setting up a free Google Search Console account. This tool helps you spot indexing errors, and it even gives you a diagnostic area where you can paste in your new robots.txt rules to confirm they work exactly the way you want, before you ever save them live.
Method 1: Editing Robots.txt Using Yoast SEO
If you’re already using Yoast SEO to manage your site’s search optimization, good news: you don’t need to install any extra plugins or log into your hosting server. Yoast comes with a built-in file editor that lets you edit your robots.txt file right from your WordPress dashboard (this part’s easier than it looks). For most site owners, this is often the simplest path.
Step 1: Open the Yoast Tools Menu
First, make sure the plugin is active on your site. Once that’s confirmed, look at your WordPress admin sidebar and click on Yoast SEO, usually shown with a large “Y” icon. From the dropdown that appears, click on the option labeled Tools.
Step 2: Access the File Editor
On the Tools page, you’ll find a handful of useful options for managing your site’s optimization. Look for the link labeled File editor and click it. If you don’t see this option, your hosting provider may have disabled file editing inside WordPress for security reasons. If that’s the case, no problem, just skip ahead to the SFTP method described later.
If the editor is available, clicking the link takes you to a page where you can edit both your .htaccess file and your robots.txt file. If you’ve never created a physical file before, you’ll see a button labeled Create robots.txt file. Click it, and Yoast will generate a text area for you automatically.
Step 3: Modify and Save Your Changes
Now you can type your custom rules right into the text field. Yoast pre-fills the box with your default settings, so you can simply add new lines or tweak the existing ones to fit your needs. Once you’re happy with your new rules, scroll to the bottom of the section and click the Save changes to robots.txt button. Yoast updates the file instantly, and your changes go live for search spiders to read.
Method 2: Editing Robots.txt Using Rank Math SEO
Rank Math is another popular SEO suite that makes file editing pretty accessible. Like Yoast, it lets you edit your robots.txt file through a clean web interface, no server logins or file transfer software required.
Step 1: Enable the File Editor Settings
To get started, log in to your WordPress dashboard and look for the Rank Math option in your sidebar menu. Click on it, then select General Settings from the list of options. You’ll see several tabs along the left side of the settings menu. Click the tab labeled Edit Robots.txt.
Step 2: Enter Your Custom Directives
In the middle of the screen, you’ll see a large, dark text area showing your current robots.txt rules. If your site was previously running on the default virtual file, Rank Math automatically displays those default rules in the text window. Just click inside the text area and start typing your custom rules.
One thing to keep in mind: Rank Math shows a small warning letting you know that if you have a physical robots.txt file sitting in your root folder, the changes you make in this dashboard editor won’t actually take effect. That’s because a physical file on your server always takes priority over the virtual file created by SEO plugins.
Step 3: Save Your New Configuration
After you’ve written your disallow rules and double-checked them for any spelling mistakes, look below the text field and click the blue Save Changes button. Rank Math saves your settings and instantly serves this updated virtual file to any search engine crawler that comes to visit your site.
Method 3: Editing Robots.txt Manually via SFTP or File Manager
If you’d rather not rely on a heavy SEO suite, or you’re a developer who wants direct control over your site files, editing robots.txt manually is a great option. This method means creating a real, physical file on your computer and uploading it straight to your website’s root directory using an SFTP client or your hosting provider’s cPanel File Manager.
Step 1: Create the Text File on Your Computer
You don’t need any fancy web development software here, a simple text editor is actually the best tool for the job. If you’re on Windows, open Notepad. If you’re on a Mac, use TextEdit (just set the format to “Plain Text” rather than “Rich Text”).
Open your text editor and type in the basic rules you want your site to follow. A standard starting template might look something like this:
User-agent: *Disallow: /wp-admin/Allow: /wp-admin/admin-ajax.phpSitemap: https://yourdomain.com/main-sitemap.xmlOnce you’ve finished writing your rules, go to the top menu, click Save As, and name the file exactly robots.txt. Make sure the file extension is set to .txt and not something like .rtf or .docx, since search engines will only recognize a plain text file format.
Step 2: Connect to Your Hosting Server
Next, you’ll need to upload this file to your web server. You can use a free SFTP client like FileZilla or Cyberduck. You’ll need your SFTP login details, server address, username, password, and port number, from your web hosting account dashboard. Not sure where to find them? Your hosting provider’s customer support team can easily point you in the right direction.
Alternatively, if your host offers a cPanel interface, you can log in and open the File Manager tool instead. This lets you upload files directly through your web browser, no extra software needed.
Step 3: Upload the File to the Root Directory
Once you’re connected to your server via SFTP or File Manager, you’ll see a list of folders. Look for your website’s root directory, usually named public_html, www, html, or something matching your domain name. You’ll know you’re in the right spot if you see other core WordPress folders nearby, like wp-content, wp-includes, and wp-admin.
Drag your new robots.txt file from your computer and drop it directly into that root folder. If the system asks whether you want to overwrite an existing file, go ahead and confirm. Once the transfer is complete, your physical robots.txt file is officially live, and it will immediately override any virtual file that WordPress or your SEO plugins were previously generating.
Method 4: Editing Robots.txt Using a Dedicated WordPress Plugin
Don’t want a massive, all-in-one SEO plugin, but also not thrilled about logging into a server via SFTP? A small, lightweight utility plugin is a perfect middle ground. These plugins have one specific job: managing your robots.txt file safely from your dashboard.
Step 1: Install a Virtual Robots.txt Plugin
Log in to your WordPress dashboard and head over to Plugins, then click Add New Plugin. In the search box at the top right, type “Virtual Robots.txt” or “Robots.txt Editor.” Look for a plugin with strong ratings and recent updates. Once you find one that fits, click Install Now and then click Activate.
Step 2: Edit Your Settings
Once it’s active, the plugin creates a new menu link in your dashboard, usually located under the Settings or Tools tab. Click on this new menu item to open the configuration screen. You’ll see a simple text editor box where you can enter your crawl instructions. This setup is genuinely intuitive because it keeps your tools separated and doesn’t clutter your site with extra search marketing settings, which is handy if you’d rather manage your SEO through other manual strategies.
Key Rules and Syntax to Use in Your Robots.txt File
Writing rules for robots.txt might sound like learning a new language, but really, there are only a handful of commands you need to know. Understanding these rules will save you from simple mistakes that could affect how Google and other search engines index your site.
Let’s walk through the core commands you’ll run into most often:
- User-agent – This tells the file which search bot you’re talking to. Using an asterisk (
*) means the rule applies to all bots. NamingGooglebotmeans the rule applies only to Google. - Disallow – This tells search bots which folders or individual pages they shouldn’t crawl. Add a slash after it (
/) and you’re telling bots to stay away from your entire website. - Allow – This command overrides a Disallow rule. Say you’re blocking a whole folder but want bots to crawl one specific file inside it, an Allow rule handles that.
- Sitemap – This points search engines straight to your XML sitemap. Including this link helps search bots discover your new content much faster.
To make this even clearer, here’s how these commands look in action across a few common scenarios:
| Directive Code | Target Crawlers | Practical Purpose |
|---|---|---|
User-agent: * |
All search engine spiders | Blocks crawlers from entering your core WordPress dashboard folder. |
User-agent: Googlebot-Image |
Google Image search crawlers only | Keeps Google from showing images from this folder in image search results. |
User-agent: * |
All search engine spiders | Blocks bots from wasting crawl budget on dynamic internal search results pages. |
User-agent: * |
All search engine spiders | Dangerous Rule: Blocks every search engine from indexing any part of your site, completely. |
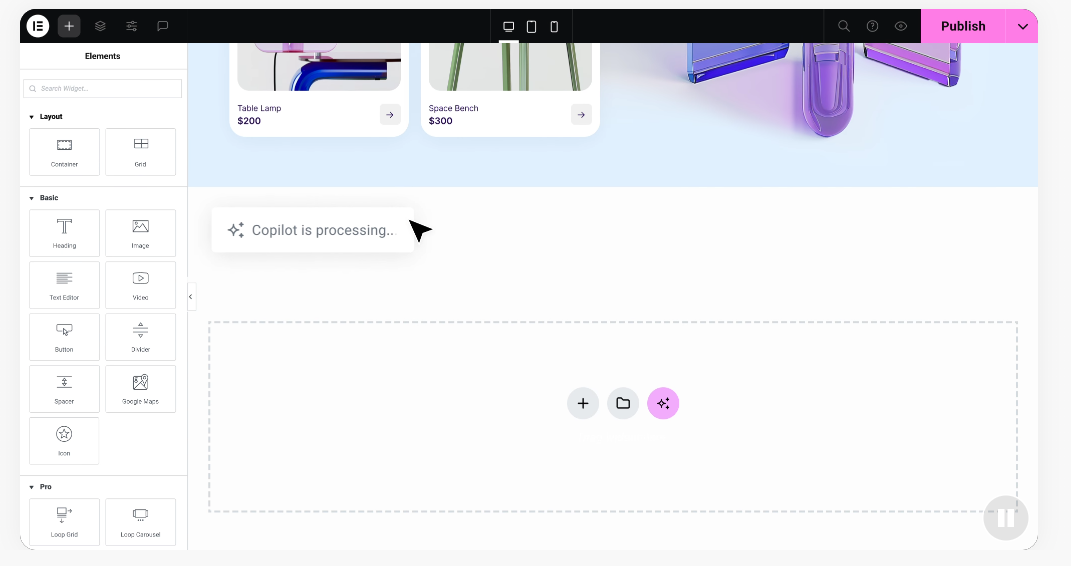
When you’re designing your site, you might use different page-building tools to create something beautiful and engaging. The Elementor website builder, for instance, is popular because it lets you design polished pages visually without touching complex code. If you use visual design tools like this, it really matters that your robots.txt file doesn’t block search engines from crawling your theme resources. Search engines need access to your CSS and JavaScript files to see that your layout is mobile-friendly and looks great. Restrict access to those style files, and search engines might assume your site is broken or poorly built, which can hurt your rankings.
How to Test and Validate Your Robots.txt File
Once you’ve finished editing your robots.txt file, don’t just assume everything’s working perfectly, it’s worth double-checking. Even a tiny, accidental typo like a misplaced slash can have a big impact on your site’s search visibility. Taking a few minutes to validate your changes is a great habit that protects your rankings.
The most reliable way to test your file is with official tools from the search engines themselves. Google offers a dedicated Robots.txt Tester tool through Google Search Console. Paste your updated text into the testing window, and the tool shows you exactly how Googlebot reads your rules. You can also enter specific URLs from your site into the test box to confirm whether they’re allowed or blocked under your current settings.
Don’t have a Google Search Console account set up yet? You can use free online validation tools instead. Sites like Ryte or other technical SEO testing tools let you enter your domain name, pull your live file, and run diagnostic checks to catch syntax errors, broken links, or conflicting rules. It’s worth running these checks after every update, just to keep your files completely healthy.
“Many site owners underestimate the power of a simple robots.txt file. A single incorrect character can accidentally hide an entire business from the internet overnight. Taking the time to test your rules in Google Search Console is the simplest insurance policy you can have for your organic search traffic.”
– Itamar Haim, Web Development Specialist
Troubleshooting and Common Robots.txt Mistakes
Even experienced developers occasionally slip up when managing their indexation rules. Knowing what to watch for will help you troubleshoot issues quickly and keep your site running smoothly.
Did You Accidentally Block Your Whole Site?
This is by far the most common mistake web creators make, especially when moving a new site from a staging environment to a live server. If your file contains the following code, you’re telling search engines to completely ignore your entire website:
User-agent: *Disallow: /If your website traffic suddenly drops to zero, check your file immediately for this specific rule. Removing the single slash after the Disallow directive will open your site back up to search crawlers.
Why Should You Bother Linking Your XML Sitemap?
Search engines can eventually find your sitemap through other channels, but adding a clear reference point in your robots.txt file is still a smart move. It works like an instant map for search engines the moment they land on your site. Just make sure you use the full, absolute URL of your sitemap, including the https:// prefix, rather than a relative path.
Does Case Sensitivity Actually Matter Here?
It does, robots.txt files and server pathways are case-sensitive (this one trips a lot of people up). If you have a folder named /Downloads/ and you write a disallow rule for /downloads/, search engines might not apply your rule correctly. Always double-check that your directory names in your rules match your actual server folder names exactly.
If you’re looking to scale your design capabilities further, exploring Elementor features can help you build optimized layouts that work beautifully with search crawlers. And when you’re managing a growing site, it’s worth checking out Elementor to see what other design resources might save you time down the road.
Frequently Asked Questions
Where is the robots.txt file located in WordPress?
The physical robots.txt file, if it exists, is located in the main directory of your WordPress installation. This directory is commonly referred to as the root folder or the public_html folder on your hosting server. If you haven’t created a physical file, WordPress will generate a virtual version on the fly when you visit yourdomain.com/robots.txt.
How do I create a robots.txt file if I don’t have one?
You can create one easily by using a simple plain text editor like Notepad on Windows or TextEdit on Mac. Create a new document, add your basic rules, and save it as robots.txt. After that, you can upload this file to your website’s root directory using an SFTP client or your hosting provider’s file manager tool.
Can a robots.txt file stop people from seeing my files?
No, a robots.txt file isn’t a security tool. It’s really just a polite suggestion for search engines to skip certain directories. If a regular user knows the direct link to a file or a folder on your website, they can still open it in their browser. If you need to protect sensitive information, use password protection or a security tool instead.
Why are my blocked pages still showing up in Google search?
If a page is blocked in your robots.txt file, search engines won’t crawl it, but they can still index the page if other websites link to it. To completely keep a page out of search results, add a “noindex” meta tag to the page itself rather than relying solely on your robots.txt file.
Is it possible to edit robots.txt without a plugin?
Yes, you can edit it manually without using any plugins at all. Just connect to your server using an SFTP client, download your existing robots.txt file to your computer, make your edits in a text editor, and then upload the updated file back to your server’s root directory.
What is crawl budget and why should I care about it?
Crawl budget is the number of pages a search engine bot will crawl on your website within a specific timeframe. If you have thousands of low-value, duplicate, or administrative pages, search engines might waste their budget on those pages and miss your high-quality content. Using robots.txt to block useless folders helps you make the most of that budget.
Will editing my robots.txt file hurt my website SEO?
It won’t, as long as you write your rules correctly. In fact, keeping your files clean and blocking low-value pages is genuinely good for your search presence. That said, if you make a mistake and accidentally block your entire site, or block essential theme resource folders like CSS and JavaScript, your search engine rankings can suffer. Always test your files after editing them.