
We’ve all landed on a site and been hit by a giant gray box demanding a cookie decision before we read a word. It’s intrusive and messy, and it can send visitors away. But compliance doesn’t have to hurt your design. A thoughtfully styled banner builds trust and keeps your brand polished from the first visit, and it’s easier than it sounds.
Key Takeaways
- Brand Alignment – Styling your banner to match your site’s fonts and colors makes the whole experience feel more trustworthy.
- Dashboard Simplicity – A native WordPress capability keeps you from juggling several outside platforms.
- Consent Integrity – Support for standards like Google Consent Mode v2 and Global Privacy Control matters for any site serving EU and California visitors.
- Layout Balance – Bottom bar and corner-slide layouts usually give you the best mix of visibility and subtlety without blocking your content.
- Audit Readiness – Clean consent logs right in your dashboard mean you’re always prepared, with no extra effort.
Why Cookie Banner Design Matters in 2026
Privacy laws aren’t new, but how we design around them keeps changing. Visitors expect transparency and a polished user experience too. When your consent banner looks like an afterthought, people may hesitate to trust your checkout or sign up for your newsletter. A well-integrated notification shows you care about the details and value their privacy.
Regulations have also grown stricter worldwide. From Europe to California, regulators want clear consent mechanisms with real user choice. The trick is making these banners look like they belong on your site, not some intrusive third-party ad. (This trips people up: too much focus on the legal text, not enough on the interface.)
The good news is you can design a banner that respects your visitors and keeps your site fully compliant. Keep your fonts, colors, and buttons consistent with the rest of your site, and compliance starts to feel like part of your brand, not something bolted on last minute.
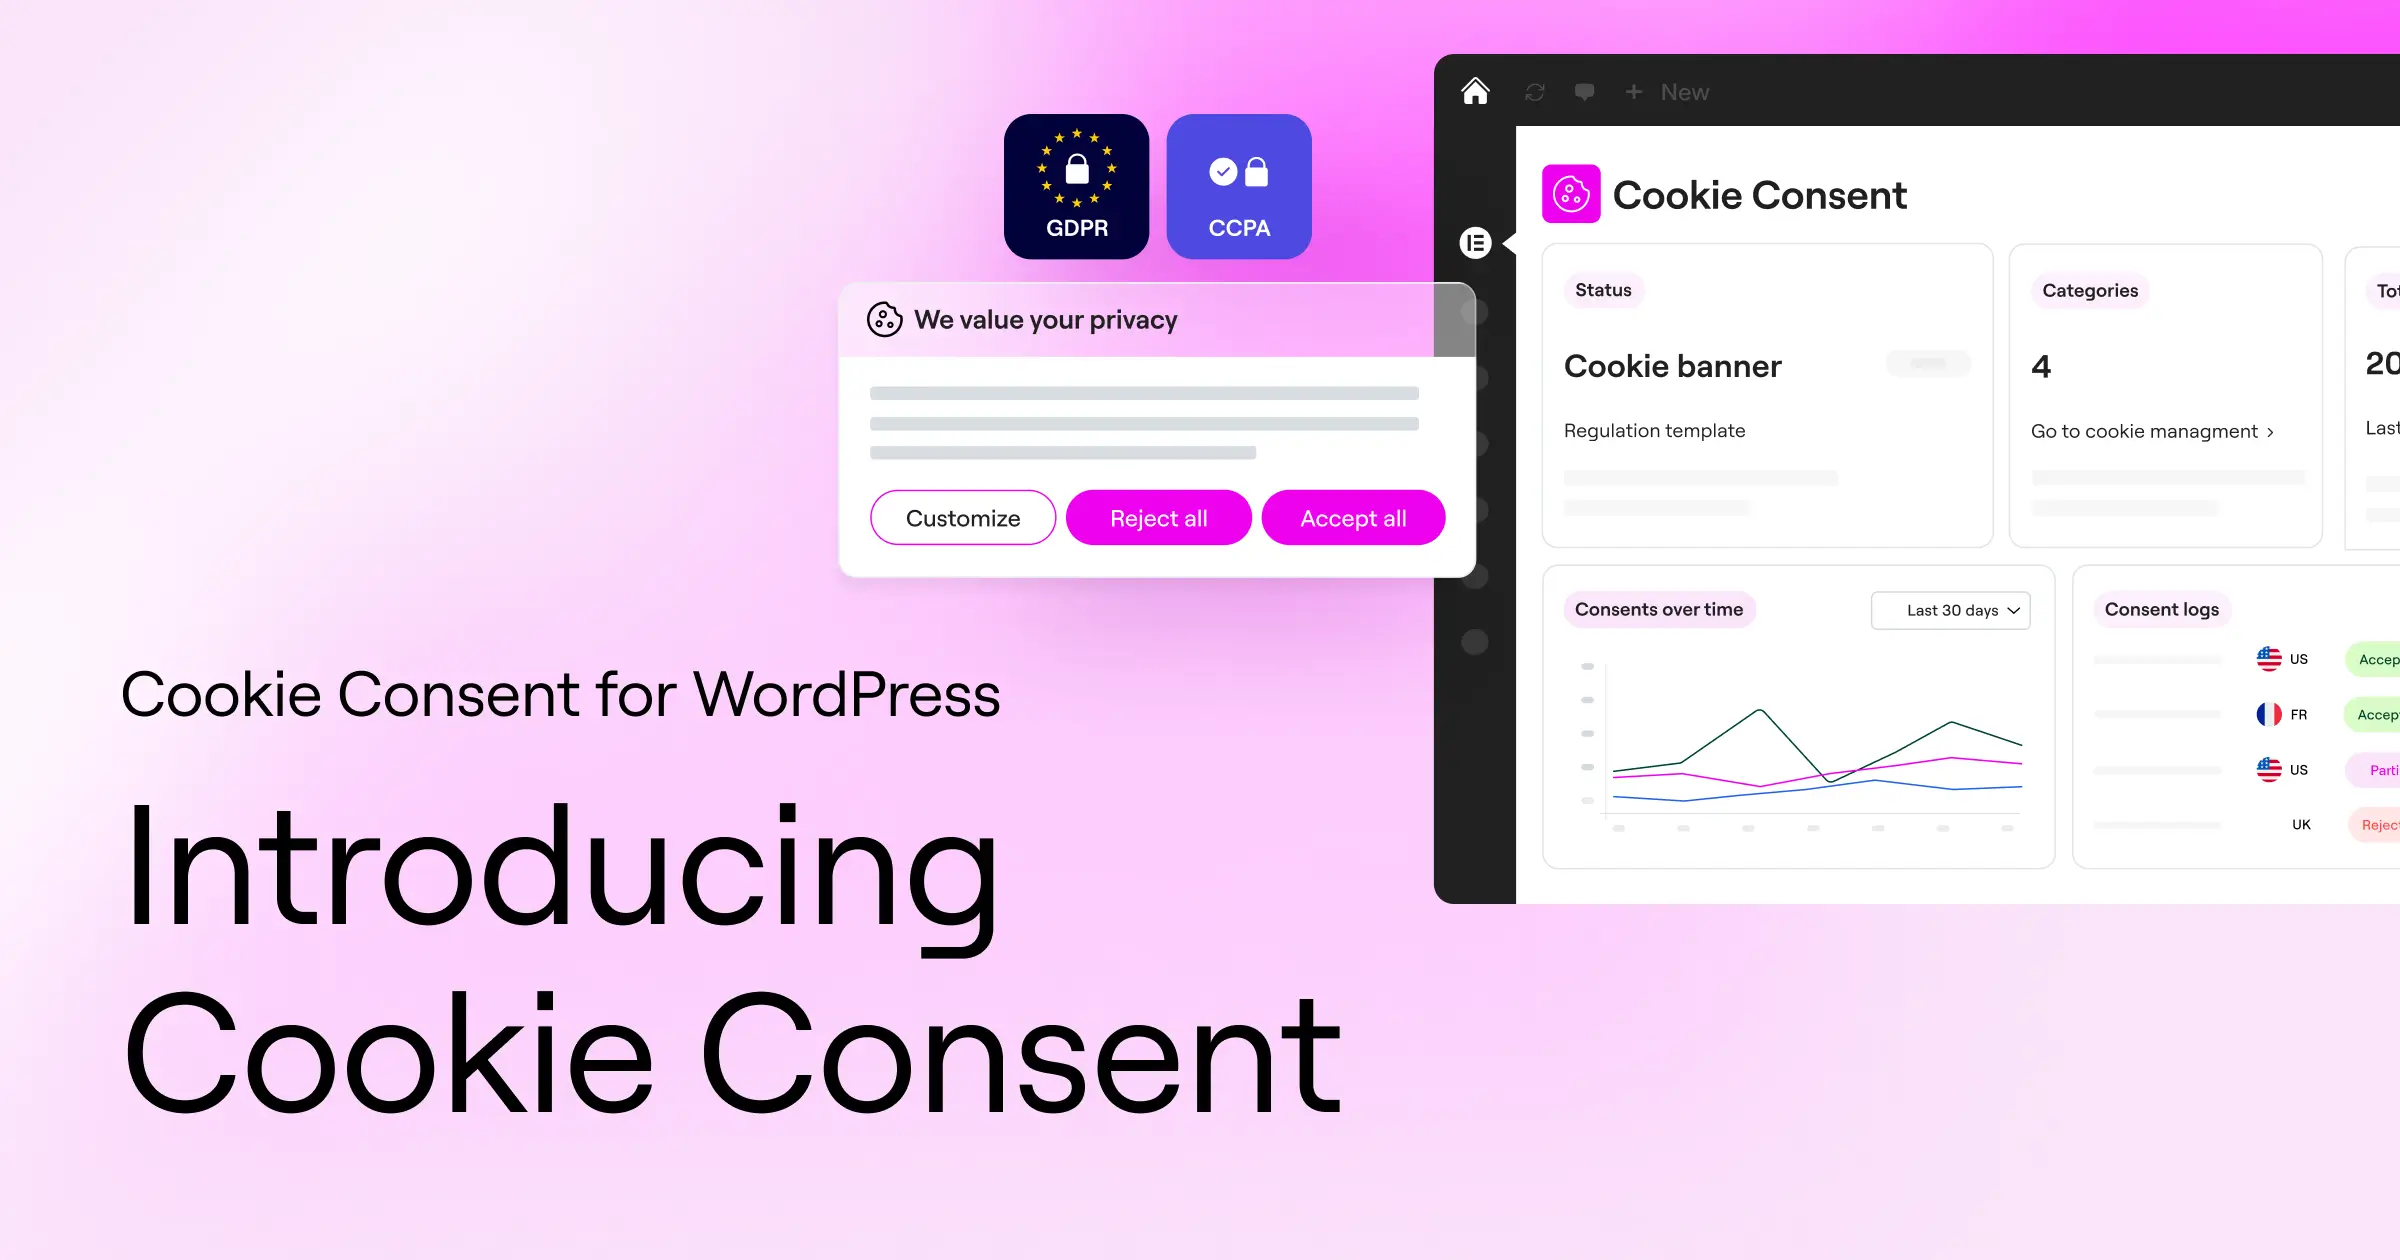
Setting Up Your Workspace with Cookie Consent
To keep the customization process simple, we’ll use a native capability. Cookie Consent is built by Elementor and lets you design, scan, and manage your compliance banners right from your WordPress dashboard. No copying code from outside dashboards, no switching between platforms.
“A consent banner should never feel like an interruption. By designing it with the same care as your main navigation, you respect your visitor’s experience while keeping your site legally compliant.”
– Itamar Haim, Web Compliance Specialist
Working with a native dashboard tool makes the whole workflow easier. Here’s what that looks like in practice:
- Matches your global site styles automatically, without any extra CSS work.
- Keeps all configuration files and scripts inside your WordPress installation.
- Runs fast, since it skips the heavy external scripts that can slow your page down.
- Simplifies layout changes through visual controls instead of complex code.
- Generates compliant consent logs you can pull up instantly whenever you need them.
Step-by-Step Guide to Customizing Cookie Consent in WordPress
Now let’s walk through setting up and styling your banner. You’ll see how quickly a basic legal notice turns into a piece that actually belongs on your site.
Step 1: Activate the Cookie Consent Tool
First, turn on the customization features. Head to your WordPress dashboard and find your active site management tools. If you use Elementor, you’ll find Cookie Consent built right into your dashboard options. Toggle it on, and your site can build, display, and manage banners without external accounts or extra setup.

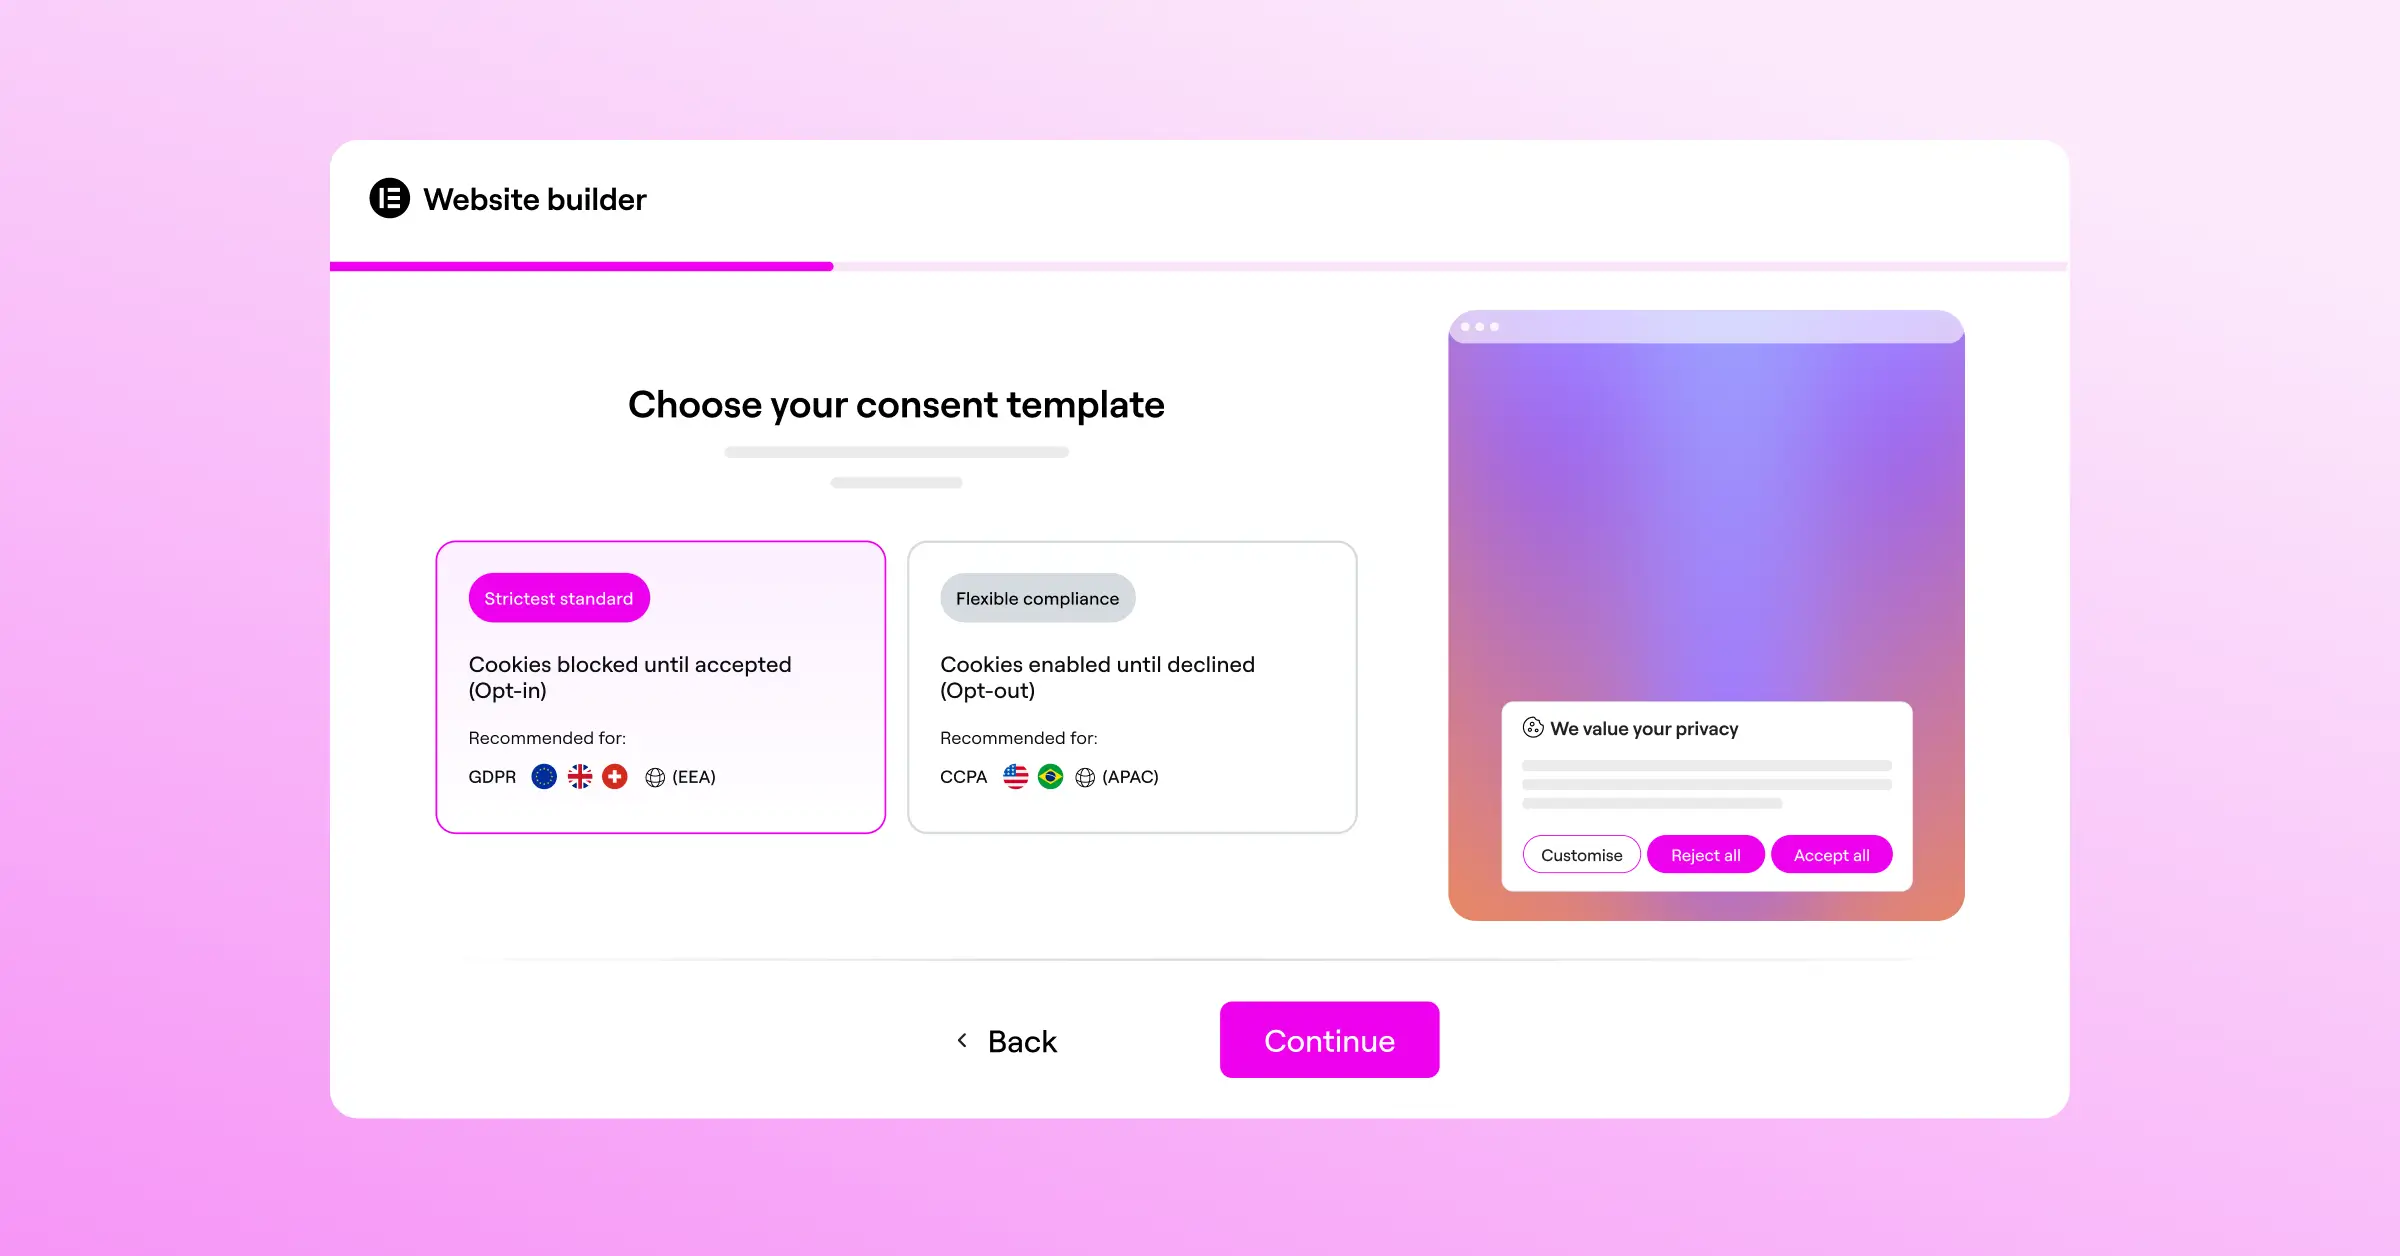
Step 2: Choose Your Layout and Position
Your banner’s layout shapes how visitors interact with it. You want something visible, but not something that blocks your content. In your configuration panel, you’ll find a few layout choices:
- Bottom Bar – A clean strip along the bottom of the viewport. Highly visible, and it leaves your main content fully readable.
- Corner Modal – A compact box that slides into the bottom-right or bottom-left corner. It mimics a live-chat widget and feels modern and unobtrusive.
- Center Pop-up – A classic overlay that asks for action before visitors read further. Use this one carefully, since it can feel disruptive.
For most sites, a bottom bar or a bottom-right corner modal works really well (simpler than it sounds, and both look clean on mobile too). These positions keep the banner well clear of your header navigation and hero text, right where you want it.
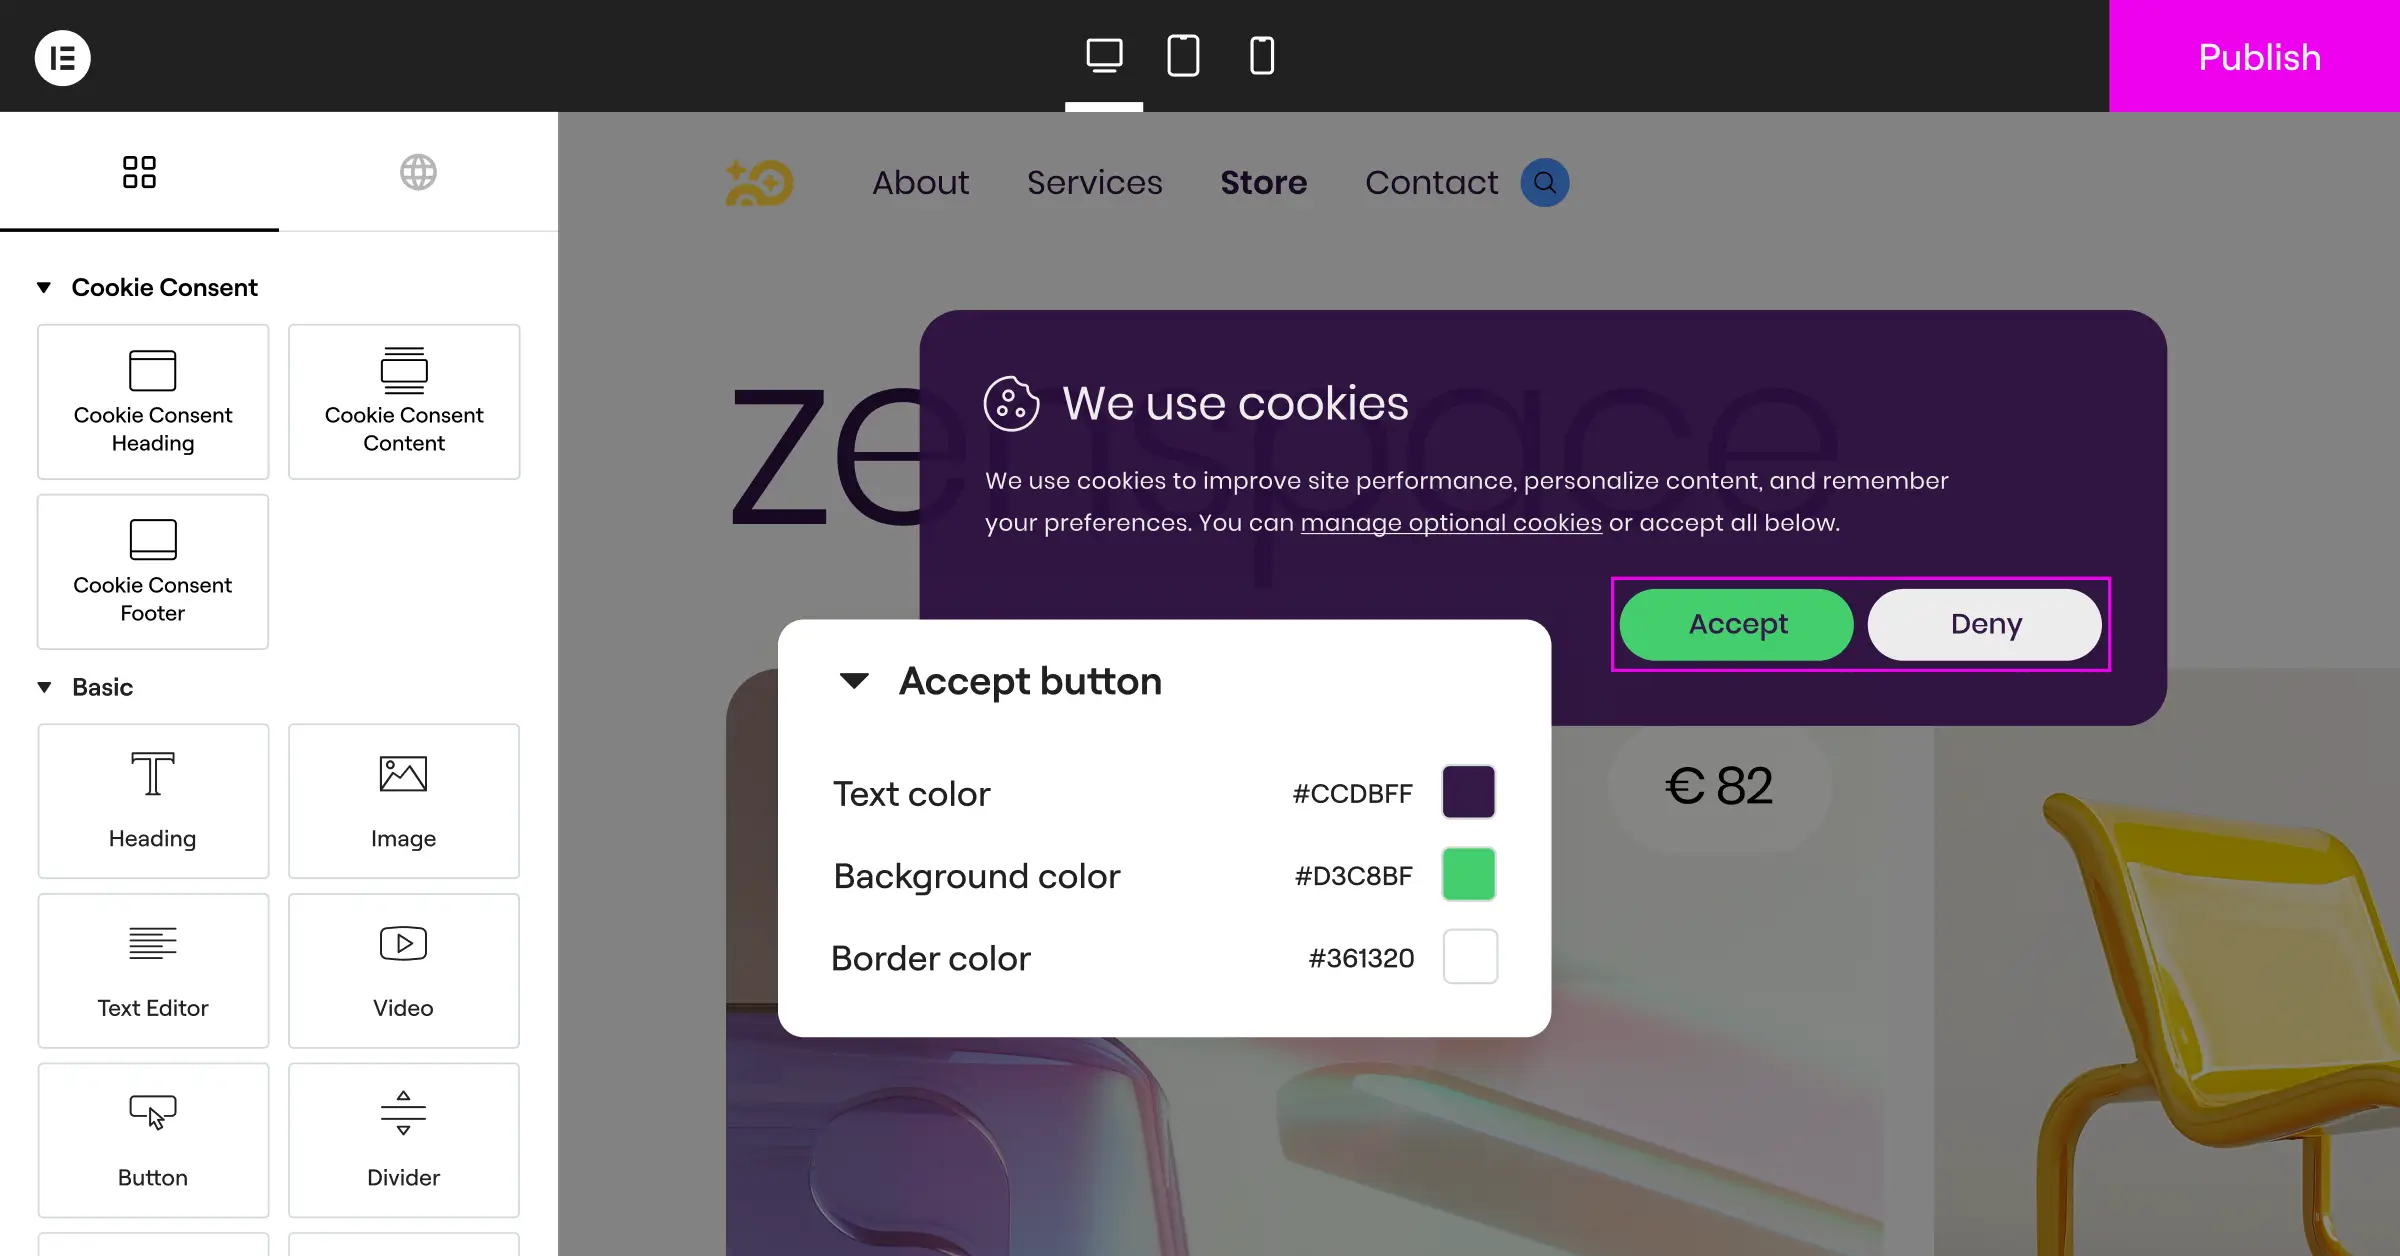
Step 3: Match Your Typography and Colors
This is where the real design work begins, and honestly, it’s the most satisfying part of the process. To keep your branding cohesive, match your banner styling to your site’s existing palette. Open the visual customizer controls and adjust:
- Background Color – Use your primary background color or a slightly darker shade, so the banner stands out subtly without clashing with the rest of the page.
- Text Color – Pick a high-contrast color that’s easy to read at a glance. Dark gray or charcoal text works well on a light background.
- Primary Buttons – Your “Accept All” button should use your main call-to-action color. It naturally guides visitors toward consent without feeling pushy.
- Secondary Buttons – Keep the “Reject” or “Settings” buttons in a neutral tone, like light gray with dark text, or a simple underlined link. They should read as clear options, not distractions.
- Font Family – Use the same global fonts as your body text throughout the site. Consistent typography is the fastest way to make a banner feel native rather than tacked on.
Step 4: Configure Content and Policy Links
Next, write your banner text: friendly, clear, and direct, without long blocks of legal jargon. A short, warm sentence on why you collect cookies goes a long way. You’ll also need a link to your privacy policy, and Cookie Consent includes a built-in policy generator if you don’t have one ready.
One small detail makes a real difference: your button labels. “Accept All” and “Reject All” are clear enough, but “Manage Preferences” or “Customize” usually feels friendlier than a bare “Settings.” Small wording choices add up to a noticeably better experience.
Step 5: Define Consent Preferences and Granular Controls
Modern compliance rules require that visitors can choose which types of cookies they allow. You’ll want your preference center set up so users can toggle specific categories. Most privacy setups use these four:
- Necessary Cookies – Required for the basic site to function. These are always active and can’t be turned off.
- Analytical Cookies – Help you understand how visitors interact with your pages, so you can keep improving the experience.
- Marketing Cookies – Used to show relevant ads or track marketing campaigns across platforms.
- Functional Cookies – Store choices like language preferences or shopping cart contents between sessions.
Styling these toggle switches to match your brand colors makes the whole preference drawer feel like an official, trustworthy part of your WordPress site. It’s a small investment that pays off in how visitors see your professionalism and your respect for their privacy.
Advanced Design Tips for Higher Consent Rates
Once the basics are in place, you can refine your design further so it performs well too. A thoughtfully tuned banner keeps your marketing data accurate while fully respecting user choices. Here are some practical tips for 2026.
First, make sure your layout is genuinely mobile-friendly. A banner that looks great on desktop can easily cover a smartphone screen, blocking your logo and navigation. Test it across screen widths before going live. Buttons should be large enough to tap comfortably, but not so large they crowd your privacy text.
Second, pay attention to color contrast. High-contrast designs help conversion, and they matter for accessibility too. You can use the Web Accessibility feature from Elementor to check that your banner text meets standard contrast ratios, so choices stay clear for every visitor, including those using assistive technologies.
Finally, consider geo-targeting to show different banners by location. Someone in a region with strict privacy laws, like the EU, sees a detailed, granular preference banner, while visitors elsewhere see a simplified version. That keeps things light for everyone, while keeping you compliant wherever you operate.
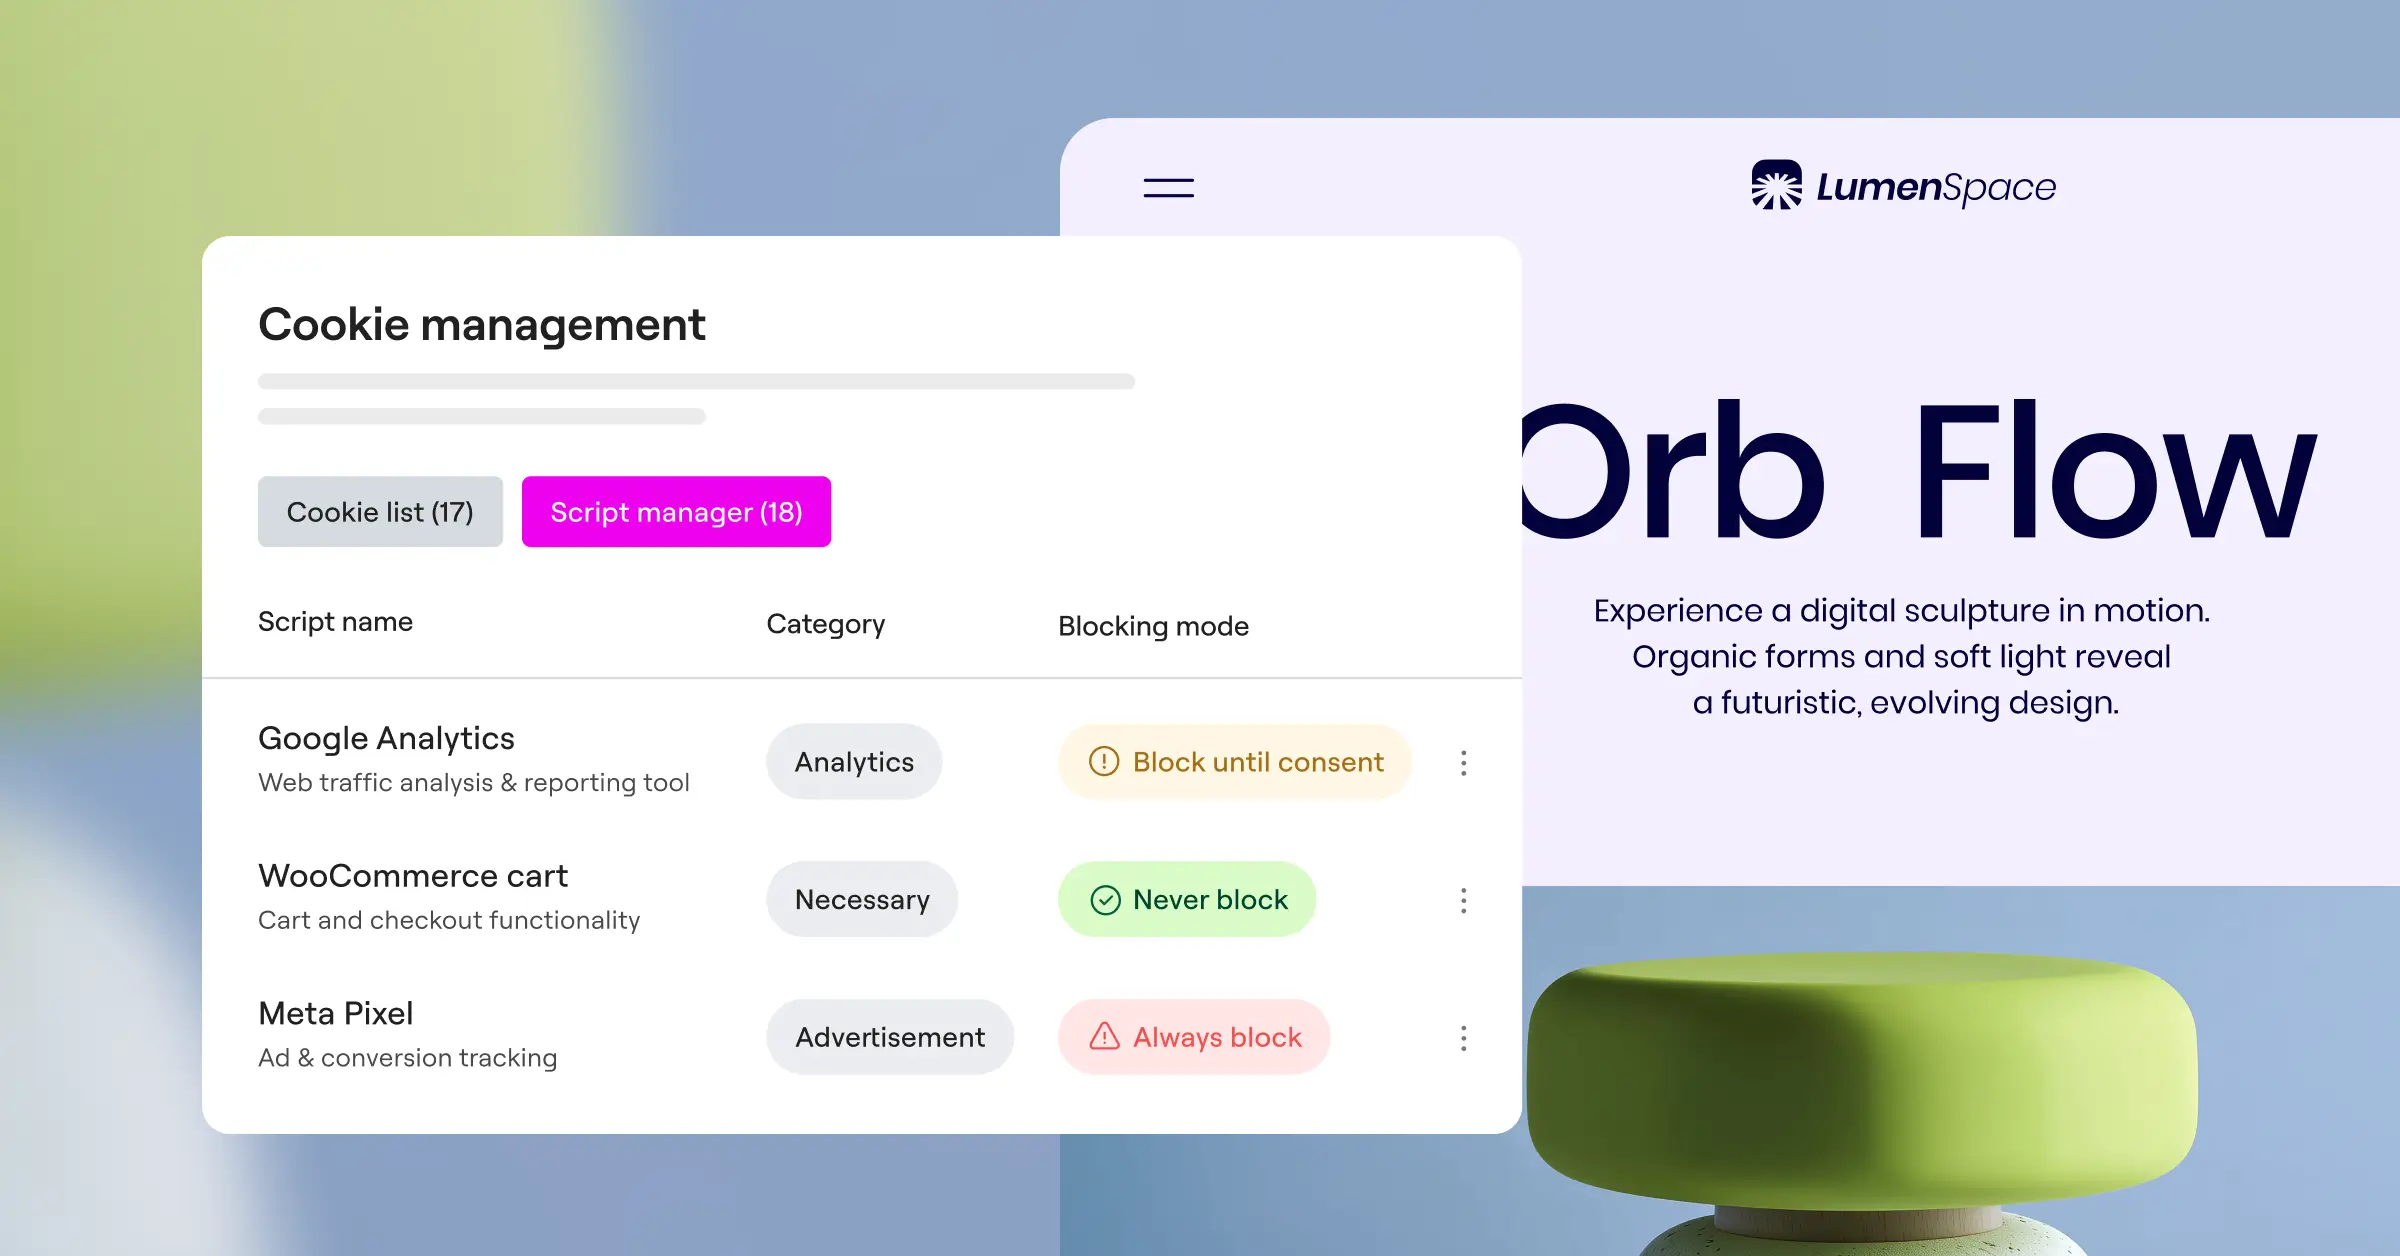
Managing Cookie Scanning and Script Blocking
One thing people often overlook is what happens after setup: keeping your cookie list accurate over time. Every time you add an analytics tool, update a marketing tracker, or embed a video player, that integration can quietly drop new cookies without you realizing it.
Cookie Consent scans your site automatically and categorizes cookies as they appear. When a visitor hasn’t consented to marketing cookies, for example, script blocking holds those scripts back until consent is granted. That keeps your compliance genuine, not just a checkbox.
Running regular scans is a good habit to build into your maintenance routine, since new tools tend to introduce cookies that weren’t part of your original scan. Keeping that list current means your banner always reflects what’s actually happening on your site.
Consent Logs and Audit Readiness
This part is easy to overlook when you’re focused on the visuals, but it’s worth getting right early. Major regulations like GDPR require you to keep consent logs as proof visitors made informed choices. If a regulator ever asks to see your compliance history, you need those records ready.
Cookie Consent saves these logs securely within your WordPress dashboard. You can access them at any time, without logging into a separate platform or exporting files. For agencies managing multiple client sites, this kind of centralized audit trail is genuinely useful during compliance reviews.
Cookie Consent is also included in Elementor One, which brings together privacy compliance alongside Web Accessibility and other tools in a single subscription. If you’re already building and maintaining sites with Elementor, having cookie compliance in the same dashboard is a real convenience.
Comparing Popular WordPress Customization Methods
There are several ways to manage compliance on your WordPress site. Some tools run on external platforms, while others live completely inside your dashboard. Here’s a factual comparison of the most widely used options available today.
| Customization Tool | Dashboard Integration | Design Flexibility | Setup Difficulty | Compliance Features |
|---|---|---|---|---|
| Cookie Consent | WordPress-Native | Very High (Direct Style Controls) | Under 5 Minutes | GDPR, CCPA, GPC, Consent Mode v2 |
| Cookiebot | External Platform | Medium (Requires CSS Customization) | Moderate | Strong Global Coverage |
| CookieYes | Hybrid Dashboard | Medium (Standard Templates) | Moderate | Multi-language Options |
| Complianz | WordPress-Native | Medium (Wizard-Driven Styles) | High (Many Steps) | Excellent Regional Settings |
| iubenda | External Platform | Low (Configured in External App) | High | Complete Compliance Suite |
External platforms offer solid privacy features, but they often require logging into a separate website just to adjust a brand color or font size. A WordPress-native capability like Cookie Consent keeps everything in one place, letting you tweak styles inside the editor you already use daily.
Troubleshooting Common Design Alignment Issues
Sometimes, even with the best tools, you might run into a visual glitch or two. These are common issues, and they’re usually very quick to fix. Here’s how to handle the ones that come up most often.
Your Banner Is Overlapping Your Footer Chat Widget
If you use a live chat tool, it might sit in the same bottom-right corner as your cookie card. Adjust the CSS padding or change your banner’s alignment to fix this. Switching to a bottom-bar layout frees up that space for your chat widget, and both sit cleanly without competing for room.
The Styling Changes Don’t Show Up on Your Live Site
If you’ve saved custom colors but the banner still looks gray and generic live, caching is almost certainly the culprit (this one trips people up). Clear your WordPress site cache and your browser cache, and if you use a Content Delivery Network, purge that cache too.
The Font Size Looks Different on Mobile Screens
Occasionally, global mobile styles override your banner’s typography. Open your visual styling controls, select the mobile viewport option, and adjust the font size there. Keeping body text around 14px on mobile keeps it readable without pushing your buttons off the screen.
Frequently Asked Questions
Does a custom cookie banner design affect site performance?
It can, if you’re using a heavy, script-loaded external tool. But a WordPress-native capability like Cookie Consent keeps things lightweight. Because the styles and controls load directly from your dashboard rather than fetching scripts from external servers, your page speeds stay fast.
How do I make my banner compliant with Google Consent Mode v2?
You need a tool that supports this standard natively. Cookie Consent includes built-in integration for Google Consent Mode v2. Once a visitor selects their preferences, the banner automatically updates your Google tags so your analytics and advertising data stay compliant.
Can I use different cookie banner designs for different countries?
Yes, and this is where geo-targeting shines. It detects where your visitor is located and shows the right layout automatically. Visitors from the EU see a full granular preference screen, while visitors elsewhere might see a simpler banner matching local regulations.
What color combinations work best for high consent rates?
Use colors that build trust and make choices easy to understand. Your primary “Accept” button should match your site’s main call-to-action color, a tone visitors already associate with positive actions. Your “Reject” or “Settings” button should still read as a clear option, but in a neutral tone, like gray or an outline border, so it doesn’t compete with the primary action.
Do I need to keep a record of my visitors’ consent choices?
Yes, major privacy regulations like GDPR require consent logs for audit trails. Cookie Consent saves these logs securely in your WordPress database. You’ll be prepared if a privacy regulator ever asks to see proof of your compliance history.
Should my cookie banner block the entire website?
Generally, no. Wall-style banners that block your entire site until someone clicks “Accept” can frustrate visitors and drive up bounce rates. A bottom bar or corner modal is friendlier, letting users see your content while they make their privacy choice at their own pace.
What is Global Privacy Control and should my banner support it?
Global Privacy Control is a browser setting that lets people set their privacy preference once, across every site they visit. If a browser sends a GPC signal, your site is legally required in many regions to respect it without a separate banner. Cookie Consent detects these signals automatically and adjusts settings right away, keeping you compliant without extra work.
How often should I scan my site for new cookies?
Run scans regularly, especially after adding or updating tools. New analytics integrations, marketing trackers, or embedded video players often introduce cookies your visitors haven’t consented to yet. Regular automatic scanning keeps your list accurate, so your banner always reflects what’s actually running on your site.


