
We’ve all been there. You’re building a clean site, and a bulky cookie banner shows up and wrecks the layout. Good web design in 2026 means you shouldn’t have to trade compliance for looks. Here are the best practices for consent banners that are legal, user-friendly, and genuinely pleasant to look at.
Key Takeaways
- Native integration keeps your design clean and doesn’t slow your page speeds down.
- Equal visual weight for accepting and rejecting cookies is now a strict legal requirement.
- Geo-targeting banners keeps the experience clean by showing warnings only where the law requires them.
- Google Consent Mode v2 support is key to keeping your analytics and ad systems working right.
1. Implement a Dashboard-Native Consent System
For years, designers and developers have put up with slow, clunky third-party tools. Loading external scripts just to show a banner can slow your page down and hurt your Core Web Vitals, which is why a native tool built into your CMS matters.
The Cookie Consent capability, built directly into Elementor, changes how this works on WordPress. Manage your whole setup from your dashboard: configure banners, run scans, categorize scripts, and track consent history without leaving your editor, saving the cost of an external subscription.
You also keep full control over styling, so your consent notice can look like any other element on the page. Here’s how this native capability helps your workflow:
- Builds responsive layouts that fit any device size without custom CSS overrides.
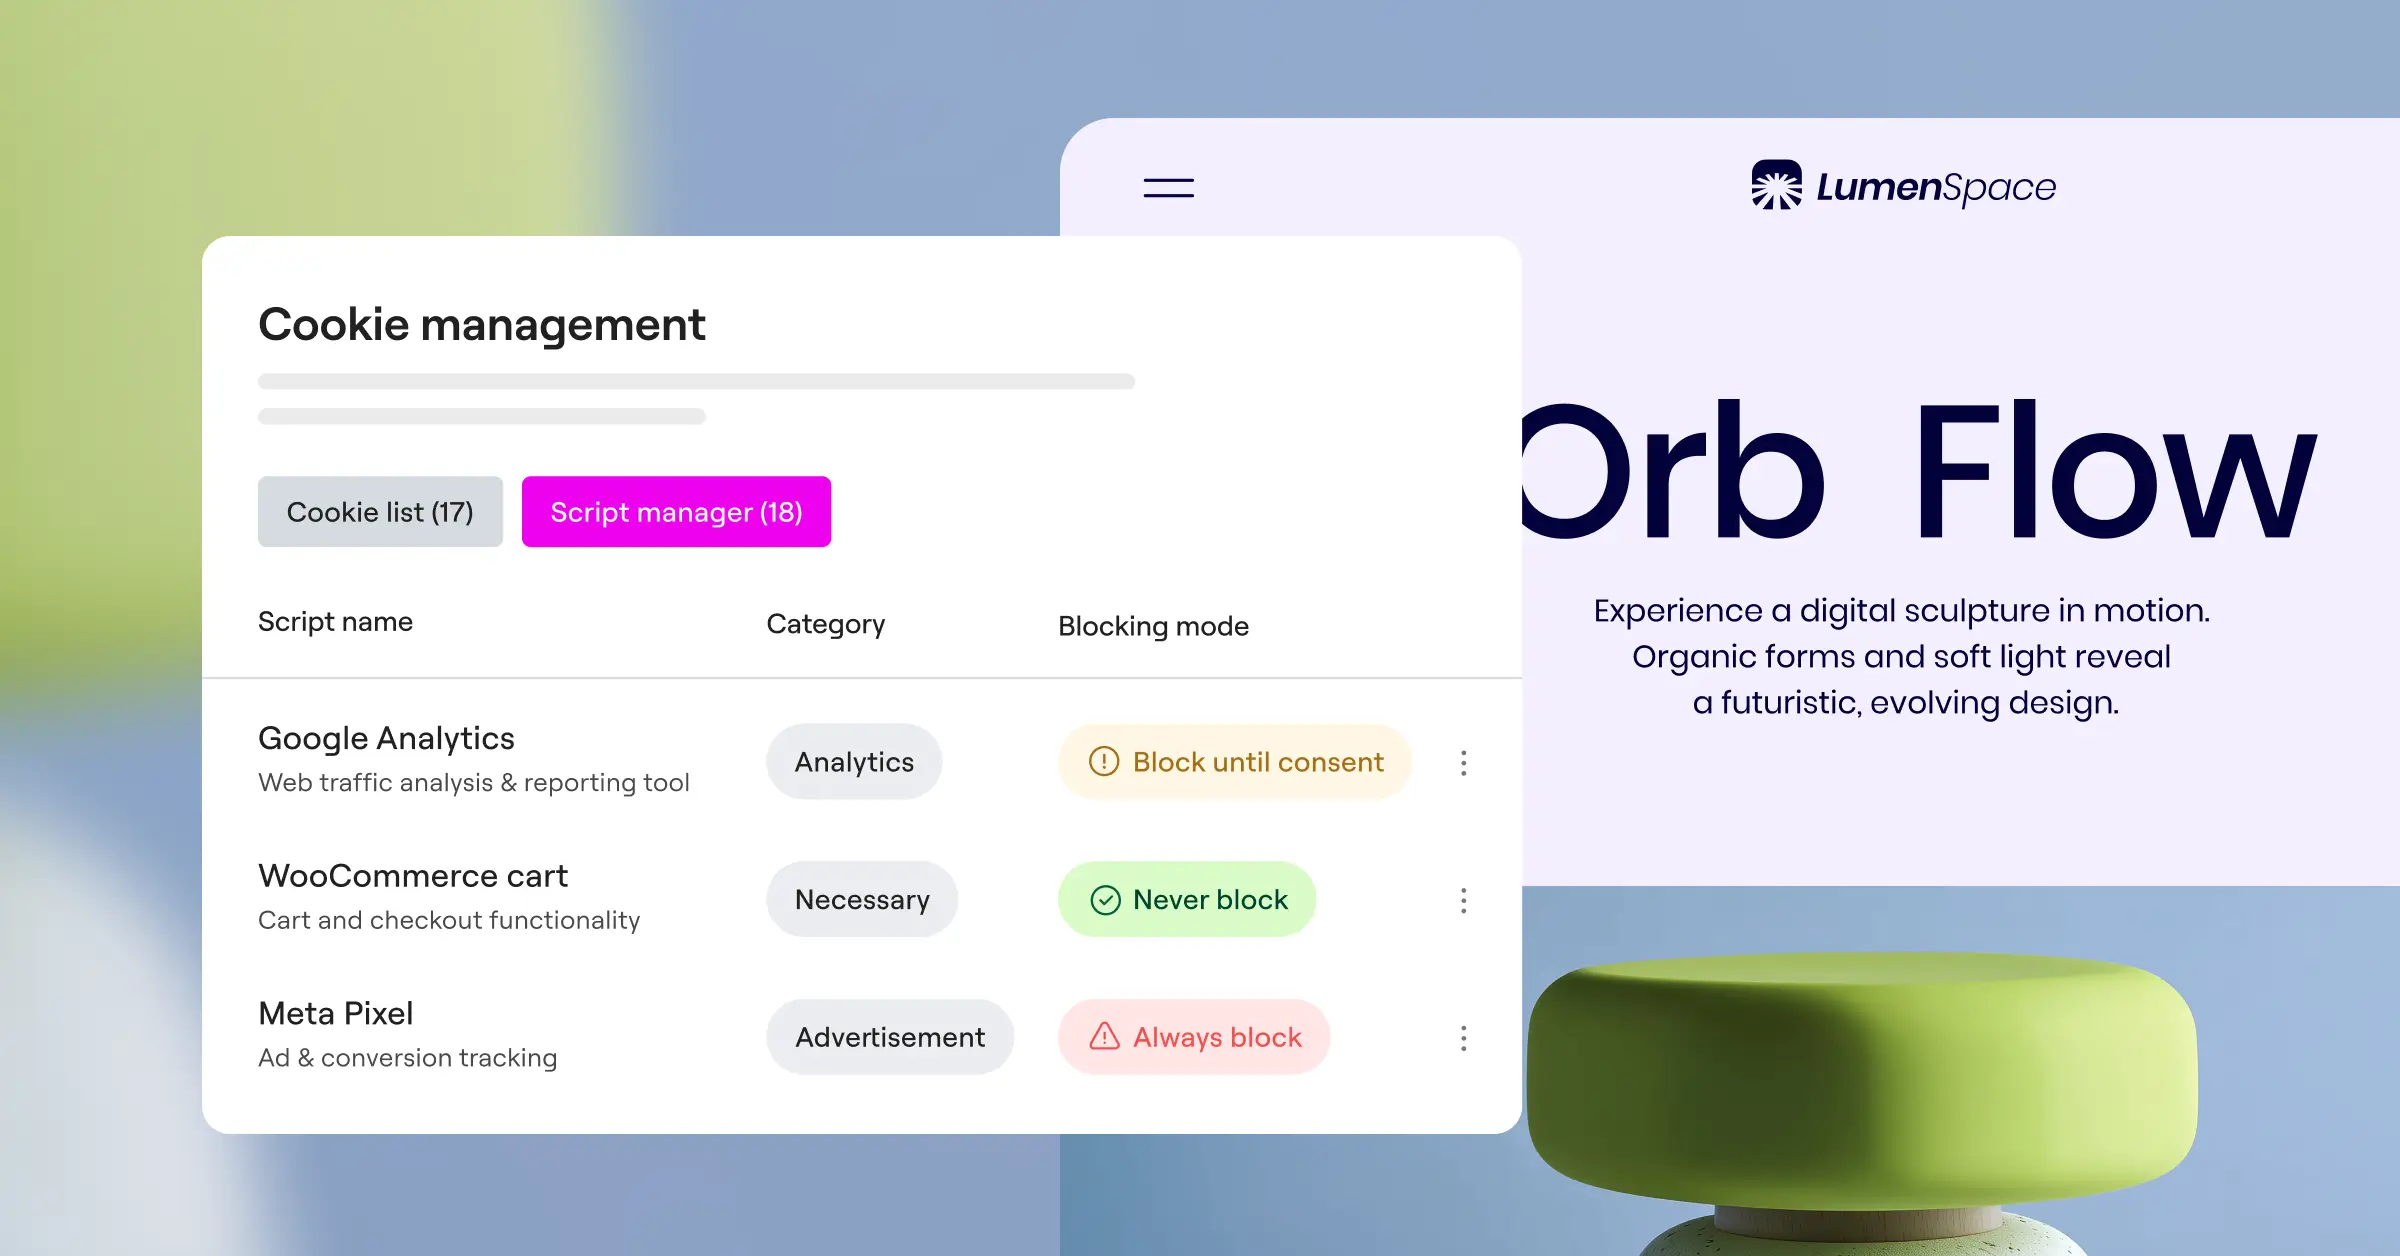
- Scans your site automatically to catalog and categorize tracking scripts.
- Blocks specific scripts from loading until a visitor grants permission.
- Displays region-specific consent styles depending on where your visitor is located.
- Saves anonymous consent logs so you’ve got a secure audit trail ready any time.
- Updates consent settings instantly, no external CDN cache-clearing required.

Because it’s part of the broader Elementor workspace, it works well alongside other native compliance tools, like Web Accessibility, making it easier to build sites that are both legal and polished. (Simpler than it sounds, once you try it.)
2. Establish Visual Hierarchy and Brand Color Contrast
Your consent banner should look like it belongs on your site. Plenty of designers default to an unstyled black-and-white bar that reads like an afterthought, or worse, a security warning. Bring your typography, border-radii, and color palette into the consent interface too.
Matching your brand matters, but strong visual contrast is a legal requirement too, with a contrast ratio of at least 4.5:1 required under guidelines like WCAG 2.1. If visitors have to squint to read your privacy terms, your banner is already letting them down.
To get this right, try these three design rules:
- Use a subtle backdrop overlay (about 30% opacity) behind modal banners to draw focus, but keep it light enough that users don’t feel locked out.
- Keep typography clean and readable, matching your body font, with a minimum size of 14 pixels for the main text.
- Set clear margins and padding (at least 24 pixels) so your copy can breathe and touch clicks stay accurate.
Treat your cookie notice as part of your UI kit, not a compliance afterthought, and your site keeps looking premium.
3. Provide Equal Visual Weight to Accept and Reject Options
This is where a lot of site owners run into trouble. Regulators are clear: opting out has to be just as easy as opting in. Dark patterns, like a bright blue “Accept All” button beside a tiny grey “Reject All” link, can lead to real penalties.
In 2026, equal visual weight is the standard for honest design. Your accept and reject buttons should share the same size, shape, and importance. Different colors are fine, but don’t make one option look secondary. Under GDPR and EDPB guidance, reject must be just as easy as accept.
“Designing a compliant cookie banner is no longer just about avoiding fines; it’s about building genuine trust with your audience from their very first click. Visual honesty in your consent options is key.”
– Itamar Haim, Web Compliance Specialist
If your accept button has a solid background, give reject a clear outlined style in the same color. That keeps the hierarchy balanced while showing visitors both choices are valid. Honest design builds more long-term trust than a few extra tracking points from a deceptive button.
4. Use Clear, Conversational Copy and Avoid Legalese
Nobody wants three paragraphs of dense legal jargon while trying to read a blog post or check out. Legalese confuses visitors and makes them suspicious. Modern privacy rules actually require plain, easy language about your cookie use.
Write your banner copy like you’re talking to a friend. Tell them why you use cookies, what they get from it, and how to change their mind later. Keep it short and friendly.
Here’s an easy comparison to help you rewrite your own consent text:
- Bad copy: “We use first-party and third-party tracking technologies to gather operational telemetry and optimize downstream advertising configurations.”
- Good copy: “We use cookies to keep our site running smoothly, see how you interact with our pages, and show you content that fits your interests.”
- Bad copy: “By continuing your session, you explicitly grant consent to all platform data-sharing practices.”
- Good copy: “You’re in control. Choose which cookies you want to allow below, and change your settings at any time.”
Keep your text human and clear, and consent feels like a conversation, not an interrogation.
5. Group and Categorize Cookies Intuitively
An all-or-nothing choice isn’t enough anymore. To stay compliant with modern privacy standards, let visitors choose exactly which scripts to allow. Offer a secondary preference center or drawer that groups your tracking scripts into clear categories.
Most consent systems break these into four core categories, so the average visitor can decide with confidence:
- Necessary Cookies – Essential for the site to function: login sessions, shopping carts, and security. They can’t be turned off.
- Functional Cookies – Save your visitor’s choices, like language, region, and theme settings.
- Analytical Cookies – Help you see how visitors use your site by tracking page views, bounce rates, and paths anonymously. Useful for improving user experience.
- Marketing Cookies – Track visitor behavior across sites to show relevant ads and run targeted campaigns.

A clean layout with simple toggle switches lets visitors set their privacy level without getting overwhelmed. Modern tools handle the categorizing work for you.
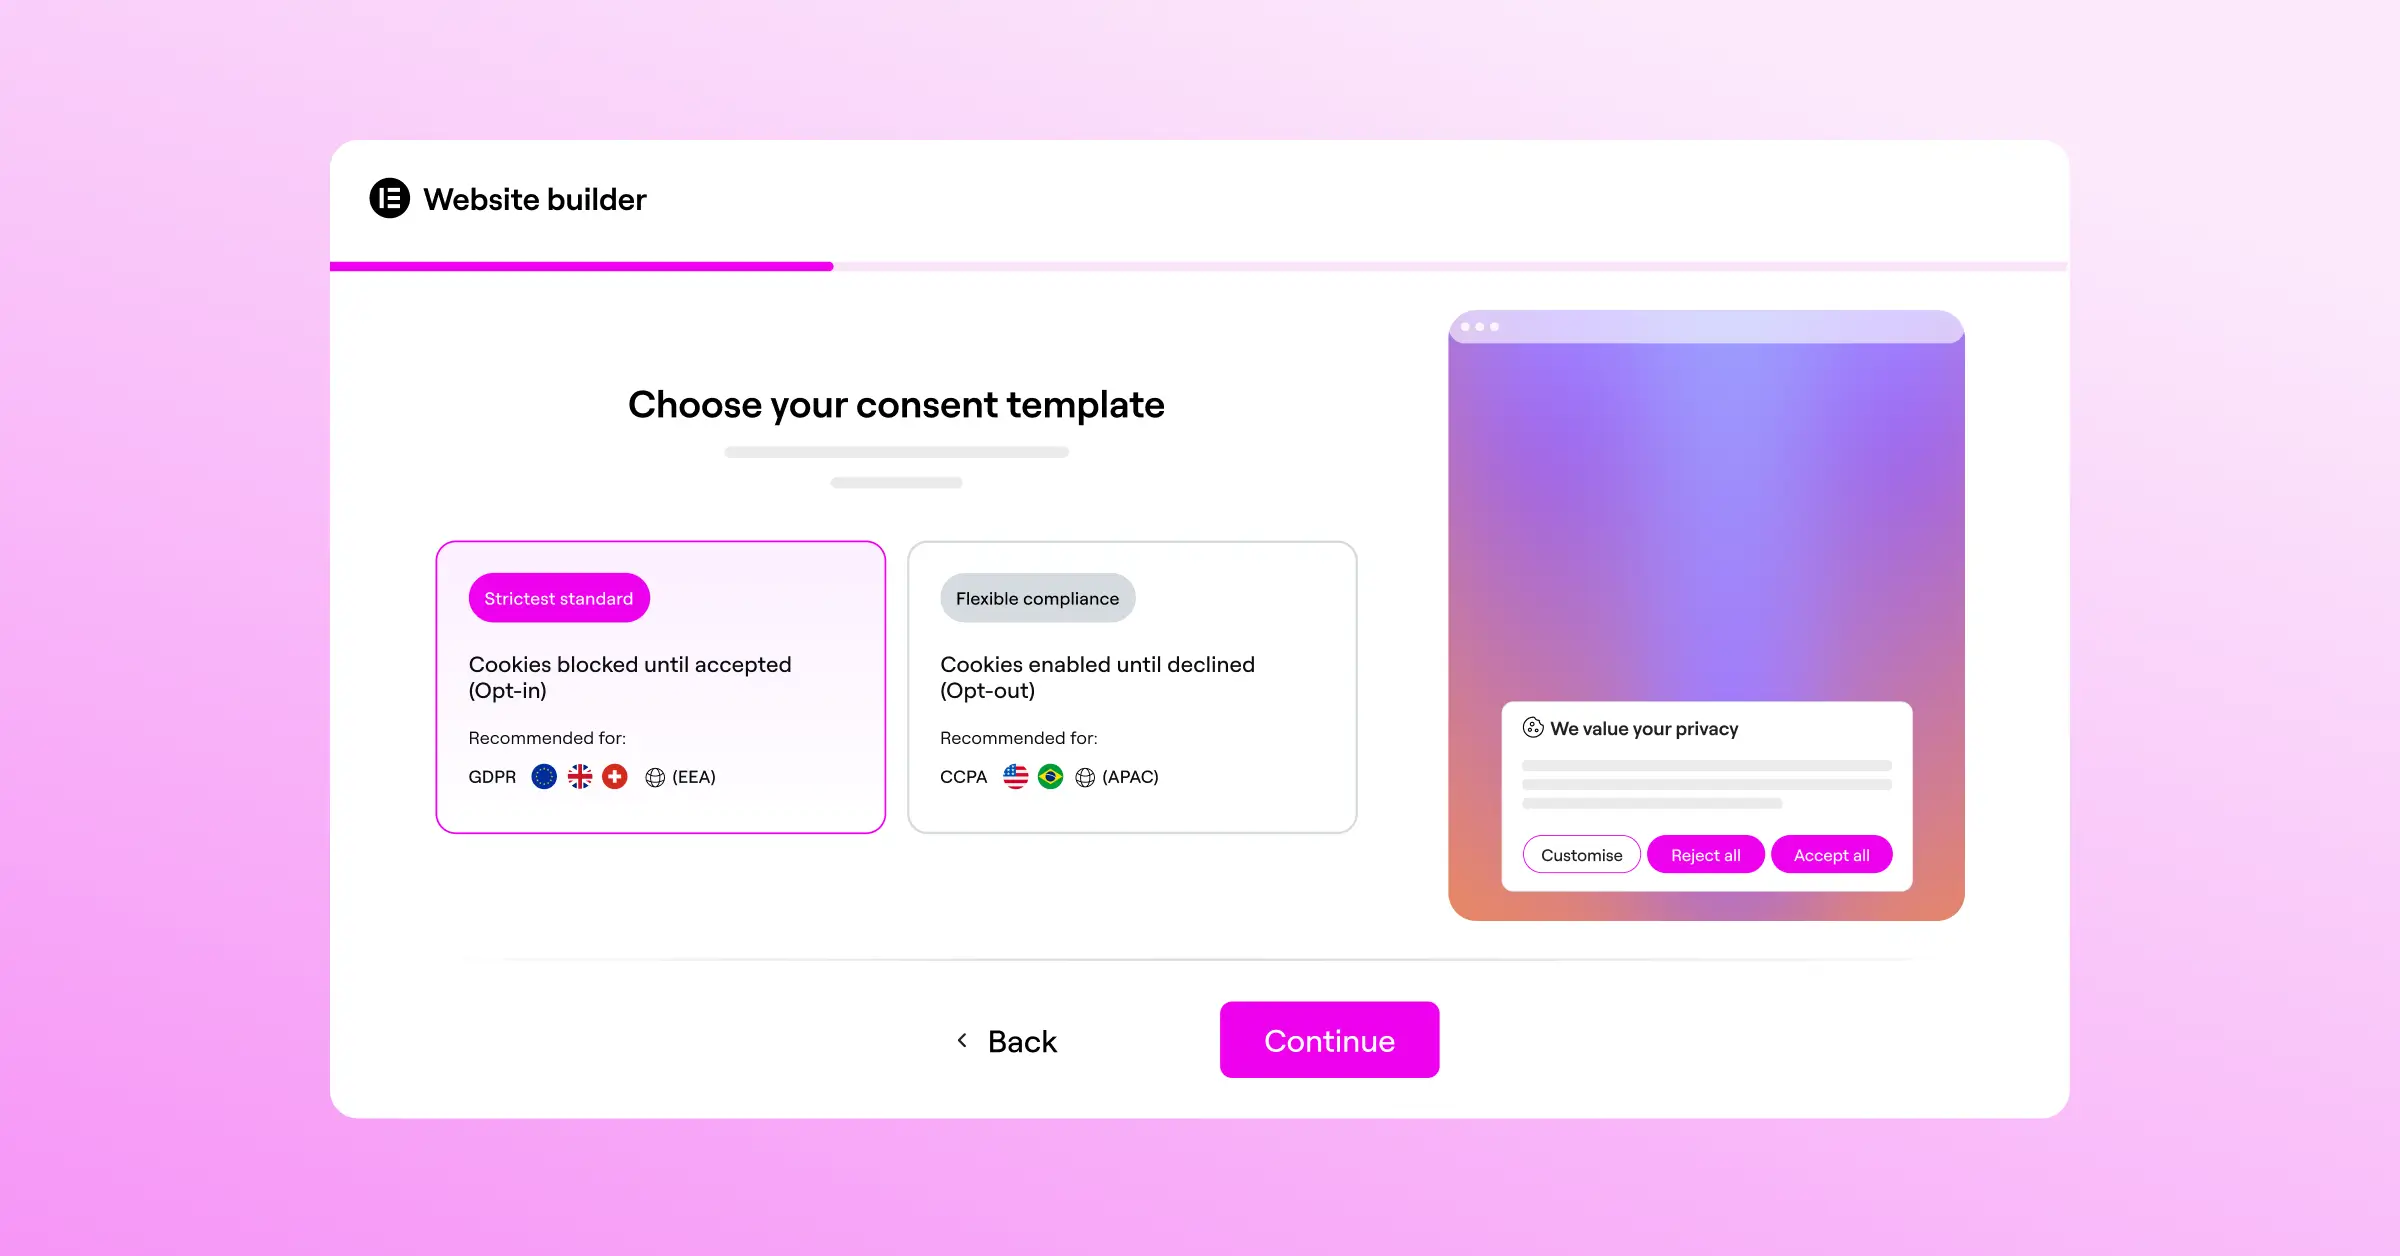
6. Enable Geo-Targeted Banner Layouts
Different parts of the world have different privacy laws. The EU’s GDPR requires explicit opt-in before loading non-essential cookies, while several US states take an opt-out approach, letting scripts load as long as visitors get an easy way out, like a “Do Not Sell My Info” link.
Show your strict European banner to every visitor worldwide, and you’ll likely hurt your marketing tracking in regions where those rules don’t apply. That’s why geo-targeting is such a practical solution for global sites.
With geo-targeted banners, your site checks the visitor’s IP address and loads the banner style their location requires: a strict, opt-in banner with equal accept and reject buttons for Europe, a smaller, lighter notice elsewhere. This keeps your site legal everywhere while your analytics stay as complete as the rules allow.
7. Optimize for Mobile Screens and Touch Targets
A great desktop cookie banner is fairly straightforward. But fitting that same banner onto a 375-pixel-wide mobile screen without breaking the layout is a real challenge. Many mobile banners end up taking over the whole screen, blocking the page before visitors read a word.
Designing for mobile means thinking about thumbs. Buttons need to be big enough to tap accurately, with a guideline of at least 44 by 44 pixels per touch target. Anything smaller leads to accidental taps or people leaving the page.
Keep these mobile-friendly layout strategies in mind:
- Positions bottom-sheet banners at the base of the screen, the easiest zone for thumbs to reach.
- Uses flexible flexbox layouts so your buttons stack vertically on small screens and sit side-by-side on desktop.
- Limits the initial mobile text to two short lines, with a clear link to expand the full details.
- Prevents any zoom shifts when the banner appears, keeping your layout stable.
Always test your banners on real mobile devices, not just a desktop emulator. You’ll quickly spot if close buttons are too small or your text blocks the navigation.
8. Integrate with Google Consent Mode v2 and GPC
If you use Google tools like Analytics 4, Tag Manager, or Ads, you’ll want Google Consent Mode v2. It passes visitor consent choices directly to Google’s tags, and without it, Google can’t measure conversions or gather accurate analytics for EU visitors.
Your site also needs to respect Global Privacy Control (GPC), a browser setting that lets users set their privacy preference once. Their browser signals that they don’t want their data sold or shared, and your consent system must recognize it and adjust tracking right away, no banner click required.
Check that your consent capability handles these steps:
- Listens for GPC signals as soon as a page begins to load, before any cookies or tracking pixels are processed.
- Updates the Google Consent Mode v2 state variables (like
ad_storageandanalytics_storage) the moment a user makes a choice. - Passes these consent choices cleanly to your Tag Manager container, letting your tag triggers activate or pause dynamically.
Set these integrations up right, and you keep your marketing data clean while staying compliant with the latest requirements from major ad platforms.
9. Keep Banners Unobtrusive but Highly Visible
There’s a fine line between getting your cookie notice seen and making it so annoying that visitors leave right away. Full-screen “cookie walls” block your content until a visitor decides. They’re legal in a few cases, but they frustrate people and can hurt your rankings by pushing up bounce rates.
A much better approach is a clean slide-in box or bottom-bar layout. These styles show you care about privacy without blocking visitors from your content or scrolling. They catch attention without getting in the way of browsing.
Subtle entrance animations can also help draw the eye without feeling aggressive. A gentle fade-in or slide-up from the bottom feels professional and fits naturally with your site’s other transitions. And yes, your visitors will thank you for not blocking their entire screen.
10. Maintain Detailed, Audit-Ready Consent Logs
Showing a cookie banner is only half the job. If a regulator ever asks for proof of compliance, you need to show visitors actually gave explicit consent, which means your system needs detailed, anonymous records of every consent action.
To respect your users’ privacy, these consent logs must never store personal data like full IP addresses or emails. Instead, they should store anonymous tokens proving a choice was made at a specific date and time, for a specific set of cookie categories.

When you set up your audit trails, make sure your system tracks these details:
- Records the exact date and time the visitor made their consent decision.
- Saves the specific version of the consent banner and privacy policy that was active at that moment.
- Logs the specific categories of cookies the visitor accepted or rejected.
- Generates an anonymous, unique consent ID token stored in the visitor’s browser for reference.
- Secures these records in your database so they’re safe from tampering but easy to export if you’re ever audited.
Having these organized records gives you real peace of mind, knowing your site is protected and ready for any regulatory review that comes your way. You can learn more about setting up Cookie Consent in Elementor if you’d like a step-by-step walkthrough.
Cookie Consent Tool Comparison
To help you choose the best setup for your workflow, here’s how the leading consent options compare factually across key features.
| Tool Name | Platform Type | Dashboard Style | Primary Benefit |
|---|---|---|---|
| Cookie Consent (by Elementor) | WordPress Native | In-Dashboard (No External Portal) | Visual integration and quick 5-minute setup directly inside your site builder. |
| Cookiebot | SaaS / Script-Based | External Cloud Dashboard | Handles complex, multi-site scanning through a central external interface. |
| CookieYes | SaaS / Script-Based | External Cloud Dashboard | Simple cross-platform setup for static websites. |
| Complianz | WordPress Plugin | In-Dashboard | Focuses on regional legal configurations for WordPress. |
| iubenda | SaaS / Script-Based | External Cloud Dashboard | Combines cookie consent with automated legal policy document generation. |
If you’re already building and managing your sites on WordPress, a native capability like the Cookie Consent tool in Elementor keeps your work centralized, clean, and fast.
Frequently Asked Questions
Is Cookie Consent included in Elementor?
Yes, the Cookie Consent capability is fully integrated natively. It’s part of the unified compliance toolkit, which also includes Web Accessibility. You don’t need extra third-party tools for privacy and compliance.
Do I really need equal Accept and Reject buttons?
Yes, under modern privacy regulations like the GDPR, opting out of cookies must be just as easy as opting in. Banners that hide the decline option or make it harder to click are no longer compliant, and can lead to regulator penalties.
What is Google Consent Mode v2 and why does it matter?
It’s a technical framework that lets your site pass visitor consent choices directly to Google’s tracking systems. If you serve EU visitors and use tools like Google Analytics or Ads, supporting it keeps your analytics and marketing tracking accurate.
Can I customize the design of my cookie banner to match my brand?
You absolutely can. With a native capability like Cookie Consent, you have full control over the colors, layout, fonts, margins, and button shapes, so your banner looks like a natural part of your site rather than a clunky afterthought.
Does a native cookie tool slow down my website?
No, quite the opposite. Native tools run directly on your own server and integrate into your existing code. That’s much faster than traditional SaaS tools that force visitors’ browsers to download heavy external scripts before the page content even loads.
What happens if a visitor uses Global Privacy Control (GPC)?
Your consent system recognizes the signal automatically and adjusts tracking to block data sharing and selling, treating it as a manual opt-out with no banner interaction required.
Is there a free plan for the native Cookie Consent tool?
Yes, on a free tier, making it easy to add clean compliance features to any site. More advanced setups are included in plans like Elementor One, with access to the full compliance toolkit.
How does geo-targeting help my website’s conversion rates?
Geo-targeting lets you show different banners based on where your visitors live: strict, detailed consent modals for regions with tough privacy laws, and smaller, simpler notices everywhere else. This keeps your user experience clean and maximizes your tracking data where it’s allowed.


