Variable fonts are an advanced font technology that allows a single font file to contain multiple styles and variations, such as different weights, widths, and optical sizes. Unlike traditional fonts, which require separate files for each style (e.g., bold, italic, condensed), a variable font can adjust these characteristics dynamically within a single file.
Variable fonts have several advantages over traditional fonts:
- Control: With traditional fonts, you’re limited to predetermined characteristics. For instance you may have to choose between a weight of 400 or 600. With variable fonts you have complete control, letting you choose a weight of 475 if that’s best for your design.
- Performance: By using a single font file that includes all variations, variable fonts can reduce the number of HTTP requests and the overall file size needed to load different font styles, improving website performance.
- Responsive Typography: Variable fonts allow for dynamic adjustments to typography based on screen size, resolution, or user preferences. For example, a font could become more condensed on smaller screens to save space or increase contrast at smaller sizes for better readability.
- CSS Integration: Variable fonts can be controlled using CSS. Properties like `font-weight`, `font-stretch`, and `font-style` can be adjusted with values beyond the usual fixed set, providing more granular control. This also means you can add animations to variable fonts.
Add Variable fonts
Before using variable fonts, you need to import them using WP Admin.
Note: Variable fonts have several variables you can use to adjust them. Width and weight are the two most commonly used and these two are supported in Elementor.
To add a variable font:
- Locate a variable font you would like to use and download it to your PC. You may need to unzip the file.
Variable fonts are available from a number of providers including Google Fonts. In Google Fonts you can check the minimum and maximum weight and width by clicking Type Tester and using the sliders to figure out the minimum and maximum values.
Record the minimum and maximum weight and width of the font. You’ll need that later.
- Go to WP Admin and navigate to Elementor>Editor>Custom elements.
The Custom Fonts screen appears.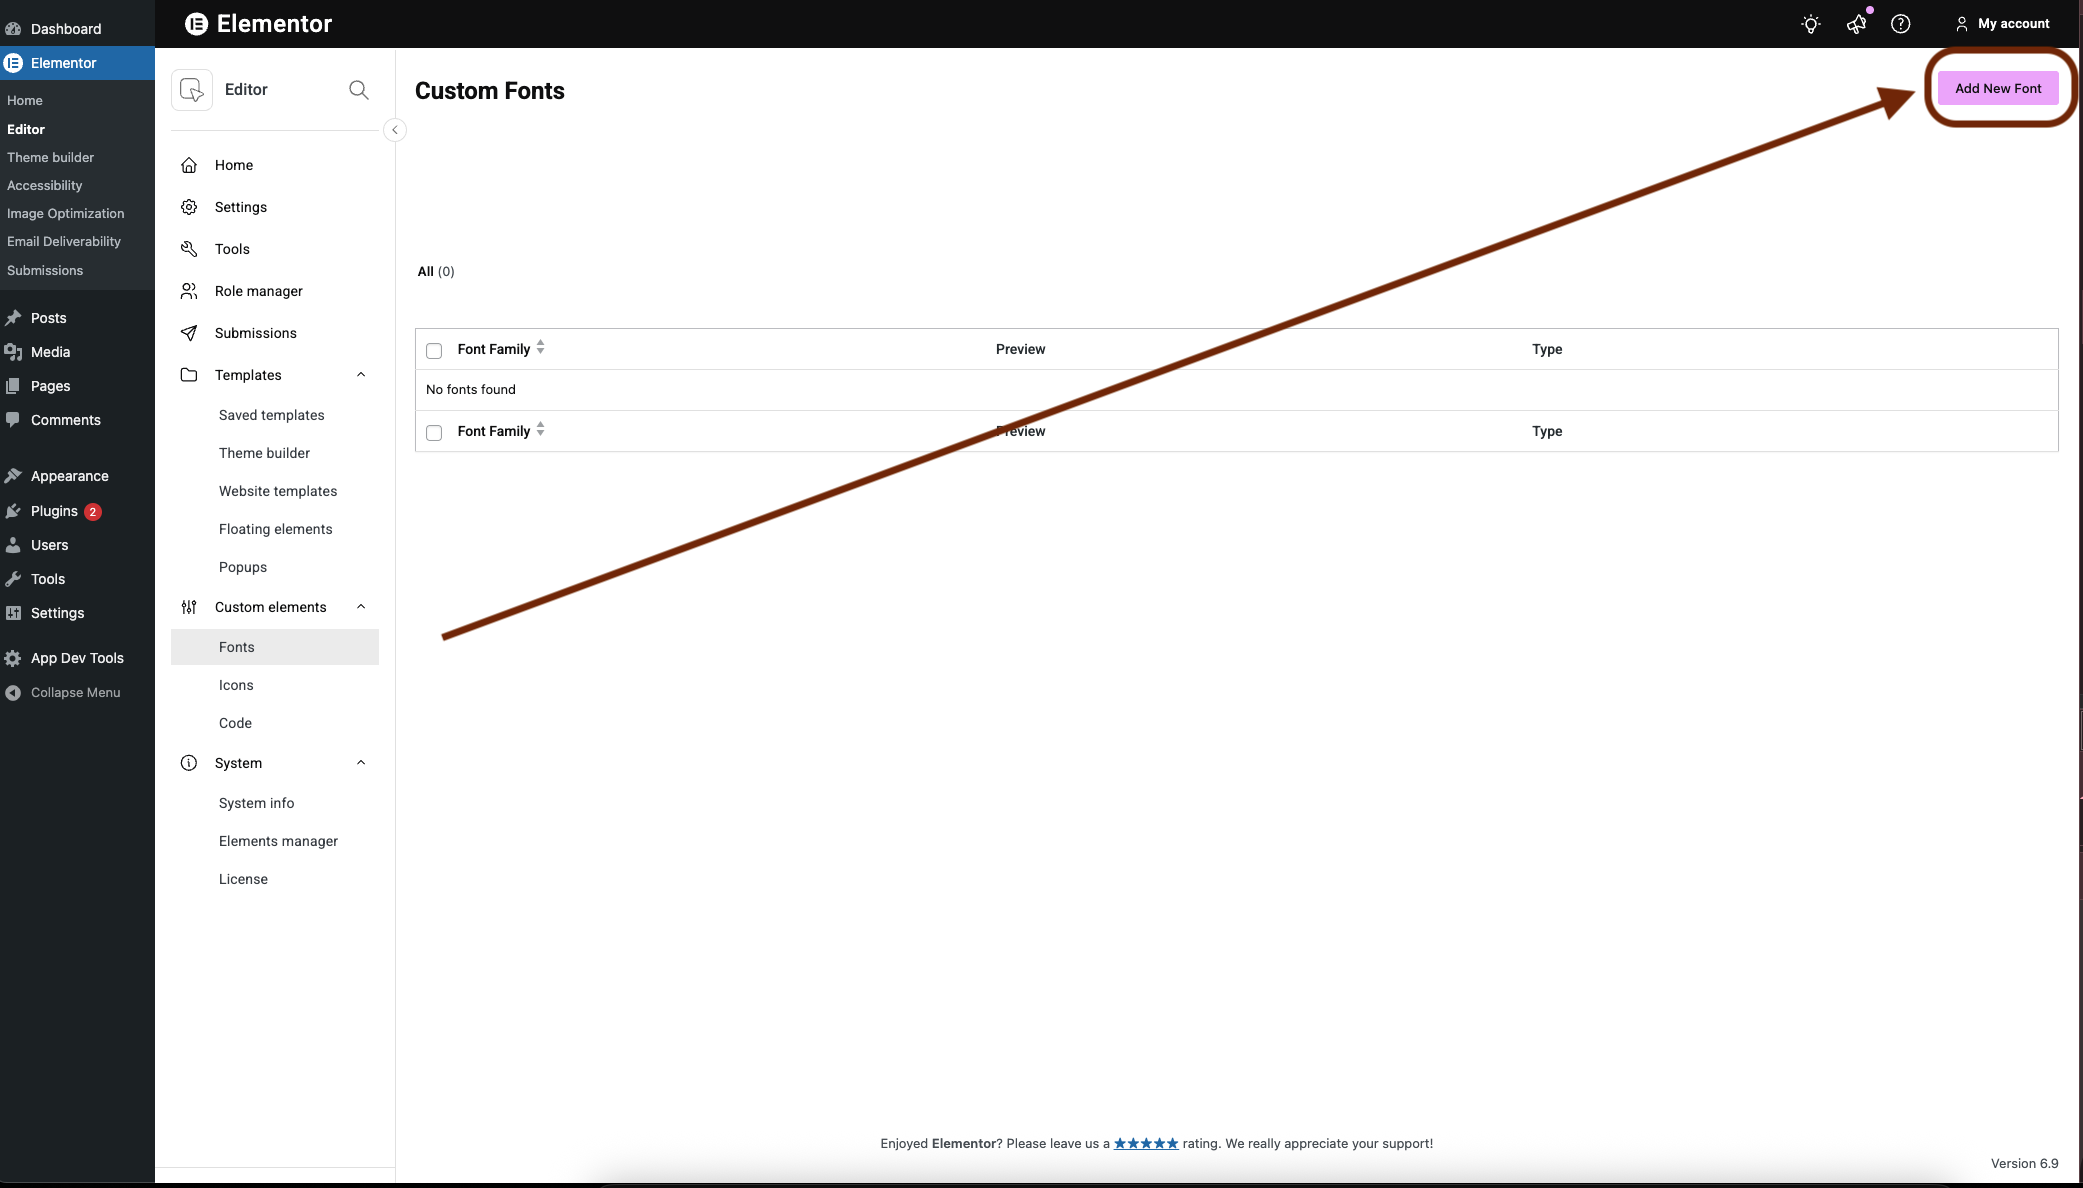
- Click Add New font.
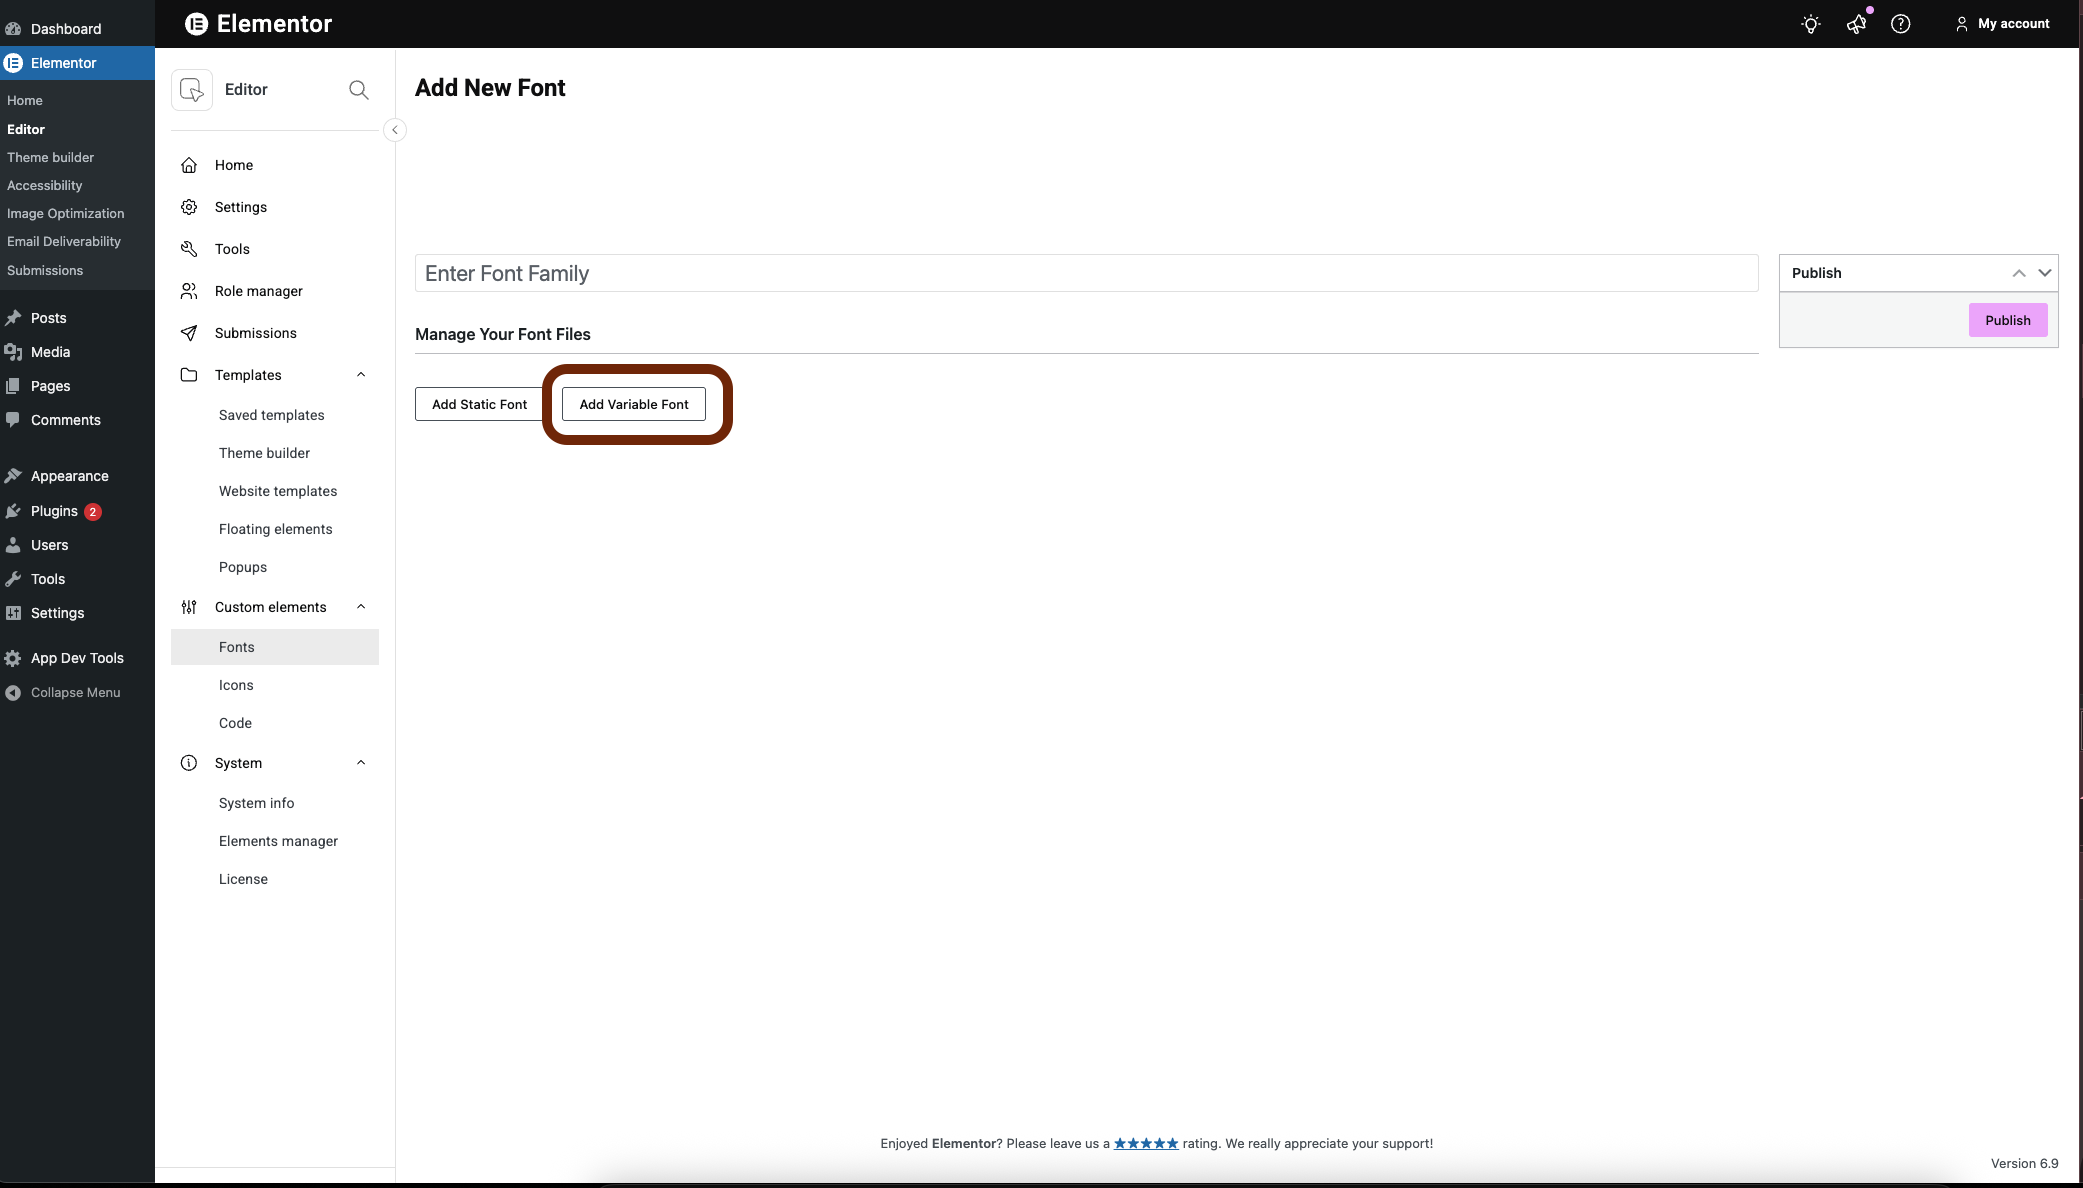
- Click Add Variable Font.
The upload screen appears.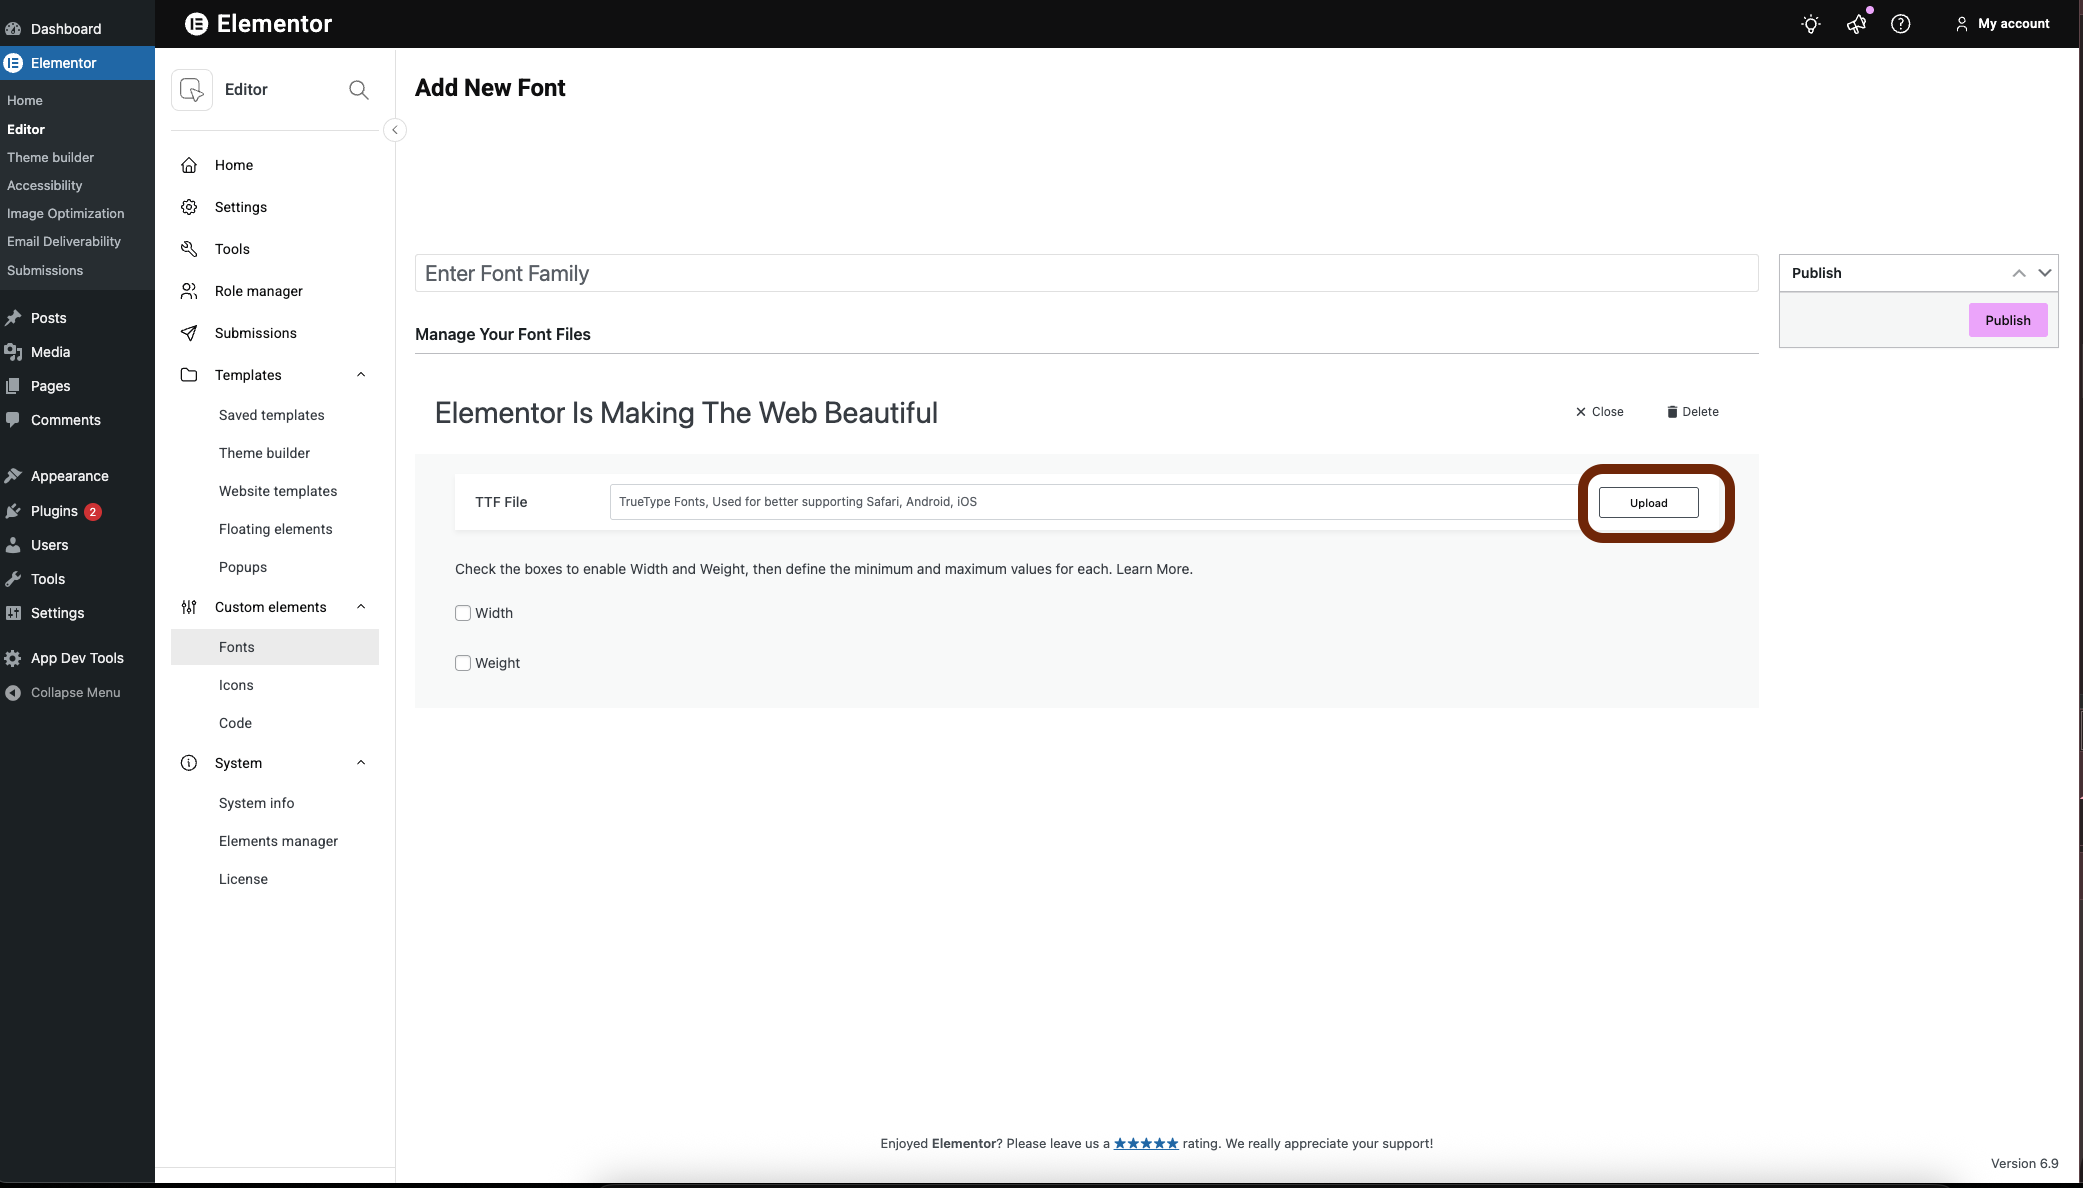
- Click Upload and navigate to the location of the font file.

- Select the Variable font file and, in the lower right, click Select ttf file.
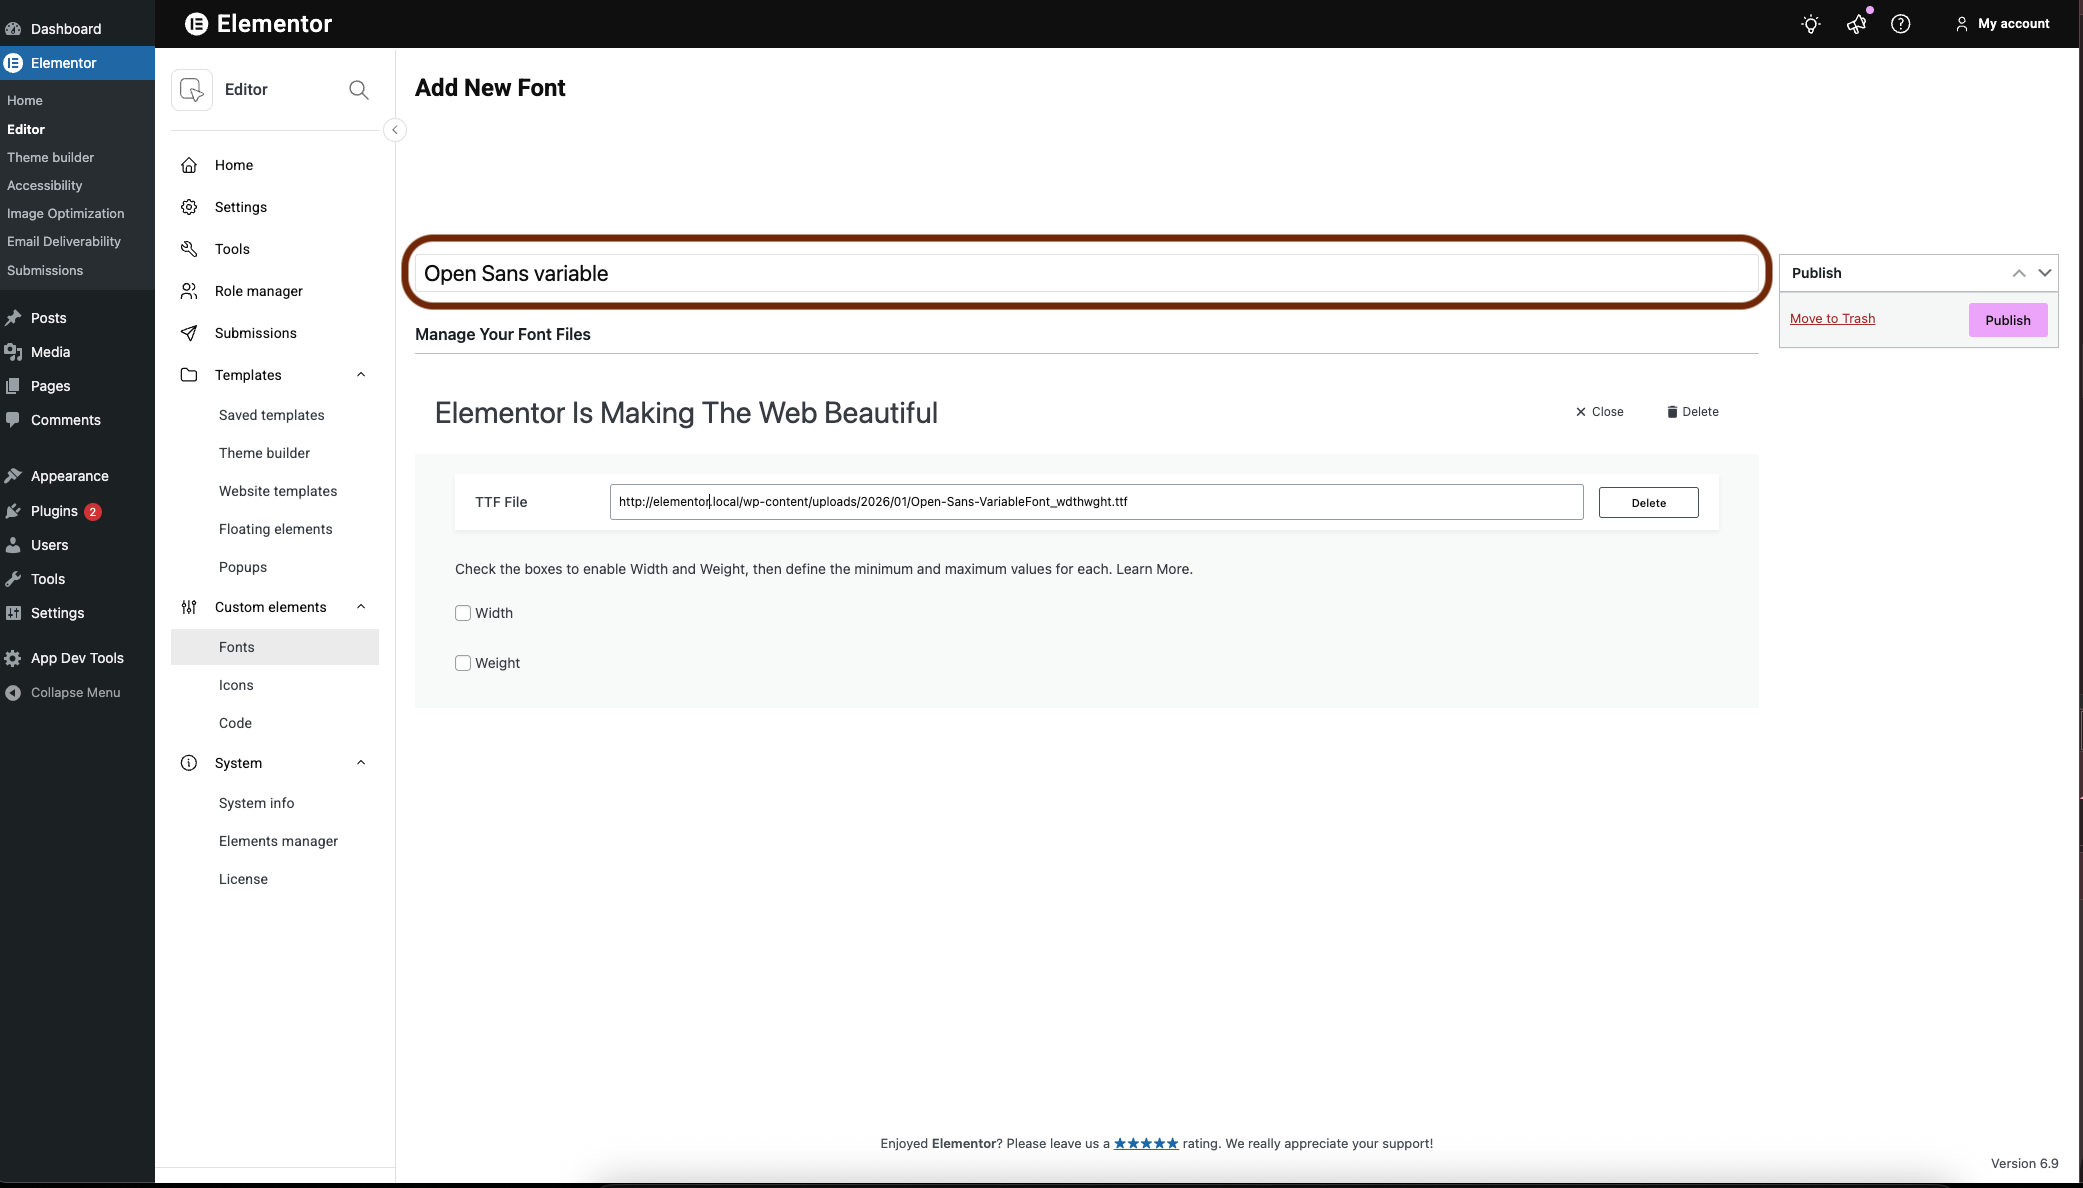
- In the Enter Font Family text box, give the font a name.
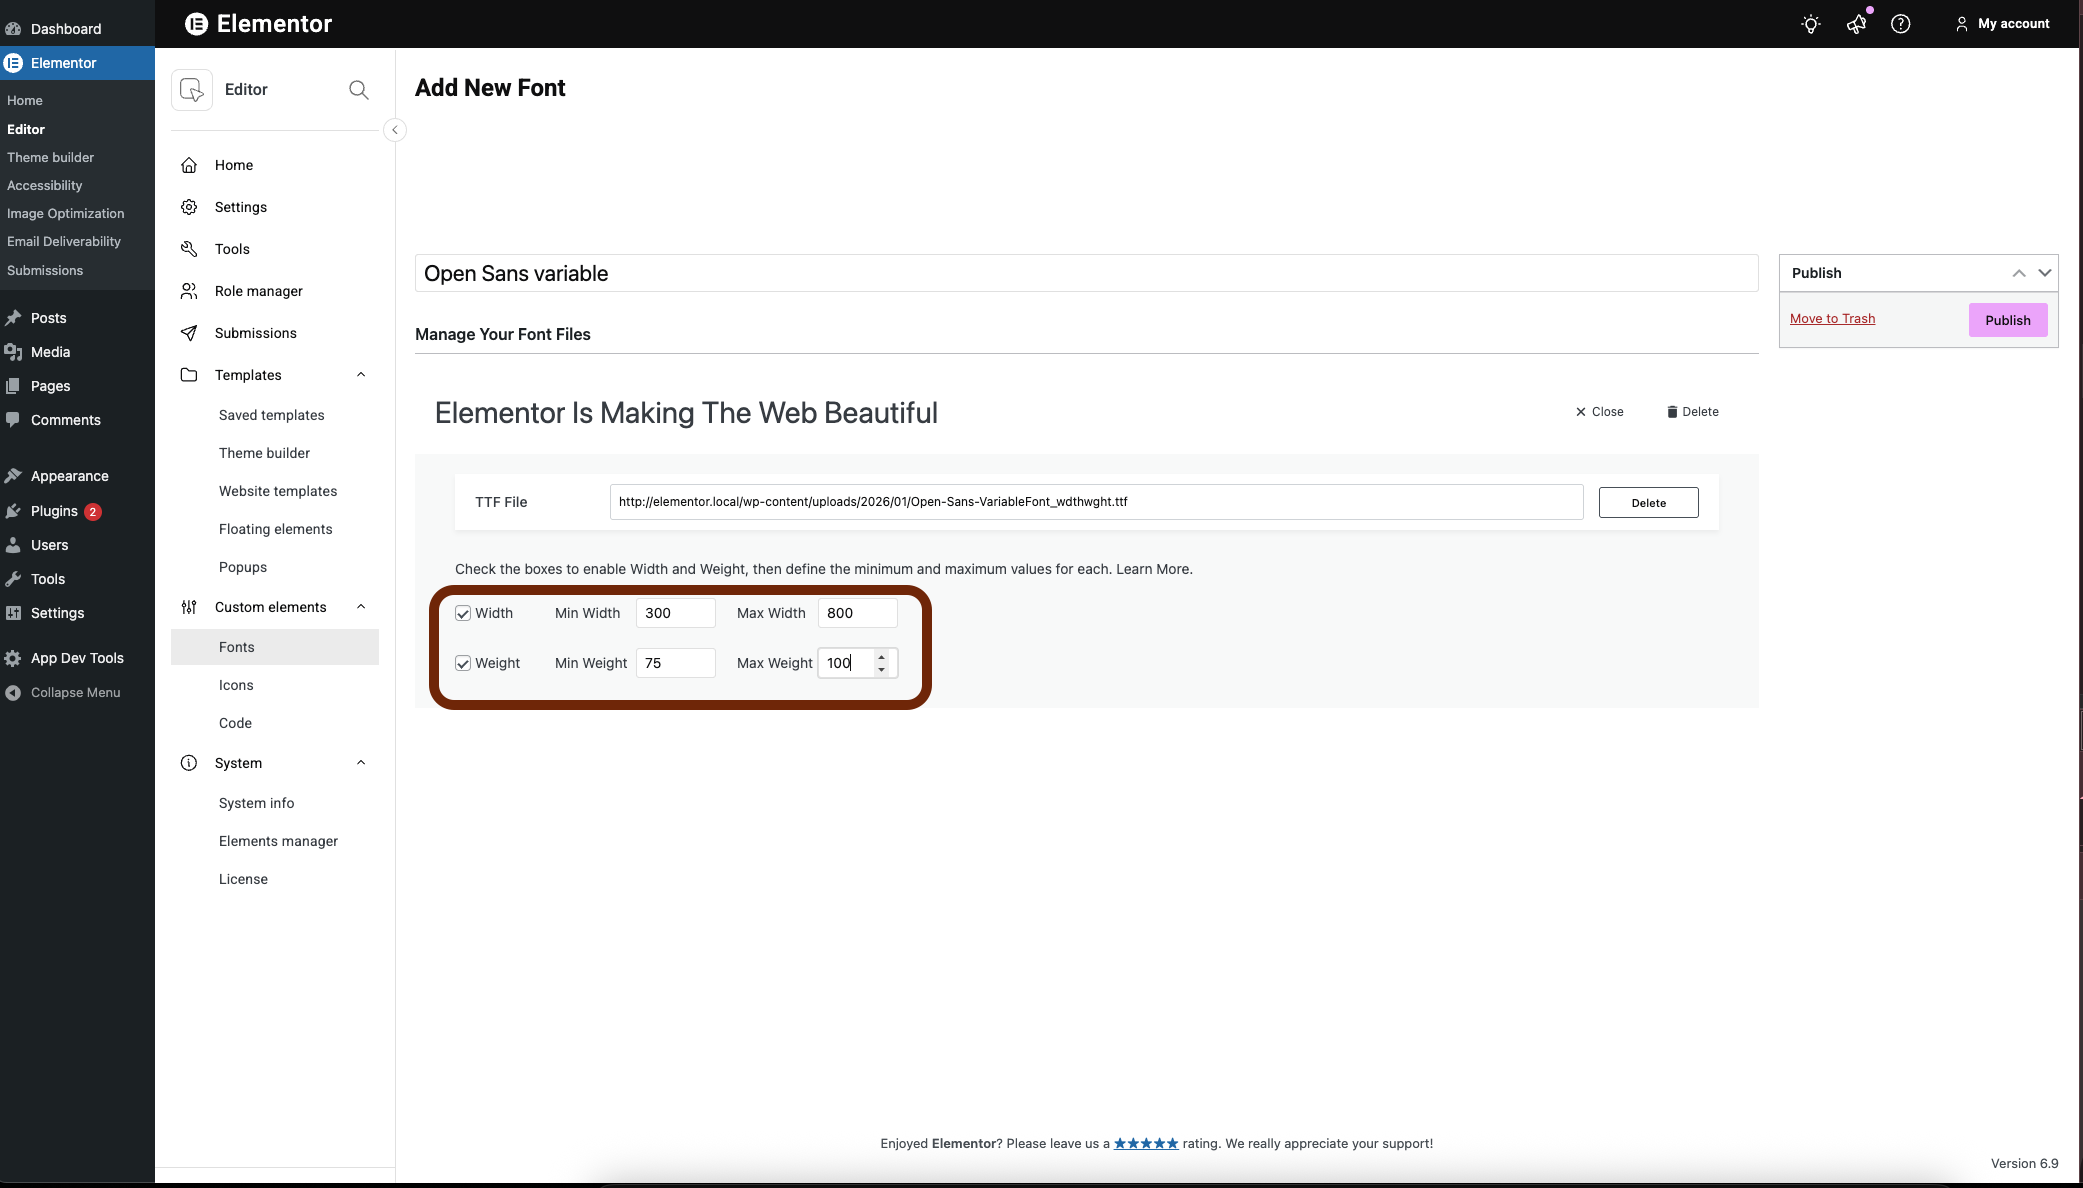
- Check Width and enter the minimum and maximum width of your font. This information is available from the font creator.
- Check Weight and enter the minimum and maximum weight of your font. This information is available from the font creator.NoteYou must set a minimum and maximum weight and/or width in order for the font to behave correctly. Not all fonts contain both the width and weight variable. In these cases, just check the relevant variable.
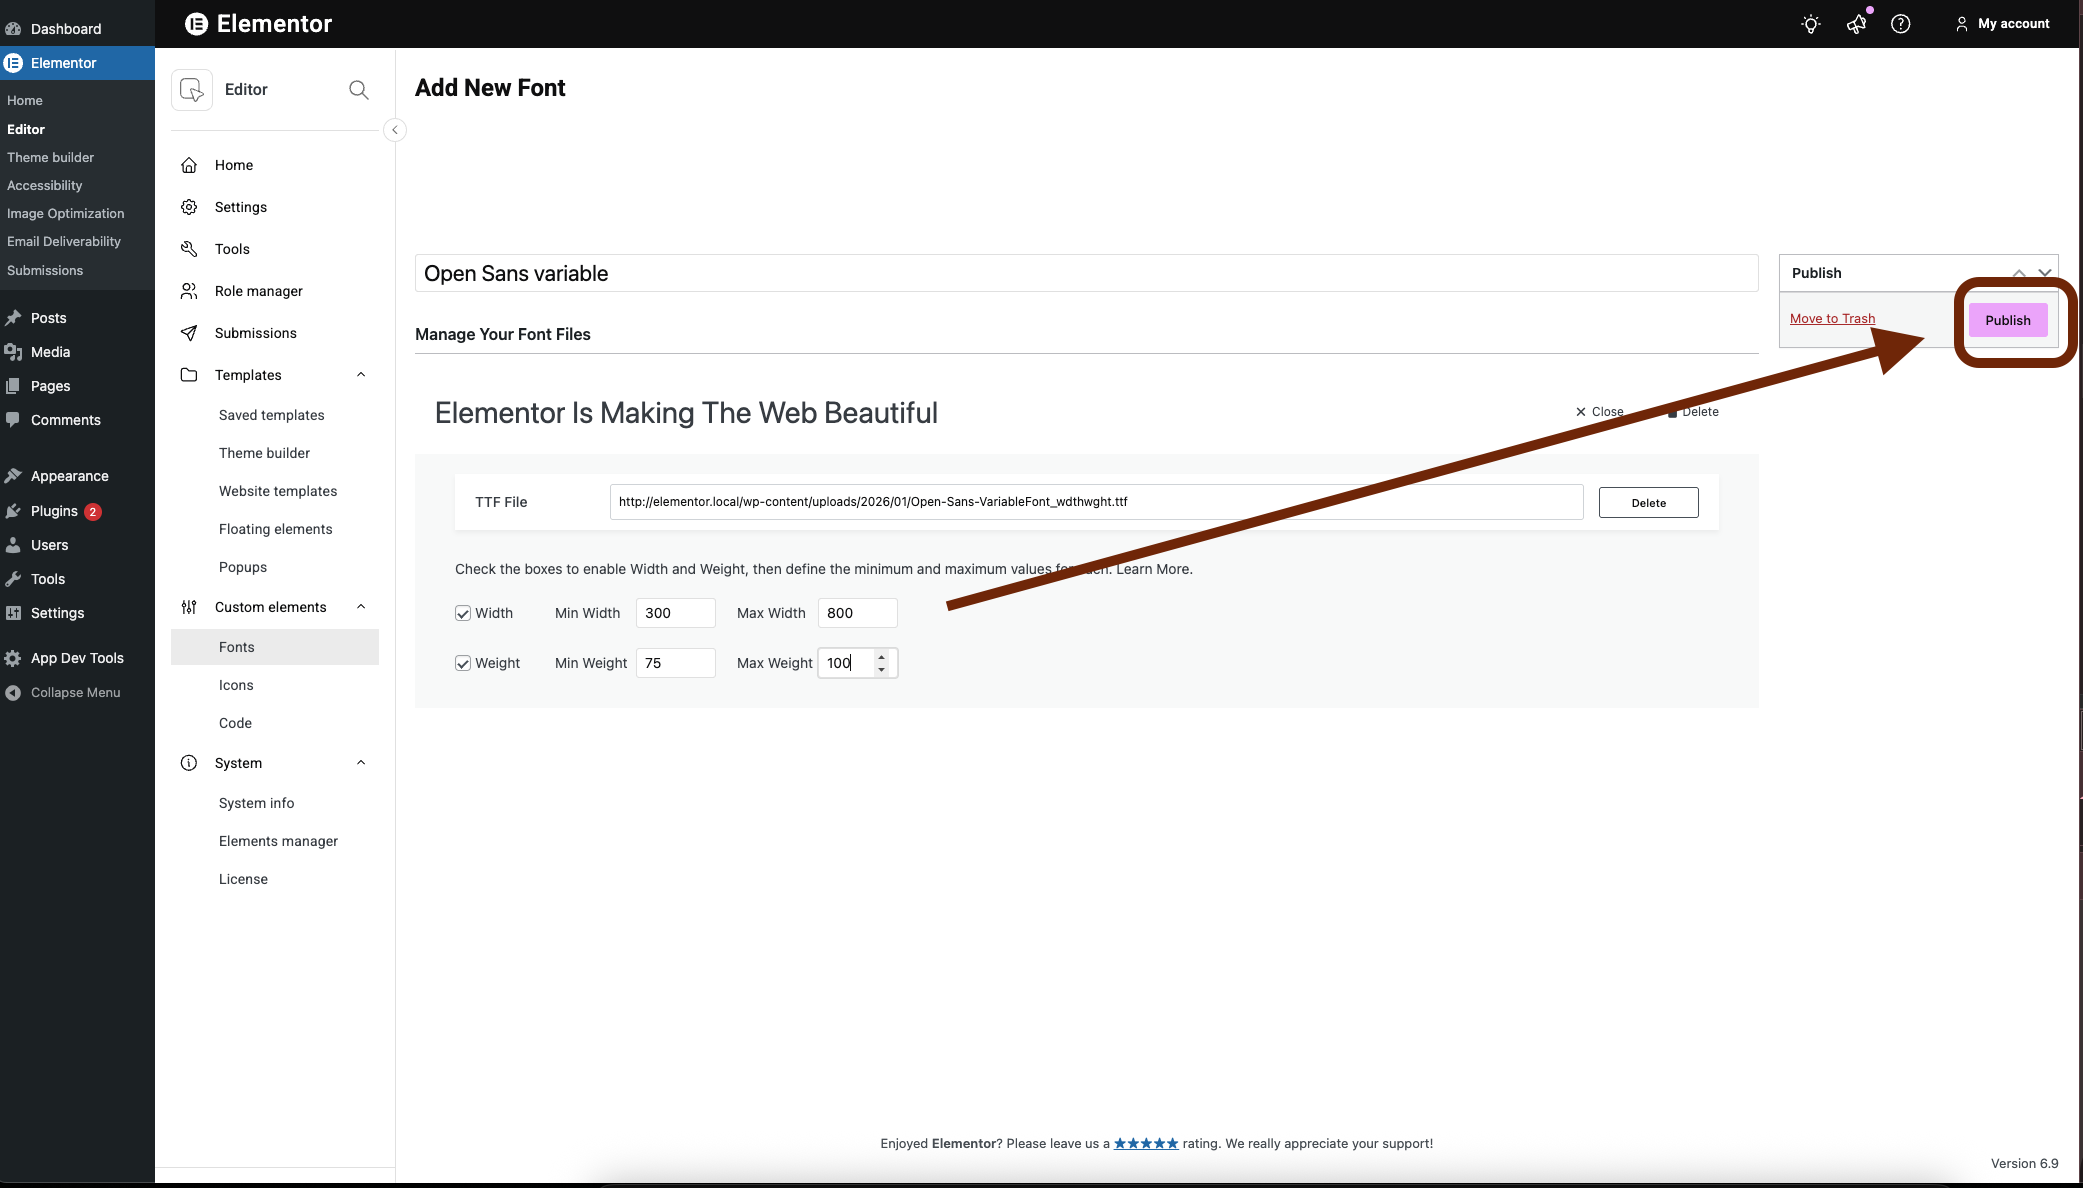
- Click Publish/Update.
You can now use this font in the Elementor Editor.
Use variable fonts in the Elementor Editor
Once you’ve installed the variable fonts, you can use them in any widget which has a typography option. In the example below we’ll use a variable font in the Heading widget.
To use variable fonts in a widget:
- Drag a widget that has text in it to the canvas.
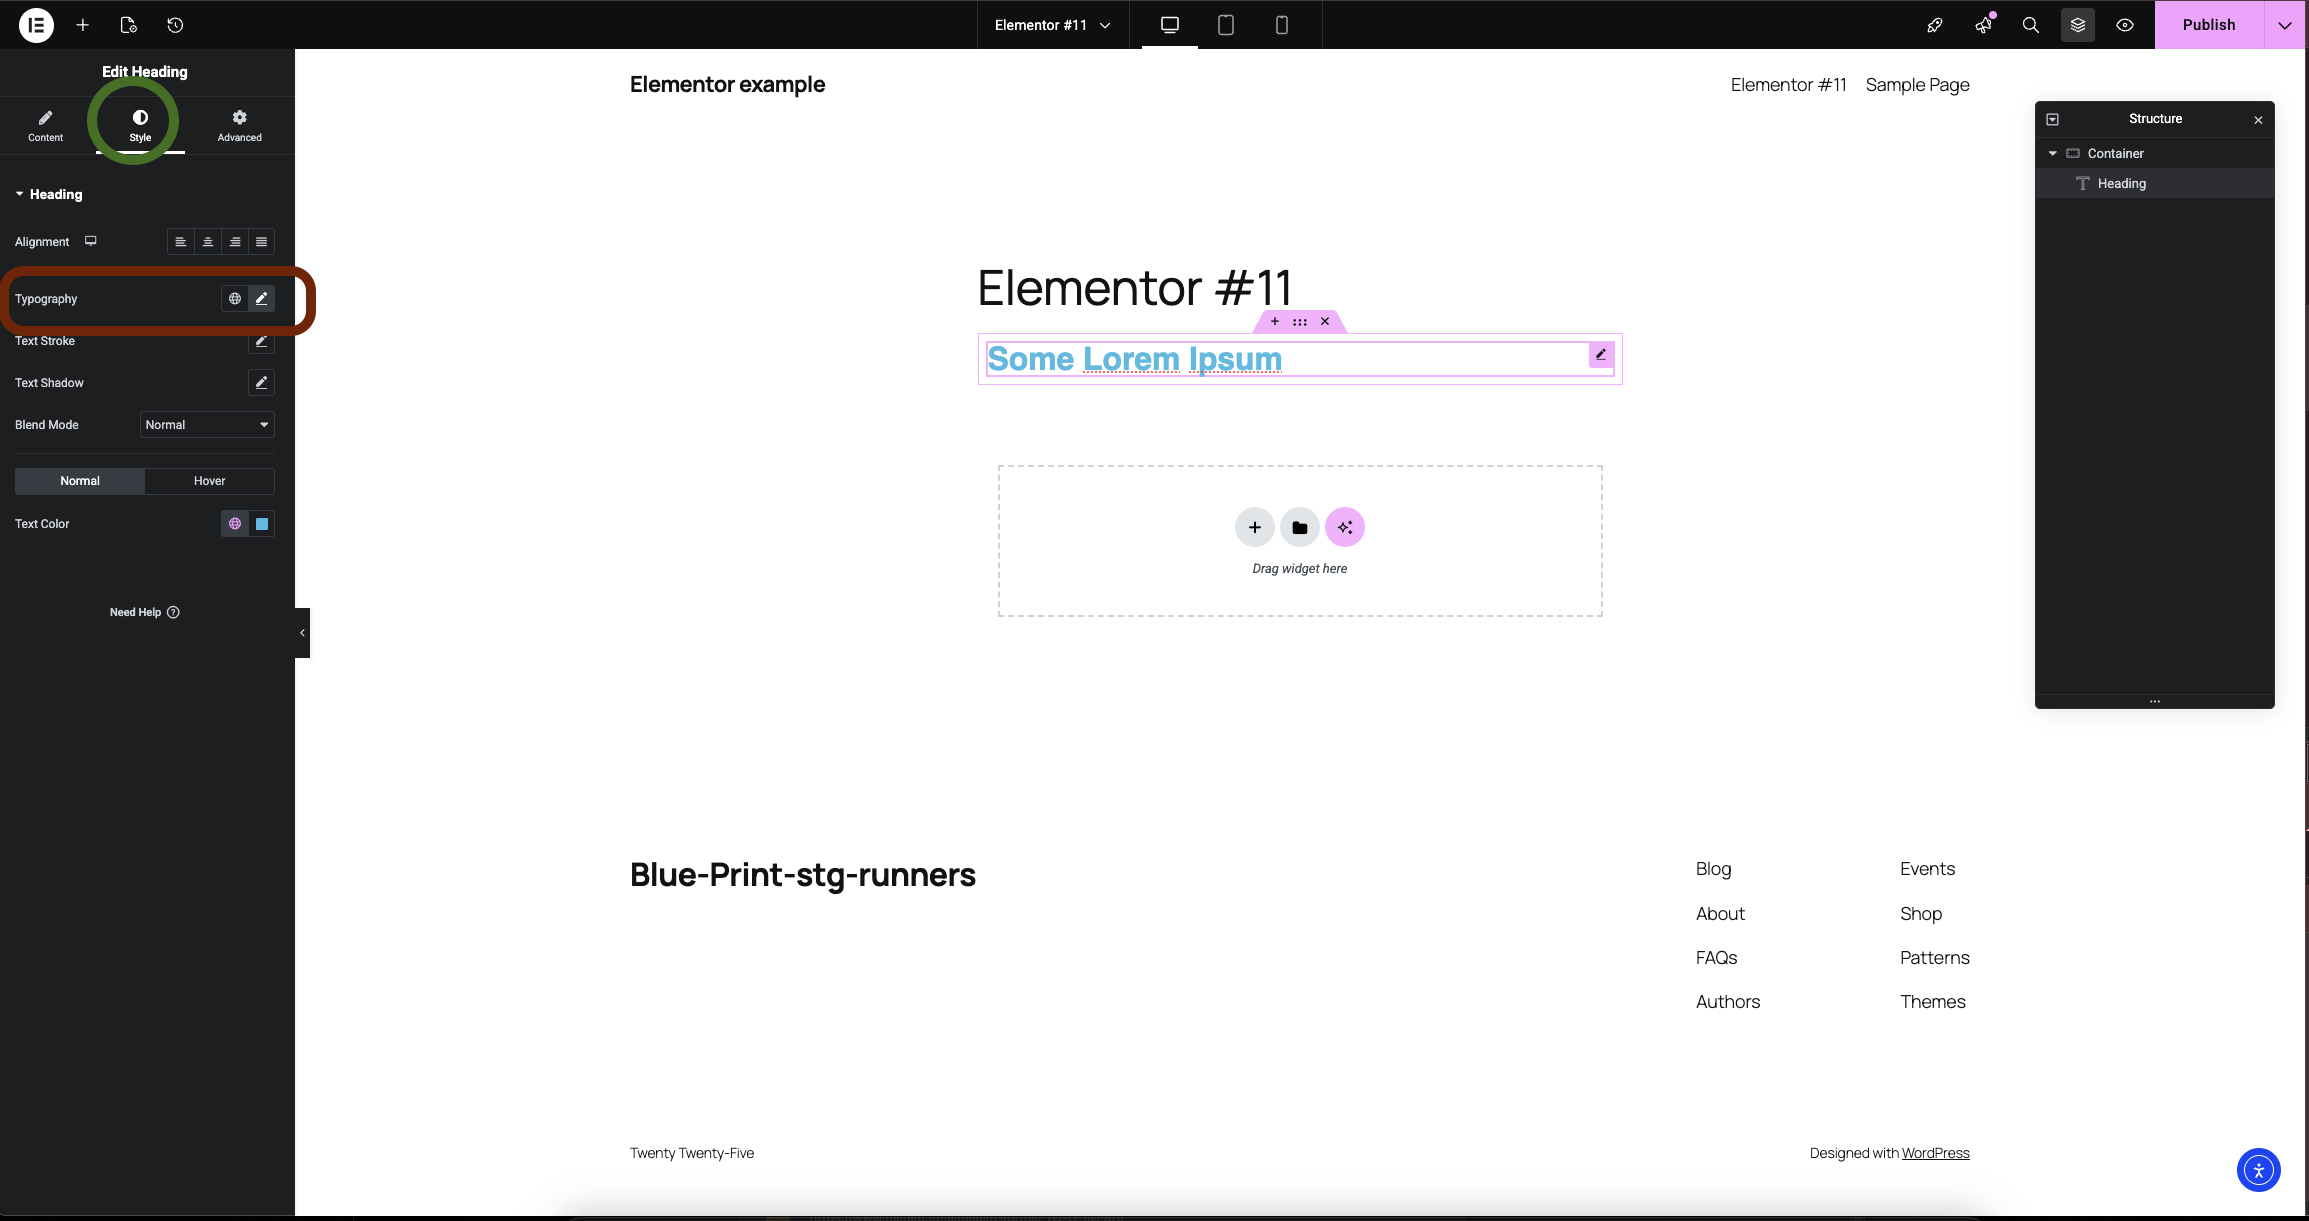
- In the panel, select the Typography option. This option can usually be found in the Style tab.
- Click the pencil icon
.
A list of fonts and font options appears.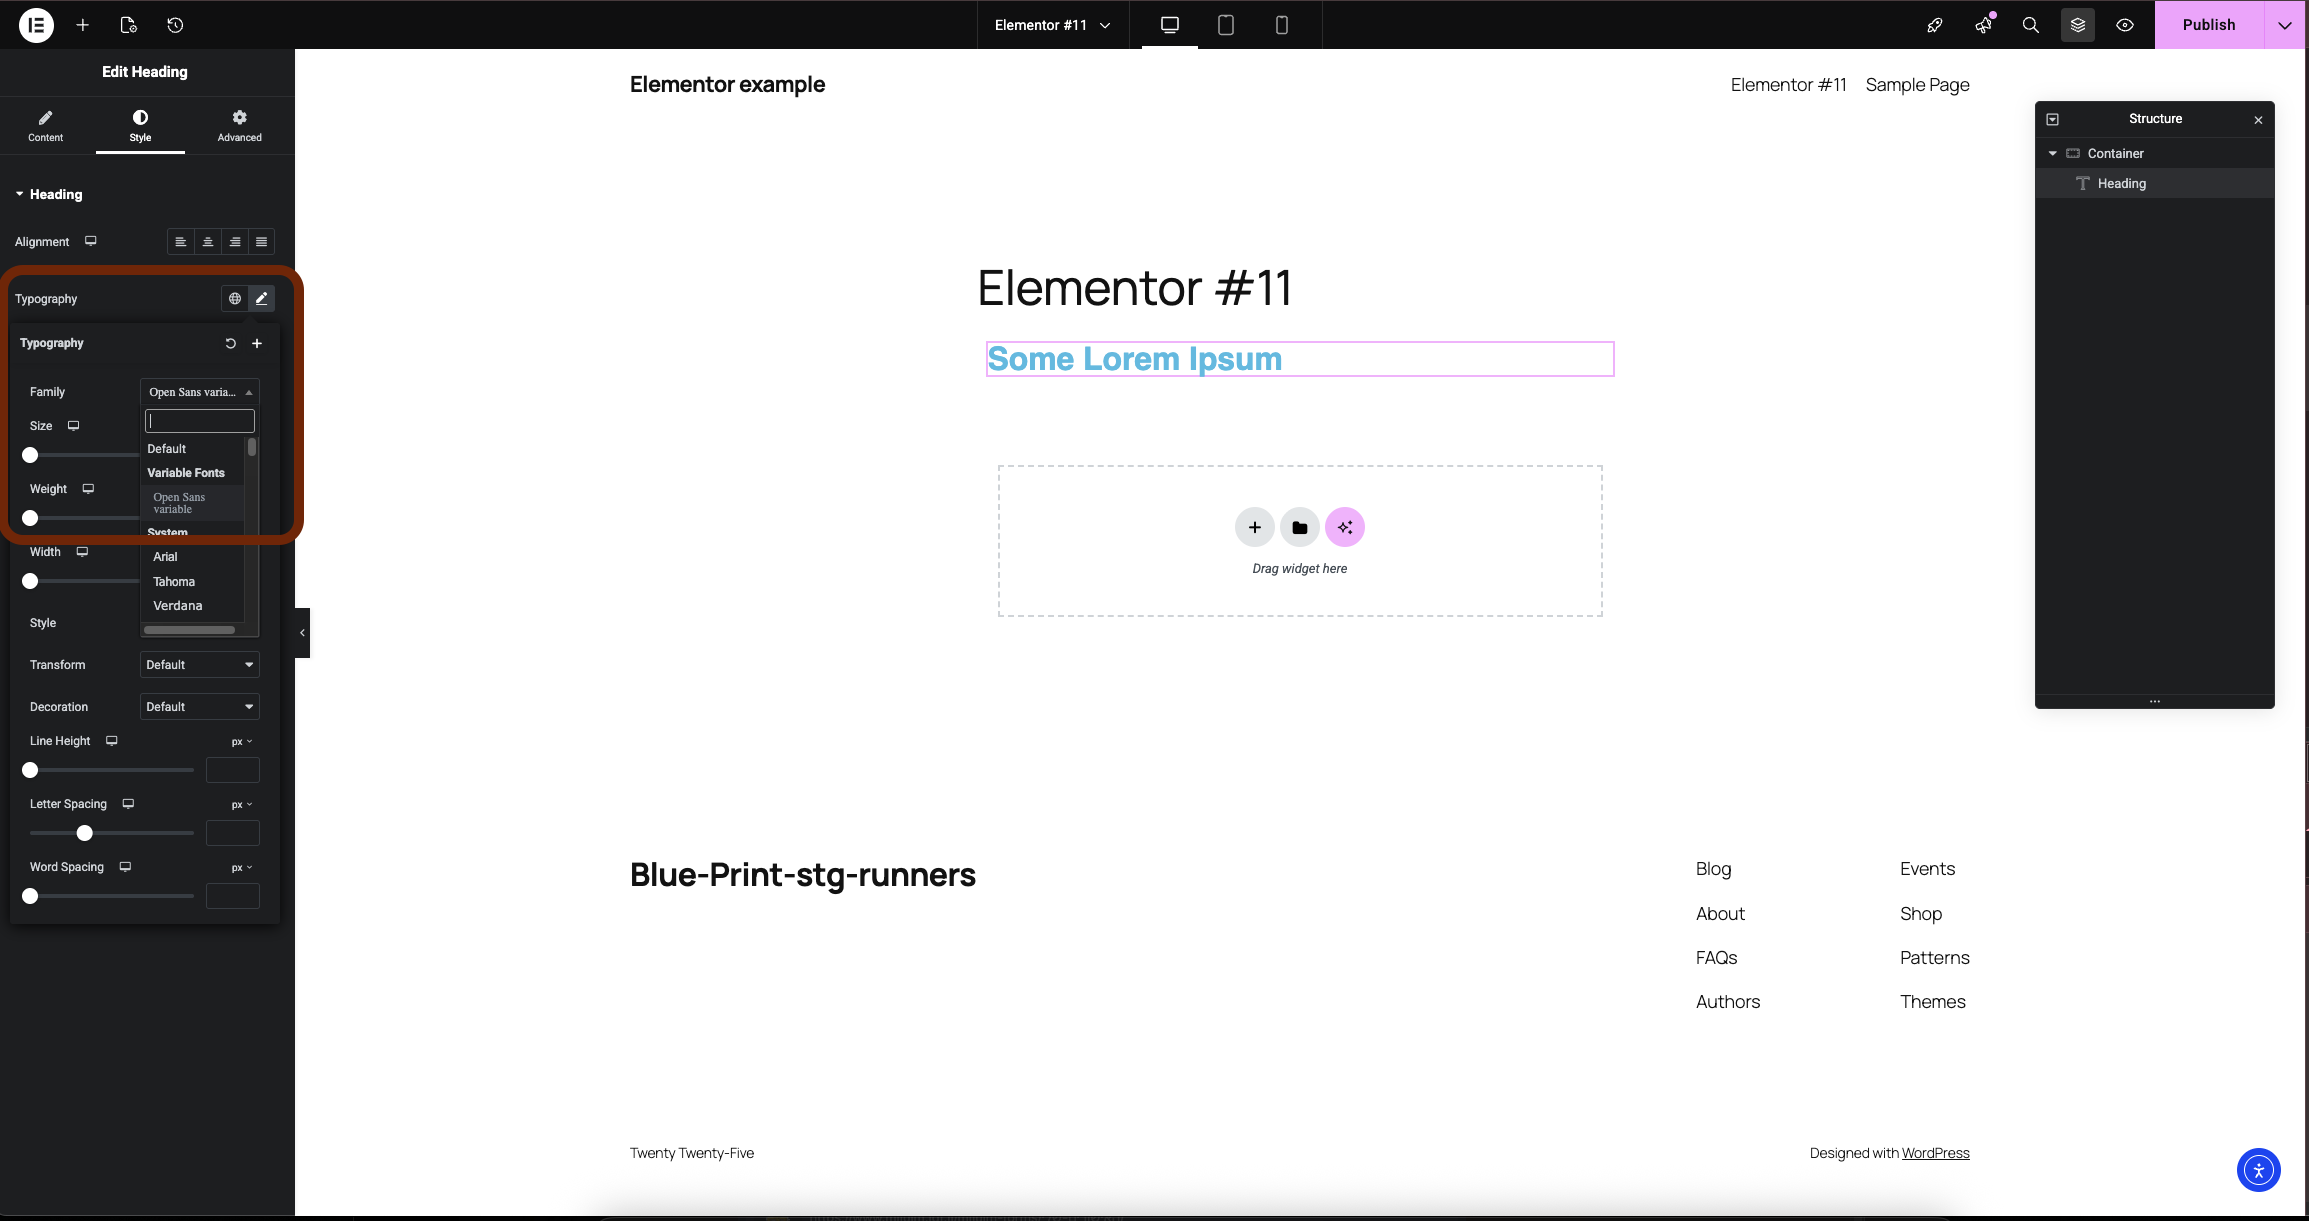
- Select a variable font. These fonts are located at the top of the fonts list in a section labeled Variable fonts.

- Use the Width and/or Weight sliders to determine the font’s appearance.
Your text now appears exactly as you want it.

