This guide will walk you through the Image Optimization settings in WordPress, explaining every option step by step to help you optimize your website’s images for better performance and faster loading times.
Install, activate, and connect the Image Optimization addon
- Install and activate Image Optimizer. For details, see Install, activate and connect the Image Optimizer.
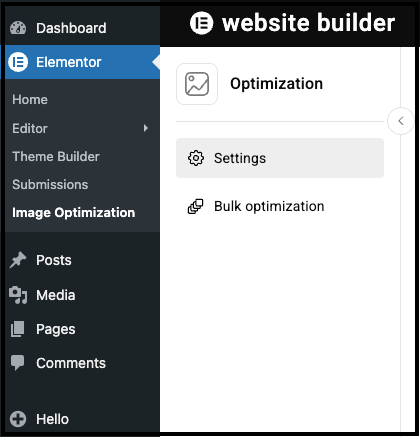
Understanding the Dashboard
When you open the Image Optimization settings page, you’ll see two main sections at the top, WpAdmin>Elementor>Image Optimization>Settings:
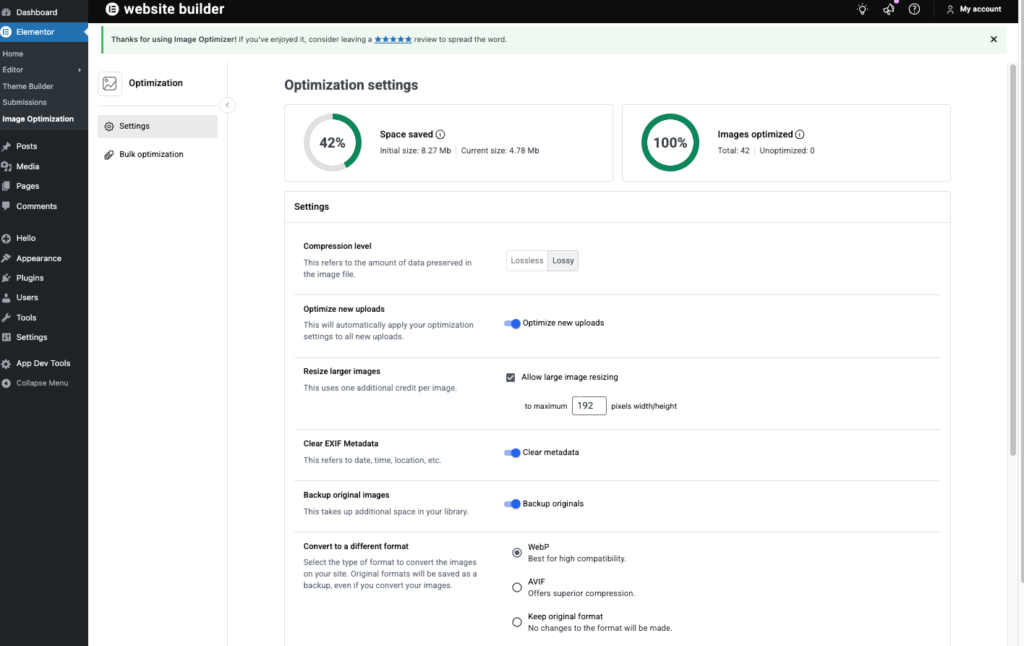
1. Space Saved:
Shows a percentage circle (e.g., 42%) indicating how much storage space you’ve saved
Displays your initial size (e.g., 8.27 Mb) and current size (e.g., 4.78 Mb).
This gives you a visual representation of your optimization success
2. Images Optimized:
Shows a percentage circle (100% when all images are optimized)
Displays total images (e.g., 42) and unoptimized count (e.g., 0)
Helps you track your optimization progress.
3. Main Settings Explained:
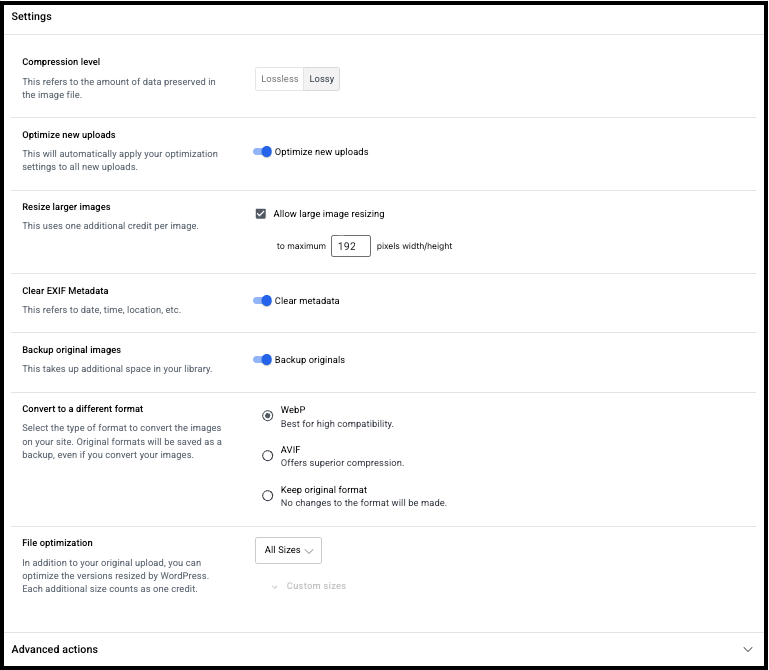
Compression Level
This controls how much your images are compressed:
Lossy: Maximizes compression for smaller file sizes. Slightly reduces quality but is usually imperceptible to the human eye. Recommended for most users.
Lossless: Reduces file size without compromising image quality or integrity. Your images stay exactly the same visually.
What to choose: Select “Lossy” for best results – it provides significant file size reduction while maintaining good visual quality.
Optimize New Uploads
This is a toggle switch that automatically applies your optimization settings to all new images you upload.
What to do: Keep this setting turned on (enabled) so that every image you upload gets optimized automatically without extra effort.
Resize Larger Images
This option automatically resizes images that are too large:
- Has a checkbox to enable/disable the feature
- Includes a text field to set maximum size (default: 192 pixels width/height)
- Note: Uses one additional credit per image
What to do:
- Check the box to enable this feature
- Set the maximum size (1920 pixels is a good standard for most websites)
- This prevents unnecessarily large images from slowing down your site
Clear EXIF Metadata
This removes hidden data from your images, like date, time, location, camera settings, etc.
What to do: Keep this turned ON. Removing metadata reduces file size and protects privacy by removing location data and camera information.
Backup Original Images
This saves a copy of your original images before they are optimized.
What to do:
- Turn this ON if you want the ability to restore original images later
- Turn this OFF if you’re confident in your settings and want to save storage space
- Note: This takes up additional space in your WordPress media library
Convert to a Different Format
This allows you to convert images to modern formats that offer better compression:
Three options are available:
- WebP (Recommended): Best for high compatibility with modern browsers
- AVIF: Offers superior compression but may have limited browser support
- Keep original format: No format changes will be made
What to do: Select “WebP” for the best balance of file size reduction and browser compatibility. Original formats are saved as backups even if you convert.
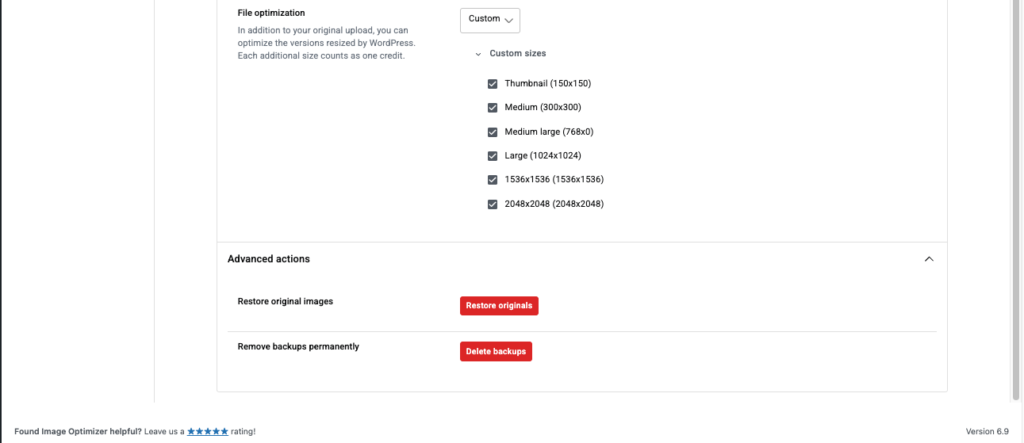
File Optimization
This section lets you choose which image sizes WordPress generates should be optimized:
Two options in the dropdown:
- All Sizes: Optimizes every version of your images (recommended)
- Custom: Lets you select specific sizes
When you select “Custom”, you can choose from:
- Thumbnail (150×150)
- Medium (300×300)
- Medium large (768×0)
- Large (1024×1024)
- 1536×1536 (1536×1536)
- 2048×2048 (2048×2048)
What to do: Select “All Sizes” to optimize every image version WordPress creates. Each additional size counts as one credit.
4. Advanced Actions
At the bottom of the settings page, you’ll find advanced options:
Restore Original Images
- Click the “Restore originals” button to revert all images back to their original, unoptimized versions
- Only available if you have “Backup original images” enabled
Remove Backups Permanently
- Click the “Delete backups” button to permanently remove all backup copies
- This frees up storage space, but cannot be undone
What to do: Use these only if you need to make major changes or free up significant storage space.
5. Additional Features
WpAdmin>Elementor>Image Optimization>Bulk Optimization:
Bulk Optimization
In the left sidebar, you’ll see a “Bulk Optimization” option. This allows you to optimize all existing images in your library at once, showing:
- A progress bar
- File names, original sizes, current sizes, optimization levels, and status
What to do: Use this after configuring your settings to optimize all images that have already been uploaded to your site.
- Go to WP Admin>Elementor>Image Optimization>Settings.
This brings up the Image Optimizer configuration page. - Click Connect to start.
If you don’t have an Elementor account, you’ll have to create one. If you have an Elementor account, you’ll be asked to log in. This securely links the Image Optimizer to our service, allowing us to optimize images externally without putting any strain on your servers.
At the top of the dashboard, you’ll see stats about your images:- The total size of your images before and after optimization.

- The number of optimized and unoptimized images.

- The number of credits you have left.NoteFor Elementor One users, image optimization credits are part of your Elementor One subscription and are not tracked separately.

- The total size of your images before and after optimization.
- Click Bulk Optimization to view all images and optimize all the site’s images.
The Image Optimizer settings are located under the stats. See Image Optimizer settings for more details.
That’s it! You’ve successfully set up Image Optimizer on your website.
If you encounter any issues, visit our support documentation or contact our support team for assistance. We’re here to help ensure your image optimization runs smoothly.
Thank you for choosing Image Optimizer!
Image Optimizer settings
- Compression Level: Choose how much to shrink your images. Less compression means better quality and bigger files, while more compression means smaller files and slightly lower quality. We recommend setting it to Lossy.

- Optimize New Uploads: Automatically optimizes any new images you upload. We highly recommend keeping this on.

- Resize Larger Images: Ensures that any image you upload stays within a manageable size. The default 1920-pixel max size works great.

- Clear EXIF Metadata: Removes hidden data like when and where the photo was taken, reducing file size and eliminating unnecessary information.

- Backup Original Images: Keeps a copy of the unoptimized version, just in case. If you ever need the original, you can easily revert back.

- Convert Images to WebP or AVIF: Both formats offer excellent optimization, but we recommend setting it to AVIF since it’s the newer and better format.

- File Optimization: WordPress automatically generates multiple image sizes for every upload. This setting lets you choose which sizes to optimize. Since each size uses a credit, consider disabling any sizes you don’t need.

Advanced actions
Advanced actions are available for more experienced Image Optimizer users. Some of the these actions are irreversible so great care should be taken when using them.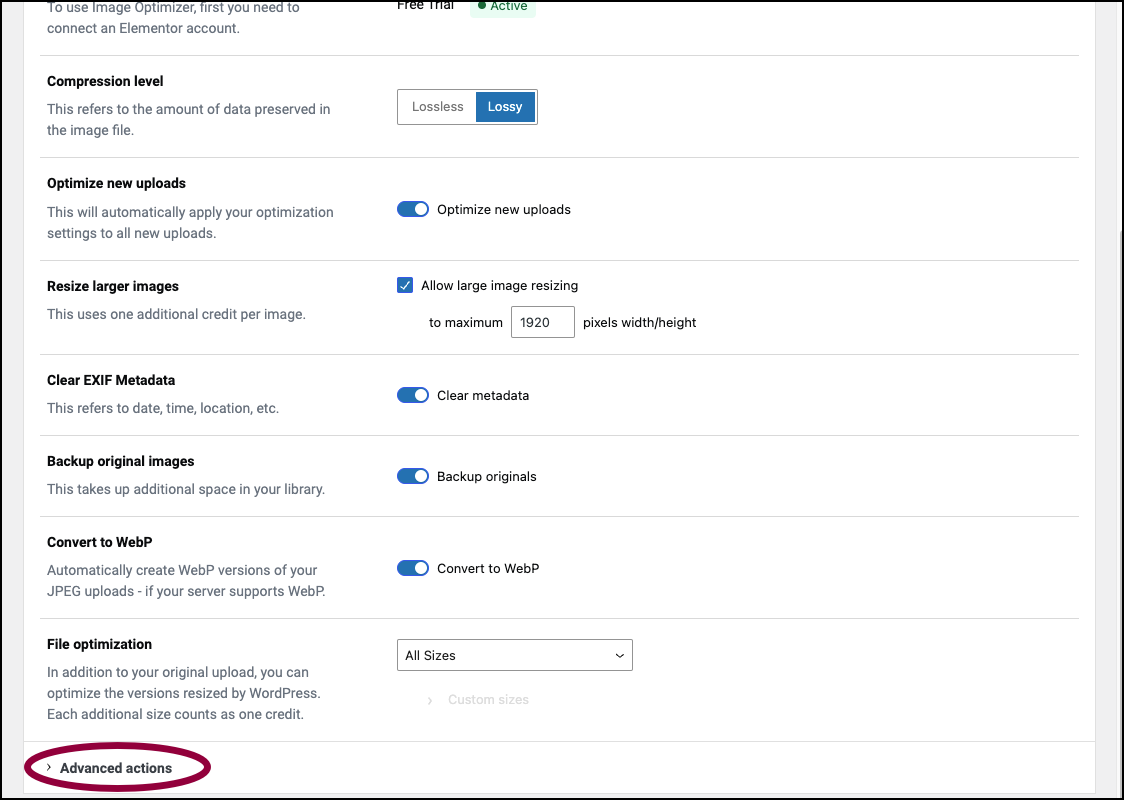
Access these actions by opening the Advanced actions field under the Image Optimizer settings.
This opens the Advanced actions screen.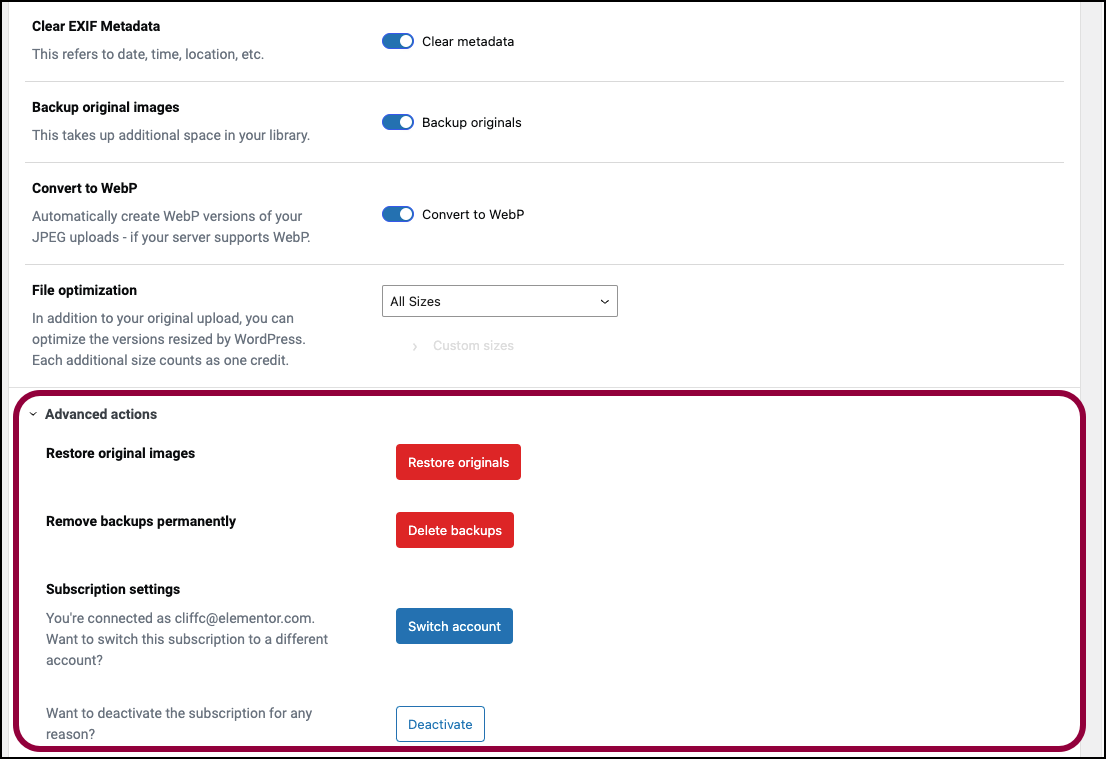
These are the advanced actions you can take:
- Click Restore Originals to revert any optimized images back to their original versions.

- Click Delete Backups to permanently remove stored copies of your original images to free up space.

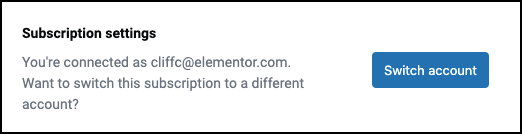
- Click Switch Account lets you change the account connected to your subscription.
- Click Deactivate to stop your subscription and disable all features tied to the Image Optimizer plugin.


