What Exactly Is Web Hosting?
Before diving into the “how,” let’s clarify the “what.” Think of your website as a house. The domain name (like www.yourwebsite.com) is the address that people use to find you. The website files—the text, images, code, and databases—are the furniture and structure inside the house. Web hosting is the plot of land where your house is built.
In technical terms, a web host provides the technologies and services needed for a website to be viewed on the internet. It stores all your website’s files on a powerful computer called a server. When someone types your domain name into their browser, the browser connects to the server, and the server sends your website’s files back to the browser to be displayed.
Hosting your own website means you are renting space on one of these servers to store your files and make them accessible to the world.
Why Should You Host Your Own Website?
While all-in-one platforms offer simplicity, choosing to host your own website provides significant advantages that are crucial for long-term growth and branding. This approach empowers you with full ownership and flexibility.
Here’s why it’s a powerful choice:
- Complete Control and Customization: When you host your own site, you are in the driver’s seat. You have the freedom to install any software you want, from content management systems (CMS) like WordPress to specific scripts or applications. You aren’t limited by the templates or features of a closed platform.
- Enhanced Performance: Hosting providers offer various plans with dedicated resources. You can choose a plan that matches your traffic needs, ensuring your site loads quickly. Since website speed is a critical factor for both user experience and SEO—with a 1-second delay in page load time potentially lowering conversions by 7%—this control is vital.
- Scalability for Growth: Your website should grow with your business. Self-hosting allows you to easily upgrade your plan as your traffic increases. You can move from a basic shared plan to a more powerful Virtual Private Server (VPS) or even a dedicated server without having to rebuild your entire site.
- Professional Branding: Using your own domain name (e.g., yourbrand.com) on a self-hosted site establishes credibility and professionalism. It reinforces your brand identity, unlike a subdomain on a shared platform (e.g., yourbrand.websiteplatform.com).
- Monetization Freedom: You have complete freedom to monetize your site however you see fit. You can run ads, sell products, implement affiliate links, or create subscription content without being restricted by a third-party platform’s terms of service or having to share revenue.
Understanding the Different Types of Web Hosting
Choosing the right type of hosting is like picking the right foundation for your house. Your decision will depend on your budget, technical expertise, and the amount of traffic you expect. Let’s break down the most common options.
Shared Hosting
Shared hosting is the most popular and affordable option, making it perfect for beginners, personal blogs, and small business websites.
- What It Is: With shared hosting, your website is stored on a server alongside hundreds or even thousands of other websites. All these sites share the server’s resources, including its processing power (CPU), memory (RAM), and disk space.
- Who It’s For: New websites, blogs, small business brochure sites, and anyone with a limited budget.
- Pros:
- Affordable: The most cost-effective hosting solution.
- User-Friendly: Most providers offer a control panel (like cPanel) and one-click installers for software like WordPress.
- Maintenance-Free: The hosting company handles all server maintenance, security, and updates.
- Cons:
- Limited Resources: A sudden traffic spike on another site on your server can slow down your site.
- Less Secure: While providers have security measures, a vulnerability on one site could potentially affect others on the same server.
- Performance Issues: Slower performance compared to other hosting types due to shared resources.
Virtual Private Server (VPS) Hosting
VPS hosting is a significant step up from shared hosting, offering more power and control without the cost of a dedicated server.
- What It Is: A VPS still involves sharing a physical server with other users. However, the server is partitioned into several virtual servers. Each VPS acts like its own dedicated machine with its own guaranteed resources (CPU, RAM) and operating system.
- Who It’s For: Growing businesses, high-traffic blogs, and websites that have outgrown shared hosting.
- Pros:
- Guaranteed Resources: Your site’s performance isn’t affected by other users on the server.
- More Control: You get “root” access, allowing you to install custom software and configure the server environment.
- Scalable: You can easily add more RAM or CPU power as your site grows.
- Cons:
- More Expensive: Costs more than shared hosting.
- Requires Technical Knowledge: You are responsible for managing and maintaining your virtual server unless you opt for a “managed” VPS plan.
Dedicated Server Hosting
Dedicated hosting gives you the ultimate in performance and control. It’s a premium solution for high-stakes websites.
- What It Is: You rent an entire physical server exclusively for your website. All of the server’s resources belong to you and you alone.
- Who It’s For: Large enterprises, high-traffic ecommerce stores, and websites with strict security and performance requirements.
- Pros:
- Maximum Performance: Unrivaled speed and reliability since you aren’t sharing resources.
- Full Control: Complete administrative access to configure the server exactly to your specifications.
- Enhanced Security: Your server is isolated from other users, reducing security risks.
- Cons:
- Very Expensive: The most costly hosting option.
- High Technical Demand: You need advanced technical skills (or a dedicated IT team) to manage the server.
Cloud Hosting
Cloud hosting is a flexible and modern approach that has gained popularity for its reliability and scalability.
- What It Is: Instead of relying on a single server, cloud hosting uses a network of connected virtual and physical servers (the “cloud”) to host your site. If one server fails, another one instantly picks up the slack.
- Who It’s For: Websites with fluctuating traffic, large-scale applications, and businesses that need high uptime.
- Pros:
- High Uptime and Reliability: Your site remains online even if there are hardware issues.
- Pay-as-you-go Pricing: You typically only pay for the resources you actually use.
- Excellent Scalability: Resources can be scaled up or down instantly to handle traffic spikes.
- Cons:
- Cost Can Be Unpredictable: The pay-as-you-go model can be hard to budget for.
- Can Be Complex: The setup and management can be more complex than traditional hosting.
Quick Comparison of Hosting Types
| Feature | Shared Hosting | VPS Hosting | Dedicated Hosting | Cloud Hosting |
| Cost | Low | Medium | High | Variable |
| Performance | Low | Medium | High | High |
| Control | Low | Medium | High | High |
| Scalability | Low | Good | Limited | Excellent |
| Technical Skill | None | Basic/Intermediate | Advanced | Intermediate |
| Best For | Beginners, Blogs | Growing Sites | Enterprises | High-Traffic Sites |
Export to Sheets
How to Host Your Website: A Step-by-Step Guide
Now that you understand the options, let’s walk through the practical steps of setting up your hosting and getting your website online.
Step 1: Choose a Web Hosting Provider
The first step is to select a reputable hosting company. With thousands of providers out there, it can be overwhelming. Here are the key factors to consider:
- Uptime Guarantee: Uptime is the percentage of time your website is online and accessible. Look for providers that offer at least a 99.9% uptime guarantee. Anything less is unacceptable.
- Customer Support: When something goes wrong, you need fast and helpful support. Check for 24/7 support via live chat, phone, and email. Read reviews to gauge the quality of their support team.
- Performance and Speed: Look for providers that use modern technology like Solid State Drives (SSDs) for storage and have data centers located near your target audience.
- Pricing and Transparency: Compare pricing, but be wary of deals that seem too good to be true. Pay close attention to renewal rates, which are often much higher than the introductory price.
- Features: Check for essential features like a user-friendly control panel (cPanel is the industry standard), one-click software installers, and security tools.
Step 2: Select a Hosting Plan
Based on the types of hosting we discussed earlier, select a plan that fits your needs.
- For a new website: Start with a basic shared hosting plan. It’s affordable and provides everything you need to get started. You can always upgrade later.
- For a growing business: If you anticipate significant traffic or need more control, a VPS plan is a solid choice. A managed VPS plan can be a great middle ground, giving you the power of a VPS without the management headache.
- For a large-scale project: A dedicated or cloud hosting solution will provide the necessary resources and reliability.
Once you’ve chosen a plan, you’ll go through the checkout process on the provider’s website and create your hosting account.
Step 3: Register a Domain Name
Your domain name is your website’s unique address on the internet. You need to register one before your site can go live.
- Choosing a Domain Name:
- Keep it short and memorable.
- Make it easy to spell and pronounce.
- Use your brand name if possible.
- Stick with .com if you can, as it’s the most recognized extension.
- How to Register: Most hosting providers offer domain registration services. In fact, many offer a free domain name for the first year when you purchase a hosting plan. This is the easiest approach, as your domain will be automatically configured to work with your hosting account.
If you already own a domain registered elsewhere, you can simply transfer it or update its settings to point to your new host.
Step 4: Point Your Domain to Your Host (DNS Configuration)
If you registered your domain with your hosting provider, you can skip this step. If your domain is registered with a different company (a domain registrar like GoDaddy or Namecheap), you need to connect it to your hosting account.
This is done by changing the domain’s nameservers. Your hosting provider will give you a set of two or more nameserver addresses (e.g., ns1.hostingcompany.com and ns2.hostingcompany.com).
- Log in to your domain registrar’s control panel.
- Find the DNS or nameserver management section.
- Replace the existing nameservers with the ones provided by your web host.
The changes can take anywhere from a few minutes to 48 hours to take effect globally. This period is known as DNS propagation.
Step 5: Install a Content Management System (CMS)
A CMS is software that allows you to create, manage, and publish content on your website without needing to code. For the vast majority of users, this is the most efficient way to build a site.
WordPress is the world’s most popular CMS, powering over 43% of all websites on the internet. It’s powerful, flexible, and supported by a massive global community.
Most web hosts offer a “one-click installer” tool in their control panel that makes installing WordPress incredibly simple:
- Log in to your hosting account’s control panel (e.g., cPanel).
- Look for an installer tool like Softaculous or Fantastico.
- Select WordPress from the list of available applications.
- Fill in some basic information like your site name, administrator username, and password.
- Click “Install.”
Within a minute, WordPress will be installed on your server, and your website will have a basic structure in place.
Step 6: Secure Your Site with an SSL Certificate
An SSL (Secure Sockets Layer) certificate encrypts the data transmitted between your website and its visitors. It’s what enables the secure HTTPS protocol and displays the padlock icon in the browser’s address bar.
SSL is essential for:
- Security: It protects sensitive user information like login credentials and credit card numbers.
- Trust: The padlock icon signals to visitors that your site is secure and trustworthy.
- SEO: Google uses HTTPS as a ranking signal, giving a slight boost to secure websites.
Many hosting providers, including most of the popular ones, offer a free Let’s Encrypt SSL certificate. You can typically activate it with a single click from your hosting control panel.
You’re Hosted! Now, How Do You Build Your Website?
With your hosting set up and WordPress installed, you now have a blank canvas. The next step is to design and build the actual pages of your site. This is where you can bring your vision to life. While WordPress themes provide a starting point, they can be rigid and often require coding to customize.
This is where a website builder becomes an indispensable tool. It allows you to leverage the full power and freedom of your self-hosted WordPress site without being a developer.
Using Elementor to Design Your Site
Elementor is a visual, drag-and-drop page builder for WordPress that replaces the standard editor with a live frontend interface. You can create stunning, professional-looking websites visually and see the results in real-time.
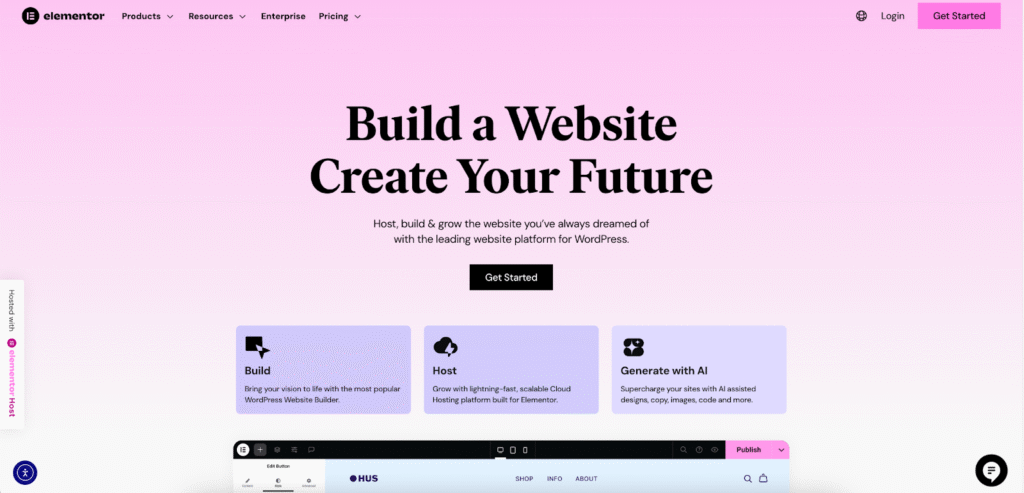
On your self-hosted WordPress site, you can install the Elementor plugin to take complete design control. This combination gives you the best of both worlds: the robust backend of WordPress and the intuitive design experience of a top-tier builder.
Key features that make this an ideal next step include:
- Live Drag-and-Drop Editor: Build and customize every part of your website without writing a single line of code. Just drag elements onto the page and style them.
- 100+ Widgets: Add everything from text and images to advanced features like sliders, forms, testimonials, and social media icons.
- Full Site & Theme Builder: Go beyond single pages. Design your website’s header, footer, blog post templates, and archive pages—all visually. This gives you full control over your site’s branding and layout.
- Professionally Designed Templates: Get a head start with hundreds of pre-designed templates for full pages or individual sections. Import a template, replace the content, and you’re ready to go.
- Responsive Editing: Easily preview and customize how your site looks on desktops, tablets, and mobile devices to ensure a perfect experience for every visitor.
- WooCommerce Builder: If you’re building an ecommerce store, you can design your product pages, shop archives, and the entire customer checkout experience to match your brand.
By using a tool like Elementor on your self-hosted site, you maintain full ownership and control while making the design process fast, efficient, and accessible. Other builders such as Beaver Builder or Divi exist, but Elementor’s extensive feature set provides a comprehensive solution for designing any type of website.
Don’t Forget Ongoing Website Maintenance
Launching your website is just the beginning. To keep it running smoothly and securely, you’ll need to perform regular maintenance.
- Backups: Regularly back up your website files and database. Many hosting providers offer automated backup services, but it’s wise to keep your own copies as well.
- Updates: Keep your software updated. This includes the WordPress core, any plugins you’ve installed, and your theme. Updates often contain crucial security patches.
- Security Scans: Use a security plugin to regularly scan your site for malware and vulnerabilities.
- Performance Monitoring: Periodically check your site’s loading speed and optimize images and other elements as needed.
A Look at the Costs of Hosting Your Own Website
The cost of hosting your own site can vary widely. Here’s a typical breakdown:
- Web Hosting:
- Shared Hosting: $3 – $15 per month.
- VPS Hosting: $20 – $80 per month.
- Dedicated Hosting: $80 – $300+ per month.
- Domain Name: $10 – $20 per year (often free for the first year).
- SSL Certificate: Often free with your hosting plan. Premium certificates can cost $50 – $200 per year.
- Premium Tools (Optional):
- Premium Themes: $50 – $100 (one-time).
- Premium Plugins (like Elementor Pro): $59 – $399 per year, depending on the plan.
For a new website, you can realistically expect to spend around $50 to $150 for the entire first year, including hosting, a free domain, and free tools.
Taking the Reins of Your Online Presence
Hosting your own website is an empowering step that gives you complete command over your digital identity. From choosing the right hosting plan to designing your pages, you have the freedom to create an online experience that is uniquely yours.
The process involves several key stages: selecting a provider, registering a domain, installing a CMS like WordPress, and then using powerful tools like Elementor to build a professional and functional site without needing to code. By following this guide, you can confidently navigate the setup process and lay a strong, scalable foundation for your online success.


