
You’ve probably had this happen: you land on a site to read something or check out a product, and a giant pop-up covers the whole screen before you’ve even seen the page. It’s annoying, and plenty of visitors just close the tab, or hit “Reject All” out of pure frustration. You want your visitors to feel safe and respected enough that opting in feels natural.
The good news? You don’t have to choose between a great experience and real privacy compliance. With the right design and the right tools, your consent banner can feel like part of your site instead of an interruption. Here’s how to get cookie consent UX right so your opt-in rates reflect genuine visitor trust.
Key Takeaways
- Native Tools Matter, a native tool like Cookie Consent keeps your site fast without complex third-party dashboards.
- Prioritize Brand Alignment, match colors, fonts, and layout so your banner looks native to your site.
- Avoid Dark Patterns, equal prominence for “Accept” and “Reject” builds trust and keeps you compliant.
- Implement Geo-Targeting, show banners only where legally required, keeping the screen clean for everyone else.
- Optimize for Mobile, use finger-friendly touch targets and non-intrusive placement on small screens.
1. Implement a Native WordPress Tool (Cookie Consent)
When you build a site with Elementor, you want your tools working together, not against each other. Many cookie banner tools push you into an external dashboard with heavy header scripts that slow page load. A native WordPress tool skips all that.
The native Cookie Consent capability built into Elementor runs entirely from your WordPress dashboard, no separate platform, no code snippets to copy. It handles GDPR and CCPA compliance without you ever leaving the admin area, keeping your site fast.
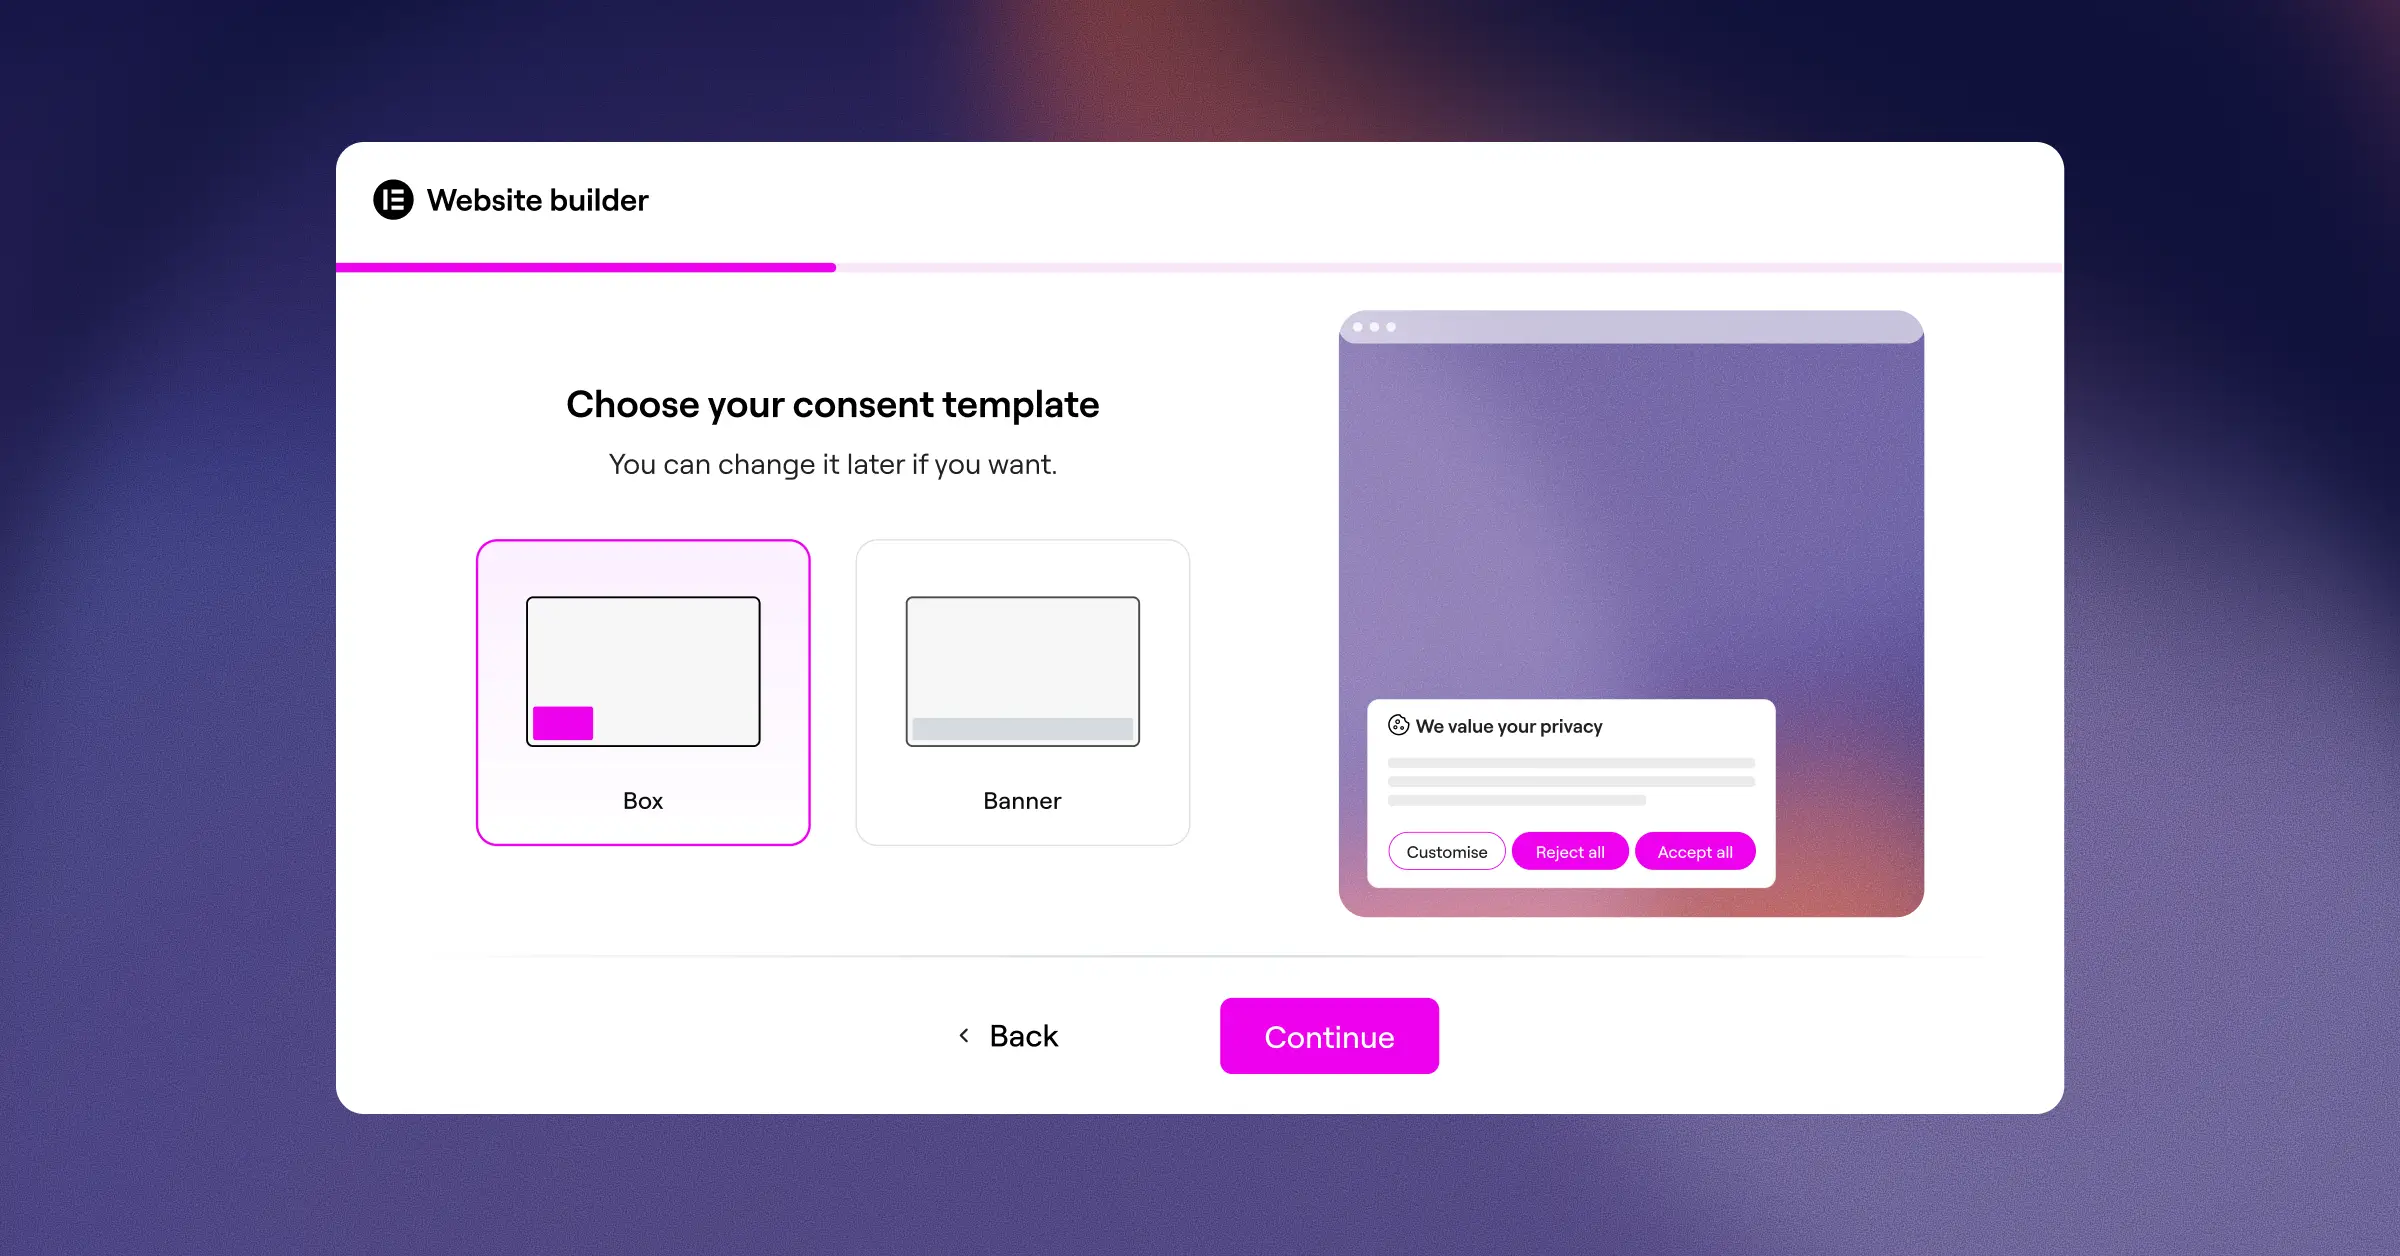
Here’s what this native capability does for your setup:
- Tracks user consent choices securely to maintain clear compliance logs.
- Builds confidence by loading instantly without causing visual shifts on your pages.
- Connects directly to Google Consent Mode v2 to keep your analytics accurate.
- Pulls in cloud-based templates that match your brand.
Setup takes under five minutes start to finish. Just follow these steps:
- Open your WordPress dashboard and find the Cookie Consent settings.
- Select a cloud-based template that matches your site’s structure.
- Run an automatic scan to categorize your cookies and scripts.
- Publish the banner to make your site instantly compliant.
Keeping everything native skips the lag external scripts cause, so visitors get a fast experience that makes them more willing to opt in.
2. Match Your Website Brand and Typography
Nothing says “untrustworthy” like a generic, gray pop-up lifted from a system alert. When a banner looks nothing like the rest of your site, visitors often assume it’s spam. Every element on your page, including compliance banners, should look like it belongs.
With the styling settings in Elementor, you can match your banner to your site’s global fonts, brand colors, and button styles, whatever look your brand already has.
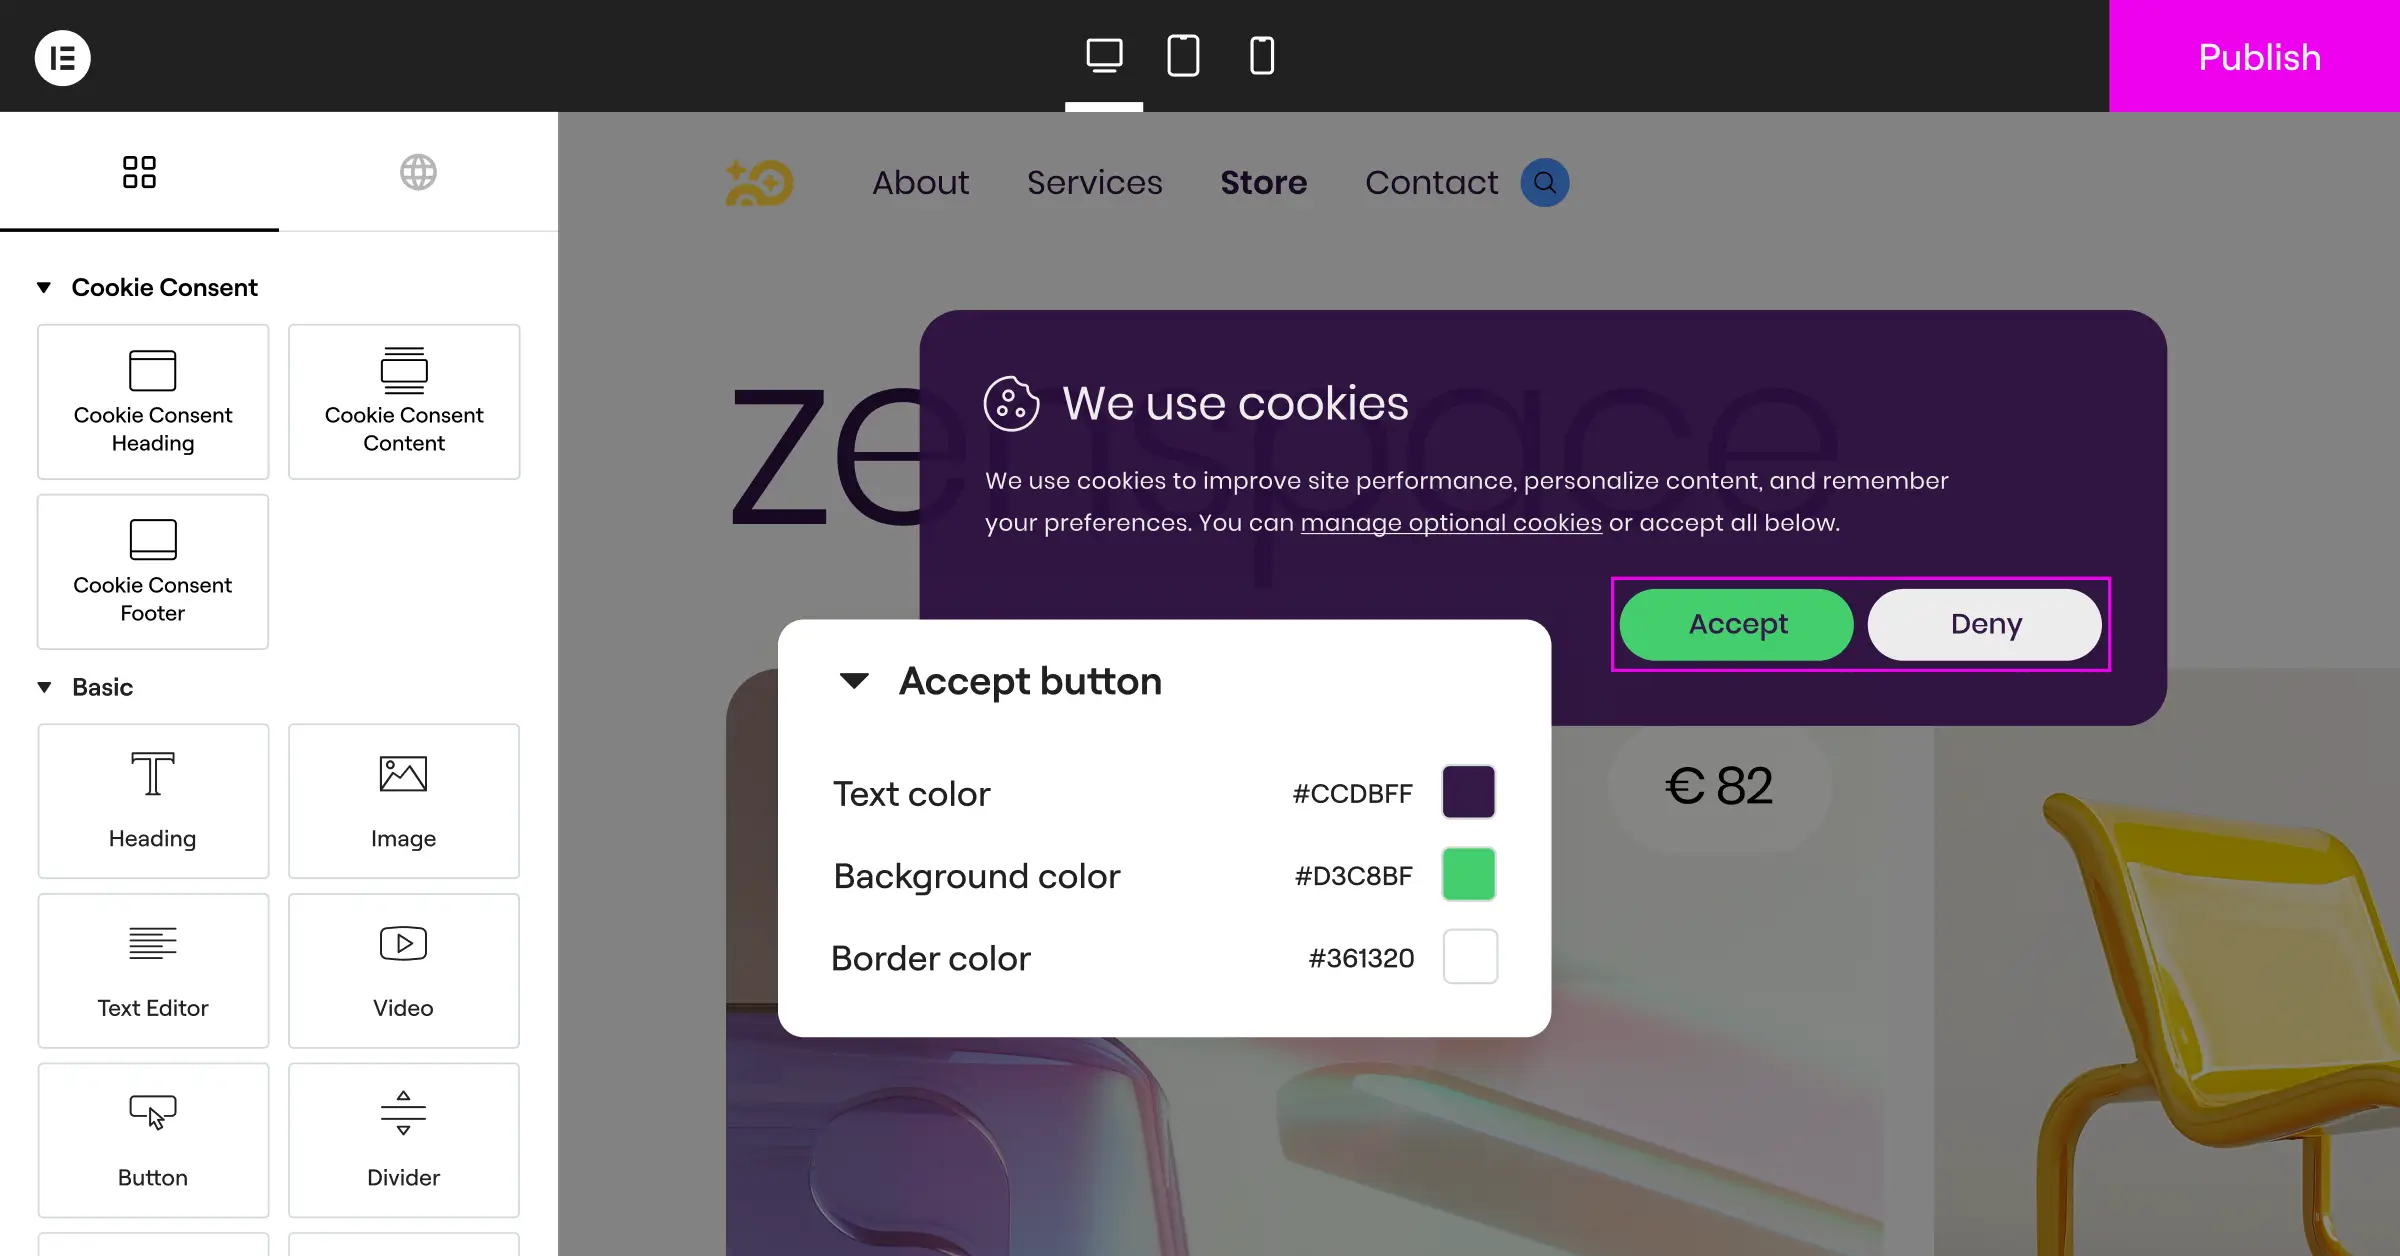
When you customize the banner, keep these design elements in mind:
- Typography, use your site’s primary global fonts so the message reads naturally.
- Color Contrast, keep text readable and buttons matched to your primary call-to-action colors.
- Border Radius, match the corner curves of your buttons and cards.
- Background Overlay, keep the background clear or only slightly dimmed so visitors don’t feel locked out.
Match your design language and you cut the friction of the consent request. Visitors feel like they’re dealing with a business they trust, not an outside barrier that showed up from nowhere.
3. Write Clear, Friendly, and Jargon-Free Copy
Privacy rules require you to explain what cookies you use, but that doesn’t mean being boring or technical. Dense jargon leaves visitors confused or defensive, and confusion is the enemy of consent. Clear, friendly language gets people to click “Accept” because they understand what they’re agreeing to.
Instead of “We use tracking pixels and third-party localized storage mechanisms to optimize telemetry data,” try: “We use cookies to remember your preferences and make our site work better for you.” That explains the benefit honestly, no legal-contract feel.
Here’s a quick reference for swapping jargon for plain language your visitors will actually understand:
| Avoid This Technical Jargon | Use This Clear, Friendly Alternative |
|---|---|
| Third-party telemetry data collection | Helping us understand how visitors use our site |
| Optimizing personalized marketing delivery | Showing you offers and products that match your interests |
| Using localized persistent browser storage | Saving your settings so you don’t have to log in every time |
| Managing script execution policies | Keeping our interactive features running smoothly |
Keep your copy short. A brief, honest explanation always beats a wall of tiny text, and visitors will be far more willing to grant permission.
4. Offer Equal Prominence to “Accept” and “Reject” Buttons
For years, plenty of sites used dark patterns: a bright “Accept” button next to a “Reject” option buried in a settings menu or shrunk to a tiny text link. In 2026, that’s not just frowned on, it’s illegal under privacy rules like the GDPR.
Real consent has to be freely given, specific, and easy to withdraw. Equal visual weight for “Accept All” and “Reject All” isn’t just ethical, it’s legally required. And here’s the thing: when visitors see you respect their right to say no, their trust in your brand goes up.
Design your buttons with the same size, shape, and legibility. Subtle color differences can guide the eye, but “Reject” needs to be just as easy to find. A solid “Accept” next to an outlined “Reject” of equal size looks balanced and compliant.
“Simplifying the user choice while maintaining full compliance is the ultimate goal of modern web design. A cookie banner should feel like a natural welcome mat, not a security checkpoint.” – Itamar Haim, Web Compliance Specialist
5. Implement Smart Geo-Targeting to Avoid Unnecessary Banners
Not every visitor needs a cookie banner. The EU (GDPR) and UK have strict opt-in rules, but other regions may have lighter rules or none at all. Showing a big banner to someone who doesn’t need it hurts conversions for no compliance benefit.
Smart geo-targeting solves this: the native Cookie Consent tool shows or hides banners based on visitor location, so everyone gets an experience suited to their region.
Here’s how geo-targeting helps you manage a global audience:
- EU and UK Visitors, see a fully compliant, opt-in banner with clear choice toggles.
- California Visitors, see a banner adapted for CCPA requirements, focused on the right to opt out.
- Unregulated Regions, browse with zero interruptions and a clean, fast experience.
This localized approach respects global privacy laws while keeping things smooth for everyone else.
6. Integrate with Google Consent Mode v2 and Global Privacy Control
Managing cookies is only half the job. Your analytics and marketing scripts need to actually respond to visitor choices. If someone rejects tracking but your Google Analytics script keeps collecting data anyway, you’re in violation of privacy law, a risk no site should take.
Your cookie consent tool needs to work with Google Consent Mode v2 and Global Privacy Control (GPC). Consent Mode v2 tells Google tags to adjust behavior based on each visitor’s status: if consent is denied, tags send anonymous pings instead of storing cookies, so you still gather aggregate data.
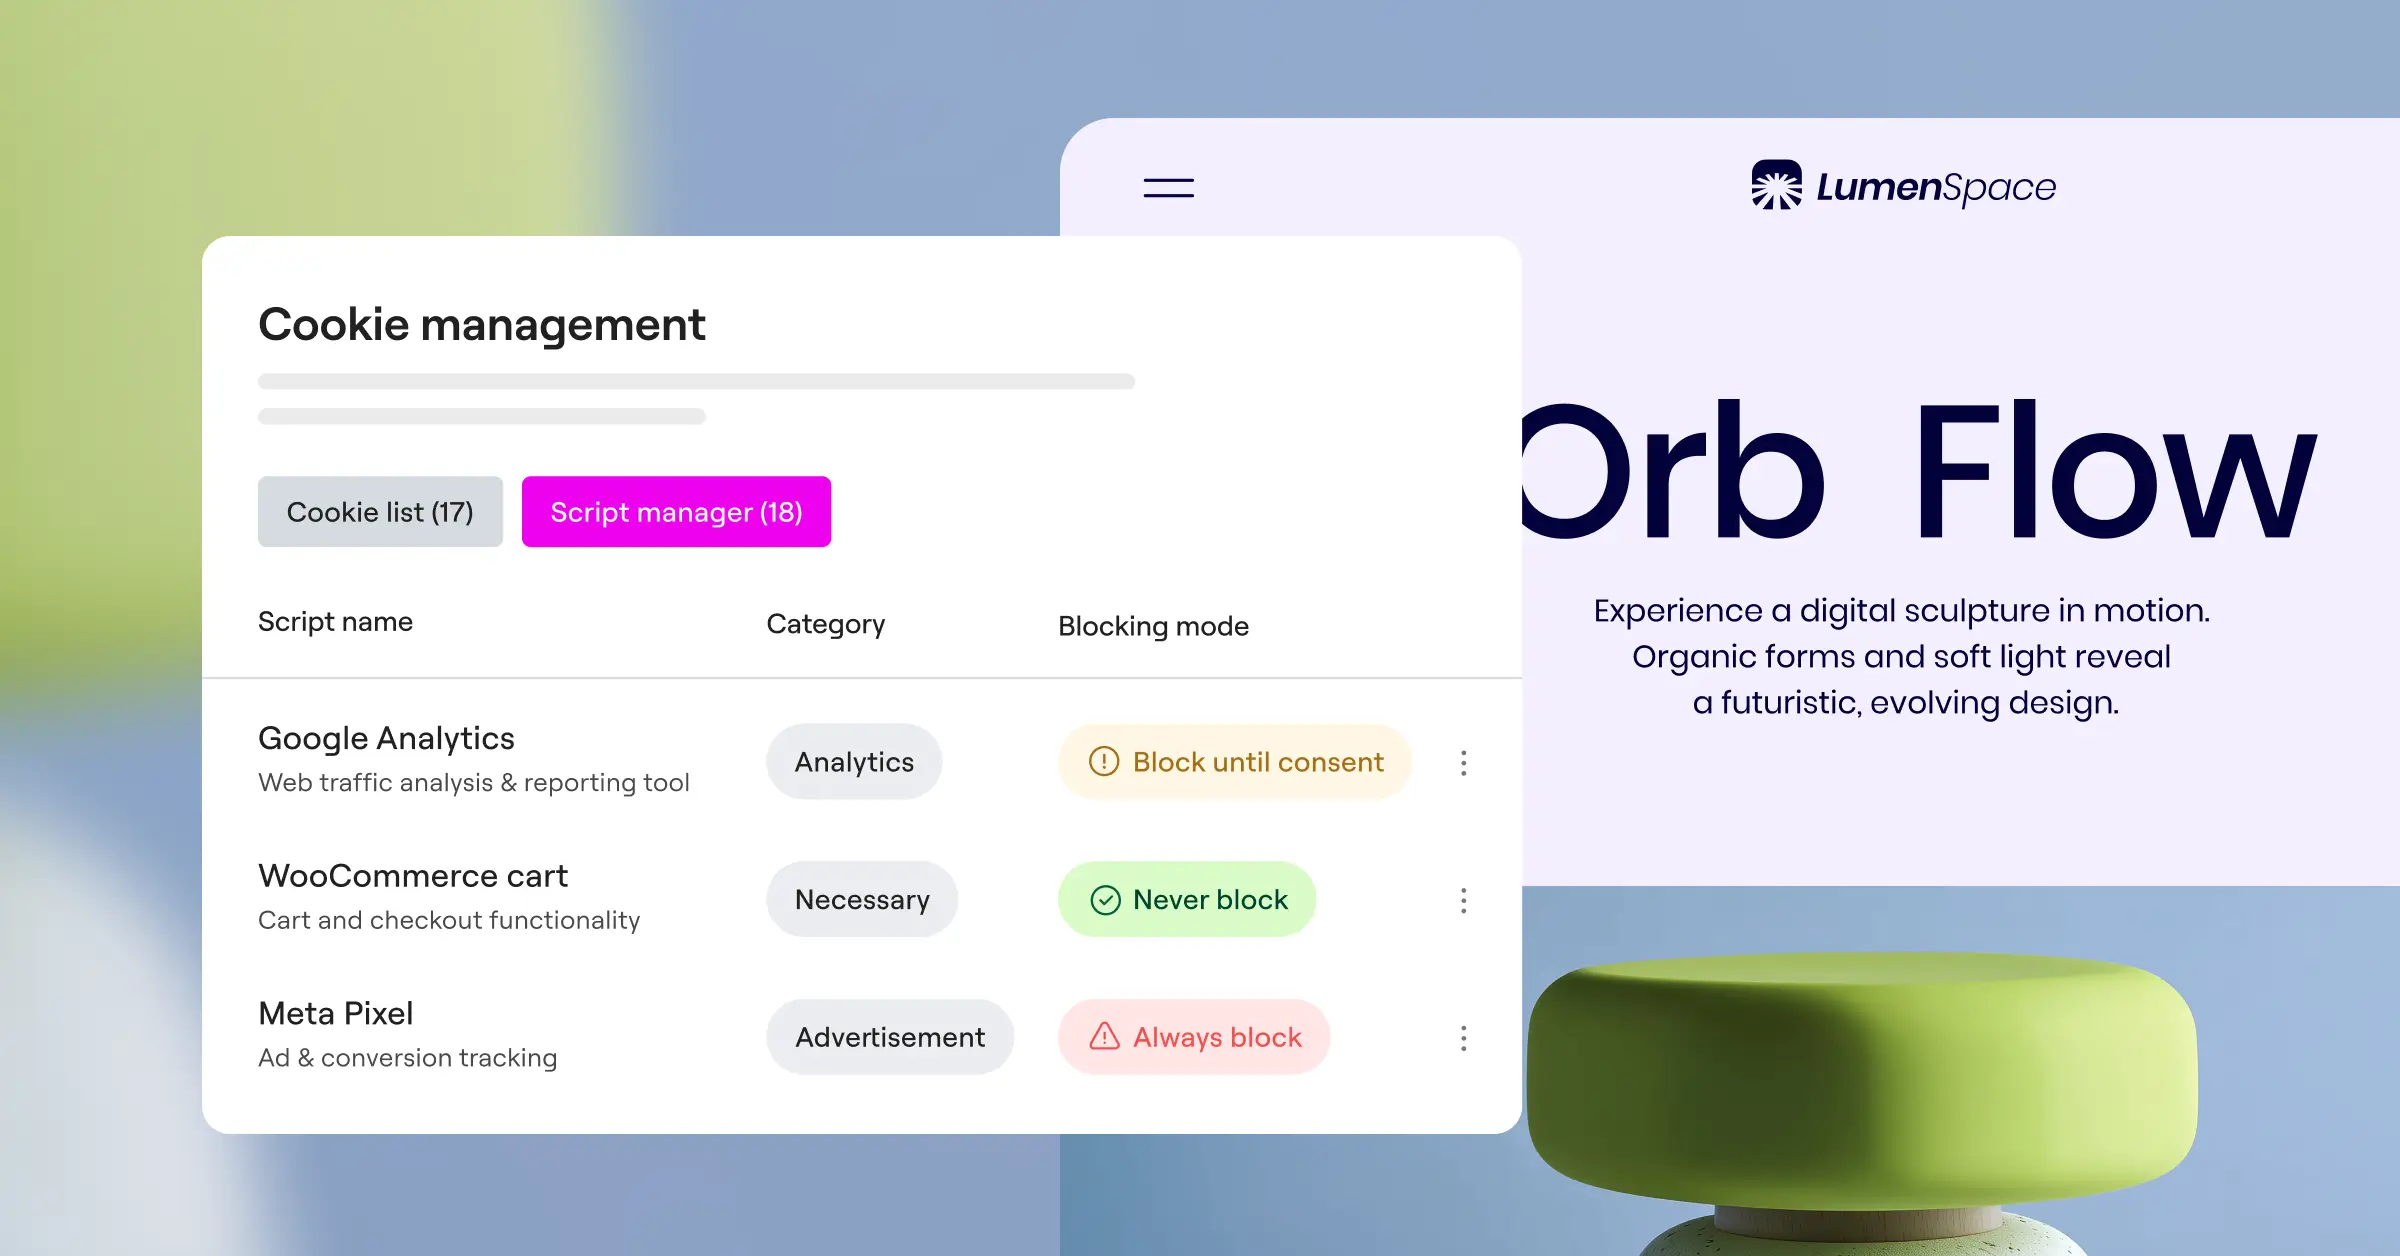
Supporting GPC means your site automatically respects the privacy settings visitors already set in their browser. When it detects a GPC signal, it opts the visitor out on its own, no banner interruption needed.
7. Optimize for Mobile Screens and Touch Targets
More than half of your traffic probably comes from mobile. But plenty of cookie banners are still designed with desktop in mind: tiny text, buttons that are hard to tap, panels that cover the whole screen. If a mobile visitor can’t easily dismiss your banner, they’ll leave.
Mobile-first design matters here. Your banner should be compact, legible, and easy to use on any screen size. These layout choices make the biggest difference:
- Touch Target Size, make sure all buttons are at least 48 pixels tall and wide so they’re easy to tap without mistakes.
- Vertical Button Layouts, stack your buttons vertically on mobile to give each option plenty of space.
- Strategic Screen Placement, put the banner at the bottom of the screen, where a thumb can reach it comfortably.
- Avoid Zoom Triggering, set text sizes to at least 16 pixels so mobile browsers don’t zoom in automatically.
Testing your layouts across a few devices is worth the effort. It’s the only real way to confirm your banner isn’t disrupting the mobile experience.
8. Provide an Always-Accessible Consent Re-entry Point
Consent isn’t a one-time decision. Someone who clicked “Accept All” in a hurry might want to revisit that choice. Someone who rejected cookies might later want to opt in for a map or interactive feature. If they can’t find a way to update their choice, frustration builds.
Keep a subtle, always-accessible re-entry point on your site: a small fingerprint icon in a corner, or a “Cookie Settings” link in your footer. Clicking it should bring the panel right back. (This one trips people up. It feels optional, but regulators increasingly expect it.)
When you set up this re-entry control, keep these guidelines in mind:
- Subtle but Clear, small enough not to block content, easy enough to find when someone’s looking for it.
- No Screen Blocking, don’t let the trigger icon float over key navigation elements or shopping cart buttons.
- Instant Loading, the consent panel should open right away on click, without reloading the page.
This transparency tells your visitors that you’re honest, cooperative, and genuinely committed to respecting their privacy choices.
9. Maximize Page Performance and Avoid Cumulative Layout Shift (CLS)
Page speed matters, for visitors and for search rankings. Many cookie tools rely on scripts that load late, which can trigger Cumulative Layout Shift (CLS): your page content jumps as the banner suddenly pops into place. A visitor goes to click a menu link and ends up tapping your banner instead.
Using the native Cookie Consent capability in Elementor avoids this entirely. Built directly into your WordPress framework, it loads in sync with your page layout, no abrupt visual shifts.
Here’s a practical checklist for keeping your consent system from hurting your Core Web Vitals:
- Use Native Code, avoid external scripts that block your site’s main thread while loading.
- Reserve Layout Space, make sure your theme designates an area for the banner so content doesn’t jump when it appears.
- Optimize Asset Loading, keep the banner design clean and skip large images inside your consent pop-ups.
When your pages load fast, visitors are less likely to bounce, and more likely to engage with your consent options too.
10. Maintain a Secure and Compliant Audit Trail (Consent Logs)
The last practice on this list is one visitors won’t see, but your compliance team will appreciate. To stay compliant with global privacy laws, you need a clear, chronological log of when and how visitors gave consent, proof your process was genuine if a regulator ever audits your site.
A good system handles this recording automatically in the background. The audit trail stores consent choices anonymously, so you can prove compliance without collecting extra personal data.
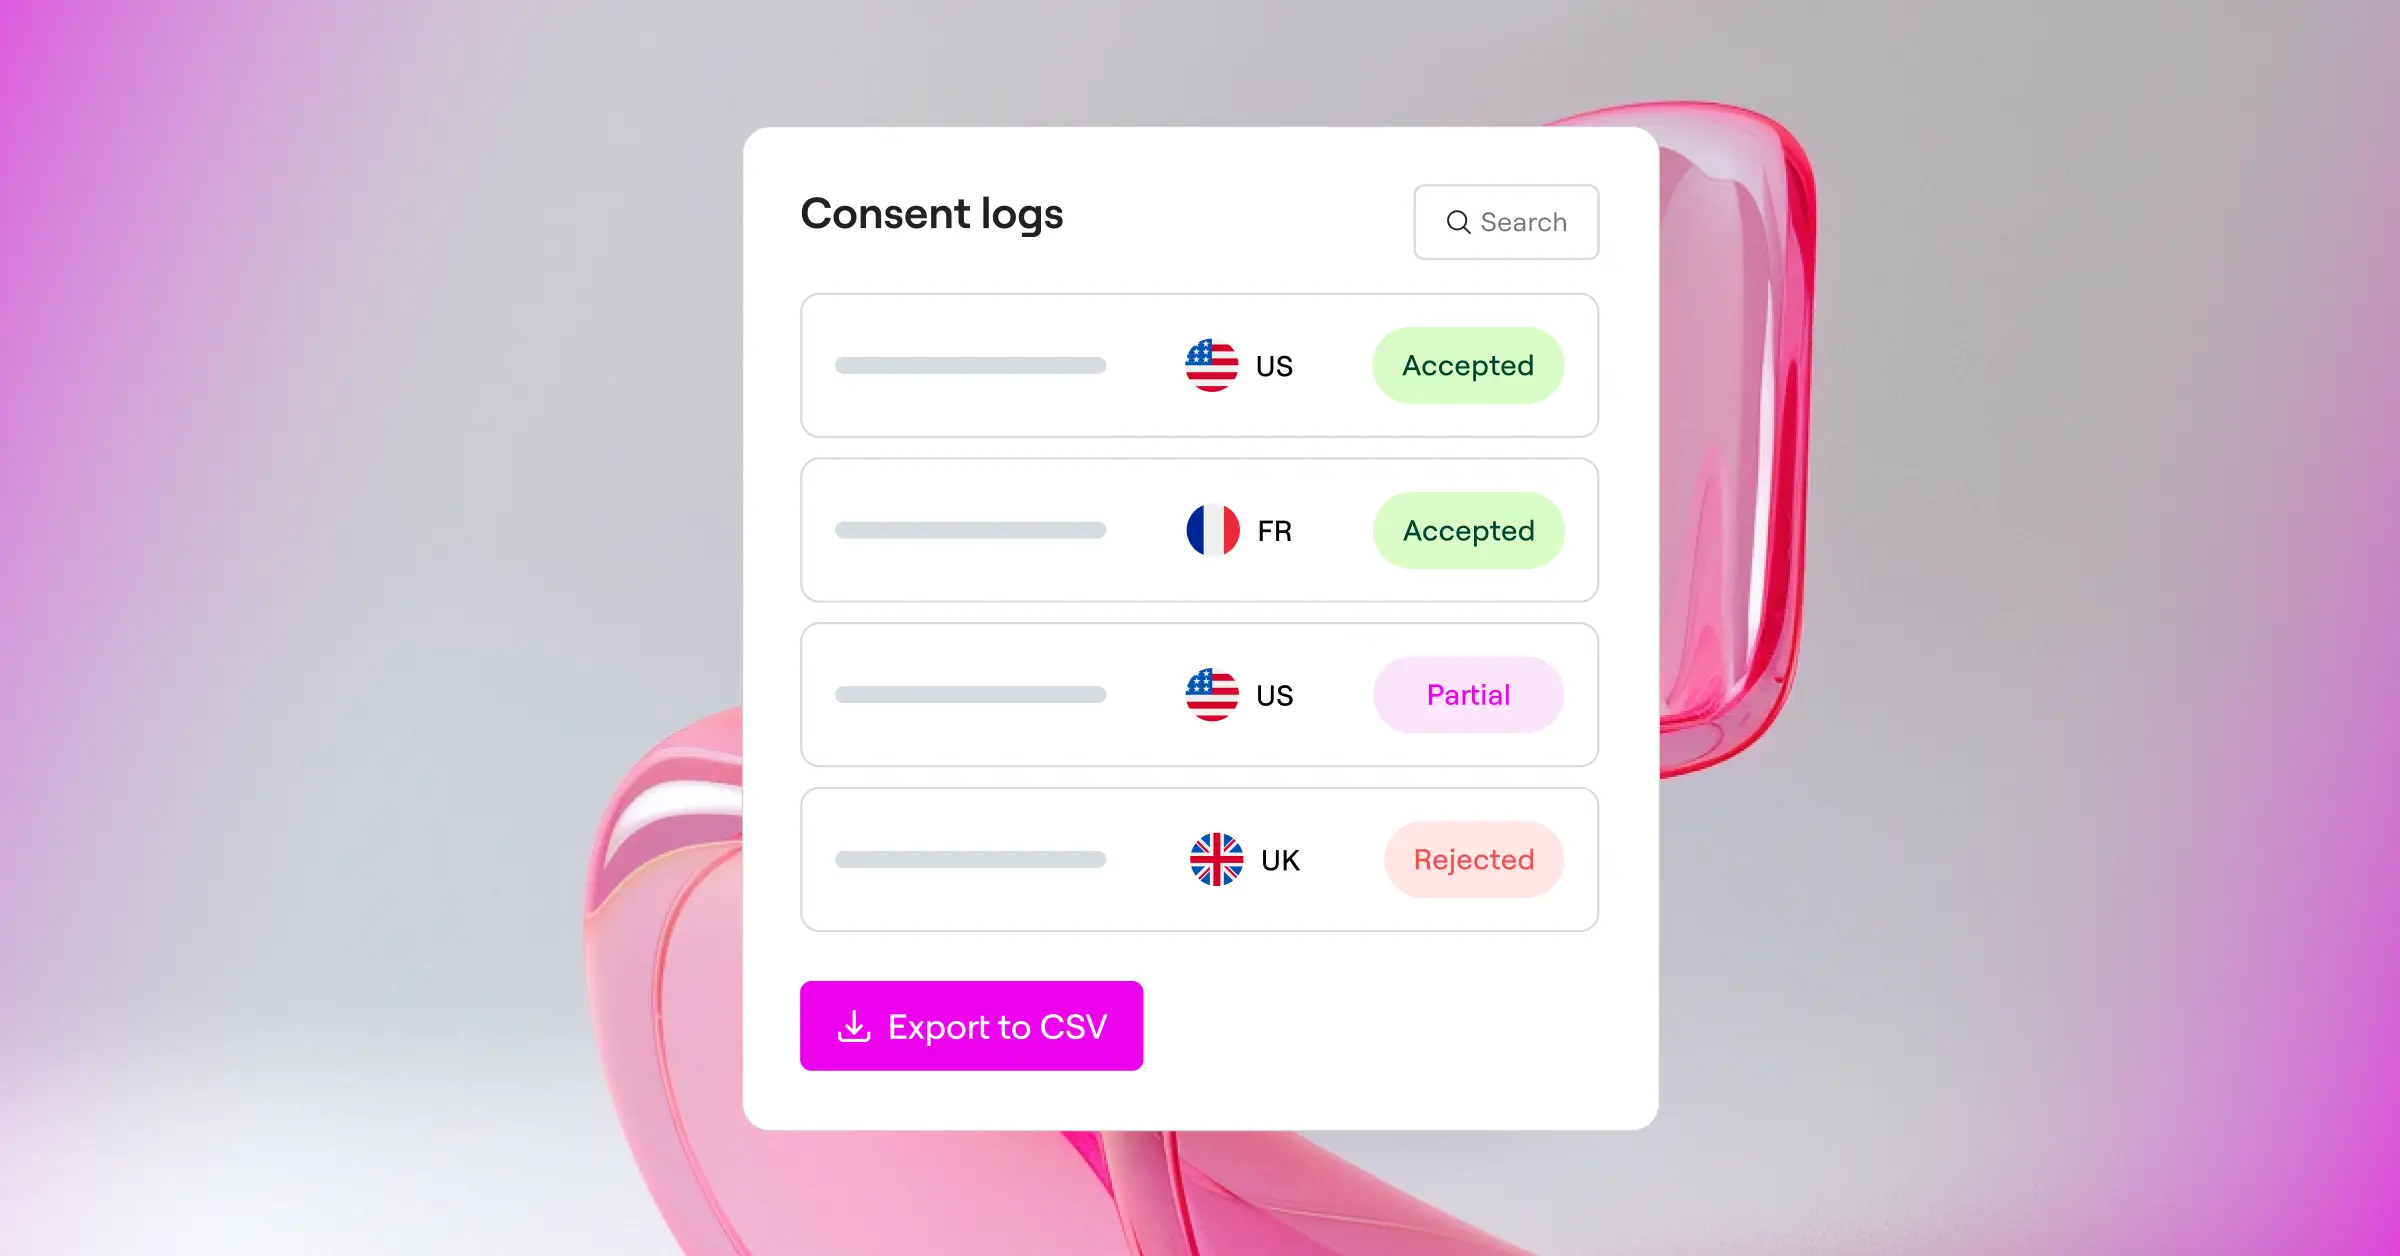
When you’re checking whether your consent logs are set up correctly, work through these steps:
- Verify that logs are saved in a secure, decentralized format.
- Confirm the logging system doesn’t slow down your server’s database requests.
- Check that consent logs capture the date, time, and specific consent settings each visitor selected.
With automated logging in place, you can focus on building great web experiences, knowing your compliance bases are covered.
How Do the Top Cookie Consent Tools Compare?
To help you choose the right solution, here’s how the leading consent tools stack up on what matters most for user experience and performance.
| Consent Tool Name | Dashboard Integration | Customization Experience | Page Speed Performance | Setup Difficulty |
|---|---|---|---|---|
| Cookie Consent (Elementor) | Native WordPress dashboard | Fully customizable in the visual editor | Excellent (no external script delays) | Very easy (under 5 minutes) |
| Cookiebot | External cloud platform | Basic template styling options | Moderate (requires external scripts) | Moderate (requires manual tag setup) |
| CookieYes | External cloud platform | Standard template styling | Moderate (external script reliance) | Moderate (dashboard configuration) |
| Complianz | WordPress dashboard | Good dashboard customization | Good (runs locally on your site) | Moderate (requires a wizard setup) |
| iubenda | External cloud platform | Highly detailed legal style control | Moderate (complex scripts) | Advanced (requires legal policy linking) |
| OneTrust | External enterprise dashboard | Advanced styling for enterprise sites | Slow (heavy enterprise scripts) | Advanced (requires dedicated training) |
Third-party platforms handle complex, enterprise setups well, but usually with longer setup times and script overhead. For most WordPress sites, a native option like Elementor’s Cookie Consent gives you the best balance of speed and convenience, without leaving your dashboard.
Frequently Asked Questions
What is Google Consent Mode v2?
Google Consent Mode v2 is a framework from Google that helps sites respect user privacy preferences in real time. It passes visitor consent choices to Google Analytics and Google Ads, so those tools run without tracking cookies when someone opts out.
How does a native cookie consent tool improve my site’s page speed?
Native tools build compliance features directly into your WordPress install. Skipping external servers for scripts or dashboards cuts DNS lookups and avoids blocking your site’s main thread, so pages load faster.
Can I use a free cookie consent tool?
Yes. Cookie Consent includes a free tier for basic consent banners, so you can protect your site without any upfront cost, and add advanced features later if you need them.
Why are dark patterns in cookie banners risky?
Dark patterns steer users toward a decision, like hiding “Reject” or making it much harder to find than “Accept.” Regulators actively enforce against these tactics and have issued real fines. Beyond the legal risk, they wear down the trust you’ve worked hard to build.
What is the difference between GDPR and CCPA consent rules?
The GDPR requires strict opt-in: you can’t run non-essential cookies until a visitor clicks “Accept.” The CCPA, protecting California residents, uses opt-out: you can run cookies right away, but must give visitors a clear way to opt out of data sale or sharing.
How do I let visitors change their consent preferences later?
Place a small icon on your site or add a “Cookie Settings” link to your footer. Clicking it brings back the consent panel so visitors can update their preferences anytime.
Is a native WordPress cookie consent tool better than a third-party script?
For most WordPress sites, yes. A native tool keeps setup fast, runs from your existing dashboard, matches your design out of the box, and skips the issues heavy third-party scripts often bring.
How does geo-targeting improve my site’s user experience?
Geo-targeting checks a visitor’s location and only shows a banner if their country requires one, keeping things clean where no banner is needed while staying compliant where it is.

