Free vs. Pro
What is the difference between Elementor and Elementor Pro?
Setup
How do I install Elementor?
- Go to the WordPress Dashboard
- Click Plugins > Add New
- In the Search field, enter Elementor and choose Elementor Website Builder.
- Press install
- After installation, click Activate.
How do I install Elementor Pro?
- Go to your account at my.elementor.com
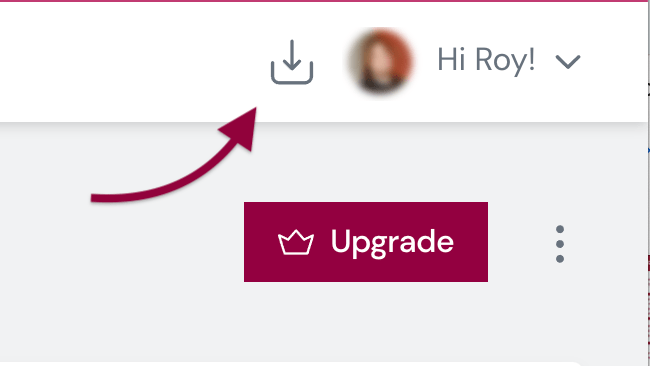
- Click the button in the image below to download a the file to your computer
- Go to the WordPress Dashboard
- Click Plugins > Add New
- Choose Upload Plugin and select the file from your computer
- Click the Install Now button

Why does it still say “Go Pro” when I already bought it?
This means Elementor Pro hasn’t downloaded automatically, or you need to reinstall it. To download Elementor Pro, please follow these steps:
- Go to Elementor account
- Login with the details you received in the email after purchase
- This will direct you to the My Account page. Click on the Download Plugin button in the upper right of the My Account section and download the file to your desktop
- Head to your website in the WordPress dashboard, and click on Plugins > Add New
- Choose the zip file you have just downloaded
- Click on Install and Activate
At the top of your website’s dashboard, you should get a message telling you to activate your license key.
Check out this article for more detailed instructions: How to Install Elementor
Licenses
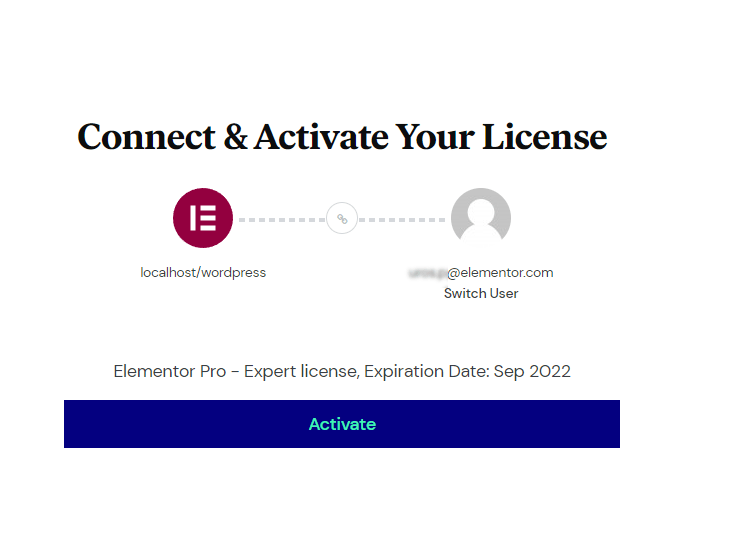
How do I connect and activate my license?

Why do I get the error "your license has exceeded the limitation" when trying to activate Elementor Pro on a new website?
- Go to your Elementor account
- Go to “Websites” and click the three dots above the site information and click “View related subscription“
- Click “Deactivate Website“
- Go to Elementor > License and click on the Disconnect button (if available). Then click on the Connect & Activate button.
- Log in using your Elementor account credentials.

How does Elementor Pro work on a multisite WordPress installation?
Elementor Pro works on multisite installations with Advanced (3 websites), Expert (25 websites), Studio (100 websites), or Agency packages (1,000 websites).
Each website under the multisite installation requires a license activation. Therefore, you will need to activate each website under the multisite manually.
Note: You have to accept the automatic updates via the main website when working with a multisite installation.
How can I work on the staging with my license?
Elementor licenses work on a per WordPress installation basis. Each WordPress installation requires a license, even if the website is a development site, sub-domain, sub-directory, etc.
There are some exceptions. Here you can find which staging/development websites won’t count towards your license activations. Keep in mind that the domain name must be in the exact same format. TLD (Top-level Domains) that are not considered as a license use:
*.dev (example.dev)
*.local (example.local)
*.staging (example.staging)
*.test (example.test)
*.example (example.example)
*.invalid (example.invalid)
Subdomains that are not considered as a license use:
dev.* (dev.example.com)
local.* (local.example.com)
test.* (test.example.com)
staging.* (staging.example.com)
If your staging domain name does not meet the above requirements, you will need an additional license (or upgrade to Plus/Expert) to activate it.
You can also remove the license from your main website, activate it on another website, and return it to the main website once the changes are complete.
How can I transfer my license to another website?
- Go to your Elementor account
- Go to Websites and click the three dots above the site information and click “View related subscription“
- Click “Deactivate Website“
- Go to Elementor > License and click on the Disconnect button (if available). Then click on the Connect & Activate button.
- Log in using your Elementor account credentials.
- Confirm the new website URL and click the Connect button.

Themes
What is a theme?
You can think of a theme being a base building block and an Elementor-made theme or template being the blocks you put on top of that.
When it comes to WordPress, a theme is technically a collection of files and templates that, when combined, provide certain functionalities and a distinct look to a website. They also allow you to control how you will present your website to the world. This means you get to customize and decide on the exact style of different website elements and sections – from entire pages down to something more specific like social icons or typography.
We usually recommend our own Hello theme since it’s pretty barebones and very easy to edit, letting you customize everything however you wish and add all the templates you need on top.
Here is a list of themes known to work best with Elementor: Which Themes Work Best with Elementor
Why do I need a theme to work with Elementor?
What is the difference between themes and templates?
The theme is a design “kit” for a WordPress website. It consists of pre-designed elements, such as header, footer, sidebars, menus, and other graphic elements.
Themes are tools that allow you to change the layout and design of your website. They customize the appearance of your website, including the layout, typography, color, and other design elements. Most importantly, to build a WordPress website, you must have a theme.
The difference between WordPress themes and WordPress templates is the number of pages each pertains to. Themes affect the design of your entire website, whereas templates affect the layout of a single page. Additionally, while you can only have one WordPress theme active on your website at a time, you can have multiple templates on your website or page.
What are the uses of different types of templates? (Theme builder Single, Single page, Single Post, etc.)
Each template has a specific but different use on the website. Some examples include:
- Single post templates design the structure of each post shown in the post archive
- Single page templates design the structure of each page on the website
- Single product templates design the structure of every product page on the online store
How do I access and connect the Template Library?
 Below are the steps to add a template:
- Inside the page where you want to add the template, click the Add Template From Library icon to add a Page template, Block, or your own Saved template from the editing screen.
- Click the magnifying glass icon to preview a template
- Click Insert to select the required template
- Give your favorite templates a heart and save them to My Favorites
Pages
How do I set the page I just created as my homepage?
To set the home page:
- Click on Settings on your Elementor account dashboard
- Set your homepage displays to a static page
- Select the static page you created as the Homepage
- Select the placeholder blog page as the Posts page
Click Save
Can I set up a landing page as a homepage?
Yes, by doing the following:
- Save your Elementor landing page as a template
- Create a new WordPress page and publish it after creating the title of the page
- Edit the newly created page with the Edit with Elementor option
- Import the saved template by clicking the middle folder button on the first element. Or, choose your Elementor landing page template from the template library
- Click Publish
Go to your WordPress dashboard, click on Settings > Reading > Your homepage displays: A static page (select below) > Homepage: Your page name
What’s the difference between a general page and a landing page?
Why can’t I edit my blog page?
To troubleshoot this issue, follow these instructions:
Make sure that you are creating an Archive Template through the Theme Builder. Then, when you wish to edit the page again, go through the Theme Builder > Templates > Edit With Elementor.
If this doesn’t work, deactivate all plugins apart from Elementor and Elementor Pro. If this helps, reactivate them one after another to find the culprit.
If deactivating plugins doesn’t work, switch your theme temporarily to another existing theme and see if that helps.
How do I set up a design system through site settings?
From any Elementor page or post, click the hamburger menu in the upper left corner of the Widget Panel. From there, click on Global Style > Global Settings > Colors & Typography.
Edit Color: Click the color swatch to select a new color for any existing color. The names can also be changed by clicking the color’s name and adding your chosen name. For example, you could change Primary to Main, Accent to Highlight, etc.
Add Color: Click Add Color button to add a new global or inline custom color.
Delete Color: Hover over the color swatch and click the trash can icon.
Edit Global Font Style: Click the pencil icon to select typography options for any existing text style. The Style Names can also be changed simply by clicking on them. For example, you could change Primary to Main, Accent to Highlight, etc.
Add Global Font Style: Click the Add Style button to add a new custom text style.
Delete Global Font Style: Hover over the pencil icon for the text style and click the trash can icon that appears.
Support
How do I submit a support ticket?
- Log into My Elementor
- Go to the Support tab
- Select Find a Solution on the Support Center. This will open a new tab
- Type a few words to describe your issue
- Scroll down and click Contact Support
- Choose the category, and fill in the summary and message, if applicable
