Build your first page in Elementor
Introduction
After you’ve set up your site, one of the first things you’ll want to do is build your first page. Even if you chose to start with a kit, this is a great way to understand the editor, which will help you customize your kit. Before starting, you’ll need to create a new page.
You should also familiarize yourself with the layout of the Elementor Editor if you haven’t already.
Building blocks
Pages in Elementor are built using three primary building blocks:
- Sections: the largest building blocks, which house the content inside columns.
- Columns: sit inside of Sections and house Widgets.
- Widgets: are placed inside Columns and are functional site components.
Let’s start building
Now it’s time to get your hands “dirty” – so we’ll start by building what’s called a “Hero section”. Hero sections are big prominent elements, usually found at the top of the page. They’re designed to attract visitors and keep them on your site.
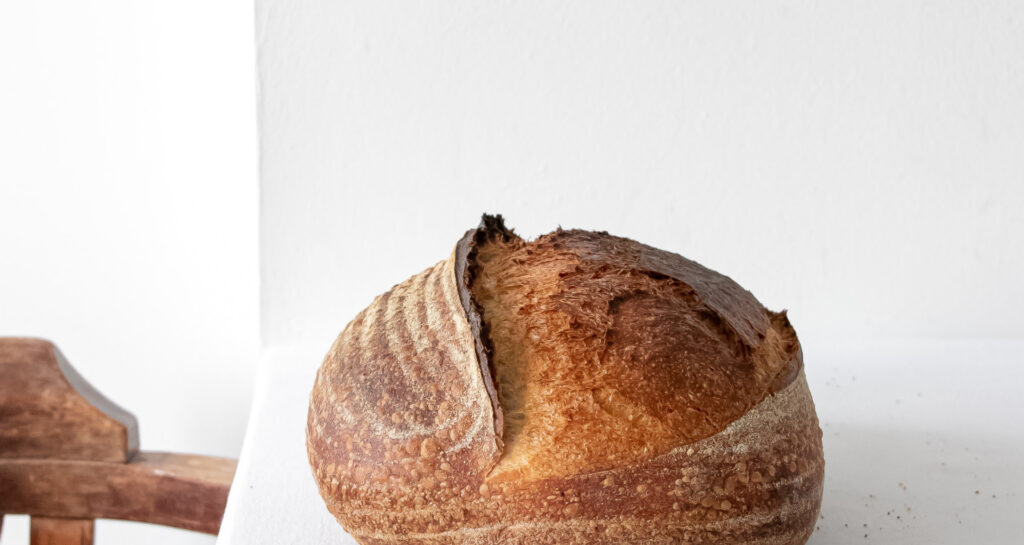
A good hero section starts with a great image, video or slideshow. In this case we’ll start with a photo. Right-click on the image below and save it to your desktop, we’ll be putting it on your site soon.
Creating the section
Now let’s create the section you’re going to hero up.
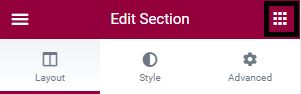
1. Click the icon to create a section. (Clicking the folder icon would start the process of importing a template, but we’re going to build this section from scratch).
2. Select the Column structure. In this case, choose one column.
Okay, now it’s time to shine. Let’s add the image to your Hero section. There are several ways to add an image to a section but, in this case, we’ll add the image as a background to the section. This way we’ll make sure the image fills up the entire section.
When you created the new section, The panel on the left side of the screen should have turned into an Edit Section panel.
If it didn’t, click the dot icon in the blue tab above the section.
We want this section to take up the entire screen, so let’s use the dropdown menus to change the width to Full Width and set the height to a minimum of 91 VH (Learn more about why measuring in VH or VW is better than measuring in pixels).

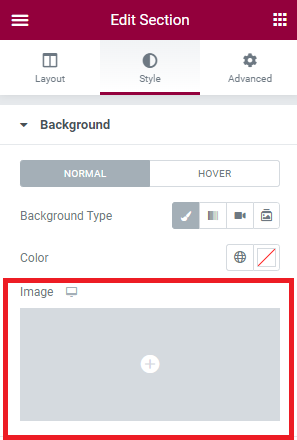
Now it’s time to add the background image. For sections and columns, the background image can be found in the Style tab.
Select the Style tab and choose the Classic background type.
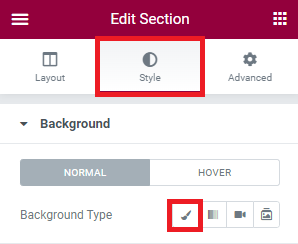
Once you’ve done that, you’ll be able to add an image by clicking the image icon.
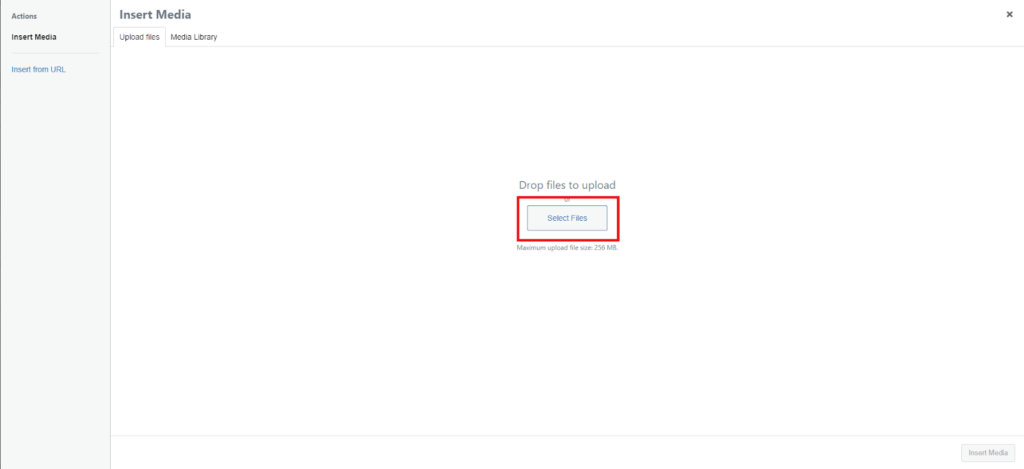
This will open your media library. In WordPress, best practice is to add media through the media library so that’s what we’ll do.
To add the image you downloaded to your media library click Upload Files.
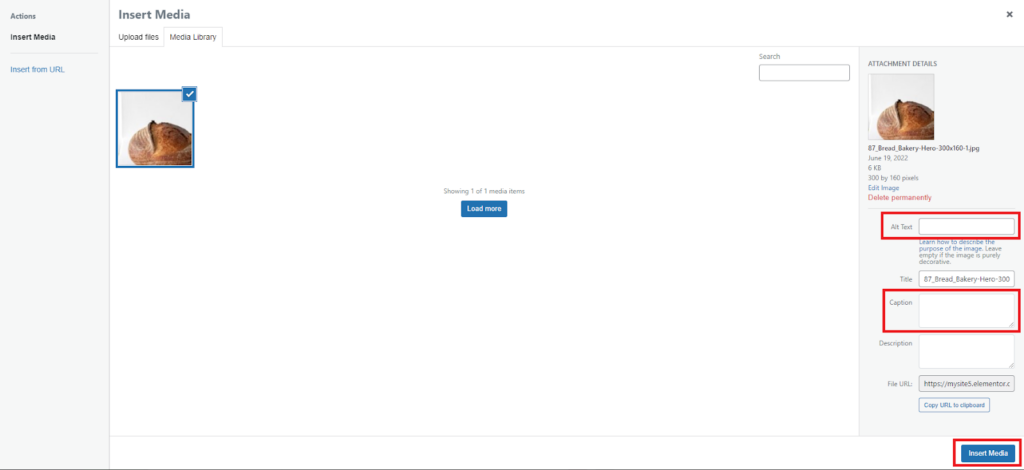
Navigate to the file you selected and click Open. This will add the image to your media library. Although it’s optional, best practice is to add Alt Text and a caption. This will help your SEO and make your site more accessible. Then click Insert Media.
Probably doesn’t look too heroic yet does it? Let’s fix that.
Change the Position of the background image to position it at the top center, set Repeat to No-repeat and the Size to Cover. Now one big image will cover the entire section.

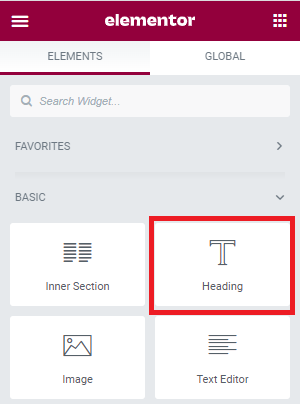
Now let’s add a heading to complete our hero section. Click the widget icon so that you can select a widget.
Drag and drop the Heading widget into the section.
Let’s give our hero section a proper title. Type “The Art of Baking” in the Title box and change the alignment so the text is centered.
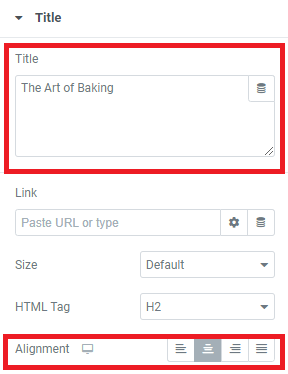
Now one final step. We want this text to appear at the top of the section, not in the middle. And here we’ll look at one of the trickier concepts in Elementor – negative margins. We’re going to move the text up, by lowering the margin between the heading widget and the top of the section.
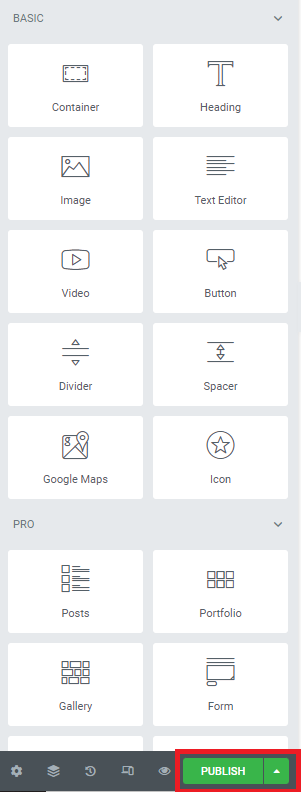
In Elementor, margins are controlled through the Advanced tab. So click the Advanced tab. By default the margins are linked, so that they are all the same. We’ll have to unlink the margins and then change the Top margin to -300.

That’s more like it.
Click Publish to save your page.
The bottom line
Of course we’ve only just scratched the surface of what you can do with Elementor. Next, you can create more sections below the hero to finish up your page. Or you can try applying a website kit to your site and customizing it for your needs. You can also apply a kit just to examine it and see how experts use Elementor. If you prefer to work from scratch, you can learn more about creating an entire site structure with the Theme Builder.
To get the most out of Elementor, head over to the Elementor Academy for more learning resources. If you have any issues or need help, please contact our Support Center.

