Table of Contents
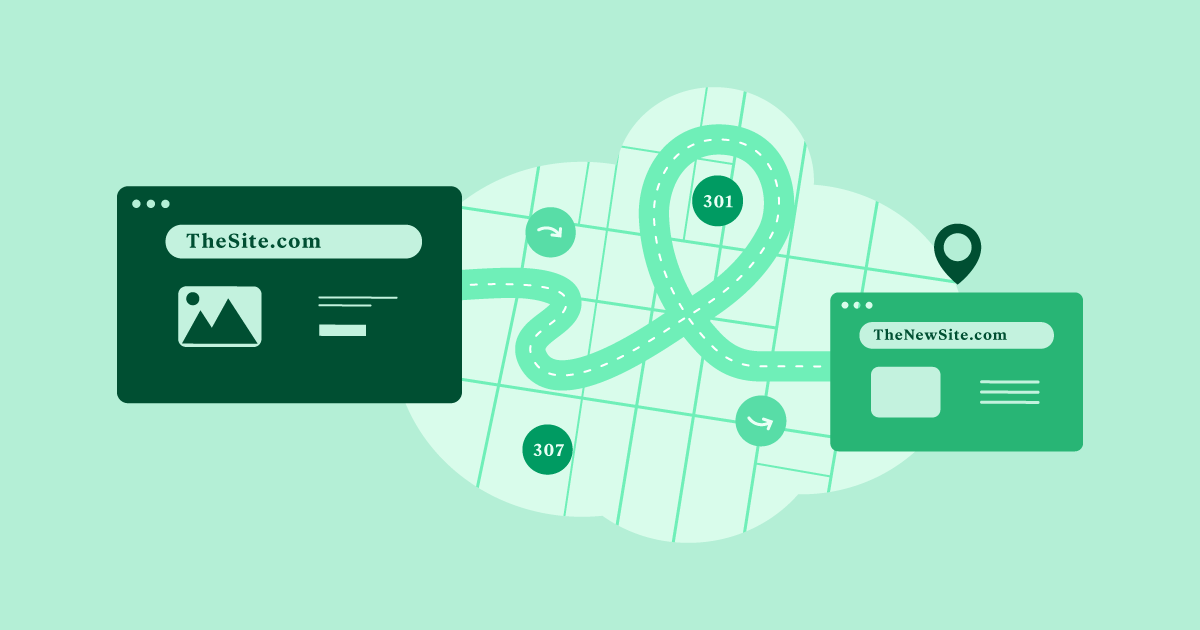
In the dynamic world of web development, the ability to redirect users seamlessly from one URL to another is a crucial skill. Redirects play a vital role in maintaining a user-friendly website, preserving search engine rankings during updates, and even streamlining marketing campaigns. If you’re a WordPress user and looking to master the art of redirects, understanding PHP redirects and various implementation methods is essential.
PHP, the core scripting language of WordPress, gives you direct control over how your website routes visitors. While several solutions exist for managing redirects, choosing the right approach depends on your website’s scale, your technical expertise, and your desired level of customization.
Understanding the Basics of PHP Redirects
Types of Redirects
When a user’s browser requests a URL that has a redirect, the server sends back a special HTTP status code that tells the browser to go to a different location. Here are the most common types of redirects you’ll encounter:
301 (Permanent Redirect)
The gold standard for when a page or resource has been permanently moved to a new address. This redirect signals to search engines to update their indexes, ensuring your SEO value transfers smoothly to the new location. Use case: Website restructuring, domain name changes.
How to Implement a 301 Redirect in PHP
Using the header() function:
<?php header("HTTP/1.1 301 Moved Permanently"); header("Location: http://www.example.com/new-page-url"); exit(); ?>Explanation:
header("HTTP/1.1 301 Moved Permanently"): Tells the browser and search engines that the move is permanent.header("Location: http://www.example.com/new-page-url"): Specifies the new address where the user should be redirected.exit(): It’s crucial to stop script execution immediately after sending the headers to prevent any other content from being outputted.
Place this code at the very top of your old PHP file. Any output before the headers will prevent the redirect from working correctly.
302 (Temporary Redirect)
Indicates that a page or resource is temporarily unavailable at its current location. Search engines won’t fully de-index the original URL in this case. Use case: Website maintenance, short-term content changes.
Using the header() function:
<?php header("Location: https://www.example.com/", true, 302); exit; ?>Explanation:
header("Location: https://www.example.com/"): This sends the “Location” header, instructing the browser where to redirect the user. Replacehttps://www.example.com/with the actual target URL.true: The second parameter (optional) replaces any previous “Location” headers, preventing conflicts.302: This explicitly specifies the HTTP status code as 302, indicating a temporary redirect.exit;: This is crucial. It stops script execution immediately, ensuring no other content is accidentally sent to the browser, potentially corrupting the redirect.
302 vs. 301:
- 302 (Temporary): Used for maintenance, temporary moves, etc. Search engines won’t heavily index the redirected location.
- 301 (Permanent): Used when content has been permanently relocated. Search engines will update their indexes to favor the new URL.
307 (Temporary Redirect)
The HTTP 307 Temporary Redirect status code indicates that a resource has been temporarily moved to a different location. Importantly, unlike a 302 redirect, a 307 redirect instructs the browser or user agent that it must reuse the same HTTP method (GET, POST, etc.) it originally used when accessing the new location.
Here’s the core PHP code to perform a 307 Temporary Redirect:
<?php header("Location: http://www.example.com/new-location", true, 307); exit; ?>Explanation
- header() function: The
header()function in PHP is essential for sending raw HTTP headers to the browser. - Location: This part of the header specifies the new URL (e.g., http://www.example.com/new-location ) where the redirection should lead.
- Status Code: The second parameter
truereplaces any existing status code with a new one. In this case, we set the status code to307. - exit: It’s crucial to include
exit;immediately after sending the redirect header. This prevents further script execution and ensures the redirect takes place without any unintended actions.
The Mechanics of PHP Redirects
At their core, PHP redirects involve using PHP code to modify the HTTP headers that your web server sends to the user’s browser. Here’s the central cast of characters:
The header() function
This versatile function allows you to send raw HTTP headers. The crucial header for redirects is Location:
die() or exit()
These are crucial companions to the header() function! They immediately stop the execution of your PHP script after sending the redirect header, preventing any further content from being sent that could interfere with the redirect.
Relative vs. Absolute URLs
- Relative URLs are specified relative to the current page’s location (e.g., /new-page). They’re handy within the same website.
- Absolute URLs include the full domain name (e.g., https://www.example.com/new-page). These are necessary when redirecting to external websites or different subdomains within your site.
A Simple Example
Let’s illustrate with a basic example of redirecting an old blog post to its new location:
<?php

header('Location: https://www.yourwebsite.com/updated-blog-post/');

exit();

?>
Security Considerations
While PHP redirects are a powerful tool, it’s vital to be mindful of security:
- Prevent Open Redirects: An open redirect occurs when user input can manipulate the redirect’s target. Malicious actors could exploit this vulnerability. Always validate and sanitize any data used to determine redirect destinations dynamically.
- Follow Best Practices: Ensure your Hosting environment is up-to-date with security patches, as outdated software can have vulnerabilities that could be targeted in conjunction with redirect mechanisms.
Implementing PHP Redirects
Manual Redirects with the header() Function
Directly modifying PHP files gives you the most granular control over your redirects. This method is ideal when you need to handle a few specific redirects or require advanced customization. Here’s where you can typically add your PHP redirect code:
- Theme Files (e.g., functions.php file): Be cautious, as updates to your theme could overwrite modifications. If extensive changes are made, create a child theme.
- Custom Plugins: A more organized approach if you have numerous redirects, especially those with complex logic.
- Page/Post Templates: If you need redirects only on certain pages, you can embed the code directly within the relevant template file in your theme.
Example Scenarios
Let’s look at some common use cases for manual PHP redirects within a WordPress context:
Redirecting a Single Post or Page:
<?php

header('Location: https://www.yourwebsite.com/new-page-location/');

exit();

?>
Redirecting an Entire Category or Tag Archive
<?php

if (is_category('old-category')) {

   header('Location: https://www.yourwebsite.com/new-category/', true, 301);

   exit();

}

?>
Always replace placeholders like https://www.yourwebsite.com/… with your actual target URLs.
Redirects in WordPress with .htaccess
The .htaccess file, typically located in the root directory of your WordPress website, allows you to set various server-level rules, including redirects. Here’s why it can be a good choice:
- No Direct PHP Editing: If you’re less comfortable modifying theme files, .htaccess redirects can be a beginner-friendly option.
- Certain Redirect Types: Some redirect patterns are more easily expressed using the .htaccess syntax.
Basic .htaccess Redirect Syntax
The core structure of a .htaccess redirect looks like this:
Redirect [status code] [old URL] [new URL]
Example: To redirect an old blog post permanently:
Redirect 301 /old-blog-post/ https://www.yourwebsite.com/new-blog-post/ Considerations for Elementor
- Potential Conflicts: While rare, overly complex .htaccess rules could sometimes interfere with how WordPress dynamically routes requests. Always thoroughly test any changes you make.
- Caching: many WordPress plugins use caching mechanisms that might interact with .htaccess redirects. Be sure to clear any relevant caches after making updates to ensure your redirects work as intended.
WordPress Plugins for Redirections
When you need to manage numerous redirects, want advanced features, or prefer a more user-friendly interface, dedicated redirect plugins are your best bet. Here’s an overview of popular choices:
- Redirection: A widely used, versatile plugin with a straightforward interface. It handles basic and complex redirects, tracks 404 errors, and offers conditional logic.
- Rank Math SEO: Many WordPress users have already leveraged Rank Math for their SEO needs. It includes a built-in redirect manager alongside its other features.
- Yoast SEO: Another popular SEO plugin that also provides redirect functionality.
Advantages of Using Plugins
- Ease of Use: Plugins typically provide intuitive dashboards and visual tools for creating and managing redirects without needing to write code.
- Advanced Features: Plugins often include conditional redirects (e.g., based on device, browser, or referrer), import/export functionality, and detailed 404 error logging.
- Compatibility: Reputable plugins are rigorously tested to work seamlessly with Elementor and other popular WordPress plugins.
Even with plugins, it’s crucial to follow best practices. Avoid having too many redirect plugins active simultaneously, as this could impact website performance.
Advanced Redirect Techniques
Conditional Redirects
Sometimes, you need more precision than simply redirecting everyone who visits a particular URL. Conditional redirects let you target users based on factors like:
- Device Type: Send mobile users to optimized pages or create device-specific experiences with redirects.
- Geolocation: Redirect users from specific countries or regions to localized content or adhere to regional regulations.
- Referrer: If a user arrives from a particular website, you might redirect them to a welcome page or special offer.
Implementing Conditional Redirects
You can implement conditional redirects using either PHP code or specialized redirect plugins:
PHP Code Example (Device-Based Redirect)
<?php

$user_agent = $_SERVER['HTTP_USER_AGENT'];

if (preg_match('/(android|bb\d+|meego).+mobile|avantgo|bada\/|blackberry|blazer|compal|elaine|fennec|hiptop|iemobile|ip(hone|od)|iris|kindle|lge |maemo|midp|mmp|mobile.+firefox|netfront|opera m(ob|in)i|palm( os)?|phone|p(ixi|re)\/|plucker|pocket|psp|series(4|6)0|symbian|treo|up\.(browser|link)|vodafone|wap|windows ce|xda|xiino/i', $user_agent)) {

    header('Location: https://www.yourwebsite.com/mobile-version/', true, 302);

    exit();

}

?>
Plugins
Plugins like Redirection offer user-friendly interfaces to set up conditional redirects based on various criteria.
Exercise caution with conditional redirects for SEO purposes. Ensure search engines can still access the original content if needed.
Timed Redirects
Do you want a redirect to be active only for a specific period? Timed redirects are your solution! Use cases include:
- Temporary “Coming Soon” Pages: Redirect visitors while a page is under development.
- Countdown Pages for Promotions: Build anticipation with a countdown that redirects users after a set time.
While achievable with PHP, this is generally better handled by JavaScript or specialized plugins.
JavaScript Redirects and Meta Refresh
- JavaScript Redirects: JavaScript’s window.location.href function allows you to redirect users on the client side (within their browser).
- Meta Refresh: The <meta> tag with the http-equiv=”refresh” attribute instructs the browser to redirect after a specified time.
When to Consider Them (Cautiously)
JavaScript and Meta Refresh redirects are generally less preferred options compared to PHP or .htaccess redirects. Here’s why:
- SEO Concerns: Search engines may only sometimes reliably follow these redirects or pass the same SEO value.
- User Experience: They can be slower, especially if a user has JavaScript disabled in their browser.
- Control: They offer less granular control over HTTP status codes compared to server-side methods.
Limited Use Cases
There are a few scenarios where they might be necessary:
- Delayed Redirects on Specific Actions: If you want to redirect a user after completing a form submission or an interaction on your webpage, JavaScript could be an option.
- Error Handling: You could use Meta Refresh as a fallback if server-side redirects fail for some reason.
Important: If you use JavaScript redirects, always provide a standard link as a backup for users who might have JavaScript disabled. Be aware of potential SEO impacts.
Redirecting on Custom Templates
If you’ve created custom templates for specific pages or posts in WordPress, you can embed PHP redirect code directly within the template file:
<?php

// Add your redirect logic here, using if/else statements for conditional redirects if needed

if ( is_page( 'old-page' ) ) {

  header('Location: https://www.yourwebsite.com/new-page/', true, 301);

  exit();

}

?>
Redirects for 404 Pages
Customizing your WordPress 404 page presents an opportunity to redirect users strategically:
<?php

if ( is_404() ) {

  // Consider redirecting to related content or a category archive

  header('Location: https://www.yourwebsite.com/blog/', true, 302);

  exit();

}

?>
For extensive or frequently changing redirect rules, a dedicated plugin might still be a more manageable solution.
Best Practices
- Minimize Redirect Chains: While sometimes necessary, having too many consecutive redirects (e.g., Page A → Page B → Page C) can negatively impact performance and user experience. Consolidate whenever possible.
- Test After Major Changes: When using redirects in conjunction with updates to your WordPress site, always test thoroughly to ensure everything works as expected. Elementor Hosting’s staging environments can be helpful for this process.
Real-World Redirect Examples
Fixing Broken Links & Redirecting Old URLs
Maintaining a healthy link profile is essential for SEO and a positive user experience. Here’s where redirects become indispensable within your WordPress workflow:
- Content Updates: If you change the URL (slug) of a page or post in WordPress, set up a 301 redirect from the old URL to the new one to ensure search engines and visitors find the updated content.
- Site Restructuring: When reorganizing categories or taxonomies on your WordPress site, use redirects to guide users and search engines from old URLs to their new counterparts.
- Domain Changes: A migration to a new domain with WordPress Hosting relies heavily on strategic redirects to prevent broken links from harming your search rankings.
Creating User-Friendly Short URLs
Long, complex URLs can be difficult to remember and less appealing to share. Redirects let you make beautiful short URLs:
- Marketing Campaigns: Create memorable vanity URLs like /promotion-2023 that redirect to longer campaign pages on your WordPress site.
- Social Media and Print: Short URLs are ideal for profiles where space is limited or for printed material where users might have to type in a link manually.
Plugins like Pretty Links (which integrates well with Elementor) can streamline the management of short URLs.
A/B Testing and Traffic Routing
Want to experiment with different landing page layouts or content variations? Redirects can help:
- Split Testing: Temporarily redirect a portion of your traffic (e.g., 50%) to a variant page and compare conversion rates using analytics integrations.
- Feature Rollouts: Use redirects to gradually introduce new WordPress site features to a subset of users before deploying them site-wide.
Website Structure Improvements
As your WordPress website grows and evolves, redirects become valuable tools for refining how content is organized:
- Consolidating Categories or Tags: If you have multiple categories or tags covering similar topics, use redirects to merge them strategically. This improves SEO by focusing signals on a single, more authoritative topic area rather than diluting them.
- Restructuring Navigation Menus: When making changes to your WordPress site’s navigation, redirects prevent old menu links from becoming dead ends, providing a smoother experience for visitors.
- Retiring Outdated Content: If pages or posts are no longer relevant, redirect them to related content or your homepage instead of serving a 404 error, which can be frustrating for users.
Enhancing the User Experience
Beyond structural benefits, redirects play a key role in creating a welcoming and intuitive experience for your WordPress website visitors:
- Regional Content: If you have a multilingual site, redirects can automatically send users to the appropriate language version based on their geolocation.
- Error Handling: Customize your 404 error page with Elementor and use redirects to suggest relevant content or guide users back to key areas of your website.
- Preserving User Preferences: If a user selects a specific view or preference (e.g., dark mode), you could store that information and utilize redirects to ensure their selected experience loads consistently across their visits.
Troubleshooting and Best Practices
Common Redirect Errors and How to Fix Them
Even with careful planning, redirect errors can sometimes occur. Here are common ones and how to address them:
- Redirect Loops: This happens when redirects create a circular pattern (e.g., Page A → Page B → Page A). Thoroughly test your redirects in a staging environment and use browser developer tools to trace the redirect chain.
- Incorrect Target URLs: Double-check that your target URLs are accurate and don’t contain typos. A single incorrect character can lead to a 404 error.
- Server Misconfiguration: If your .htaccess rules or PHP code have syntax errors, redirects could malfunction. Review the code carefully or use online validation tools.
Debugging and Testing Redirects
- Browser Developer Tools (Network Tab): This will show you the HTTP status codes of each request involved in a redirect chain, making it easy to pinpoint issues.
- Online Redirect Checkers: There are various online tools that can simulate redirects and report on potential problems.
- Server Logs: If you’re comfortable with technical troubleshooting, your WordPress Hosting server logs can reveal detailed information about redirect execution.
SEO Implications of Redirects
- Choose the Right Status Code: Using 301 redirects for permanent changes ensures search engines pass link equity and ranking signals to the new URL. For temporary changes, use 302 or 307.
- Avoid Excessive Redirect Chains: While sometimes unavoidable, long redirect chains can slightly slow down page load times and potentially dilute SEO value slightly with each “hop.”
Conclusion
Throughout this comprehensive guide, we’ve explored the mechanics of PHP redirects, various implementation methods, and their strategic applications within the context of WordPress websites. Redirects are indispensable in your WordPress toolkit, whether you’re fixing broken links, optimizing user experience, restructuring content, or running marketing campaigns.
Looking for fresh content?
By entering your email, you agree to receive Elementor emails, including marketing emails,
and agree to our Terms & Conditions and Privacy Policy.


