Table of Contents
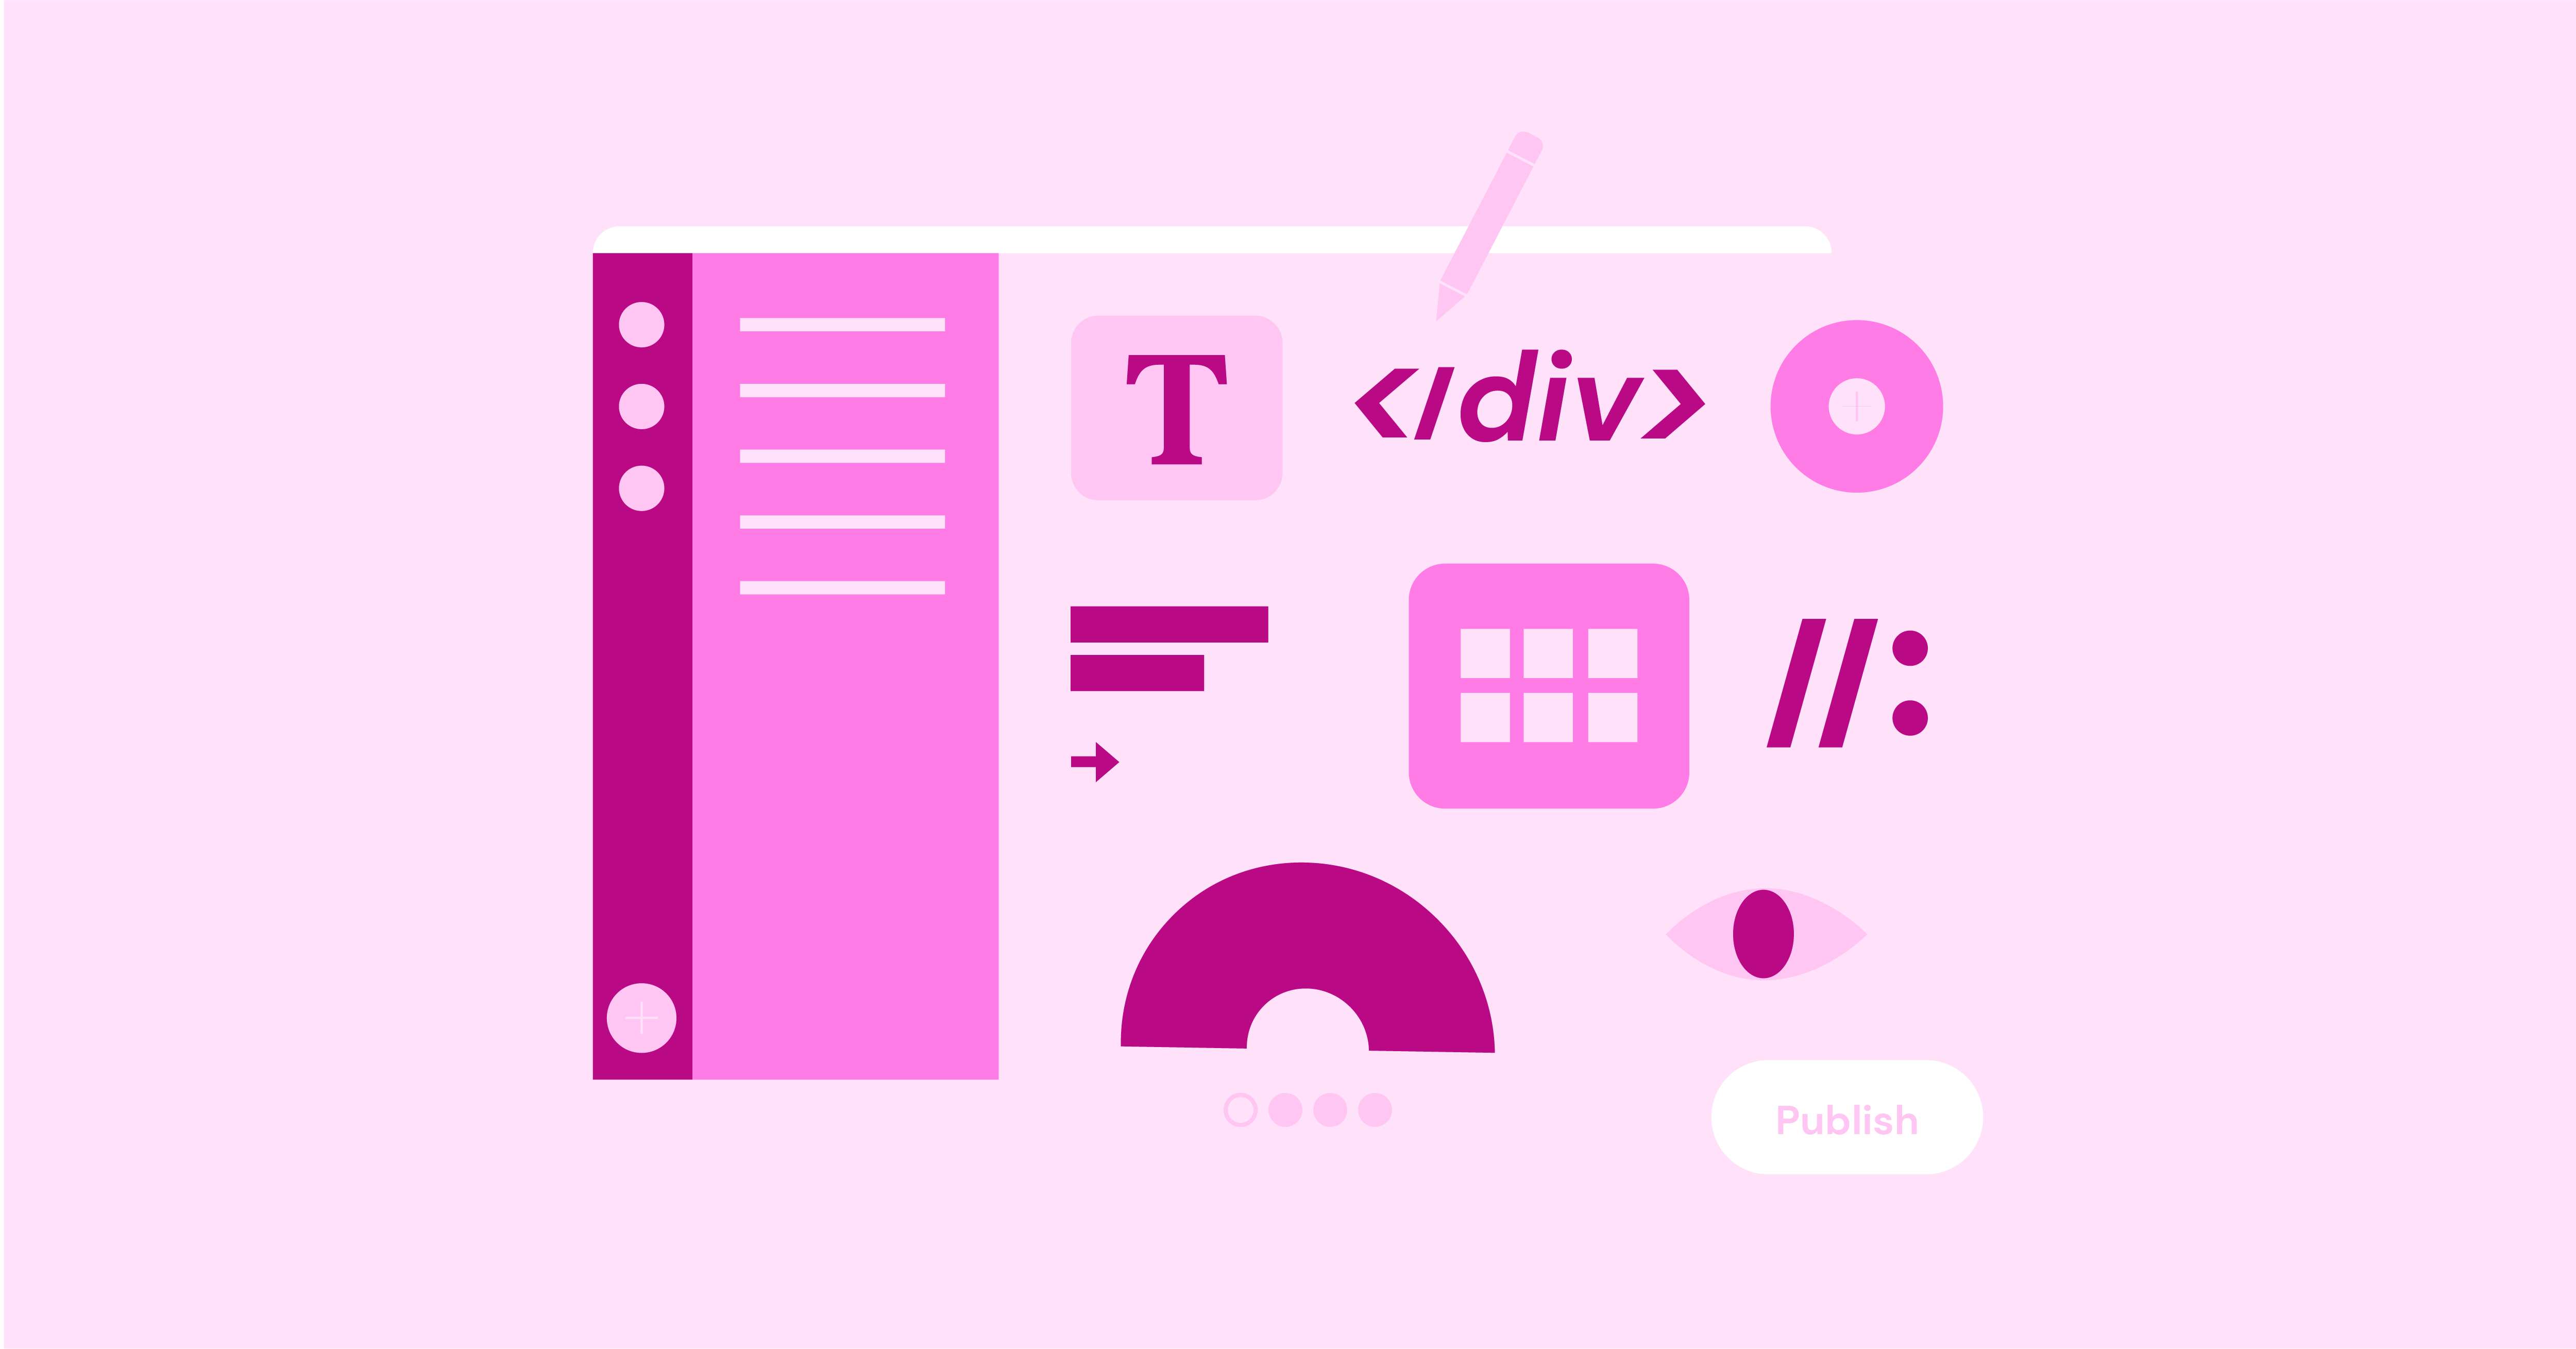
Cascading Style Sheets (CSS) is a design language that transforms simple web pages into visually appealing and engaging experiences. CSS is behind the attractive designs, animations, and intuitive layouts that you see on websites.
CSS gives you the power to control every aspect of your website’s look and feel. It’s like having a paintbrush and a toolbox for your digital canvas. With CSS, you can:
- Customize Colors & Fonts: Create a unique brand identity or match your website to your favorite aesthetic.
- Craft Beautiful Layouts: Arrange text, images, and other elements to create a visually appealing and organized structure.
- Add Engaging Animations: Capture attention and guide users with smooth transitions and eye-catching effects.
- Optimize for All Devices: Make sure your website looks fantastic on desktops, tablets, and phones.
- Boost User Experience: Enhance readability, navigation, and overall enjoyment for your visitors.
CSS vs. Elementor: A Perfect Match
You might be wondering, “Why learn CSS if I have Elementor?” Great question! Elementor is an amazing tool that provides a visual way to design websites, and it often generates CSS behind the scenes. However, understanding CSS fundamentals gives you a deeper level of control and flexibility. It allows you to fine-tune your designs, troubleshoot issues, and even create custom styles beyond Elementor’s capabilities. Think of CSS as the secret ingredient that takes your Elementor designs to the next level.
Get Ready to Dive In
In this comprehensive tutorial, we’ll guide you through every aspect of CSS, from the basics to advanced techniques. By the end, you’ll be equipped with the knowledge and skills to style any website with confidence. We’ll even show you how Elementor’s AI features can accelerate your workflow and inspire your creativity.
So, buckle up and get ready to embark on an exciting CSS journey. Whether you’re a beginner taking your first steps or an experienced designer seeking to refine your skills, we’ve got you covered!
CSS Fundamentals
In this section, we’ll cover the essential building blocks of CSS that will enable you to start styling your web pages:
CSS Syntax: The Rules of the Game
At its core, CSS is a language with a specific structure or syntax that you need to follow. Think of it like a set of grammatical rules for styling your content. Here’s the basic breakdown:
					selector {
  property: value;
  property: value;
  /* ...more properties and values */
}
Let’s break down each component:
- Selector: This is the HTML element you want to style. It could be a specific element (e.g., h1, p, img) or a group of elements based on their class (class=”banner”) or ID (id=”main-content”).
- Property: This specifies the aspect of the element you want to change (e.g., color, font size, background color).
- Value: This is the setting you assign to the property (e.g., blue, 16px, #f0f0f0).
- Declaration: A property and its corresponding value, separated by a colon, form a declaration.
- Ruleset: A ruleset is a selector followed by a set of declarations enclosed in curly braces.
Example:
					p {
  color: blue;
  font-size: 16px;
}
This ruleset targets all paragraph (<p>) elements on the page and sets their text color to blue and their font size to 16 pixels.
Adding CSS to Your HTML: Three Different Approaches
There are three main ways to incorporate CSS into your web pages:
Inline Styles (Least Preferred): This involves adding CSS directly to an HTML element’s style attribute. While convenient for quick fixes, it’s generally discouraged due to poor maintainability and the potential for code clutter.
<p style="color: red; font-weight: bold;">This is a paragraph with inline styles.</p>
- Internal Stylesheets (Moderately Preferred): This method places your CSS within a <style> tag in the <head> section of your HTML document. It’s suitable for small websites or specific page styles, but it can still become cumbersome as your CSS grows.
					HTML
<head>
  <style>
    p {
      color: green;
    }
  </style>
</head>
- External Stylesheets (Most Preferred): This involves creating a separate CSS file (with a .css extension) and linking it to your HTML file using the <link> tag. This promotes organization, reusability, and easier maintenance, making it the ideal approach for larger projects.
style.css:
					CSS
body {
  font-family: Arial, sans-serif;
}

h1 {
  color: orange;
}
index.html:
					<head>
  <link rel="stylesheet" href="style.css">
</head>
Choosing the Right Method
In most cases, external stylesheets are the best choice. They offer the best balance of flexibility, organization, and performance. However, inline styles or internal stylesheets might be useful in specific situations where you need to override styles or apply quick fixes.
Now, let’s explore the fundamental principles that govern how your CSS rules are applied to your web pages.
The Cascade, Inheritance, and Specificity: How Browsers Decide Which Styles Win
CSS can get complicated when multiple rules apply to the same element. Luckily, browsers have a system for resolving these conflicts, and it’s based on three core principles:
1. The Cascade
Imagine CSS as a waterfall, where styles flow downwards. Styles defined later in your code generally override earlier ones. This is why the order of your CSS rules matters!
Example:
					p {
  color: blue; /* This will be overridden */
}

p {
  color: green; /* This wins because it comes later */
}
In this case, all paragraphs would be green, even though the first rule set the color to blue. This is the cascade in action.
2. Inheritance
Some CSS properties are inherited by default, meaning they are passed down from parent elements to their children. For example, if you set a font family on the body element, all its child elements (headings, paragraphs, etc.) will automatically inherit that font unless you specifically override it.
Example:
					body {
  font-family: Arial, sans-serif;
}

h1 {
  /* This heading will inherit the Arial font from the body */
}
Not all properties are inherited. For example, margin and padding do not allow you to control the spacing of individual elements independently.
3. Specificity
When conflicting rules have the same origin and order, specificity determines which rule wins. The more specific a selector, the higher its priority. Here’s a simplified way to think about it:
- Inline styles: Most specific (overrides everything else)
- ID selectors (#my-element): Very specific
- Class selectors (.my-class), attribute selectors, and pseudo-classes: Moderately specific
- Element selectors (div, p): Least specific
Example:
					p {
  color: blue; /* Less specific */
}

.highlight {
  color: orange; /* More specific, so this wins */
}
In this scenario, a paragraph with the class “highlight” (<p class=”highlight”>) would be orange because the class selector is more specific than the element selector.
Understanding the Cascade, Inheritance, and Specificity
These three concepts seem a bit tricky at first, but they’re crucial to mastering CSS. Here’s why:
- The cascade: Helps you manage the order and priority of your styles.
- Inheritance: Allows you to apply styles efficiently and avoid repetition.
- Specificity: Empowers you to override styles when needed and achieve fine-grained control.
By understanding how these principles work together, you can confidently predict how your CSS will be applied and troubleshoot any unexpected results. If you need clarification on which rule will win, you can use online CSS specificity calculators.
The Box Model: Understanding the Building Blocks of Layout
Every HTML element on your web page is like a rectangular box. This “box” is defined by the CSS box model, which consists of four areas:
- Content: The actual content of the element (text, images, etc.). This is the innermost area.
- Padding: is the space around the content within the border. It is similar to the cushioning inside a box.
- Border: This is the line that surrounds the padding and content. You can control its style, color, and width.
- Margin: The space outside the border, separating the element from other elements. Think of it as the space around a box in a warehouse.
How the Box Model Works
Here’s how the box model impacts the size and layout of your elements:
- Total Element Size: The total width and height of an element are calculated by adding up the content, padding, border, and margin values.
- Spacing Between Elements: Margins create space between elements, preventing them from overlapping or touching.
- Padding vs. Margin: Padding affects the space inside an element, while margin affects the space outside an element.
- Box-Sizing Property: By default, the width and height properties you set in CSS apply only to the content area. This means that adding padding or a border will increase the element’s overall size. However, you can change this behavior using the box-sizing property:
- box-sizing: content-box (default): Width and height apply to content only.
- box-sizing: border-box: Width and height include padding and border, making calculations more intuitive for many developers.
Example:
					.my-box {
  width: 200px;
  height: 100px;
  padding: 20px;
  border: 5px solid black;
  margin: 10px;
  box-sizing: border-box; /* Ensures the total width and height remain at 200px and 100px, respectively */
}
In this example, the total width of .my-box would be 200px (content + padding + border), and the total height would also be 100px.
Mastering the Box Model
Understanding the box model is essential for creating well-structured and visually appealing layouts. Here are some tips:
- Plan Your Layout: Before you start writing CSS, sketch out your desired layout and consider the size and spacing of each element.
- Choose Your Units Wisely: Decide whether to use pixels (px), percentages (%), ems (em), or rems (rem) for your measurements. Each unit has its advantages and use cases.
- Experiment and Debug: Feel free to experiment with different box model values to see how they affect your layout. Use your browser’s developer tools to inspect elements and troubleshoot any issues.
- Think Responsively: Consider how your layout will look on different screen sizes. Use media queries to adjust the box model values for smaller or larger screens.
With a solid grasp of the box model, you’ll be well-equipped to tackle the essential CSS properties that we’ll cover next.
Essential CSS Properties
Now that you understand the fundamentals let’s explore the core CSS properties that you’ll use to style your web pages. We’ll cover everything from typography and colors to backgrounds and borders.
Typography: Making Your Text Look Great
Typography is the art of arranging text to make it legible, readable, and visually appealing. In CSS, you have a wide range of properties at your disposal to control the appearance of your text:
- font-family: Specifies the typeface for your text. You can use generic font families like serif, sans-serif, or monospace, or you can specify specific fonts like “Arial,” “Times New Roman,” or “Georgia.” If you want to use a custom font that isn’t available on the user’s computer, you can use the @font-face rule to load it from an external source.
					body {
  font-family: "Open Sans", sans-serif; /* Uses a custom font and a fallback font */
}
- font-size: Sets the size of your text. You can use pixels (px), points (pt), ems (em), rems (rem), or percentages (%).
					h1 {
  font-size: 2em; /* Makes the heading twice the size of the base font */
}
- font-weight: Controls the boldness of your text. You can use keywords like normal, bold, bolder, lighter, or numeric values from 100 (thinnest) to 900 (boldest).
					strong {
  font-weight: bold;
}
- Line height: determines the vertical spacing between lines of text. You can use a number (the multiplier of the font size), a length (px, em), or a percentage.
					p {
  line-height: 1.5; /* Sets the line height to 1.5 times the font size */
}
text-align: Aligns the text within its container (left, center, right, or justify).
					.center-text {
  text-align: center;
}
- text-decoration: Adds or removes decorations like underlines, overlines, and line-throughs.
					a {
  text-decoration: none; /* Removes the default underline from links */
}
- text-transform: Changes the capitalization of your text (uppercase, lowercase, or capitalize).
					.uppercase {
  text-transform: uppercase;
}
- text-shadow: Adds a shadow effect to your text.
					h2 {
  text-shadow: 2px 2px 4px rgba(0, 0, 0, 0.5);
}
These are just a few of the many CSS properties that you can use to style your text. By experimenting with different combinations, you can create unique and engaging typography that enhances the overall look and feel of your website. Remember, choosing fonts and sizes that are easy to read and appropriate for your content is crucial for a positive user experience.
In the next section, we’ll explore another essential aspect of web design: colors!
Colors: Painting Your Website with Personality
Colors are fundamental to web design. They set the mood, evoke emotions, and guide the user’s attention. CSS offers several ways to define colors:
- Color Keywords: CSS provides a set of 140 color keywords you can use directly in your styles, like red, blue, green, orange, etc. These are convenient, but they have a limited palette.
					h1 {
  color: blue;
}
- HEX Values (Hexadecimal): This is the most common way to represent colors in CSS. A HEX value starts with a # followed by six characters (0-9, A-F). Each pair of characters represents the red, green, and blue (RGB) components of the color.
					.button {
  background-color: #007bff; /* A shade of blue */
}
- RGB Values: You can also specify colors directly by using their red, green, and blue components. Each component is a number from 0 (no intensity) to 255 (full intensity).
					p {
  color: rgb(255, 0, 0); /* Red */
}
- HSL Values (Hue, Saturation, Lightness): HSL is another way to represent colors, and it can be more intuitive for some designers. Hue (0-360) is the base color, saturation (0-100%) is the intensity of the color, and lightness (0-100%) is how bright or dark it is.
					body {
  background-color: hsl(120, 50%, 50%); /* Green */
}
- RGBA and HSLA Values: These are extensions of RGB and HSL that add an alpha channel, controlling the color’s opacity (transparency). The alpha value ranges from 0 (fully transparent) to 1 (fully opaque).
					.overlay {
  background-color: rgba(0, 0, 0, 0.5); /* Black with 50% opacity */
}
Choosing the Right Color Format
The best color format depends on your personal preference and the specific situation:
- Keywords: Simple and easy to remember, but limited options.
- HEX: Widely used and supported, good for most cases.
- RGB: Intuitive for understanding color components.
- HSL: More human-readable for adjusting colors (e.g., making a color lighter or darker).
- RGBA/HSLA: Essential for creating transparent colors.
Color Tools
Numerous online tools and browser extensions can help you choose, generate, and convert colors:
- Color Pickers: Let you sample colors from images or websites.
- Color Palette Generators: Suggest harmonious color combinations.
- Color Contrast Checkers: Ensure your text has enough contrast with the background for readability.
Accessibility Considerations
When choosing colors for your website, it’s crucial to consider accessibility:
- Color Contrast: Ensure there’s enough contrast between text and background colors for people with visual impairments.
- Colorblindness: Be mindful of color choices that might be difficult for people with colorblindness to distinguish.
- Alternative Text for Images: Provide alternative text descriptions for images that convey important information through color.
With a thoughtful approach to color selection, you can create a visually appealing website that is also accessible to all users.
Backgrounds: Setting the Stage for Your Content
Backgrounds are more than just a backdrop for your text and images. They can create depth, texture, and visual interest, setting the overall mood and tone of your website. CSS offers a versatile set of properties to control backgrounds:
background-color: This property sets the background color of an element. You can use any of the color formats we discussed earlier (keywords, HEX, RGB, HSL, RGBA, HSLA).
					body {
  background-color: #f0f0f0; /* Light gray background */
}
background-image: Use this property to add an image as the background of an element. The image can be a simple pattern, a photograph, or even a gradient.
					.hero {
  background-image: url("images/hero-banner.jpg");
}
Background-repeat: This controls how the background image repeats itself to fill the element’s area. Options include repeat (default, repeats both horizontally and vertically), repeat-x (repeats horizontally only), repeat-y (repeats vertically only), and no-repeat (doesn’t repeat at all).
					.pattern {
  background-image: url("images/pattern.png");
  background-repeat: repeat;
}
Background-position: This specifies the initial position of the background image within the element. You can use keywords like top, bottom, left, right, and center or specific values like 10px 20px (horizontal and vertical offset).
					.logo {
  background-image: url("images/logo.png");
  background-position: center center; /* Centers the image horizontally and vertically */
}
background-size: Determines the size of the background image. You can use keywords like cover (scales the image to cover the entire element, potentially cropping it) or contain (scales the image to fit within the element, maintaining its aspect ratio), or you can set specific dimensions in pixels or percentages.
					.fullscreen-image {
  background-image: url("images/landscape.jpg");
  background-size: cover; /* Covers the entire element */
}
background-attachment: Specifies whether the background image scrolls with the content (scroll, default) or remains fixed in place (fixed).
					.parallax {
  background-image: url("images/background.jpg");
  background-attachment: fixed; /* Creates a parallax scrolling effect */
}
Shorthand Property: background
You can use the shorthand property background to set multiple background properties in a single declaration. The order of the values is background-color, background-image, background-position, background-size, background-repeat, and background-attachment.
					.card {
  background: #fff url("images/card-bg.jpg") no-repeat center center / cover; /* Sets multiple background properties at once */
}
Background Gradients
CSS also allows you to create beautiful gradient backgrounds using the linear-gradient or radial-gradient functions.
					.gradient {
  background-image: linear-gradient(to bottom, #007bff, #0056b3); /* Creates a linear gradient from blue to dark blue */
}
Backgrounds offer a wealth of creative possibilities. By combining colors, images, gradients, and different background properties, you can create visually stunning designs that enhance your website’s overall aesthetic. Experiment with these properties and let your creativity flow!
Borders: Defining the Edges of Your Elements
Borders are the lines that surround your HTML elements. They help define the shape and boundaries of your content, create visual separation between elements, and add a touch of style to your website. CSS provides a range of properties to control borders:
border-style (Required): This property specifies the type of border you want to use. There are several options to choose from:
- solid: A single, solid line.
- dotted: A series of dots.
- dashed: A series of dashes.
- double: Two parallel lines with space between them.
- groove: Creates a 3D grooved effect.
- ridge: Creates a 3D ridged effect.
- inset: Creates a 3D inset effect.
- outset: Creates a 3D outset effect.
- none: No border (default).
- hidden: Similar to none, but might affect table layout differently.
.box {
  border-style: dashed; /* Creates a dashed border */
}
border-width: This property sets the thickness of the border. You can use pixels (px), points (pt), ems (em), rems (rem), or keywords like thin, medium, and thick.
					.box {
  border-width: 5px; /* Creates a 5px thick border */
}
border-color: This property defines the color of the border. You can use any of the color formats we discussed earlier.
					.box {
  border-color: red; /* Creates a red border */
}
Shorthand Property: border
Similar to the background property, you can use the shorthand property border to set all border properties at once. The order is: border-width, border-style (required), and border-color.
					.box {
  border: 2px dotted blue; /* Sets width, style, and color in one line */
}
Individual Border Properties
You can also set properties for individual sides of the border:
- border-top: Top border
- border-right: Right border
- border-bottom: Bottom border
- border-left: Left border
For example, to create a border only on the bottom of an element:
					.section {
  border-bottom: 1px solid #ccc; /* Creates a 1px light gray border on the bottom */
}
border-radius: This property allows you to round the corners of your borders. You can specify a single value to round all corners equally or different values for each corner.
					.button {
  border-radius: 5px; /* Rounds all corners by 5px */
}
Borders are versatile tools for visual design. By experimenting with different styles, widths, colors, and rounded corners, you can create borders that enhance the overall look and feel of your website.
Padding: Creating Breathing Room for Your Content
Padding is the space between an element’s content and its border. It is like the cushioning inside a box that protects its contents. In CSS, padding is essential for controlling the internal spacing of your elements, improving readability, and creating visual separation between different parts of your layout.
Padding Properties
CSS offers several properties to control padding:
- padding (Shorthand): Sets the padding for all four sides of an element at once. You can provide one, two, three, or four values, following a clockwise order:
- One value: Applies the same padding to all sides.
- Two values: The first value applies to the top and bottom, the second to the left and right.
- Three values: The first value applies to the top, the second to the left and right, and the third to the bottom.
- Four values: The first value applies to the top, the second to the right, the third to the bottom, and the fourth to the left.
					.box {
  padding: 20px;       /* All sides: 20px padding */
  padding: 10px 20px;  /* Top/bottom: 10px, left/right: 20px */
  padding: 5px 10px 15px; /* Top: 5px, left/right: 10px, bottom: 15px */
  padding: 5px 10px 15px 20px; /* Top: 5px, right: 10px, bottom: 15px, left: 20px */
}
- Individual Padding Properties: You can also set padding for each side separately:
- padding-top
- padding-right
- padding-bottom
- padding-left
					.box {
  padding-top: 10px;
  padding-left: 20px;
}
Padding and the Box Model
Remember, padding is part of the CSS box model and affects an element’s total size. If you set an element’s width to 200px and add 20px of padding on each side, the total width will be 240px. To avoid this, you can use the box-sizing: border-box property, which includes padding and border in the element’s total width and height.
Using Padding for Layout and Design
Padding is a versatile tool for creating visually appealing and user-friendly layouts. Here are some common use cases:
- Readability: Adding padding around text content makes it easier to read and digest.
- Visual Separation: Use padding to create space between different elements in your layout, such as sections, headings, and paragraphs.
- Button Styles: Add padding to buttons to make them more visually appealing and easier to click.
- Navigation Menus: Padding can help create well-spaced and easy-to-use navigation menus.
Best Practices for Padding
- Consistency: Strive for consistent padding values throughout your website to create a cohesive look and feel.
- Responsive Design: Use media queries to adjust padding values for different screen sizes, ensuring your layout adapts well to various devices.
- Don’t Overdo It: Too much padding can make your layout feel cluttered and overwhelming. Use it judiciously to enhance your website’s visual appeal.
Padding is a powerful CSS property that, when used effectively, can significantly improve the look, feel, and usability of your website.
Margins: Creating Space Around Your Elements
While padding creates breathing room within an element, margins create space around it. Margins are crucial for controlling the layout and positioning of your elements, ensuring that they don’t overlap or crowd each other. They are the invisible force fields that keep your website elements neatly organized.
Margin Properties
CSS offers several properties to control margins, just like padding:
- margin (Shorthand): Sets the margin for all four sides of an element at once. It follows the same one-value, two-value, three-value, or four-value pattern as padding.
					.box {
  margin: 20px;       /* All sides: 20px margin */
  margin: 10px 20px;  /* Top/bottom: 10px, left/right: 20px */
  margin: 5px 10px 15px; /* Top: 5px, left/right: 10px, bottom: 15px */
  margin: 5px 10px 15px 20px; /* Top: 5px, right: 10px, bottom: 15px, left: 20px */
}
- Individual Margin Properties: You can also set margins for each side individually:
- margin-top
- margin-right
- margin-bottom
- margin-left
					.box {
  margin-top: 10px;
  margin-left: 20px;
}
Margins and the Box Model
Unlike padding, margins are not considered part of the element’s box model. They exist outside the border and do not contribute to the element’s total width or height.
Auto Margins for Centering
One of the most common uses of margins is to center elements horizontally. You can achieve this by setting both the margin-left and margin-right properties to auto. This tells the browser to calculate equal margins on both sides, effectively centering the element within its container.
					.container {
  width: 80%; /* Set a fixed width for the container */
}

.centered-box {
  margin: 0 auto; /* Center the box horizontally within the container */
}
Margin Collapse
A unique aspect of margins is margin collapse. When two vertical margins (top and bottom) meet, they combine into a single margin, taking the value of the larger one. This is most commonly seen between adjacent block-level elements like paragraphs or divs.
Negative Margins
Negative margins can be used to overlap elements or create interesting visual effects. However, they should be used with caution, as they can sometimes lead to unexpected layout issues.
Using Margins for Layout and Design
Margins are a powerful tool for creating well-structured and aesthetically pleasing layouts. Here are some common use cases:
- Spacing Between Elements: Use margins to create space between elements like headings, paragraphs, images, and sections.
- Grid Layouts: Combine margins with widths and floats to create basic grid layouts.
- Alignment: Use margin-left and margin-right to control the horizontal alignment of elements.
- Visual Hierarchy: You can use different margin values to establish a visual hierarchy between elements, making some stand out more than others.
- Responsive Design: Use media queries to adjust margin values for different screen sizes, ensuring your layout looks good on all devices.
Best Practices for Margins
- Consistency: Try to maintain consistent margin values throughout your website for a cohesive look.
- Minimalism: Don’t overuse margins. More space can make your layout feel sparse and connected.
- Debugging: If your layout isn’t behaving as expected, check your margin values and watch out for margin collapse issues.
By mastering the use of margins, you can create clean, well-organized layouts that are easy to read and navigate.
CSS Display: Controlling How Elements Behave
The display property is one of the most powerful tools in your CSS arsenal. It determines how an element is rendered on the page, influencing its layout, interaction with other elements, and overall behavior.
Key Display Values
Here are some of the most common and useful values for the display property:
- block: Elements with display: block take up the full available width of their container and create a line break before and after them. Common examples include headings (<h1>-<h6>), paragraphs (<p>), divs (<div>), and most other structural elements.
					div {
  display: block;
}
- inline: Elements with display: inline only take up as much space as their content requires and do not create line breaks. Common examples include links (<a>), spans (<span>), and strong tags (<strong>).
					span {
  display: inline;
}
- inline-block: Elements with display: inline-block are a hybrid of block and inline elements. They flow within a line like inline elements, but you can set their width, height, margins, and padding like block elements.
					button {
  display: inline-block;
}
- None: Elements with display: none are completely hidden and removed from the page’s flow. This is different from visibility: hidden, which hides the element but still takes up space.
					.hidden-element {
  display: none;
}
- flex and grid: These values enable the powerful flexbox and grid layout systems, which we’ll discuss in more detail later.
Understanding Element Flow
Block and inline elements behave differently in terms of how they flow on the page. Block elements naturally start on a new line, while inline elements flow within lines of text. This is the default behavior, but you can change it using the display property.
Changing the Display Value
The display property is highly flexible and can be used to change the way an element is rendered. For example, you could use it to:
- Make an inline element behave like a block element: This would allow you to set its width, height, margins, and padding.
- Hide an element completely: This could be used to create dynamic content that appears or disappears based on user interactions.
- To change the layout of a section: you could use display: flex or display: grid to create more complex layouts.
Example:
					/* Makes an inline element behave like a block element */
a {
  display: block;
  width: 200px;
  height: 50px;
  padding: 10px;
  background-color: #007bff;
  text-align: center;
}
In this example, we’ve changed the display of a link (<a>) to block, which allows us to set its width, height, padding, background color, and text alignment.
The display property is a fundamental tool for controlling the structure and layout of your web pages. By understanding how it works, you can create more flexible, dynamic, and visually appealing designs.
CSS Positioning: Placing Elements with Precision
Imagine your web page as a canvas and CSS positioning as the tools that let you precisely arrange the elements on that canvas. With CSS positioning, you can place elements anywhere you want, create overlapping layers, and even control how elements behave when the user scrolls.
Types of CSS Positioning
CSS offers five main types of positioning:
- Static (Default): This is the default positioning for all elements. Elements are positioned according to the document’s normal flow.
- Relative: The element is positioned relative to its original position in the document flow. You can use the top, right, bottom, and left properties to move the element from its starting point.
- Absolute: The element is removed from the normal document flow and positioned relative to its nearest positioned ancestor (or the viewport if there isn’t one).
- Fixed: The element is removed from the normal document flow and positioned relative to the viewport. It stays in the same place even when the page is scrolled.
- Sticky: is a hybrid of relative and fixed positioning. The element acts like a relatively positioned element until it reaches a certain scroll point, at which point it becomes fixed.
The position Property
To use any of these positioning types, you need to set the position property on the element:
					.element {
  position: relative;
  top: 20px;
  left: 10px;
}
In this example, the .element will be moved 20 pixels down and 10 pixels to the right from its original position in the document flow.
Offset Properties: top, right, bottom, and left.
The top, right, bottom, and left properties control an element’s position relative to its containing block (or the viewport for fixed positioning). These properties accept values in pixels, percentages, ems, or rems.
The z-index Property
When elements overlap, the z-index property controls which element appears on top. A higher z-index value means the element will be stacked above elements with lower z-index values.
Positioning Use Cases
CSS positioning is incredibly versatile and can be used for a variety of purposes:
- Image Overlays: Position text or other elements on top of images.
- Dropdown Menus: Create menus that appear when a user hovers over or clicks on a button.
- Sticky Headers: Keep your header visible even when the user scrolls down the page.
- Custom Tooltips: Create informative tooltips that appear when a user hovers over an element.
- Modal Windows: Display pop-up windows that overlay the main content.
Positioning and Responsive Design
When working with CSS positioning, it’s important to keep responsive design in mind. Consider how your layout will look on different screen sizes and use media queries to adjust positioning values as needed.
Advanced Positioning Techniques
There are many advanced positioning techniques you can use to create complex layouts and interactions. For example, you can:
- Create overlapping elements: Use absolute positioning and z-index to create overlapping elements.
- Use negative positioning values: Move elements outside of their normal container.
- Position elements relative to the viewport: Create fixed or sticky elements that stay in place when the user scrolls.
By mastering CSS positioning, you can achieve precise control over the layout of your web pages and create visually appealing and interactive designs.
CSS Floats: Creating Multi-Column Layouts (and Some Quirks)
Before the rise of modern layout techniques like flexbox and grid, floats were the primary way to create multi-column layouts. While less common now, understanding floats is still valuable for CSS mastery and for working with older websites.
What are Floats?
The float property allows you to remove an element from the document’s normal flow and position it to the left or right of its container. The content that follows will flow around the floated element.
Using Floats
Here’s a simple example of how to create a two-column layout using floats:
					<div class="container">
  <div class="column left">Left Column Content</div>
  <div class="column right">Right Column Content</div>
</div>
					CSS
.container {
  overflow: hidden; /* Clears the floats */
}

.column {
  width: 50%;
  float: left;
}
In this code:
- We create a container div to hold the columns.
- We define two columns, each with a width of 50%.
- We float the left column to the left and the right column to the right.
- We add overflow, hidden to the container, to clear the floats and prevent the columns from collapsing.
Clearing Floats
Floats can cause layout issues if not handled properly. When an element is floated, it is removed from the document’s normal flow, which can cause the following content to wrap around it in unexpected ways. To prevent this, you need to “clear” the floats.
There are a few ways to clear floats:
- Empty Div Method: Add an empty div element with the clear: both property after the floated elements.
- Overflow Method: Set the overflow property of the container element to hidden, auto, or scroll.
- Clearfix Hack: A more complex technique involving pseudo-elements, but it’s a robust solution for older browsers.
Limitations of Floats
While floats can be useful, they have some limitations:
- Complex Layouts: Creating complex layouts with floats can be cumbersome and require a lot of extra markup.
- Equal Height Columns: It’s difficult to make columns with equal heights using floats alone.
- Source Order: Floated elements can disrupt the visual order of your content if not carefully managed.
When to Use Floats
Floats are best suited for simple layouts, like image galleries or sidebars. For more complex layouts, flexbox or grid are often better options.
Floats and Elementor
Elementor’s visual builder handles floats behind the scenes, so you don’t need to worry about them in most cases. However, understanding floats can be helpful if you need to make advanced customizations or troubleshoot layout issues.
In the next section, we’ll explore the exciting world of Flexbox, a modern layout tool that makes creating complex layouts easy!
Flexbox: Your Layout Superhero
Flexbox, short for Flexible Box Layout, is a modern CSS layout module designed to make it easier to create flexible and responsive layouts. It revolutionized the way web developers approach layout design, offering a more intuitive and adaptable approach compared to older methods like floats.
Flexbox Concepts
To understand Flexbox, you need to grasp a few key concepts:
- Flex Container: The parent element that holds the flex items. You enable flexbox by setting display: flex or display: inline-flex on this element.
- Flex Items: are the child elements within the flex container. Flexbox properties control their layout and behavior.
- Main Axis: The primary axis along which flex items are laid out. The flex-direction property determines whether it is horizontal (row) or vertical (column).
- Cross Axis: The axis perpendicular to the main axis. It’s used to align items in the opposite direction of the main axis.
- Flex Properties: A set of properties that you apply to the flex container and flex items to control their alignment, ordering, size, and spacing.
Flexbox Properties (A Quick Overview)
Here’s a quick overview of some of the most important flexbox properties:
- flex-direction: Sets the direction of the main axis (row, row-reverse, column, column-reverse).
- justify-content: Aligns items along the main axis (flex-start, flex-end, center, space-between, space-around, space-evenly).
- align-items: Aligns items along the cross axis (flex-start, flex-end, center, stretch, baseline).
- align-content: Aligns multiple lines of items along the cross axis (flex-start, flex-end, center, space-between, space-around, stretch).
- flex-wrap: Controls whether items wrap onto multiple lines (nowrap, wrap, wrap-reverse).
- order: Changes the visual order of flex items (lower numbers appear first).
- flex-grow: Allows an item to grow and take up available space.
- flex-shrink: Allows an item to shrink to fit within the container.
- flex-basis: Sets the initial size of an item before any growing or shrinking takes place.
Why Flexbox Rocks
Flexbox offers several advantages over traditional layout methods:
- Easy Vertical Centering: Flexbox makes it incredibly easy to center elements both horizontally and vertically.
- Flexible and Responsive: Flexbox layouts automatically adjust to different screen sizes, making them ideal for responsive web design.
- Intuitive Alignment: Flexbox provides a variety of properties for aligning items along both the main and cross axes.
- Reordering Elements: You can easily change the visual order of elements without modifying your HTML.
- Equal Height Columns: Creating columns with equal heights is a breeze with Flexbox.
Getting Started with Flexbox
The best way to learn Flexbox is to start experimenting with it. Create a few simple Flex containers and Flex items and play around with different properties to see how they work. You’ll quickly discover how powerful and intuitive Flexbox can be.
Here’s a basic example to get you started:
					<div class="flex-container">
  <div class="flex-item">Item 1</div>
  <div class="flex-item">Item 2</div>
  <div class="flex-item">Item 3</div>
</div>
					.flex-container {
  display: flex;
  justify-content: space-around; /* Distribute items evenly with space around them */
  align-items: center; /* Center items vertically */
}
In this example, we create a flex container with three flex items. The justify-content property distributes the items evenly along the main axis with space around them, and the align-items property centers the items vertically.
Flexbox is a game-changer for web layouts. Once you master it, you’ll find yourself using it for all sorts of layouts, from simple navigation menus to complex grids and everything in between.
CSS Grid: Leveling Up Your Layouts
If Flexbox is your superhero, then CSS Grid is your superweapon. While Flexbox excels at one-dimensional layouts (either rows or columns), CSS Grid empowers you to create complex two-dimensional layouts with ease. It’s like having a blueprint for your website’s structure, allowing you to define rows, columns, and even overlapping areas with incredible precision.
Grid Concepts
To harness the power of CSS Grid, familiarize yourself with these key concepts:
- Grid Container: This is the parent element that holds the grid items. To enable grid layout, set display: grid or display: inline-grid.
- Grid Items: The direct children of the grid container. These are the building blocks of your layout.
- Grid Tracks: The horizontal (rows) and vertical (columns) divisions of the grid container.
- Grid Lines: The lines that separate the grid tracks.
- Grid Cells: The individual spaces within the grid, formed by the intersection of rows and columns.
- Grid Areas: One or more grid cells combined to form a named region.
Grid Properties (A Glimpse)
CSS Grid comes with a rich set of properties, but here are some of the essentials to get you started:
- grid-template-columns and grid-template-rows: Define the size and number of columns and rows in your grid.
- grid-gap (or row-gap and column-gap): Set the spacing between grid rows and columns.
- grid-template-areas: Name and define areas within the grid using ASCII art-like syntax.
- grid-area: Assigns grid items to specific areas.
- justify-items, align-items, justify-content, align-content: Similar to flexbox, control the alignment of items within and across grid tracks.
- grid-auto-flow: Determines how the grid automatically places items (row, column, or dense).
Why CSS Grid is a Game-Changer
CSS Grid offers significant advantages for web layout:
- True Two-Dimensional Layouts: Create complex layouts with rows and columns without resorting to hacks or complex workarounds.
- Precise Control: Define the exact position and size of each grid item with granular control.
- Content-First Design: Design your layout around your content rather than forcing it to fit a rigid structure.
- Overlapping Elements: Create overlapping grid items to achieve unique visual effects.
- Responsive by Nature: Grid layouts can easily adapt to different screen sizes and orientations.
Embracing the Grid
While CSS Grid might seem daunting at first, it’s incredibly rewarding to learn. Start by creating simple grids and gradually experiment with more complex layouts. You’ll quickly discover the power and flexibility it offers for building modern, responsive web pages.
Here’s a basic example to get you started:
					<div class="grid-container">
  <div class="grid-item">Item 1</div>
  <div class="grid-item">Item 2</div>
  <div class="grid-item">Item 3</div>
  <div class="grid-item">Item 4</div>
  <div class="grid-item">Item 5</div>
  <div class="grid-item">Item 6</div>
</div>
					.grid-container {
  display: grid;
  grid-template-columns: repeat(3, 1fr); /* Three equal-width columns */
  grid-gap: 10px; /* 10px gap between items */
}
In this example, we create a grid container with six grid items. The grid-template-columns property defines three equal-width columns, and the grid-gap property adds 10 pixels of space between the items.
CSS Grid is an incredibly powerful tool that can elevate your web design skills. Embrace its potential, and you’ll unlock a whole new world of layout possibilities!
CSS Transforms: Adding Movement and Dimension
The transform property in CSS opens up a world of creative possibilities. It allows you to manipulate the size, position, and rotation of elements, adding a dynamic flair to your web pages. Transforms can be used for simple effects like rotating an image or for complex animations and 3D transformations.
Transform Functions
Here’s a quick rundown of some common transform functions:
- translate(x, y): Moves an element horizontally (x) and vertically (y).
- scale(x, y): Scales an element by a factor of x horizontally and y vertically.
- rotate(angle): Rotates an element clockwise by the specified angle (in degrees).
- skew(x-angle, y-angle): Skews an element along the X and Y axes.
- matrix(): A more complex function that combines multiple transformations into one.
You can combine multiple transform functions in a single declaration using the transform property:
CSS
.element {
transform: translate(50px, 100px) rotate(45deg);
}
In this example, the element will be moved 50 pixels to the right and 100 pixels down and then rotated 45 degrees clockwise.
Transform Origin
The transform-origin property controls the point around which a transformation occurs. By default, transformations occur around the center of the element, but you can change this by specifying different values for the X and Y coordinates.
					.element {
  transform-origin: top left; /* Transformation will occur around the top-left corner of the element */
}
Transforming on Hover (Interactive Example)
One popular use of transforms is to create hover effects. Here’s an example:
					.button {
  transition: transform 0.3s ease; /* Add a smooth transition */
}

.button:hover {
  transform: scale(1.1); /* Make the button slightly larger on hover */
}
Transforming for Responsive Design
Transforms can also be used to create responsive designs. For example, you could use a transform to scale down an image or rotate an element on smaller screens.
Using Elementor’s Visual Transform Controls
If you’re using Elementor, you can easily apply transforms to elements using the visual controls in the editor. This makes it simple to add hover effects, animations, and other visual enhancements without writing any code.
CSS transforms are a powerful tool for creating dynamic and engaging web pages. Whether you’re using them for simple effects or complex animations, transforms can help you bring your designs to life.
CSS Transitions: Smooth Operator
Imagine opening a door that swings open instantly versus one that smoothly glides open. The latter is much more visually pleasing. CSS transitions provide that smooth experience for your website elements, making changes like hover effects, color shifts, and size adjustments more elegant and less jarring.
How Transitions Work
Transitions essentially tell the browser to gradually change the value of a CSS property over a specified duration. Instead of an abrupt jump, the property’s value smoothly animates from its initial state to its final state.
The transition Property
The transition property is a shorthand that combines several individual properties:
- transition-property: Specifies which property or properties to transition (e.g., background-color, width, transform).
- transition-duration: Sets the length of time the transition should take (e.g., 0.5s, 2s).
- transition-timing-function: Defines the speed curve of the transition (e.g., ease, linear, ease-in-out).
- transition-delay: Sets a delay before the transition starts (e.g., 1s).
Example:
					.button {
  background-color: #007bff;
  transition: background-color 0.3s ease; /* Transition the background color smoothly over 0.3 seconds with an ease timing function */
}

.button:hover {
  background-color: #0056b3;
}
In this example, when you hover over the button, the background color will smoothly transition from blue (#007bff) to a darker blue (#0056b3) over 0.3 seconds.
Transition Timing Functions
CSS provides several built-in timing functions to control the speed curve of your transitions:
- ease (Default): Starts slow, speeds up, then slows down again.
- linear: Constant speed throughout the transition.
- ease-in: Starts slow and gradually speeds up.
- ease-out: Starts fast and gradually slows down.
- ease-in-out: A combination of ease-in and ease-out.
- cubic-bezier(): Allows you to create custom timing functions.
Using Transitions for User Interactions
Transitions are most commonly used to create smooth interactions for users. Here are a few examples:
- Hover Effects: Change the appearance of buttons, links, or other elements when the user hovers over them.
- Active States: Visually indicate when a button or link is active (e.g., being clicked or pressed).
- Focus States: Provide a visual cue for keyboard users when an element has focus.
- Form Validation: Smoothly transition between valid and invalid form field states.
Seamless Transitions with Elementor
Elementor’s visual builder simplifies the process of adding transitions to your elements. You can easily set transition properties for hover, focus, and other states without writing any CSS code. This makes it super easy to create interactive and engaging designs with smooth transitions.
CSS transitions are a simple yet powerful way to enhance the user experience on your website. By adding smooth transitions to your elements, you can create a more polished and professional look.
CSS Animations: Bringing Your Website to Life
Ready to inject some serious pizzazz into your web pages? CSS animations are your ticket to creating dynamic, eye-catching effects that go beyond static layouts. From fades to complex character animations, CSS animations are a versatile tool for enhancing user engagement and adding personality to your website.
Animation Basics
A CSS animation consists of two main components:
- Keyframes: These define the different stages of your animation. Each keyframe specifies the styles (e.g., position, color, opacity) that an element should have at a particular point in time during the animation.
- Animation Properties: These are applied to the element you want to animate, and they control the animation’s timing, duration, direction, iteration count, and more.
Keyframes: The Building Blocks of Animation
Keyframes are the heart of CSS animations. They act like checkpoints along a timeline, specifying the styles the element should have at each point. You define keyframes using the @keyframes rule, followed by a name for your animation and a set of style declarations for each keyframe.
Example:
					@keyframes slideIn {
  0% {
    transform: translateX(-100%);
  }
  100% {
    transform: translateX(0);
  }
}
In this example, the .animated-box element will slide in from the leftover 1 second with an ease-out timing function.
Shorthand Property: animation
You can use the shorthand property animation to set all these properties in a single declaration.
Animating Multiple Properties
You can animate multiple CSS properties simultaneously by defining them in different keyframes. For example, you could animate an element’s opacity, color, and position at the same time.
Advanced Animation Techniques
CSS animations offer a wealth of advanced techniques, such as:
- Animation delays and offsets: Start different animations at different times or stagger them.
- Cubic Bezier curves: Create custom timing functions for unique animation effects.
- JavaScript control: Use JavaScript to trigger, pause, or manipulate animations.
Animating with Elementor
Elementor’s visual builder provides a user-friendly interface for creating animations. You can choose from a variety of pre-built animations or create your own custom animations using keyframes. This makes it easy to add animation effects to your website without writing any CSS code.
CSS animations are a powerful tool for enhancing the visual appeal and interactivity of your website. With a little creativity and experimentation, you can create stunning animation effects that will impress your visitors and make your website stand out.
Wrapping Up Essential CSS Properties: Your Styling Toolbox
We’ve covered a lot of ground in this section, exploring the essential CSS properties that you’ll use to style your web pages. Let’s recap what we’ve learned:
- Typography: We delved into the art of text styling, using properties like font-family, font-size, font-weight, and more to create beautiful and readable typography.
- Colors: We explored the vibrant world of colors, learning about different color formats (keywords, HEX, RGB, HSL) and how to choose the right colors for your design.
- Backgrounds: We discovered how to create captivating backgrounds with colors, images, gradients, and patterns.
- Borders: We learned how to add borders to elements, customizing their style, width, color, and even rounding the corners.
- Padding and Margins: We explored the nuances of padding and margins, understanding how to create space within and around elements for better layout and readability.
- Display: We unlocked the power of the display property, learning how to control the behavior and layout of elements.
- Positioning: We mastered the art of placing elements with precision, exploring static, relative, absolute, fixed, and sticky positioning.
- Floats: We ventured into the world of floats, understanding their use in multi-column layouts and their limitations.
- Flexbox: We embraced the flexibility of flexbox, a modern layout tool for creating adaptable and responsive designs.
- CSS Grid: We unleashed the power of CSS Grid, a two-dimensional layout system for building complex and dynamic layouts.
- Transforms: We discovered how to move, scale, rotate, and skew elements to add visual interest and interactivity.
- Transitions: We learned how to create smooth transitions between property values for a more polished user experience.
- Animations: We dove into the world of animation, learning how to bring our websites to life with keyframes and animation properties.
With these essential CSS properties under your belt, you’re well on your way to becoming a CSS master. But our journey doesn’t end here! In the next sections, we’ll dive deeper into advanced CSS techniques, responsive web design, and how to leverage Elementor’s AI-powered tools to streamline your workflow and create stunning websites with ease.
Advanced CSS Techniques
Now that you’ve mastered the essential CSS properties, it’s time to level up your skills and explore some more advanced techniques. In this section, we’ll cover topics like pseudo-elements, pseudo-classes, combinators, specificity, inheritance, and the cascade. These concepts will give you a deeper understanding of CSS and empower you to create more sophisticated and nuanced designs.
Pseudo-Elements and Pseudo-Classes: Styling Beyond the Basics
Pseudo-elements and pseudo-classes are special selectors in CSS that allow you to style specific parts of an element or target elements based on their state or position. They give you the ability to add content before or after an element, change styles on hover or focus, and much more.
Pseudo-Elements: Styling Specific Parts
Pseudo-elements are keywords that you add to a selector using two colons (::). They allow you to style parts of an element that don’t exist in the HTML structure. Here are a few common pseudo-elements:
- ::before: Inserts content before the content of an element.
- ::after: Inserts content after the content of an element.
- ::first-letter: Styles the first letter of the first line of a block-level element.
- ::first-line: Styles the first line of a block-level element.
- ::selection: Styles the portion of a document that the user has highlighted.
Example (::before and ::after):
					p::before {
  content: "Read this: "; /* Adds the text "Read this: " before each paragraph */
}

.quote::after {
  content: "\201D"; /* Adds a closing quotation mark after a quote */
}
In this example, the ::before pseudo-element adds the text “Read this: ” before each paragraph, while the ::after pseudo-element adds a closing quotation mark after elements with the class “quote.”
Pseudo-Classes: Styling Based on State or Position
Pseudo-classes are keywords that you add to a selector using a single colon (:). They allow you to style elements based on their state (e.g., hover, focus, active) or their position in the document tree (e.g., first-child, nth-child). Here are a few common pseudo-classes:
- :hover: Applies styles when the user hovers over an element with the mouse.
- :active: Applies styles while the user is actively clicking or interacting with an element.
- :focus: Applies styles when an element (e.g., a form field) has keyboard focus.
- :link: Styles unvisited links.
- :visited: Styles visited links.
- :first-child: Styles the first child element of its parent.
- :nth-child(n): Styles the nth child element of its parent (e.g., :nth-child(2) styles the second child).
- :nth-of-type(n): Similar to nth-child, but only counts elements of the same type.
Example (:hover):
CSS
.button:hover {
background-color: #0056b3; /* Changes background color on hover */
cursor: pointer; /* Changes cursor to a pointer on hover */
}
In this example, the: hover pseudo-class changes the background color and cursor of a button when the user hovers over it.
Combining Pseudo-Elements and Pseudo-Classes
You can combine pseudo-elements and pseudo-classes to create more specific styling rules. For example, you could style the first letter of the first line of a paragraph only when it’s being hovered over:
CSS
p::first-letter:hover {
font-size: 2em;
}
CSS Combinators: Selecting Elements with Relationships
CSS combinators are symbols that combine multiple selectors into more complex selectors. They let you target elements based on their relationship to other elements in the document tree, giving you a lot of power and flexibility when styling your web pages.
Types of Combinators
There are four main types of combinators in CSS:
- Descendant Selector (Space):
- This selector targets all descendants of an element.
- For example, div p selects all paragraph elements that are descendants of a div element.
					div p {
  color: gray; /* All paragraphs inside divs will be gray */
}
- Child Selector (>):
- This selector targets only the direct children of an element.
- For example, ul > li selects all list items (<li>) that are direct children of an unordered list (<ul>).
					ul > li {
  list-style-type: square; /* Only direct children of the <ul> will have square bullets */
}
- Adjacent Sibling Selector (+):
- This selector targets the element that immediately follows another element.
- For example, h2 + p selects the first paragraph that immediately follows an <h2> element.
					h2 + p {
  margin-top: 0; /* Removes the top margin from the first paragraph after an <h2> */
}
- General Sibling Selector (~):
- This selector targets all siblings of an element that follow it.
- For example, h2 ~ p selects all paragraph elements that follow an <h2> element (not just the first one).
					h2 ~ p {
  font-style: italic; /* All paragraphs after an <h2> will be italic */
}
Combining Combinators
You can combine multiple combinators to create even more specific selectors. For example, you could target the first list item (<li>) that is a direct child of an unordered list (<ul>) within a navigation element (<nav>):
					nav > ul > li:first-child {
  font-weight: bold;
}
Using Combinators Effectively
Combinators give you fine-grained control over your styles. By using combinators, you can target specific elements based on their relationships to other elements, allowing you to create more targeted and maintainable CSS code.
Remember:
- Combinators are powerful: Use them wisely to avoid creating overly complex selectors.
- Specificity matters: Combinators affect the specificity of your selectors. Be aware of how combinators interact with the cascade and inheritance to determine which styles are applied.
CSS Specificity: The Hierarchy of Styles
As you become a CSS aficionado, you’ll inevitably encounter situations where multiple CSS rules seem to target the same element. How does the browser decide which rule to apply? That’s where CSS specificity comes into play.
Think of it like a game of trumps. Each selector type (IDs, classes, elements) has a different ranking in the specificity hierarchy. The rule with the highest specificity wins, and its styles are applied to the element.
Calculating Specificity
To determine the specificity of a selector, you can assign points based on the following:
- Inline styles: 1,000 points
- ID selectors (#my-id): 100 points
- Class selectors (.my-class), attribute selectors (e.g., [type=”text”]), and pseudo-classes (e.g., :hover): 10 points
- Type selectors (e.g., div, p) and pseudo-elements (e.g., ::before): 1 point
- Universal selector (*) and combinators (+, >, ~, ‘ ‘): 0 points
When you have a complex selector with multiple parts, you simply add up the points for each part. The selector with the highest total score wins.
Specificity Examples
Let’s look at a few examples to illustrate how specificity works:
					/* Specificity: 0,0,1 */
p {
  color: blue;
}

/* Specificity: 0,1,0 */
.highlight {
  color: orange;
}

/* Specificity: 1,0,0 */
#main-content {
  color: red;
}
In this case, even though the p selector comes first in the cascade, the #main-content selector wins because it has higher specificity due to its ID. If an element has the class “highlight” and is inside the element with the ID “main-content”, its color would still be red because IDs trump classes.
!important Declaration
The !important declaration is like a wildcard in CSS. It overrides all other styles, regardless of specificity. However, use it sparingly, as it can make your CSS harder to maintain.
					p {
  color: blue !important; /* This will always be blue, even if other rules try to override it */
}
Specificity and Elementor
Elementor’s visual builder generates CSS classes for the elements you add to your page. These classes usually have a medium level of specificity, so you can easily override them with more specific selectors if needed.
Mastering Specificity
Understanding CSS specificity is crucial for:
- Predicting Styles: You can confidently predict which styles will be applied when multiple rules compete.
- Debugging: If your styles aren’t working as expected, checking specificity is often the key to solving the issue.
- Maintaining Your Code: Writing CSS with proper specificity makes your code more organized, readable, and easier to maintain.
With a solid grasp of specificity, you’ll be equipped to handle even the most complex CSS scenarios. Now, let’s explore another fundamental principle: inheritance!
The Cascade: The Order of Things in CSS
You’ve met specificity and inheritance—now it’s time to understand how the cascade ties them together in CSS. Think of the cascade as a set of rules that determines which CSS declarations win the battle for styling an element.
The Cascade’s Three Levels
- Importance: Some CSS rules carry more weight than others.
- Important declarations are of the highest importance and override everything else. Use them sparingly, though, as they can make your code harder to manage.
- Styles defined in the browser’s user agent stylesheet (default browser styles) have the lowest importance.
- Specificity: We’ve already discussed this in detail. More specific selectors beat less specific ones.
- Source Order: If importance and specificity are equal, the rule that appears later in the CSS code wins.
How the Cascade Works in Practice
Let’s consider an example to see how the cascade works in practice:
					/* Rule 1: Low specificity */
p {
  color: blue;
}

/* Rule 2: Medium specificity */
.highlight {
  color: orange;
}

/* Rule 3: Highest specificity */
p#special {
  color: red;
}
In this scenario:
- A normal paragraph (<p>) would be blue (Rule 1).
- A paragraph with the class “highlight” (<p class=”highlight”>) would be orange (Rule 2).
- A paragraph with the ID “special” (<p id=”special”>) would be red (Rule 3).
If we added another rule with the same specificity as Rule 3 but placed it after Rule 3 in the CSS file, it would win due to the source order.
The Cascade in Action
The cascade is constantly at work, resolving conflicts and determining which styles are ultimately applied to your elements. It’s a dynamic system that takes into account all the CSS rules in your stylesheets, as well as any user styles or browser default styles.
Tips for Working with the Cascade
- Organize Your CSS: Structure your stylesheets logically to make it easier to manage and override styles.
- Use Specificity Wisely: Avoid overly specific selectors, as they can be difficult to override later.
- Minimize !important: Use the! important declaration sparingly to avoid creating CSS that’s hard to maintain.
- Test in Different Browsers: Browsers might interpret the cascade slightly differently, so test your styles in multiple browsers.
Elementor and the Cascade
Elementor’s visual builder generates CSS that follows the cascade, making it easier for you to override styles and customize your designs. You can add your own custom CSS to your Elementor-built site and be confident that it will interact with the cascade as expected.
The Cascade in the Big Picture
The cascade is a fundamental concept in CSS. By understanding how it works, you can write more predictable and maintainable CSS code. When combined with a solid grasp of inheritance and specificity, you’ll have complete control over the styling of your web pages.
Responsive Web Design: Adapting to Any Screen
In today’s multi-device world, your website needs to look great on everything from tiny smartphone screens to massive desktop monitors. That’s where responsive web design (RWD) comes in. It’s the art and science of creating web pages that adapt seamlessly to different screen sizes and orientations, ensuring a smooth and enjoyable experience for all users.
Why Responsive Design Matters
Responsive design isn’t just a nice-to-have; it’s essential for modern websites. Here’s why:
- Improved User Experience: Responsive websites are easier to use and navigate on smaller screens, leading to happier visitors and lower bounce rates.
- Increased Mobile Traffic: More people are accessing the web on mobile devices than ever before. A responsive site ensures you get this growing audience.
- Better SEO: Google and other search engines favor responsive websites, giving them a higher ranking in search results.
- Future-Proofing: New devices with varying screen sizes are constantly emerging. Responsive design helps your website stay relevant and accessible across all platforms.
Media Queries: The Backbone of Responsive Design
At the heart of responsive web design lies the concept of media queries. These are special CSS rules that allow you to apply different styles based on the characteristics of the user’s device, such as screen width, height, resolution, and orientation.
Media Query Syntax
A media query consists of two main parts:
- Media Type: Specifies the type of device or media being targeted. Common media types include:
- all: Applies to all device types (default).
- screen: Applies to computer screens, tablets, and smartphones.
- print: Applies to printed pages.
- speech: Applies to screen readers (text-to-speech devices).
- Media Feature: Defines the specific characteristic of the device that the query should match. Some common media features include:
- width: The width of the viewport (browser window).
- height: The height of the viewport.
- max-width: The maximum width of the viewport.
- min-width: The minimum width of the viewport.
- orientation: The orientation of the screen (portrait or landscape).
Example:
					/* Applies styles when the screen width is 768 pixels or wider */
@media (min-width: 768px) {
  body {
    font-size: 18px;
  }
  .container {
    width: 750px;
  }
}

/* Applies styles when the screen width is less than 768 pixels */
@media (max-width: 767px) {
  body {
    font-size: 16px;
  }
  .container {
    width: 90%; /* Use a percentage for a more fluid layout */
  }
}
In this example, we have two media queries. The first applies styles when the screen width is 768px or wider, and the second applies styles when the screen width is less than 768px. This allows us to create a layout that adapts to different screen sizes.
Using Media Queries Effectively
- Define Breakpoints: Identify the key screen widths where your layout needs to change. These are your breakpoints.
- Write Your Media Queries: Create media queries for each breakpoint, targeting the appropriate media type and feature.
- Test, Test, Test: Always test your responsive design on different devices and screen sizes to ensure it works as expected.
By mastering media queries, you can create websites that look great and function flawlessly on any device. In the next part of this section, we’ll delve into viewport units and mobile-first design, two more essential concepts in responsive web design.
Viewport Units: Sizing Elements Relative to the Screen
In responsive web design, we often want elements to scale proportionally to the size of the screen. That’s where viewport units come in. These units are based on the dimensions of the browser window or viewport, making it easy to create designs that adapt fluidly to different screen sizes.
Types of Viewport Units
CSS offers four main types of viewport units:
- vw (Viewport Width): 1vw is equal to 1% of the viewport’s width.
- vh (Viewport Height): 1vh is equal to 1% of the viewport’s height.
- vmin (Viewport Minimum): 1vmin is equal to the smaller of 1vw or 1vh.
- vmax (Viewport Maximum): 1vmax is equal to the larger of 1vw or 1vh.
Using Viewport Units
Viewport units are particularly useful for:
- Full-Screen Elements: Setting an element’s width or height to 100vw or 100vh will make it fill the entire viewport.
- Responsive Typography: Using vw or vmin for font sizes can help your text scale appropriately with the screen size.
- Fluid Layouts: Using viewport units for widths, heights, and margins can help create layouts that adjust smoothly to different screen sizes.
Example
					.full-screen-hero {
  width: 100vw;
  height: 100vh;
}

h1 {
  font-size: 5vw; /* Heading size scales with the viewport width */
}
In this example, we have two media queries. The first applies styles when the screen width is 768px or wider, and the second applies styles when the screen width is less than 768px. This allows us to create a layout that adapts to different screen sizes.
Using Media Queries Effectively
- Define Breakpoints: Identify the key screen widths where your layout needs to change. These are your breakpoints.
- Write Your Media Queries: Create media queries for each breakpoint, targeting the appropriate media type and feature.
- Test, Test, Test: Always test your responsive design on different devices and screen sizes to ensure it works as expected.
By mastering media queries, you can create websites that look great and function flawlessly on any device. In the next part of this section, we’ll delve into viewport units and mobile-first design, two more essential concepts in responsive web design.
Viewport Units: Sizing Elements Relative to the Screen
In responsive web design, we often want elements to scale proportionally to the size of the screen. That’s where viewport units come in. These units are based on the dimensions of the browser window or viewport, making it easy to create designs that adapt fluidly to different screen sizes.
Types of Viewport Units
CSS offers four main types of viewport units:
- vw (Viewport Width): 1vw is equal to 1% of the viewport’s width.
- vh (Viewport Height): 1vh is equal to 1% of the viewport’s height.
- vmin (Viewport Minimum): 1vmin is equal to the smaller of 1vw or 1vh.
- vmax (Viewport Maximum): 1vmax is equal to the larger of 1vw or 1vh.
Using Viewport Units
Viewport units are particularly useful for:
- Full-Screen Elements: Setting an element’s width or height to 100vw or 100vh will make it fill the entire viewport.
- Responsive Typography: Using vw or vmin for font sizes can help your text scale appropriately with the screen size.
- Fluid Layouts: Using viewport units for widths, heights, and margins can help create layouts that adjust smoothly to different screen sizes.
Example:
CSS
.full-screen-hero {
width: 100vw;
height: 100vh;
}
h1 {
font-size: 5vw; /* Heading size scales with the viewport width */
}
In this example, the .full-screen-hero element will always cover the entire viewport, and the heading’s font size will be 5% of the viewport width.
Viewport Units and Accessibility
While viewport units are powerful, it’s important to use them responsibly, especially when it comes to text. Using very large viewport units for font sizes can make text too big on large screens, leading to readability issues. It’s generally recommended to set a maximum font size using media queries or the clamp() function to prevent text from becoming excessively large.
Viewport Units in Elementor
Elementor supports viewport units in its visual builder, allowing you to easily set responsive sizes for your elements without writing any custom CSS. This makes it simple to create layouts that adapt to different screen sizes.
Browser Support
Viewport units are widely supported in modern browsers, but you may need to consider fallbacks for older browsers that don’t support them.
Understanding the Viewport
The viewport is essentially the visible area of a web page within a browser window. It’s important to understand how the viewport works and how it changes on different devices in order to use viewport units effectively.
Mobile-First Design: Prioritizing the Small Screen
Mobile-first design is a philosophy and strategy for building websites that prioritizes the mobile user experience. Instead of designing for desktop first and then scaling down (which can lead to compromises and clunky mobile experiences), mobile-first starts with the smallest screen and gradually enhances the design for larger screens.
The Philosophy Behind Mobile-First
Mobile-first design embraces the constraints of mobile devices. It forces you to focus on the most essential content and interactions, stripping away any unnecessary clutter. This leads to:
- Faster Loading Times: Mobile-first websites tend to be leaner and load faster, which is crucial for mobile users with limited data plans or slower connections.
- Improved Usability: By prioritizing the core functionality, you create a more focused and intuitive experience for mobile users.
- Better Performance: Optimized for smaller screens, mobile-first designs often perform better on all devices.
How to Implement Mobile-First Design
Here’s a simplified approach to implementing mobile-first design:
- Content First: Start by identifying the most critical content and features that your users need on mobile.
- Design for Mobile: Create a layout and design that is optimized for small screens, focusing on clear navigation, readable text, and easy-to-use interactions.
- Progressively Enhance: As you move to larger screens, add more content and features, taking advantage of the additional space. Use media queries to apply different styles at different breakpoints.
Media Queries and Mobile-First
Media queries are essential for mobile-first design. They allow you to apply specific styles to different screen sizes, ensuring your layout adapts gracefully as the screen gets bigger. Here’s how you can use media queries in a mobile-first approach:
					/* Base styles for mobile */
body {
  font-size: 16px;
}

.container {
  width: 90%;
}

/* Enhance for larger screens */
@media (min-width: 768px) {
  body {
    font-size: 18px;
  }
  .container {
    width: 750px;
  }
}
In this example, the base styles are applied to all screen sizes. Then, a media query enhances the styles for screens that are 768px or wider. This ensures that the layout starts with a mobile-friendly design and progressively improves for larger screens.
Elementor and Mobile-First
Elementor’s visual builder is well-suited for mobile-first design. It allows you to easily switch between different device previews, ensuring your designs look great on all screens. Elementor also provides responsive controls for various elements, allowing you to adjust their appearance for different screen sizes without writing custom CSS.
Benefits of Mobile-First Design
By adopting a mobile-first approach, you can:
- Improve User Experience: Create a user-friendly experience for the growing number of mobile users.
- Boost SEO: Get a higher ranking in search results due to Google’s mobile-first indexing.
- Streamline Development: By starting with the most constrained layout, you can simplify the development process and avoid unnecessary rework.
- Future-Proof Your Website: As new devices emerge, your mobile-first website will be better prepared to adapt.
Mobile-first design is a fundamental principle in modern web development. By putting the mobile user at the center of your design process, you can create websites that are both beautiful and functional on all devices.
Mastering CSS
You’ve built a strong foundation with essential CSS properties and delved into some advanced techniques. Now, it’s time to refine your skills and discover some tools and tricks that will make you a CSS master.
Pseudo-Elements and Pseudo-Classes: Styling Beyond the Basics
Remember those handy pseudo-elements and pseudo-classes we touched on earlier? Let’s dive deeper into their powerful capabilities and explore how they can be used to style elements beyond their basic appearance.
Pseudo-Elements: Targeting Specific Parts of Elements
Pseudo-elements are special selectors that target parts of an element that aren’t defined in your HTML structure. They’re like invisible hooks you can latch onto to add or modify content, create visual effects, and apply styles to specific regions within an element.
Here’s a quick recap of some common pseudo-elements and their uses:
- ::before and ::after: These are the most versatile pseudo-elements, allowing you to insert content before or after an element. You can use them to add decorative elements, icons, quotation marks, or even entire blocks of text.
					.section-title::before {
  content: "✨ ";  /* Add a sparkle emoji before the section title */
}
- ::first-letter and ::first-line: These target the first letter or line of a block-level element, allowing you to create eye-catching initial caps or highlight specific text.
					p::first-letter {
  font-size: 2em;  /* Make the first letter larger */
  float: left;
  margin-right: 5px;
}
- ::selection: This pseudo-element allows you to style the text that a user selects on your web page. You can change the background color, text color or even add a border to the selection.
					::selection {
  background-color: #007bff; /* Change the background color of selected text */
  color: white;
}
console.log( 'Code is Poetry' );
Use code with caution.
content_copy
- ::marker: This pseudo-element targets the bullet point or number in a list item. You can use it to customize the appearance of your lists.
					li::marker {
  content: "👉 ";  /* Replace the default bullet with an arrow */
}
Pseudo-Classes: Styling Based on State or Condition
Pseudo-classes target elements based on their state (e.g., hover, focus, active) or their position in the document tree (e.g., first-child, last-child). They allow you to create interactive elements that respond to user actions or to style elements differently depending on their context.
Here’s a quick recap of some common pseudo-classes and their uses:
- :hover, :active, :focus: These pseudo-classes are essential for creating interactive elements like buttons, links, and form fields. They allow you to change the appearance of an element when the user interacts with it.
					.button:hover {
  background-color: #0056b3; /* Darken the button on hover */
}
- :link, :visited: These pseudo-classes target links based on whether they have been visited or not, allowing you to create different styles for visited and unvisited links.
					a:link {
  color: blue;
}

a:visited {
  color: purple;
}
- :first-child, :last-child, :nth-child(n): These pseudo-classes target elements based on their position within their parent container. You can use them to create alternating row styles in a table or to style specific items in a list.
Combining Pseudo-Elements and Pseudo-Classes
You can combine pseudo-elements and pseudo-classes to create even more powerful and specific styling rules. This allows you to target very specific parts of elements or elements in very specific states.
Example:
					/* Style the first letter of the first paragraph on hover */
p:first-of-type::first-letter:hover {
  font-size: 3em;
  color: red;
}
In this example, the first letter of the first paragraph on the page will become larger and turn red when the user hovers over it.
Beyond the Basics
The pseudo-elements and pseudo-classes covered here are just the tip of the iceberg. There are many more that you can use to achieve specific styling effects. For example:
- ::placeholder: Styles the placeholder text in form fields.
- ::backdrop: Styles the backdrop of a modal dialog.
- :disabled: Styles disabled form elements.
- :empty: Styles elements that have no children.
- :checked: Styles checked checkboxes and radio buttons.
Pseudo-Elements, Pseudo-Classes, and Elementor
Elementor’s visual builder simplifies the process of using pseudo-elements and pseudo-classes. You can easily apply styles to hover states, focus states, and other states without writing any CSS code. Additionally, Elementor Pro’s Theme Builder allows you to apply styles to specific parts of your theme, such as the header, footer, or archive pages, using CSS selectors that often include pseudo-elements and pseudo-classes.
Pseudo-elements and pseudo-classes are indispensable tools in your CSS toolbox. They give you the flexibility to create nuanced designs, add interactivity, and style elements in ways that would be impossible with just basic selectors. By mastering these concepts, you can take your CSS skills to the next level and create truly unique and engaging web experiences.
CSS Specificity Calculator: Unveiling the Winner
We’ve already covered the concept of CSS specificity, where different selectors are assigned “points” based on their type (IDs, classes, elements, etc.). The selector with the highest specificity wins and gets to style the element.
However, manually calculating specificity for complex selectors can be a headache. That’s where CSS specificity calculators come to the rescue! These handy online tools let you quickly determine the specificity of any selector, helping you predict which styles will be applied and troubleshoot any conflicts.
How to Use a Specificity Calculator
- Find a Calculator: Many free CSS specificity calculators are available online. A simple web search will reveal several options.
- Enter Your Selector: Paste the selector you want to analyze into the calculator.
- Get the Specificity Score: The calculator will instantly show you the specificity score for your selector, usually broken down into its parts (IDs, classes, elements).
- Compare Scores: If you have multiple selectors targeting the same element, you can compare their specificity scores to see which one will win.
Why Specificity Calculators Are Useful
- Predicting Styles: By knowing the specificity of your selectors, you can accurately predict which styles will be applied to an element, even in complex scenarios.
- Debugging: If you’re having trouble figuring out why a particular style isn’t being applied, a specificity calculator can help you identify the conflicting rule and its specificity.
- Refactoring CSS: If you’re refactoring your CSS, a specificity calculator can help you ensure that your new selectors have the correct specificity to override existing styles.
- Learning CSS: Specificity calculators are also a great learning tool. By playing around with different selectors and seeing their specificity scores, you can gain a deeper understanding of how specificity works in CSS.
Example
Let’s say you have the following CSS rules:
					/* Specificity: 0,1,1 */
.container p {
  color: blue;
}

/* Specificity: 0,2,0 */
.highlight {
  color: orange;
}
You want to know which color will be applied to a paragraph that has both the container and highlight classes. A specificity calculator would show you that the second selector has a higher specificity (0, 2, 0) than the first selector (0, 1, 1), so the paragraph would be orange.
Elementor and Specificity
Elementor’s visual builder generates CSS classes for the elements you add to your page. These classes usually have a medium level of specificity. If you want to override Elementor’s styles, you can use more specific selectors or add the ! important declaration to your custom CSS.
CSS specificity calculators are valuable tools for any web developer. By analyzing your selectors, you can gain valuable insights into how your styles will be applied and ensure that your website looks exactly as you intended.
CSS Preprocessors: Supercharging Your CSS
As your CSS projects grow larger and more complex, you might wish for more powerful tools to streamline your workflow and make your code more maintainable. That’s where CSS preprocessors come in.
Preprocessors like Sass, Less, and Stylus are scripting languages that extend CSS’s capabilities. They offer features like variables, functions, mixins (reusable blocks of code), nesting, and inheritance, which can significantly improve the organization, efficiency, and readability of your CSS code.
Why Use a CSS Preprocessor?
- Variables: Define reusable values for colors, font sizes, and other properties, making it easier to maintain a consistent design.
- Functions: Create custom functions to perform calculations, manipulate colors, or generate complex CSS values.
- Mixins: Encapsulate reusable chunks of CSS code, reducing repetition and making your code more DRY (Don’t Repeat Yourself).
- Nesting: Write more organized and intuitive CSS by nesting selectors within each other.
- Inheritance: Create relationships between selectors to avoid repeating styles.
- Mathematical Operations: Perform calculations within your CSS to dynamically adjust values.
- Cleaner Syntax: Preprocessors often have a more concise and readable syntax than plain CSS.
Choosing a Preprocessor
The three most popular CSS preprocessors are:
- Sass (Syntactically Awesome Style Sheets): The most mature and widely used preprocessor. It offers two syntax options: SCSS (similar to CSS) and Sass (indentation-based).
- Less (Leaner Style Sheets): A simpler preprocessor with a syntax that’s closer to CSS.
- Stylus: A more flexible preprocessor with a minimalistic syntax.
Which preprocessor you choose is largely a matter of personal preference. All three offer similar features, so try them out and see which one feels most comfortable to you.
Example (Sass)
					$primary-color: #007bff;
$secondary-color: #6c757d;

.button {
  background-color: $primary-color;
  color: white;

  &:hover {
    background-color: $secondary-color;
  }
}
In this example, we’ve defined variables for our primary and secondary colors. We then use these variables in our button styles, making it easy to change the colors throughout our entire website by simply updating the variable values.
Compiling Preprocessor Code
Preprocessors need to be “compiled” into standard CSS before browsers can understand them. This is usually done using a task runner like Gulp or Grunt or with a command-line tool like Sass or lessc.
Preprocessors and Elementor
Elementor don’t directly support preprocessors, but you can still use them in your workflow. You can write your styles in Sass, Less, or Stylus, compile them into CSS, and then add the compiled CSS to your Elementor-built website.
Should You Use a Preprocessor?
CSS preprocessors are not strictly necessary, but they can significantly improve your development experience, especially for larger projects. If you find yourself repeating a lot of CSS code or need help keeping your styles organized, then a preprocessor might be a good fit for you.
Preprocessors are another tool in your web developer’s toolbox. By mastering them, you can write cleaner, more efficient, and more maintainable CSS, making your development process smoother and more enjoyable.
CSS Variables (Custom Properties): Your Design Chameleon 🦎
CSS variables, also known as custom properties, are a game-changer for managing your website’s design. They allow you to store values (like colors, font sizes, or spacing) in one place and reuse them throughout your stylesheet. This makes your CSS more organized, maintainable, and adaptable. Think of them like little containers that hold your design values, ready to be used whenever and wherever you need them.
Declaring and Using CSS Variables
To create a CSS variable, you start with two dashes (–) followed by the variable name. Then, you assign a value to the variable using standard CSS syntax.
CSS
:root {
–primary-color: #007bff;
–secondary-color: #6c757d;
–font-size: 16px;
}
In this example, we’ve defined three variables: –primary-color, –secondary-color, and –font-size. Notice that we’ve defined them within the :root pseudo-class, which represents the root element of the document (usually the <html> element). This makes the variables globally available throughout your stylesheet.
To use a variable, you wrap it in the var() function:
					body {
  background-color: var(--primary-color);
  color: var(--secondary-color);
  font-size: var(--font-size);
}
Now, any changes to the variable values will automatically update all the places where the variable is used. This makes it super easy to maintain a consistent design and make global changes without having to hunt down and modify individual CSS rules.
Scope and Inheritance of CSS Variables
CSS variables follow the same scoping rules as other CSS properties. By default, they are inherited by child elements, but you can override them in specific contexts.
The Power of CSS Variables
CSS variables unlock a world of design possibilities:
- Theme Switching: Create multiple themes for your website and easily switch between them by changing the values of your CSS variables.
- Dynamic Styling: Update styles based on user interactions or other events using JavaScript to modify variable values.
- Easier Maintenance: Keep your design consistent and make global changes effortlessly.
- Readability: Make your CSS more readable and self-documenting by using meaningful variable names.
Real-World Use Cases
CSS variables are incredibly versatile and can be used for a wide range of design tasks:
- Color Themes: Define a set of primary, secondary, and accent colors as variables and use them throughout your website.
- Typography: Control font families, sizes, weights, and line heights with variables.
- Spacing: Manage margins, padding, and gaps between elements using variables.
- Responsive Design: Use variables to create fluid layouts that adapt to different screen sizes.
- Customizable Components: Allow users to personalize the appearance of components like buttons or cards by adjusting variable values.
Elementor and CSS Variables
Elementor lets you define and use CSS variables directly within the visual builder. You can even create custom widgets that expose variable controls to your users, allowing them to customize the look and feel of your website without touching the code.
CSS variables are a powerful addition to your CSS toolkit. They can streamline your workflow, organize your code, and empower you to create more adaptable and customizable designs.
CSS Architecture: Organizing Your Styles for Success
Imagine trying to find a specific book in a library with no shelving system or organization. It would be a chaotic mess! The same applies to CSS. As your projects grow, your stylesheets can become unwieldy and difficult to manage. This is where CSS architecture comes in, providing methodologies and principles to help you structure your CSS code for better organization, maintainability, and scalability.
Why CSS Architecture Matters
A well-structured CSS codebase offers several benefits:
- Improved Maintainability: Changes are easier to make and less likely to break other parts of your code.
- Increased Reusability: Write modular CSS components that can be reused across your website.
- Enhanced Readability: Make your code easier for yourself and other developers to understand.
- Scalability: Your CSS code can grow gracefully as your project expands.
- Better Collaboration: Multiple developers can work on the same codebase without stepping on each other’s toes.
Popular CSS Architectures
Several CSS architectures have emerged over the years to address the challenges of managing large stylesheets. Here are a few of the most popular ones:
- BEM (Block, Element, Modifier): BEM is a naming convention that divides your CSS into independent blocks (e.g., .header), elements within those blocks (e.g., .header__logo), and modifiers for different variations (e.g., .header__logo–small). This creates a clear hierarchy and makes your CSS more predictable and easier to understand.
- OOCSS (Object-Oriented CSS): OOCSS emphasizes separating structure (layout) from skin (appearance). This allows you to create reusable UI components that can be easily restyled with different skins.
- SMACSS (Scalable and Modular Architecture for CSS): SMACSS categorizes your CSS rules into base styles, layout rules, module rules, state rules, and these rules. This helps you organize your codebase and understand the purpose of each rule.
- ITCSS (Inverted Triangle CSS): ITCSS organizes your CSS in a layered structure, with the most generic styles at the top and the most specific styles at the bottom. This ensures that more specific styles override more generic ones, making it easier to manage and maintain your code.
Choosing the Right Architecture
There is no one-size-fits-all CSS architecture. The best approach for you will depend on the size and complexity of your project, your team’s preferences, and the specific challenges you’re facing. Experiment with different architectures to see what works best for you.
Example (BEM)
					/* Block */
.card {
  /* ... */
}

/* Element */
.card__title {
  /* ... */
}

/* Modifier */
.card__title--large {
  /* ... */
}
In this BEM example, we have a card block, a card__title element, and a card__title–large modifier that styles the title differently.
CSS Architecture and Elementor
Elementor’s visual builder generates CSS that follows a consistent structure. You can easily add your own custom CSS to your Elementor-built website and choose to organize it according to your preferred CSS architecture.
Beyond Architecture: Additional Tips
- Use a CSS Style Guide: A style guide documents your project’s coding conventions, naming conventions, and design patterns. This ensures consistency across your codebase and makes it easier for new developers to learn.
- Keep Your CSS DRY: Avoid repeating yourself by using variables, mixins, and inheritance.
- Write Comments: Add comments to your CSS to explain the purpose of each rule and make your code more readable.
CSS architecture is a valuable skill for any web developer. By adopting a structured approach to your CSS, you can create cleaner, more maintainable, and more scalable code, leading to better websites and a smoother development experience.
CSS Best Practices: Writing Clean, Maintainable, and Efficient Code
Just like a well-organized kitchen makes cooking easier and more enjoyable, writing clean and well-structured CSS code can make your web development experience smoother and more productive. Following best practices not only improves the readability and maintainability of your code but also helps ensure your website performs optimally and is easier to update in the future.
Here are some key CSS best practices to adopt:
1. Organization is Key
- Use a Clear Structure: Organize your CSS into logical sections, grouping related styles. You can use comments to separate different parts of your stylesheet.
- Choose a Naming Convention: Adopt a consistent naming convention for your classes and IDs. Popular options include BEM (Block Element Modifier), OOCSS (Object Oriented CSS), and SMACSS (Scalable and Modular Architecture for CSS).
- Write Comments: Explain the purpose of your CSS rules and the decisions behind them. This will help you and other developers understand your code in the future.
2. Keep It DRY (Don’t Repeat Yourself)
- Use Variables: CSS variables (custom properties) allow you to store values (e.g., colors, font sizes) in one place and reuse them throughout your code. This makes your stylesheet more maintainable and easier to update.
- Embrace Mixins (If Using a Preprocessor): Mixins are reusable blocks of code that can be included in multiple places. They’re great for reducing repetition and keeping your code DRY.
- Group Common Styles: Look for patterns in your styles and group common styles together. This can make your code more concise and easier to read.
3. Write Efficient CSS
- Be Selective with Selectors: Avoid overly complex selectors that can slow down your browser’s rendering.
- Minimize the Use of !important: Use !important only when necessary, as it can make your CSS harder to override and maintain.
- Optimize Your Images: Compress images and use appropriate file formats to reduce file sizes and improve page load times.
- Use Shorthand Properties: Where possible, use shorthand properties (e.g., margin, padding, background) to reduce the amount of code you need to write.
4. Prioritize Accessibility
- Ensure Sufficient Color Contrast: Make sure there’s enough contrast between text and background colors for people with visual impairments. Use online contrast checkers to verify your color choices.
- Use Semantic HTML: Structure your HTML with meaningful elements (e.g., <header>, <nav>, <main>, <article>, <footer>) to make your code more accessible to screen readers and other assistive technologies.
- Provide Text Alternatives for Images: Use the alt attribute to describe images for users who cannot see them.
5. Test, Test, Test!
- Test on Different Browsers and Devices: Ensure your website looks and functions correctly across a variety of browsers and devices, including different screen sizes and resolutions.
- Use Browser Developer Tools: Browser developer tools (e.g., Chrome DevTools, Firefox Developer Tools) are invaluable for inspecting your CSS, debugging issues, and testing responsiveness.
- Validate Your CSS: Use a CSS validator to check your code for errors and warnings.
6. Stay Up-to-Date
- Follow CSS News and Trends: CSS is constantly evolving, so stay informed about new features, techniques, and best practices.
- Learn from Others: Read blogs, tutorials, and articles written by experienced CSS developers.
- Experiment and Practice: The best way to learn is by doing. Experiment with different CSS techniques and challenge yourself to create new and innovative designs.
By adhering to these best practices, you can write CSS code that is clean, maintainable, efficient, accessible, and future-proof. Your website will not only look great but also perform well and be a joy to work with for you and other developers.
Common CSS Mistakes: Avoiding Pitfalls and Frustrations
Even seasoned developers can stumble upon common CSS mistakes that lead to frustrating layout problems, browser inconsistencies, or performance issues. By understanding these pitfalls, you can avoid them and write cleaner, more efficient CSS code.
- Overusing !important:
- While !important can be a quick fix, it’s like a band-aid solution that can create bigger problems down the road. It overrides the cascade and makes your styles harder to manage and override in the future. Use it sparingly, only when necessary.
- Ignoring Browser Compatibility:
- Not all browsers interpret CSS the same way. Always test your website on different browsers (Chrome, Firefox, Safari, Edge, etc.) to ensure your styles are consistent across platforms. Use vendor prefixes (e.g., -webkit-, -moz-) for properties that are not fully supported.
- Complex Selectors:
- While CSS combinators are powerful, overly complex selectors can be difficult to read and maintain. Strive for simplicity and clarity in your selector choices.
- Forgetting to Clear Floats:
- Floats can cause layout problems if not properly cleared. Remember to use the clear property or the overflow/clear fix techniques to prevent content from wrapping around floated elements unexpectedly.
- Not Optimizing Images:
- Large image files can significantly slow down your website’s loading time. Use image optimization tools to compress images without sacrificing quality. Consider using modern formats like WebP for better performance.
- Misusing Units:
- Choose the right units for the job. Pixels (px) are good for fixed sizes, percentages (%) for relative sizes, and em or rem for font sizes and spacing. Avoid mixing units unnecessarily.
- Lack of Responsive Design:
- In today’s mobile-first world, responsive design is essential. Use media queries and viewport units to ensure your website looks great and functions well on all devices.
- Reinventing the Wheel:
- Before writing custom CSS, check if existing solutions, such as CSS frameworks or libraries, are available. These can save you time and effort and ensure you’re following best practices.
- Skipping Comments and Documentation:
- Comments are your friends! Explain the purpose of your CSS rules and the decisions behind them. This will help you and other developers understand your code in the future.
- Not Validating Your CSS:
- Use a CSS validator (like the one at https://jigsaw.w3.org/css-validator/) to check your code for errors and warnings. This can help you catch typos, syntax errors, and other issues that could cause problems.
Avoiding Mistakes with Elementor
Elementor’s visual builder can help you avoid many common CSS mistakes. It automatically generates clean and valid CSS code, and it provides features like responsive controls and image optimization that can help you create better websites. However, it’s still important to be aware of these common mistakes so you can troubleshoot any issues that may arise.
By learning from these common CSS mistakes, you can save yourself time and frustration in the long run and become a more proficient and confident CSS developer.
Debugging CSS: Troubleshooting Your Styles
Even with the best intentions and a thorough understanding of CSS, you’re bound to encounter some hiccups along the way. Styles might not be applied as expected, layouts might break, or performance might suffer. This is where debugging CSS comes in handy, allowing you to identify and fix those pesky issues that can crop up in your code.
Essential Debugging Tools and Techniques
- Browser Developer Tools: Your browser’s developer tools are your best friend when it comes to CSS debugging. They allow you to:
- Inspect Elements: View the HTML structure and the CSS styles applied to any element on your page.
- Modify Styles Live: Experiment with different CSS values in real-time to see how they affect the layout.
- Debug Responsive Layouts: Simulate different screen sizes and orientations to see how your website adapts.
- View the Computed Styles: See the final, calculated styles that are actually applied to an element, taking into account inheritance, specificity, and the cascade.
- Identify Performance Bottlenecks: Use the performance profiler to identify CSS rules that are slowing down your website.
- CSS Validators: Online CSS validators can help you catch syntax errors, invalid property values, or other issues in your code. The W3C CSS Validator is a popular choice.
- CSS Linters: Linters like Stylelint or CSSLint can help you enforce coding standards, identify potential problems, and improve the overall quality and consistency of your CSS code.
- Debugging Tips:
- Start Small: If you’re facing a complex issue, try isolating the problem by removing styles or elements one by one until you find the culprit.
- Check for Typos and Errors: Double-check your CSS for typos, missing semicolons, or other syntax errors.
- Review Specificity: Ensure that the styles you want to apply are more specific than any conflicting rules. Use a specificity calculator if needed.
- Inspect the DOM: Examine the HTML structure (Document Object Model) to make sure your selectors are targeting the correct elements.
- Look for Conflicting Styles: Check for styles that might be overriding the ones you intend to apply.
- Test in Different Browsers: Make sure your styles work consistently across different browsers.
- Use a CSS Reset or Normalize: These stylesheets can help eliminate inconsistencies between browsers by resetting or normalizing default styles.
Common CSS Debugging Scenarios
Here are a few common CSS debugging scenarios and how to tackle them:
- Styles Not Applied: Check the selector specificity, make sure the CSS file is linked correctly, and verify that there are no typos in the selector or property names.
- Layout Issues: Inspect the box model (margins, padding, borders) of your elements to see if they are causing unexpected spacing or positioning. Use a flexbox or grid to create more robust and adaptable layouts.
- Responsive Problems: Test your website on different screen sizes using your browser’s responsive design mode. Use media queries to adjust styles for different viewport widths.
- Performance Problems: Profile your website using the browser’s developer tools to identify any CSS rules that are slowing down your page.
Debugging with Elementor
Elementor’s visual builder provides some helpful debugging tools. You can use the navigator to find and select elements quickly, and you can preview your website on different devices to check for responsiveness issues. If you’re having trouble with custom CSS, you can use the browser’s developer tools to inspect the generated code and identify any problems.
By mastering CSS debugging techniques, you’ll be able to quickly and efficiently troubleshoot any issues that arise in your code. This will not only save you time and frustration but also help you create more reliable and well-functioning websites.
Elementor AI: Your CSS Companion
You’ve come a long way on your CSS journey, mastering fundamental properties and exploring advanced techniques. But what if you could design stunning websites even faster and easier without getting bogged down in the nitty-gritty details of CSS? That’s where Elementor AI comes in, your intelligent design assistant, ready to supercharge your workflow and empower your creativity.
Elementor AI: Empowering Beginners and Streamlining Pros
Elementor AI is a set of AI-powered tools integrated seamlessly into the Elementor website builder. It’s designed to make web design more accessible to everyone, regardless of their coding experience. Whether you’re a beginner taking your first steps or a seasoned professional looking to boost efficiency, Elementor AI has something to offer you.
Key Features of Elementor AI
- Image Generation:
- Do you need a unique image for your website? Elementor AI can generate custom images based on your descriptions or preferences.
- Resize existing images without losing quality.
- Replace backgrounds or extend images beyond their original boundaries.
- Text Generation:
- Create compelling website copy with just a few clicks.
- Translate your content into multiple languages.
- Tailor the tone of your text to match your brand’s voice.
- Automatically correct grammar and spelling errors.
- Custom Code Generation:
- For those who want to dive deeper, Elementor AI can generate HTML, CSS, and even JavaScript code snippets to implement complex features or customizations.
Elementor AI in Action: Real-World Examples
- Generating Product Descriptions: If you’re running an online store, you can use Elementor AI to generate unique and engaging product descriptions for each item, saving you time and effort.
- Creating Eye-Catching Headlines: Need a catchy headline for your blog post or landing page? Let Elementor AI brainstorm creative options for you.
- Designing Custom Sections: Do you need help designing a specific section of your website? Elementor AI can generate layout suggestions and even write the CSS code to bring your vision to life.
- Translating Website Content: Expand your reach to a global audience by easily translating your website content into multiple languages with Elementor AI.
- Generating Custom Code: Want to add a unique animation or interactive element to your website? Elementor AI can generate the code for you, even if you don’t know how to code yourself.
The Benefits of Elementor AI
- Efficiency: Automate repetitive tasks and speed up your design process.
- Accessibility: Empower non-coders to create professional-looking websites.
- Creativity: Generate fresh ideas and explore new design possibilities.
- Quality: Produce high-quality content and code that adheres to best practices.
- Customization: Tailor your website to your specific needs and preferences.
With Elementor AI, you can focus on the big picture—your creative vision—while letting the AI handle the technical details. This allows you to create stunning websites faster and easier than ever before.
In the next section, we’ll examine Elementor’s Copilot feature. This feature acts as your virtual design assistant, guiding you through the website creation process and offering intelligent suggestions.
Elementor AI Copilot: Your Virtual Design Assistant
Imagine having a personal design advisor whispering brilliant ideas in your ear as you build your website. That’s the magic of Elementor AI Copilot. This intelligent assistant harnesses the power of AI to guide you through the design process, offer smart suggestions, and help you overcome creative blocks.
How Elementor AI Copilot Works
Copilot analyzes your design in real-time, considering your content, style preferences, and industry trends. It then provides you with personalized recommendations and suggestions to help you enhance your website’s design and functionality.
Key Features of Elementor AI Copilot
- Layout Suggestions:
- Do you need help with how to arrange your content? Based on your content and design choices, Copilot can suggest full-page layouts or individual sections.
- It considers factors like visual hierarchy, balance, and readability to create layouts that are both aesthetically pleasing and effective.
- You can choose from various layout options and customize them further to match your vision.
- Content Generation:
- Do you need help writing compelling headlines, taglines, or call-to-action buttons? Copilot can generate text suggestions that resonate with your target audience.
- It can also help you find the perfect images to complement your content, ensuring your website is visually appealing and engaging.
- AI Context:
- Copilot learns from your actions and preferences as you build your website, allowing it to provide more personalized and relevant suggestions over time.
- The more you use Copilot, the better it understands your style and goals, making it an even more valuable asset in your design toolkit.
Benefits of Elementor AI Copilot
- Streamlined Workflow: Automate repetitive tasks and get instant feedback on your designs, saving you valuable time and effort.
- Enhanced Creativity: Discover new design ideas and possibilities that you might have yet to consider on your own.
- Quality Content and Design: Create more effective websites with compelling content and visually appealing layouts.
- Overcome Creative Blocks: Get unstuck and find inspiration when you’re feeling creatively challenged.
Who Should Use Elementor AI Copilot?
Elementor AI Copilot is a valuable tool for both beginners and experienced designers:
- Beginners: If you’re new to web design, Copilot can guide you through the process, offering expert advice and ensuring your website looks professional.
- Experienced Designers: Even seasoned pros can benefit from Copilot’s ability to generate fresh ideas, optimize designs, and handle tedious tasks, allowing you to focus on your creative vision.
Elementor AI Copilot in Action
Imagine you’re designing a landing page for a new product. You need to figure out how to arrange your content, what kind of images to use, or how to write compelling copy. Elementor AI Copilot can step in and offer suggestions for:
- A visually balanced layout that highlights your product’s key features.
- Images that resonate with your target audience and evoke the desired emotions.
- Persuasive headlines and calls to action that drive conversions.
By leveraging the power of AI, Copilot can help you create a high-converting landing page that captivates your audience and drives results.
The Future of Web Design with AI
Elementor AI and Copilot are just the beginning of what’s possible with artificial intelligence in web design. As AI technology continues to advance, we can expect even more sophisticated tools and features that will empower designers to create websites that are both beautiful and intelligent.
If you’re looking to elevate your web design game and create stunning websites with ease, Elementor AI and Copilot are your ultimate allies. With their intuitive interface and powerful AI capabilities, they’ll help you unlock your creative potential and bring your website visions to life.
Conclusion
Congratulations! You’ve completed our comprehensive CSS tutorial, covering everything from the fundamentals to advanced techniques. You’ve even explored the powerful capabilities of Elementor AI. You now have a solid foundation in CSS and are well-equipped to style your websites with confidence and creativity.
Looking for fresh content?
By entering your email, you agree to receive Elementor emails, including marketing emails,
and agree to our Terms & Conditions and Privacy Policy.


