Table of Contents
We created the Elementor Popup Builder to offer our customers the best way to create popups that look great and are consistent with their site design, and don’t require custom CSS in the process.
In this guide, I will show you why you no longer need to be limited by external WordPress popup plugins. Instead – use Popup Builder and build popups in the same editor you use to build your entire site.
This is just the first of several videos and written tutorials we are releasing to explain how to create various amazing popups in Elementor.
Ready to build your first popup with Elementor? Let’s go for it…
The Popup You'll Create
In this guide, we’ll show you:
- How to edit the popup window
- How to create an Elementor popup that includes a contact form
- How to open the popup when the user scrolls down past 80% of the page
- How to close the popup after the user submits the form
- How to manually trigger the popup onclick (when the visitor clicks on a button)
Step 1: Getting Started
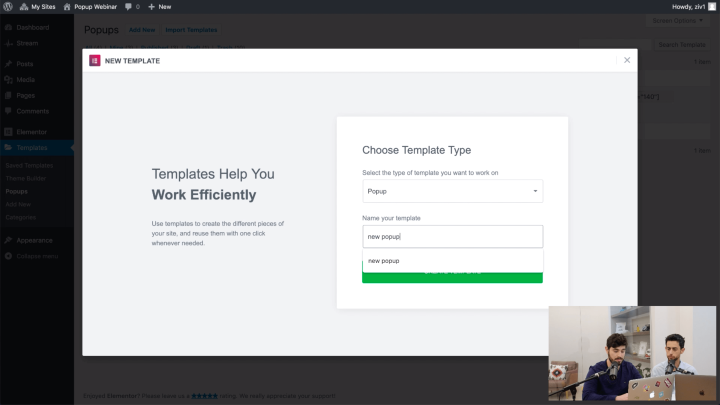
In Elementor, popups are built just like any other type of template.
If you’re familiar with the Elementor Theme Builder, you’ve come across templates like the header, footer, single and archive.
Popups are built in the same way.
In the WordPress dashboard, go to Templates > Popups > Add New
Let’s name our Popup template My First Template and hit ‘Create Template’.
Then, the popup templates window will open. You’ll be able to choose from over one hundred pre-designed popup templates.
As you can see, we did a lot of work creating a huge library of beautiful popup templates for you to use. You can also build the entire popup yourself using the power of Elementor Pro and its widgets.
Step 2: Designing the Popup Window Under Popup Settings
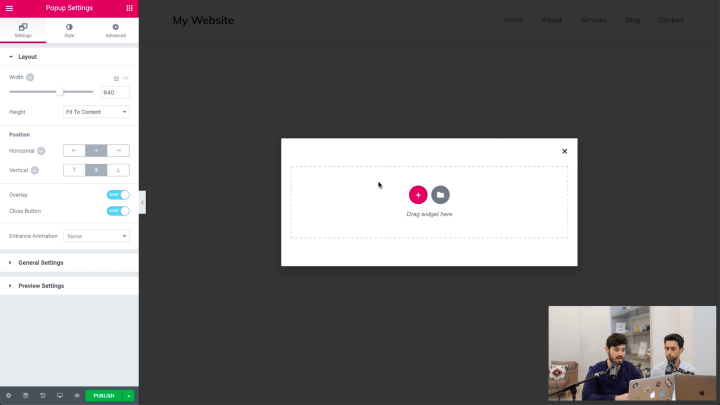
After you close the Library window, the Elementor editor will open up, with the Popup settings panel appearing on the left.
BTW, this panel is always accessible through the bottom gear icon.
In the Layout tab, we’ll set the width of the popup to 700 pixels, and the height as ‘Fit to Content’. Our popup will be positioned to the center, both horizontally and vertically.
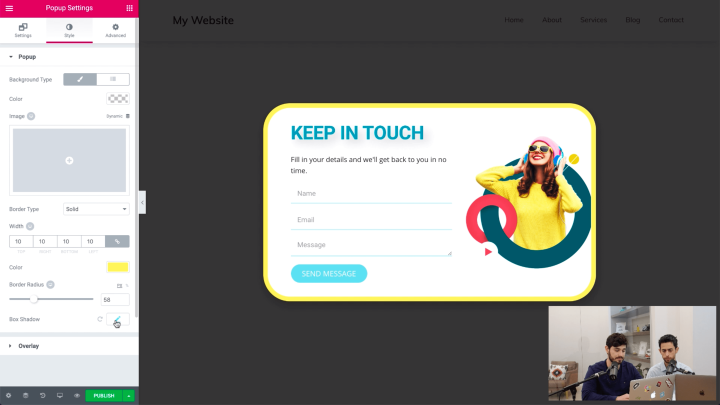
In the Style tab, we’ll set a solid yellow border, with a 35-pixel border radius, giving our popup a rounded look.
Popup settings also include additional settings, like showing the close button after a set time, automatically closing the popup, a switch to prevent the popup from closing, a switch to disable page scrolling and a switch for avoiding multiple popups. We won’t be using them here, but it’s handy to know in case you need them.
Step 3: Build the Inside of the Popup
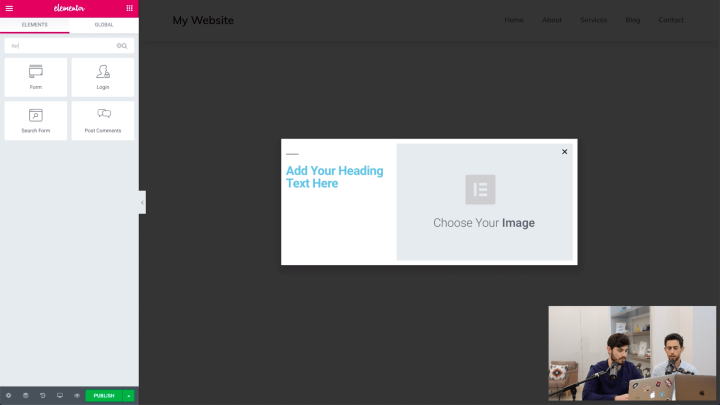
Since designing the inside of popups is the same process as designing any page, we won’t go over the process in detail.
Simply note that every type of content and template you have in Elementor can be used in your popups.
The final design of our popup looks like this:
How to Target Popups Using Publish Settings
As you will see, setting advanced targeting and triggers is as easy as flipping a switch. Hit publish and the Publish Setting window will open up.
Let’s quickly go over the targeting options in the Popup Builder, so you know how to properly target popups using the Conditions, Triggers and Advanced Rules targeting options.
Conditions
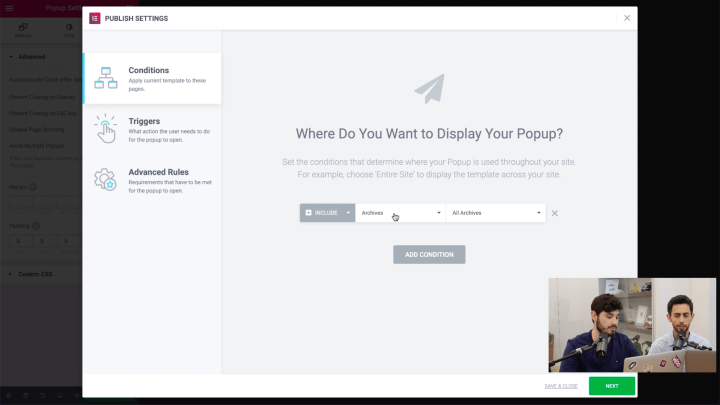
Set the conditions that determine where (on which pages) the popup appears throughout the site.
For example, if you choose “Entire Site” it will display the Popup everywhere across the site! You can get very detailed as well, for example by selecting a specific posts category.
It is similar to the theme builder, we actually have an in-depth video tutorial about this.
Now that we have defined where the Popup is used throughout the site, we can go on to set the triggers, which are the user actions that make your popup appear.
Triggers
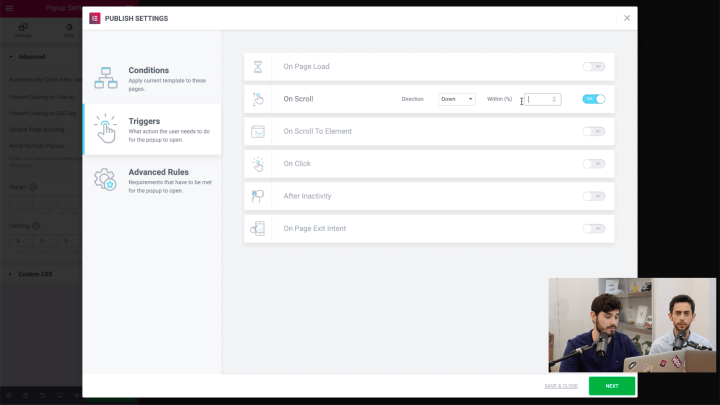
Using Triggers, we can set the popup to show:
- On Page Load
- On Scroll
- On Scroll to Element
- On Click
- After Inactivity
- And On Page Exit Intent
Advanced Rules
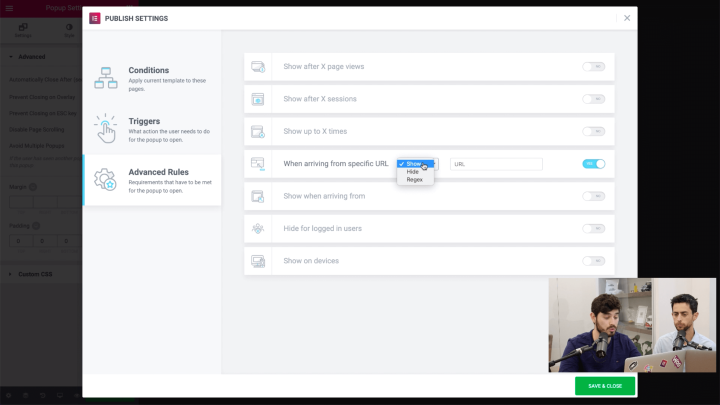
Under Advanced Rules, we can set very specific requirements that have to be met for the popup to appear:
- After a certain number of Page Views
- After a certain number of website visits
- When visitors arrive from a specific URL
- When visitors arrive from external links / internal links
- When they arrive from search engines.
You can also hide popups from logged-in users or choose to only show them on desktop, tablet, and mobile devices.
Step 4: Set Popup to Show on Scroll & Close on Submit
We wanted to show you two different ways to set off the popup we created: one manual via link click, the other automatic using the on scroll trigger.
For the automatic trigger, we also want the popup to close after the user submits the form inside the popup.
Open Popup With On Scroll Trigger
So, for the first popup example, we want the popup to appear when the user scrolls through 80% of the page.
Under Triggers, switch on ‘On Scroll’ keep the direction set on ‘Down’ and enter 80 in the ‘Within’ field.
Close Popup With Form Submission
Go to the Form widget inside the popup, and under ‘Actions After Submit’, choose ‘Popup’.
Click on the popup item that will now appear below.
Under ‘Action’, choose ‘Close Popup’.
Step 5: Manually Connect Popups to Links or Forms
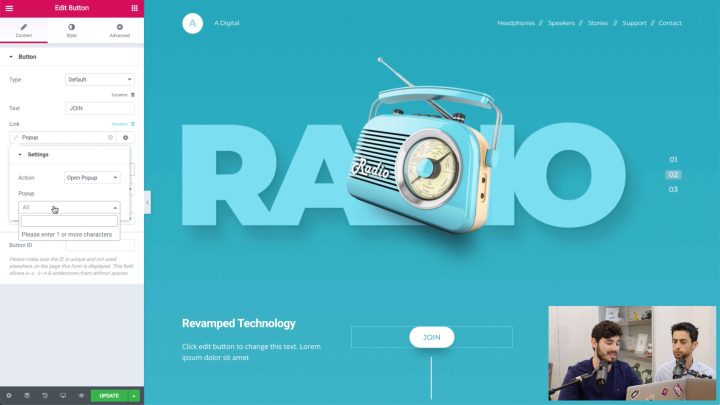
To set a manual trigger, we will go to our landing page and connect one of our buttons to the popups.
Hit CMD / CTRL + E to open finder, and type ‘Add new page’.
In the new page, drag in a Button widget.
In the Button settings, under content, click on the dynamic icon next to the Link field.
Then, under Link > Actions, choose Popup.
Click on the Popup again, make sure the action is set to ‘Open Popup’, and type the name of the popup we created.
Hit publish and view your live page. Now, clicking on the button should open the popup.
That’s it! We’ve successfully opened the popup using the Scroll trigger and the On Click manual trigger, and closed it on form submission.
Conclusion
This webinar offers a first taste of the vast design and targeting options available in the Popup Builder. Be sure to checkout the popup tutorial playlist we’ve prepared for you.
We’d love to hear from you — show us the popups you created and let us know if you have any questions.
Looking for fresh content?
By entering your email, you agree to receive Elementor emails, including marketing emails,
and agree to our Terms & Conditions and Privacy Policy.


