Too often, photographers get stuck with websites that need to be clearer and more modern or more complex to build. You need a platform that not only showcases your masterpieces in their full glory but also attracts and converts potential clients.
That’s where this guide comes in. We’ll walk you through the entire process of creating a professional photography website that’s both visually stunning and easy to manage, even if you’re not a tech whiz. By leveraging the power of Elementor and its intuitive tools, you’ll have a website that truly reflects your artistic vision and helps you take your photography business to the next level.
Planning Your Photography Website
Defining Your Website’s Purpose and Goals
Before diving into the technicalities, it’s crucial to establish a clear vision for your website. Ask yourself:
- Who is your target audience? Are you aiming to attract high-end wedding clients, nature enthusiasts, or commercial brands? Understanding your ideal client will shape your website’s design, content, and overall message.
- What are your goals for the website? Do you want to showcase your portfolio, sell prints, book clients for photoshoots, or all of the above? Defining your objectives will help you prioritize the features and functionalities your website needs.
Remember, yYour website is more than just a digital portfolio; it’s a powerful marketing tool that can elevate your brand and drive business growth.
Choosing the Right Platform: Why Elementor?
The foundation of your photography website is your Content Management System (CMS), and for photographers, WordPress stands out as the top choice. It’s incredibly flexible customizable, and offers a vast array of plugins to enhance your site’s functionality.
But WordPress alone isn’t enough. To truly bring your vision to life, you need a website builder that empowers you to create a stunning design without coding knowledge. That’s where Elementor comes in.
Elementor is a drag-and-drop website builder designed to make web design accessible to everyone, including those without technical expertise. It offers an intuitive interface, a vast library of professionally designed templates, and a plethora of widgets and features that cater specifically to photographers.
What sets Elementor apart from other website builders?
- Intuitive Visual Editor: Easily customize every aspect of your website without touching a line of code.
- Extensive Template Library: Choose from a wide range of stunning templates designed specifically for photographers.
- Powerful Widgets and Features: Add galleries, slideshows, contact forms, pricing tables, and more with just a few clicks.
- Responsive Design: Ensure your website looks great on all devices, from desktops to mobile phones.
- SEO Optimization: Elementor pairs with Yoast SEO to help your website rank higher in search engine results.
- Integration with Popular Tools: Seamlessly integrate Elementor with marketing platforms, social media, and e-commerce solutions.
- Elementor AI: Harness the power of artificial intelligence to streamline your design process and generate creative content.
With Elementor, you can create a professional photography website that reflects your unique style and captivates your audience.
Selecting a Domain Name and Hosting Provider
Your domain name is your website’s address on the internet (e.g., elementor.com). It should be memorable, relevant to your brand, and ideally include your name or your business’s name.
Hosting is where your website’s files and data are stored. It’s essential to choose a reliable hosting provider that offers fast loading times, security, and good customer support.
The Ideal Solution for Your Website
Elementor WordPress Hosting is the perfect match for anyone using Elementor to build their website.
Here’s why:
- Seamless Integration: It’s explicitly designed for Elementor, ensuring optimal performance and a smooth workflow.
- Enhanced Performance: Advanced caching and optimizations make your website lightning-fast.
- Robust Security: Automatic backups, malware scanning, and protection against vulnerabilities keep your site safe.
- Excellent Support: The support team is knowledgeable about both WordPress and Elementor.
- Additional Benefits: Often includes Elementor Pro, easy custom domain connection, and simple setup.
If you want a hassle-free, optimized experience for your Elementor website, Elementor Hosting is the ideal choice. It takes care of the technical details so you can focus on creating a beautiful and successful website.
Building Your Photography Website with Elementor
Designing a Visually Striking Homepage
Your homepage is your website’s digital storefront, the first impression visitors have of your work. It needs to be visually stunning, easy to navigate, and must effectively communicate your brand.
Choosing a Template:
Elementor offers a vast library of professionally designed templates specifically tailored for photographers. These templates provide a solid foundation for your website, saving you time and effort in the design process.
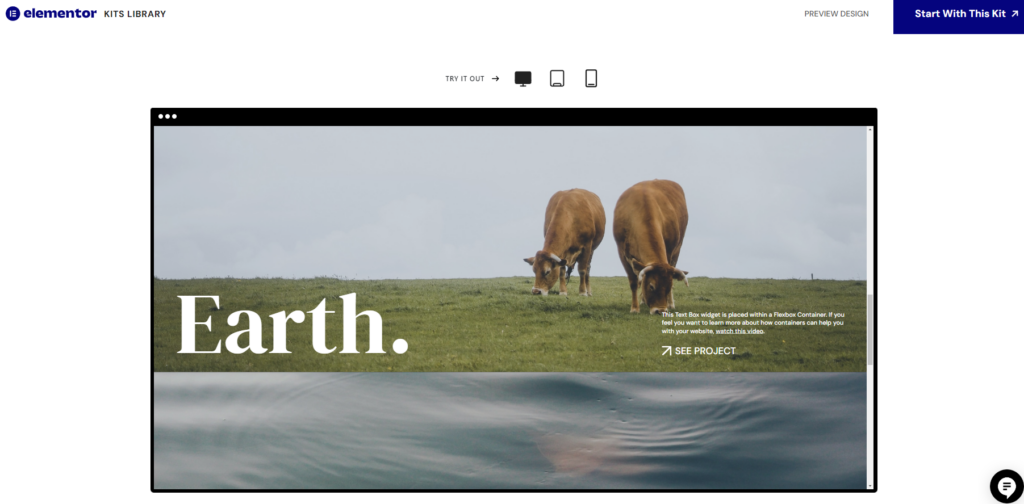
When choosing a template, consider your niche and brand aesthetic. Do you specialize in weddings, landscapes, portraits, or something else? Select a template that aligns with your photography style and resonates with your target audience.
Once you’ve chosen a template, you can easily customize it using Elementor’s intuitive drag-and-drop editor. You can change colors, fonts, and layouts and add or remove elements to create a truly unique and personalized homepage.
Crafting a Compelling Headline and Bio:
Your homepage headline should be attention-grabbing and clearly communicate what you offer. It could be something like:
- “Capturing Life’s Moments Through the Lens”
- “Award-Winning Wedding Photographer”
- “Your Vision, My Passion: Creating Stunning Visuals”
Your bio should be concise and engaging, summarizing your experience, expertise, and passion for photography. Share your unique story and what sets you apart from other photographers.
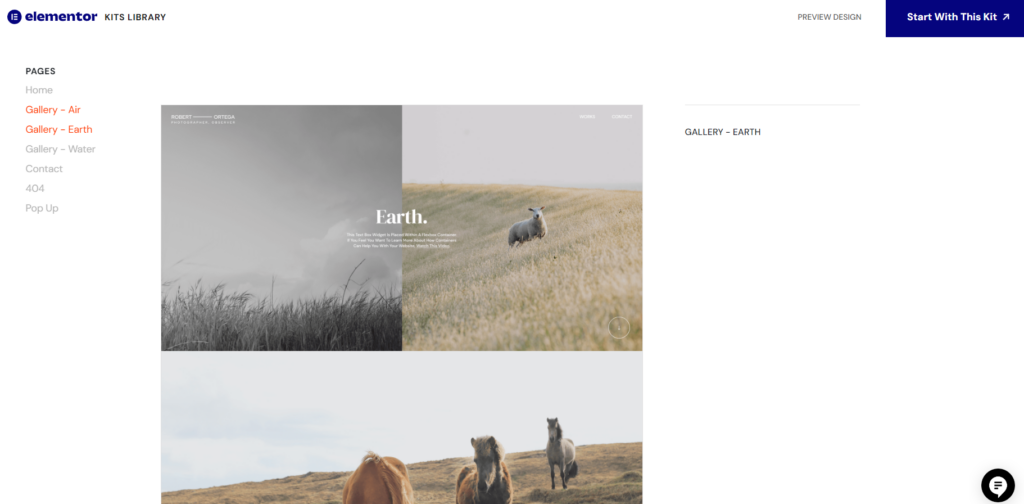
Showcasing Your Best Work in a Portfolio Gallery:
Your portfolio is the heart of your photography website. It’s where you showcase your most compelling images and demonstrate your skills and style.
Elementor offers various gallery widgets to create beautiful and functional portfolios. You can choose from different layouts (grid, masonry, slideshow), add captions and descriptions, and even create lightbox popups for a more immersive viewing experience.
Remember to curate your portfolio carefully. Only include your best work that represents your brand and appeals to your target audience.
Adding Client Testimonials:
Client testimonials are powerful tools for building credibility and trust. If you have positive feedback from past clients, showcase it prominently on your homepage. You can use Elementor’s Testimonial Carousal widget to create visually appealing testimonial sections with quotes, photos, and even star ratings.
Even a few glowing testimonials can significantly impact potential clients’ decision to choose you as their photographer.
Creating an Engaging Portfolio
Your portfolio is more than just a collection of images; it’s a visual story that showcases your unique style and capabilities.
Different Gallery Layouts to Consider:
Elementor offers a variety of gallery layouts to choose from, including:
- Grid: A classic layout that displays images in a structured grid format.
- Masonry: A more dynamic layout where images of different sizes are arranged in a staggered fashion.
- Slideshow: A visually engaging layout that showcases images in a rotating slideshow format.
- Carousel: Similar to a slideshow, but with multiple images visible at once.
Consider the type of photography you specialize in and choose a layout that best complements your work. For example, a grid layout might be ideal for showcasing product photography, while a masonry layout could be more suitable for wedding or event photography.
Optimizing Images for the Web:
Large, high-resolution images can significantly slow down your website’s loading speed. To ensure a smooth user experience, it’s crucial to optimize your images for the web.
This involves resizing your images to the appropriate dimensions for your website and compressing them to reduce file size without sacrificing too much quality. Elementor’s built-in Image Optimizer can help you automate this process. It automatically compresses and converts your images and also supports conversion to WebP or AVIF format. This modern image format offers smaller file sizes and faster loading times compared to traditional formats like JPEG and PNG.

By optimizing your images, you’ll improve your website’s performance, which is crucial for user experience and SEO.
Essential Pages for Your Photography Website
In addition to your homepage and portfolio, there are a few other essential pages that every photography website should have:
About Page: Telling Your Story
Your About page is your opportunity to connect with your audience on a personal level. Share your story, your passion for photography, and what makes you unique. You can also include information about your experience, qualifications, and approach to photography.
Services Page: Outlining Your Offerings and Pricing
Clearly outline the photography services you offer, whether it’s weddings, portraits, events, or commercial photography. Include pricing information or a starting price range to give potential clients an idea of your rates.
Consider creating different packages to cater to various budgets and needs. This can help streamline the booking process and make it easier for clients to choose the right option for them.
Contact Page: Making it Easy for Clients to Get in Touch
A well-designed contact page is essential for converting website visitors into paying clients. Make it easy for potential clients to get in touch by providing multiple contact options, such as:
- Contact Form: Use Elementor’s Form widget to create a user-friendly contact form.
- Email Address: Display your professional email address prominently.
- Phone Number: Include your phone number if you’re comfortable with phone inquiries.
- Social Media Links: Add links to your social media profiles so clients can connect with you on their preferred platforms.
Make sure your contact page is easy to find by including it in your website’s main navigation menu.
Blog Page: Sharing Your Expertise and Insights
A blog can be a valuable addition to your photography website, allowing you to share your knowledge, establish yourself as an expert, and attract organic traffic through search engines.
If you enjoy writing and have valuable insights to share, consider adding a blog to your website. You can write about topics like:
- Photography tips and techniques
- Behind-the-scenes stories from your shoots
- Industry news and trends
- Client spotlights or case studies
Elementor makes it easy to create and manage a blog. You can use the Posts widget to display your latest blog posts on your homepage or other pages and the Theme Builder to customize the look and feel of your blog pages.
Optimizing Your Photography Website
SEO for Photographers: Getting Found on Google
Search Engine Optimization (SEO) is the process of optimizing your website to rank higher in search engine results pages (SERPs). For photographers, this means making sure your website appears when potential clients search for terms like “wedding photographer in [your location]” or “[your niche] photographer.”
Keyword Research: What Are Your Ideal Clients Searching For?
The first step in SEO is keyword research. This involves identifying the keywords and phrases your target audience uses to search for photography services. You can use tools like Google Keyword Planner, SEMrush, or Ahrefs to conduct keyword research.
Once you’ve identified relevant keywords, you can incorporate them into your website’s content, titles, meta descriptions, and image alt text. This will help search engines understand what your website is about and rank it higher for relevant searches.
On-Page Optimization (Titles, Meta Descriptions, Image Alt Text):
Think of on-page optimization as the fine-tuning of your website’s content to make it more appealing to search engines. It involves:
- Titles: Each page on your website should have a unique and descriptive title that includes your target keywords. For example, a page showcasing your wedding photography could be titled “Elegant Wedding Photography in [Your Location] – [Your Name].”
- Meta Descriptions: These are short snippets of text that appear under your website’s title in search results. They should summarize the page’s content and include relevant keywords.
- Image Alt Text: This is descriptive text that is added to the HTML code of your images. It helps search engines understand what your images are about and can improve your website’s accessibility for visually impaired users.
Elementor makes it easy to add and edit titles, meta descriptions, and image alt text directly in the editor.
Technical SEO (Site Speed, Mobile Responsiveness, Structured Data):
Technical SEO refers to the behind-the-scenes aspects of your website that affect its search engine ranking. Some key factors include:
- Site Speed: How quickly your website loads. A slow website can negatively impact user experience and SEO.
- Mobile Responsiveness: How well your website adapts to different screen sizes. With more and more people browsing the web on mobile devices, your website must be mobile-friendly.
- Structured Data: This is code that you add to your website to help search engines understand your content better. For example, you can use structured data to mark up your images, videos, and events.
Elementor is built with performance in mind, so websites created with Elementor are fast and responsive. Additionally, Elementor Pro offers features like CSS and JavaScript minification, which can further improve your website’s speed.
Integrating Social Media and Marketing Tools
Social media is a powerful tool for photographers to connect with potential clients, showcase their work, and build their brand. Integrating your website with your social media profiles makes it easy for visitors to share your work and follow you on their favorite platforms.
Leveraging Elementor’s Marketing Integrations (Mailchimp, HubSpot, etc.):
Elementor seamlessly integrates with popular email marketing and CRM platforms like Mailchimp, HubSpot, and ActiveCampaign. This allows you to easily collect email addresses from your website visitors and nurture them into potential clients.
With these integrations, you can:
- Create and embed signup forms on your website.
- Send targeted email campaigns to your subscribers.
- Track the performance of your email marketing efforts.
Building an email list is a crucial step in growing your photography business. By staying connected with your audience and sharing valuable content, you can build relationships and generate leads over time.
Understanding Website Analytics and Tracking
It’s not enough to simply create a website; you need to understand how people are interacting with it. This is where website analytics comes in.
Setting Up Google Analytics and Google Search Console:
Google Analytics is a free tool that provides valuable insights into your website traffic, such as:
- How many people visit your website
- Where they come from (referrals, search engines, social media)
- Which pages do they visit
- How long they stay on your website
- What actions they take (e.g., filling out a contact form, making a purchase)
Google Search Console helps you understand how your website performs in Google search results. It can show you:
- Which keywords people use to find your website
- How often your website appears in search results
- Your website’s click-through rate
Both Google Analytics and Google Search Console are essential tools for understanding your website’s performance and identifying areas for improvement.
Tracking Website Traffic, User Behavior, and Conversions:
By tracking your website’s analytics, you can gain valuable insights into your audience’s behavior. This information can help you make data-driven decisions about your website’s design, content, and marketing strategies.
For example, if you notice that most of your visitors are coming from social media, you may focus your marketing efforts on those platforms. Or, if you see that a particular page has a high bounce rate (the percentage of visitors who leave after viewing only one page), you can optimize that page’s content or design to make it more engaging.
Using Data to Improve Your Website and Marketing Efforts:
Website analytics data can be used to:
- Identify your most popular pages and content.
- See where your traffic is coming from.
- Track your conversion rates (e.g., how many visitors become clients).
- Test different design and marketing strategies.
- Measure the success of your SEO efforts.
By using data to inform your decisions, you can continuously improve your website and attract more clients.
Connecting Your Website to Social Media Platforms (Sharing, Following):
Elementor offers seamless integration with popular social media platforms like Facebook, Instagram, Twitter, and Pinterest. You can easily add social media icons to your website’s header, footer, or sidebar, making it simple for visitors to connect with you on their preferred platforms.
Additionally, Elementor’s Share Buttons widget allows visitors to share your images and blog posts directly from your website, expanding your reach and driving traffic back to your site.
Using Social Media to Promote Your Photography Business:
Social media platforms are not just for sharing pretty pictures; they’re powerful marketing tools that can help you reach new audiences and grow your business.
Here are a few tips for using social media to promote your photography:
- Post regularly: Share your latest work, behind-the-scenes glimpses, and helpful tips.
- Engage with your audience: Respond to comments and messages, participate in conversations, and build relationships.
- Run contests and giveaways: Encourage engagement and attract new followers.
- Use relevant hashtags: Help people discover your content.
- Consider paid advertising: Reach a wider audience with targeted ads.
Email Marketing for Photographers (Building a List, Sending Newsletters):
Email marketing is a highly effective way to stay connected with potential clients and nurture leads. By building an email list, you can send regular newsletters featuring your latest work, special offers, and helpful tips.
Elementor integrates with popular email marketing platforms like Mailchimp, making it easy to create and send professional-looking newsletters. You can also use Elementor’s Popup Builder to create eye-catching popups that encourage visitors to subscribe to your email list.
Advanced Strategies for Photography Websites
Selling Prints and Services Online
If you want to monetize your photography website, consider selling prints or offering your services online. This can be a great way to generate additional income and reach a wider audience.
Setting up an Online Store with WooCommerce:
WooCommerce is a popular e-commerce platform that seamlessly integrates with WordPress and Elementor. With WooCommerce, you can easily create an online store to sell your photographs as prints, digital downloads, or other products.
Elementor offers a variety of WooCommerce widgets and templates to help you design a beautiful and functional online store. You can customize product pages, create shopping carts and checkout pages, and manage your inventory, all within Elementor.
Pricing Your Photography Prints and Services
While pricing your work, strike a balance between valuing your skills and experience and remaining competitive in the market.
Here are a few factors to consider when setting your prices:
- Your Costs: Calculate your expenses, including equipment, software, travel, marketing, and any other business-related costs.
- Your Experience and Skill Level: More experienced photographers typically charge higher rates.
- Your Target Market: Research what your ideal clients are willing to pay.
- Your Location: Prices can vary depending on the cost of living in your area.
- The Type of Service: Different types of photography services (e.g., weddings, portraits, events) often have different pricing structures.
Consider offering different packages to cater to various budgets and needs. You can also offer add-ons like photo albums, prints, or digital downloads to increase your revenue.
Marketing Your Online Store
Once you’ve set up your online store, you need to promote it to potential customers. Here are a few tips:
- Share your products on social media: Showcase your prints and services on your social media profiles.
- Run promotions and discounts: Attract new customers with special offers.
- Partner with other businesses: Collaborate with local businesses or influencers to reach a wider audience.
- Optimize your product pages for SEO: Make sure your products are easily found in search results.
By actively promoting your online store, you can increase your sales and turn your passion for photography into a profitable business.
Leveraging AI for Your Photography Website
Artificial intelligence (AI) is revolutionizing the way photographers create and manage their websites. Elementor AI is a powerful tool that can help you automate design tasks, generate creative content, and enhance your images.
Elementor AI: Automating Design and Content Creation
Elementor AI can assist you with various aspects of your website design and content creation, including:
- Layout Generation: Quickly generate different layout options for your pages based on your content and preferences.
- Text Generation: Create engaging headlines, taglines, and calls to action with just a few clicks.
- Image Enhancement: Improve the quality of your images with AI-powered tools for resizing, cropping, and color correction.
By leveraging Elementor AI, you can save time and effort while creating a professional and visually appealing website.
AI-Powered Tools for Photographers (Image Editing, Retouching, Keyword Tagging):
In addition to Elementor AI, there are many other AI-powered tools available to photographers. These tools can help you with tasks like:
- Image Editing and Retouching: Automatically enhance your photos and remove blemishes.
- Keyword Tagging: Quickly and accurately tag your images with relevant keywords for better SEO.
- Client Management: Automate client communication and booking processes.
By incorporating AI into your workflow, you can streamline your processes, improve your efficiency, and focus on what you do best – creating stunning photographs.
Additional Tips and Resources
To further enhance your photography website and ensure its success, consider these additional tips and resources:
Mobile Optimization for Photography Websites (Responsive Design, Fast Loading):
Your website must look and function flawlessly on smartphones and tablets. Elementor’s responsive design features make it easy to create a website that adapts seamlessly to different screen sizes.
To ensure fast loading times on mobile devices:
- Optimize your images: Use Elementor’s Image Optimizer to compress images and reduce file sizes.
- Minimize HTTP requests: Combine and minify CSS and JavaScript files.
- Leverage browser caching: Store website data on visitors’ devices to speed up subsequent visits.
By prioritizing mobile optimization, you’ll provide a smooth and enjoyable browsing experience for all users, regardless of their device.
Legal Considerations (Copyright, Model Releases, Terms of Service):
As a photographer, it’s important to understand the legal aspects of running a website. This includes:
- Copyright: Protect your images by displaying a copyright notice and watermarking your photos.
- Model Releases: Obtain written consent from anyone you photograph, especially for commercial use.
- Terms of Service: Clearly outline your policies regarding image usage, payment, and cancellation.
Consult with a legal professional to ensure your website complies with all applicable laws and regulations.
Choosing the Right Fonts and Colors for Your Brand:
The fonts and colors you choose for your website can significantly impact its overall look and feel. Select fonts that are legible and align with your brand personality.
Use a color palette that complements your photography style and creates a cohesive visual identity. Stick to a few main colors and use them consistently throughout your website.
Writing Compelling Calls to Action:
A call to action (CTA) is a phrase or button that encourages visitors to take a specific action, such as contacting you, booking a session, or purchasing a print. Make your CTAs clear, concise, and action-oriented.
Use strong verbs like “Book Now,” “Contact Me,” or “Shop Now” to create a sense of urgency and encourage visitors to take the next step.
Pricing Your Photography Services:
You want to value your time, talent, and expertise while also attracting clients with competitive rates. Here’s a breakdown of common pricing models:
- Hourly Rate: This model works well for smaller projects or when the scope of work is uncertain.
- Package Pricing: Bundling your services into packages (e.g., wedding photography packages) can simplify pricing and appeal to clients looking for an all-inclusive solution.
- Per-Project Pricing: This model is suitable for projects with a clearly defined scope, such as event photography or product shoots.
Feel free to experiment with different pricing models and adjust your rates as your business grows.
Mobile Optimization Best Practices:
Since more and more people browse the web on their smartphones, ensure your photography website is optimized for mobile devices.
Here are some best practices to follow:
- Responsive Design: Use a responsive design that adapts to different screen sizes. Elementor makes this easy with its mobile-responsive templates and editing tools.
- Optimize Images: Compress images to reduce file size and improve loading times on mobile devices. Elementor’s Image Optimizer can help with this.
- Simplify Navigation: Make it easy for users to find what they’re looking for on a small screen.
- Use Large, Touch-Friendly Buttons: Ensure buttons are easy to tap with a finger.
- Test on Different Devices: Test your website on various mobile devices to ensure it looks and functions correctly.
By prioritizing mobile optimization, you’ll create a positive user experience for all visitors, regardless of their device.
Frequently Asked Questions
- How much does it cost to create a photography website? The cost can vary greatly depending on the platform you choose, whether you use a template or hire a designer and the features and functionality you require. However, with tools like Elementor, you can create a professional website for a relatively low cost.
- Do I need a blog for my photography website? While a blog isn’t strictly necessary, it can be a valuable asset for sharing your expertise, attracting organic traffic, and building relationships with potential clients.
- How can I make my photography website stand out? Focus on showcasing your unique style and personality. Create a visually stunning portfolio, write engaging content, and offer exceptional customer service.
- What are the best SEO practices for photography websites? Conduct keyword research, optimize your page titles and meta descriptions, use alt text for your images, and create high-quality content that people will want to share.
- Should I sell prints or services on my website? If you’re looking to monetize your website, selling prints or services can be a great option. Consider your target audience and what they’re likely to be interested in.
Conclusion
Creating a photography website can be a simple task. By following this step-by-step guide and leveraging the power of Elementor, you can build a stunning website that showcases your work, attracts clients, and grows your business.
Your website is your online storefront, so invest time and effort into creating a website that truly represents your brand and makes a lasting impression on your visitors.
Key Takeaways:
- Define your goals: Determine the purpose of your website and what you hope to achieve with it.
- Choose the right platform: WordPress and Elementor offer a powerful and user-friendly combination for photographers.
- Create a captivating homepage and portfolio: Showcase your best work in a visually appealing way.
- Optimize for SEO and mobile: Ensure search engines easily find your website and that it looks great on all devices.
- Market your website and track your results: Use social media, email marketing, and analytics to promote your website and measure its success.
By following these tips and utilizing Elementor’s powerful features, you can create a photography website that elevates your brand and helps you achieve your business goals.


