Table of Contents
The Ultimate Cookie Banner Placement Best Practices For Conversions Guide for 2026
Privacy regulations changed everything about web design. Your bounce rate shouldn’t suffer just because you need legal consent. But finding the perfect spot for your consent popup isn’t exactly intuitive.
Are you blindly throwing a massive modal in the center of the screen? Stop doing that. We’re going to fix your banner strategy right now.
Key Takeaways
- Bottom-left placements achieve a solid 64% consent rate while maintaining readability.
- Center modals boost consent to 82% but increase your bounce rate by a massive 12%.
- Poorly coded consent scripts delay your Largest Contentful Paint (LCP) by an average of 450ms.
- Over 58% of mobile users prefer bottom placements due to the natural thumb zone.
- Banners loading under 200ms yield a 7% higher conversion rate on the underlying page.
- Adding a prominent Reject All button increases user trust for 76% of visitors.
Why Cookie Banner Placement is a Conversion Lever
Nobody wakes up excited to configure consent scripts. Look, the tension between strict legal compliance and smooth user experience is real. You want data. Your users want privacy. Regulators want massive fines.
How massive? By 2026, total GDPR fines exceeded €4.5 billion globally. And the global consent management market is projected to hit $2.1 billion by 2030. You can’t ignore this anymore.
The Evolution of Consent in 2026
We’ve moved past the era of tiny, hidden text at the very top of the page. Modern users actively look for your privacy controls. If they don’t find them instantly, they leave. It’s really that simple.
Here’s what a privacy-first design approach actually requires today:
- Total transparency – Clear language instead of dense legal jargon.
- Visual accessibility – High contrast ratios for visually impaired users.
- Device adaptability – Layouts that physically shift based on screen size.
- Immediate interactivity – Buttons that respond without any network delay.
- Contextual timing – Showing the banner immediately, rather than waiting for a scroll event.
- Granular control – Letting users pick exact tracking categories easily.
How Placement Affects Your Bottom Line
Placement creates friction. And friction destroys checkouts. If your banner covers the primary call-to-action (which happens constantly on mobile), your sales will tank. the team created 200+ sites and terrible banner placement is the number one silent conversion killer.
When you force a user to interact with a clunky overlay before they even see your headline, you’re practically begging them to hit the back button. You need a strategy that respects their time while satisfying the lawyers.
The Psychology of Placement: Where Users Look First
Eye-tracking studies from 2026 reveal exactly how people scan websites. The famous F-Pattern still dictates desktop behavior. Users start top-left, scan right, and drop down. So, where does your banner fit into this visual hierarchy?
If you put it at the top, it pushes your entire site layout down. That’s a terrible idea. It causes layout shifts and ruins your metrics.
Bottom-Left vs. Bottom-Right: The Battle of the Corners
Let’s break down the exact viewing habits of modern web traffic.
- The Bottom-Left Safe Zone – This area naturally catches the eye after a user finishes scanning the page downward. It achieves a reliable 64% consent rate without blocking core content.
- The Bottom-Right Blind Spot – Users typically expect live chat widgets or back-to-top buttons here. Placing a consent banner here often leads to accidental clicks or complete banner blindness.
- The Mobile Thumb Zone – Over 58% of mobile users prefer bottom interactions. Thumbs naturally rest at the bottom third of the screen.
- The Header Banner – This pushes content down, creating visual jarring. Users historically ignore top bars, assuming they’re promotional announcements.
The Center Modal: High Consent vs. High Bounce
Center modals are aggressive. They completely hijack the screen. Yes, they can push your consent rate up to 82%. But that comes at a heavy cost.
Are you willing to sacrifice a 12% increase in bounce rate just to get more analytics data? Honestly, this is overkill for most people. Center modals only make sense if your legal team absolutely mandates an explicit block before any page rendering occurs. Furthermore, sites using manipulative dark patterns in these modals saw a 22% decrease in customer lifetime value.
Performance Benchmarks: Speed vs. Compliance
Your banner isn’t just a visual element. It’s a heavy javascript payload. And that payload can destroy your site speed if you aren’t paying attention.
Every millisecond counts when you’re optimizing for conversions. Let’s look at the hard data for 2026.
| Banner Placement Type | Average Consent Rate | Impact on Bounce Rate | Average LCP Delay |
|---|---|---|---|
| Bottom-Left Toast | 64% | +2% | 80ms |
| Full Bottom Bar | 71% | +4% | 110ms |
| Center Blocking Modal | 82% | +12% | 250ms |
| Top Push-Down Bar | 45% | +8% | 450ms (High CLS risk) |
Impact on Core Web Vitals (LCP and CLS)
Poorly optimized consent scripts increase Core Web Vitals metrics drastically. Specifically, they bump your Largest Contentful Paint (LCP) by an average of 450ms. That’s half a second of dead time where your user is staring at a blank screen.
Cumulative Layout Shift (CLS) is another major victim. If your banner suddenly injects itself at the top of the DOM, the whole page violently shoves downward. Google’s algorithm heavily penalizes this exact behavior.
Script Loading Strategies: Async vs. Defer
You can’t just drop a script tag into your header and hope for the best. You need a specific loading strategy.
- Async attribute – The script downloads in the background and executes the exact millisecond it finishes. This is risky for consent banners because it might fire before your CSS loads, causing a flash of unstyled content.
- Defer attribute – The script downloads in the background but waits for the HTML to fully parse before executing. This is usually the safest bet for maintaining page speed.
- Google Tag Manager triggers – Firing the banner based on a specific DOM ready event keeps your initial render incredibly fast.
- Resource hints – Using preconnect for your consent provider’s domain shaves off crucial DNS lookup time.
- Local hosting – Whenever possible, hosting the script locally prevents third-party server latency.
Implementing a High-Converting Banner in Elementor Pro
You don’t need a heavy third-party plugin to build a beautiful banner. You already have the tools. Elementor powers over 9.5% of all websites globally as of 2026, and its native features are perfect for this.
We’re going to use the Elementor Editor Pro to build a lightweight, highly-customized layout.
Step 1: Designing the Layout in Elementor Editor Pro
First, open the Popup Builder. This tool gives you total control over the visual hierarchy without writing raw CSS.
- Create a new popup – Go to Templates, select Popups, and click Add New. Name it “Global Consent 2026”.
- Set the container – Drop in a Flexbox container. Set the direction to Row for desktop, and Column for mobile. This guarantees the buttons stack perfectly on small screens.
- Position the popup – In the popup settings gear icon, set the horizontal position to Left and the vertical position to Bottom. Remove the entrance animation (fade-in delays cost you conversions).
- Style the overlay – Turn off the background overlay completely. You want users to still see your site behind the banner.
- Add the content – Insert a Heading widget for a friendly title, a Text Editor for the legal brief, and two Button widgets (Accept All and Manage Preferences).
- Apply z-index – Set the popup container’s z-index to 9999 to ensure it sits above sticky headers and chat widgets.
Step 2: Setting Display Conditions and Triggers
You need this banner to show up perfectly on time. Don’t wait for a scroll trigger.
Set the Display Condition to “Entire Site”. Under Triggers, select “On Page Load” and set it to zero seconds. You want that banner active instantly. Under Advanced Rules, ensure “Show on all devices” is checked.
Step 3: Integrating with CMP APIs
Design is useless without the actual blocking logic. You must connect your beautifully designed Elementor buttons to a real consent platform.
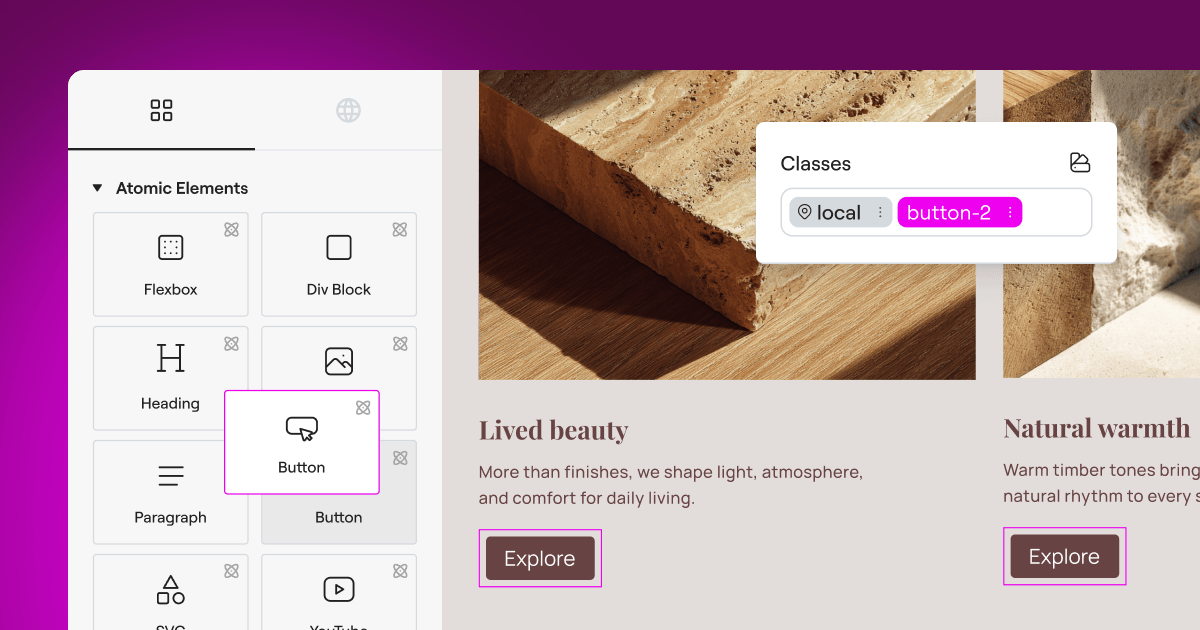
If you use a tool like Cookiez or Cookiebot, you’ll need to assign specific HTML classes to your Elementor buttons. For example, give your “Accept All” button the class cookie-accept-all. The external script will listen for clicks on that specific class and update the user’s consent state dynamically.
Intermediate Strategies: Design and Micro-copy for 2026
Stop writing “We use cookies to improve your experience.” Everyone knows that’s a lie. You use them to track analytics and run retargeting ads. Users respect honesty.
Your micro-copy needs a major improvement if you want high conversion rates. Bland corporate speak doesn’t work anymore.
Transparency isn’t just a legal requirement; it’s a conversion mechanism. When users feel entirely in control of their data footprint, their baseline trust in your primary offers increases exponentially. Don’t hide the opt-out.
Itamar Haim, SEO Team Lead at Elementor. A digital strategist merging SEO, AEO/GEO, and web development.
The Power of Reject All Symmetry
This is the part nobody tells you about. Visual manipulation creates resentment. If your “Accept” button is bright green and your “Reject” button is tiny, gray text hidden in a corner, you’re employing a dark pattern.
- A 2026 survey found that 76% of users feel more comfortable sharing data when the “Reject All” button is equally prominent.
- High-contrast buttons (blue or green against neutral backgrounds) increase total interaction clicks by 14%.
- Symmetrical button sizes prevent accidental misclicks on mobile devices.
- Equal padding around both buttons ensures they meet basic touch-target accessibility standards.
- Hover states should be visually identical for both positive and negative actions.
Pro tip: Never use a ghost button (transparent background with a thin border) for your primary opt-out. It fails standard WCAG contrast checks on most mobile screens.
Micro-copy that Converts
Good copy feels human. Instead of “Cookie Policy Notice”, try “Your Privacy, Your Choice”. Instead of “Accept All Cookies”, try “Allow All Tracking”.
When you use plain English, cognitive load drops. Users make decisions faster, which means they get back to reading your actual content faster. And faster reading leads to faster buying.
Advanced Techniques: Geo-targeting and A-B Testing
Why are you showing a massive GDPR modal to a user in Texas? It makes absolutely zero sense. You’re voluntarily introducing friction where none is legally required.
In 2026, intelligent geo-targeting isn’t an optional luxury. It’s the baseline standard for serious web operations.
Scenario A: The Global E-commerce Store
Imagine you run a store with traffic from London, New York, and Sydney. The laws in these regions are entirely different.
- Detect the IP – Use a server-side lookup or a fast edge-logic script to identify the visitor’s country.
- Apply EU logic – For visitors in Germany, load the strict opt-in model. Nothing fires until they click accept. The average “Reject All” rate here has climbed to 35%.
- Apply US logic – For visitors in Florida, load an opt-out model (CCPA style). The scripts fire immediately, but you provide a simple “Do Not Sell My Info” link in the footer.
- Result – By removing unnecessary banners for non-regulated users, you immediately gain a 5.5% conversion boost site-wide.
Tools like Cookiez handle this regional logic natively. You just toggle the regions on, and the script does the heavy lifting based on the user’s location.
Scenario B: The High-Traffic Blog
Let’s say you’ve 100,000 monthly readers. Even a tiny change in bounce rate impacts your ad revenue massively. You must run A/B tests on your banner placements.
Test a bottom-left toast against a sleek bottom bar. Measure the time-on-page metrics. You’ll likely find that desktop users prefer the toast (it feels like a notification), while mobile users prefer the full bottom bar (it feels like a native app menu). Stop guessing and start measuring.
Comparing Top Consent Management Tools for 2026
You can’t code a compliant scanner from scratch. You need a dedicated Consent Management Platform (CMP). But the market is flooded with options.
Let’s break down the major players so you can make an informed choice.
Cookiebot: The Automated Choice
Cookiebot remains incredibly popular because it requires almost zero manual tagging. It scans your site, finds the trackers, and blocks them automatically.
- Pros – Fully automated monthly scanning. Huge database of known trackers. Easy implementation.
- Cons – Pricing scales aggressively. A domain with over 1,000 pages will cost you $55/month in 2026. The default banner designs are quite rigid and difficult to style cleanly.
- Best for – Agencies managing dozens of mid-sized client sites who need a set-it-and-forget-it solution.
OneTrust: The Enterprise Standard
If you’ve a massive legal department and highly complex data-sharing agreements, this is where you end up.
- Pros – Unmatched granularity. Handles everything from cookie consent to vendor risk management. Integrates deeply with enterprise data lakes.
- Cons – Ridiculously expensive. Mid-market modules start around $500/month. The backend interface is famously complicated.
- Best for – Fortune 500 companies with dedicated privacy officers.
Termly: The professional Alternative
For startups and small businesses, Termly offers a great balance of features and affordability.
- Pros – Very affordable Pro plan at just $15/month. Includes multi-regional compliance out of the box. Excellent custom CSS capabilities for your banners.
- Cons – The automated scanning occasionally misses obscure third-party marketing pixels, requiring manual overrides.
- Best for – Local businesses and independent creators who need fast, affordable protection.
Pro tip: Don’t forget that Cookiez is also a highly capable alternative, especially when you need specific geo-targeting rules without the enterprise price tag.
The 2026 Cookie Compliance and Conversion Audit
Before you push any new banner live, you need to audit the implementation. A broken banner is worse than no banner at all.
Run through this exact checklist. If you fail any of these points, you aren’t ready for production.
Technical Audit Items
- Verify script blocking – Open Chrome DevTools, clear your cache, and load the site. Did Google Analytics fire before you clicked accept? If yes, your implementation is broken.
- Check mobile responsiveness – Shrink your browser window to 320px wide. Does the banner text overflow? Are the buttons stacked neatly?
- Measure load times – Run Lighthouse. Is your banner script pushing your LCP over 2.5 seconds? You need to defer the script.
- Test the API – Click “Accept All” and then refresh the page. Does the banner reappear? Your consent cookie isn’t setting correctly.
- Audit cross-domain tracking – If you use subdomains (like shop.yoursite.com), verify that consent passes smoothly across the whole environment.
Design and UX Audit Items
- Contrast validation – Run your button colors through a WCAG contrast checker. You need a minimum ratio of 4.5:1.
- Reject button visibility – Can a user clearly see how to opt-out within two seconds of looking at the banner?
- Z-index conflicts – Scroll down your page. Does your sticky header overlap the consent popup? Adjust your z-index values immediately.
- Font legibility – Ensure your legal disclaimer text is no smaller than 14px on mobile devices.
Frequently Asked Questions
Does banner placement legally matter under GDPR?
Yes, placement matters indirectly. GDPR requires that withdrawing consent is as easy as giving it. If your placement obscures the opt-out mechanism or makes it difficult to access the settings later, you’re violating compliance standards.
Why shouldn’t I just put the banner at the very top of my site?
Top banners push all your main content down when they load. This creates a terrible Cumulative Layout Shift (CLS) score, which hurts your Google rankings. It also annoys users who just want to read your headline.
Can Elementor popups actually replace a dedicated CMP?
No. Elementor builds the visual interface, but you still need a CMP (like Cookiebot or Cookiez) to handle the actual javascript blocking and log the consent records for legal audits.
What happens if I don’t include a ‘Reject All’ button?
In 2026, European regulators actively fine websites that hide the reject option behind multiple clicks. You’ll likely face heavy penalties, and user trust will plummet.
How much does a consent banner slow down my website?
A poorly implemented banner can delay your Largest Contentful Paint by up to 450ms. However, using async/defer tags and optimized scripts can reduce this delay to under 80ms.
Should I show the same banner to US and EU visitors?
Absolutely not. EU visitors require strict prior consent (opt-in), while many US states allow an opt-out model. Use geo-targeting to serve the correct banner and maximize your conversion rates.
Is a floating toast better than a full-width bottom bar?
It depends on your device traffic. Desktop users generally engage better with a discreet bottom-left floating toast. Mobile users, however, prefer a full-width bottom bar because it fits the natural thumb zone perfectly.
Looking for fresh content?
By entering your email, you agree to receive Elementor emails, including marketing emails,
and agree to our Terms & Conditions and Privacy Policy.


