Setting up a compliant website can feel like a balancing act. You want to focus on creating beautiful layouts and growing your business, but modern privacy laws require clear consent before you track any user data. If you run a WordPress site, you’ve likely come across both Cookiebot and Elementor’s native compliance capability, Cookie Consent. Both platforms aim to solve the same core puzzle, but they take very different paths to get you there. In this complete comparison, we’ll explain how these two solutions handle privacy rules, design customization, and daily workflows so you can choose the best fit for your site.
Key Takeaways
- Native integration, Cookie Consent lives entirely inside your WordPress dashboard, removing the need for third-party platforms.
- Enterprise-grade reach, Cookiebot offers powerful multi-site scanning built for large external networks, managed via an outside cloud portal.
- Google Consent Mode v2, Both tools support this critical Google standard, helping you maintain accurate analytics and ad tracking.
- Setup speed, You can get Elementor’s compliance tool up and running in under five minutes using simple templates.
- Design control, Customizing your banner to match your exact brand colors is simpler when your consent tool is built directly into your builder framework.
Why Web Compliance Matters More Than Ever in 2026
The rules around user privacy have shifted dramatically over the last few years. A simple footer banner saying “we use cookies” used to be enough. Those days are gone. Regulators in the European Union, the United Kingdom, California, and dozens of other jurisdictions now require consent that is explicit, informed, and easy to withdraw. If your site processes any kind of user data, you must get active consent before loading tracking scripts.
Major technology platforms are enforcing these rules too. Web browsers are phasing out third-party tracking, and Google now mandates Google Consent Mode v2 for any business running ads or analyzing traffic in the European Economic Area. Without verified consent signals, your marketing campaigns will lose accuracy. This shift has turned compliance from a legal chore into a critical piece of your marketing strategy.
As you evaluate your options, the biggest choice you face is whether to use a WordPress-native capability that keeps your workflow unified, or an external SaaS portal that treats compliance as a completely separate service.

An Overview of Cookie Consent by Elementor
When Elementor developed its Cookie Consent capability, the focus was on bringing compliance directly into the creative workflow. Rather than making you jump back and forth between different management portals, this tool handles everything right from your main WordPress dashboard. It’s a native compliance feature designed to manage GDPR and CCPA rules without adding unnecessary complexity to your site structure.
The setup process takes under five minutes. You don’t have to copy and paste code blocks into your theme files or worry about breaking your site layout. The tool handles cookie scanning, script categorization, and template design in one unified interface. It’s an ideal fit for site owners who want to build visitor trust while meeting strict privacy law requirements without leaving their familiar workspace.
Because it’s built into the broader Elementor ecosystem, it works naturally alongside other site features. This matches the philosophy behind other platform developments, such as Web Accessibility, where the goal is to make web compliance a natural part of the design process rather than an afterthought. Cookie Consent is also included as part of Elementor One, giving creators a complete toolkit for building modern, high-performing websites.
Key Features of Cookie Consent
- Builds customized banners using flexible cloud templates.
- Scans your website automatically to identify active tracking scripts.
- Logs user choices to maintain a secure audit trail for regulators.
- Supports multiple languages to serve visitors in their native tongue.
- Adapts your tracking behavior using built-in Google Consent Mode v2 capabilities.
- Restricts specific scripts based on geographic targeting settings.
An Overview of Cookiebot
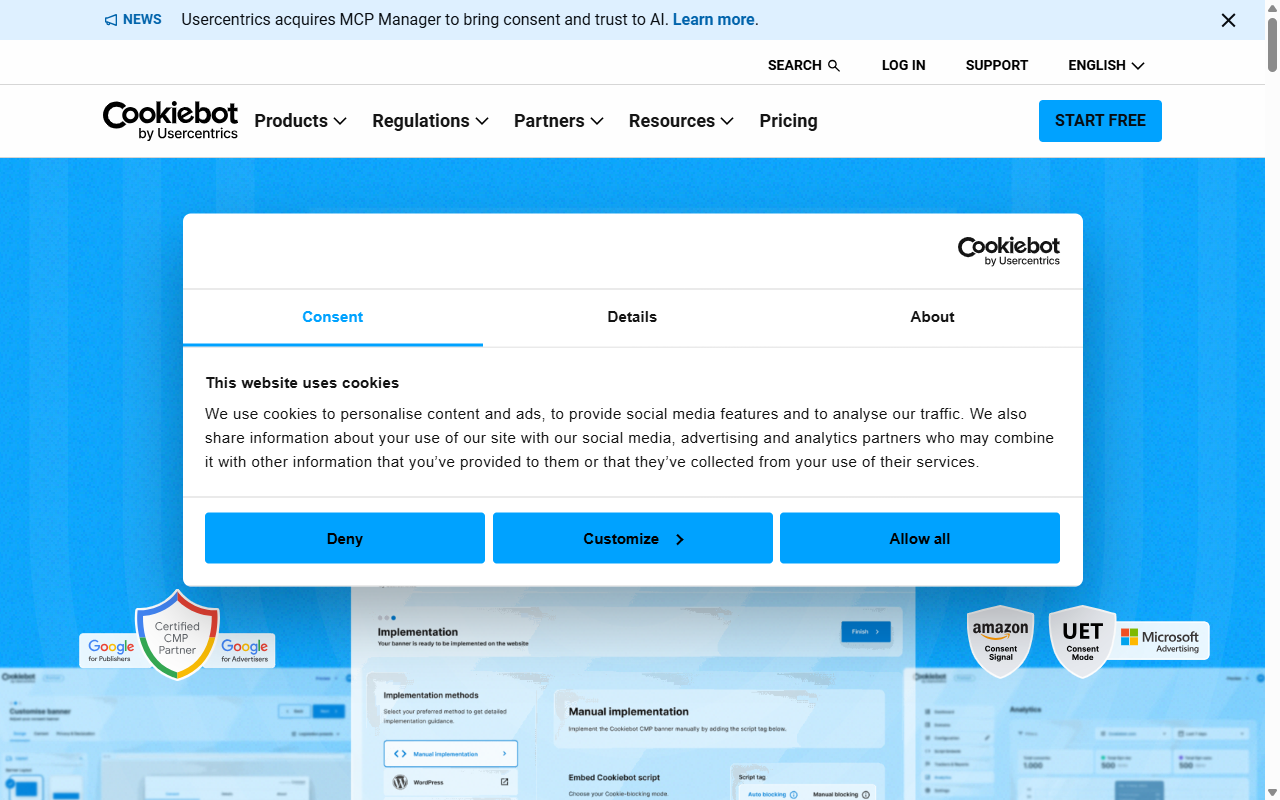
Cookiebot is an established, dedicated consent management platform that operates on a cloud-based software-as-a-service model. Because it’s a standalone tool, it’s designed to work across any content management system, not just WordPress. It relies on an external dashboard where you configure your banners, manage your cookie declarations, and review your compliance logs.
To use Cookiebot on WordPress, you typically install their integration helper, sign up for an external account on their website, and link the two platforms using an API key or a script snippet. From there, Cookiebot runs automated monthly scans of your site from its cloud servers, compiling a detailed inventory of every cookie and tracker it finds. It then generates a dynamic declaration page that you can embed directly into your privacy policy.
This external approach is highly structured. It appeals to corporate legal teams and agencies who manage consent across a diverse portfolio of websites built on different platforms. It treats compliance as a separate utility, delivering automated scanning reports and structured consent registries from its dedicated cloud infrastructure.
Key Features of Cookiebot
- Crawls your entire website on a monthly automated schedule.
- Generates a detailed cookie declaration page automatically.
- Saves consent data securely inside a centralized cloud repository.
- Translates banner text into dozens of different languages automatically.
- Controls script execution using a cloud-based manager interface.
- Syncs settings across a large portfolio of external domains.
Side-by-Side Comparison
To help you see how these two tools stack up at a glance, here’s how their core differences break down across the areas that matter most to WordPress site owners.
| Feature | Cookie Consent (Elementor) | Cookiebot |
|---|---|---|
| Dashboard Location | 100% WordPress-native | External cloud platform |
| Setup Time | Under 5 minutes | 15 to 30 minutes |
| Design Control | Direct style options in the editor | Template-based with custom CSS overrides |
| Consent Mode v2 | Fully supported natively | Fully supported via script configurations |
| Geo-Targeting | Included out of the box | Available on premium tiers |
| Policy Generator | Built in | Available via external portal |
| Free Tier | Yes | Limited trial available |
| Platform Focus | WordPress-native | Platform-agnostic SaaS |
A Closer Look at Daily Workflow
Managing a website involves keeping track of many different details, so cutting down on external accounts you need to log into is always a win (simpler than it sounds).
With Cookie Consent, your entire setup lives directly in your WordPress dashboard. You don’t need to create a separate account on another platform, remember another password, or copy API keys back and forth. Everything from scanning your cookies to customizing the banner layout happens within your existing admin panel. This native integration keeps your database clean and ensures that your consent system loads efficiently alongside your other site elements.
Cookiebot requires you to manage your settings from their external cloud portal. While they offer a helper integration to connect the script to your site, the heavier tasks, such as categorizing cookies, reviewing consent statistics, and updating your subscription settings, happen on their external site. For some users, this split workflow is completely fine. But if you prefer to keep your tools centralized and avoid jumping between platforms, a native tool keeps things noticeably simpler.
“Managing user consent is no longer just about putting a banner on your footer. It’s about maintaining clear, verifiable audit trails and ensuring your technical tags align with your marketing goals without breaking user trust.”
– Itamar Haim, Web Compliance Specialist
Google Consent Mode v2 and Compliance Standards
If you run ads on Google or track visitor behavior with Google Analytics, you must support Google Consent Mode v2. This technical standard communicates your visitors’ consent choices directly to Google’s tag systems. If a visitor declines cookies, Google’s tags automatically adjust their behavior, sending anonymous pings instead of storing personal identifiers. This keeps your measurement accurate while respecting user privacy.
Both platforms support this standard, but they approach the configuration differently:
- Cookie Consent handles Google Consent Mode v2 natively. The feature communicates directly with your site’s script loading engine, letting you map consent categories to Google’s specific tag variables without having to configure complex third-party container rules.
- Cookiebot supports the standard through its cloud dashboard and tag manager integrations. You’ll need to ensure that your external container tags are set up to listen to Cookiebot’s consent signals, which often requires some manual testing and helper configurations.
- Global Privacy Control (GPC) is supported by both tools, allowing them to automatically honor browser-level privacy signals sent by users who want to opt out of tracking.
This setup prevents the legal risk of loading marketing scripts before a user has clicked “Accept.” By keeping these settings straightforward, you can feel confident your site stays compliant with the latest guidelines from both privacy regulators and tech platforms.
Design Customization and Brand Styling
Your cookie consent banner is often the very first thing a new visitor sees when they arrive on your site. If it looks generic, out of place, or blocky, it can immediately hurt the user experience and damage trust. A professionally styled, well-integrated banner helps reassure visitors that you take their privacy seriously.
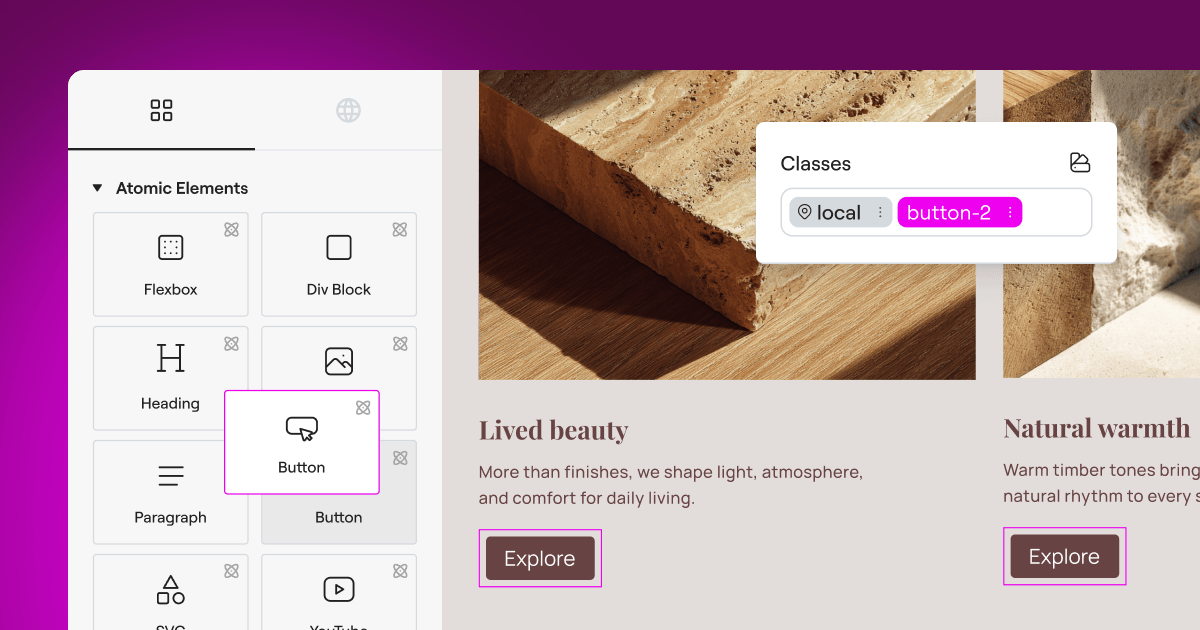
Because cookie consent is built into the Elementor environment, it gives you complete design freedom. You can use your site’s native global fonts, color palettes, and spacing rules to style the banner. Whether you want a subtle slide-in card, a full-width footer bar, or a focused overlay modal, you can design it visually. There’s no need to write custom CSS rules or wrestle with hosted stylesheets to get the look just right.
Cookiebot provides several clean, pre-built layouts. They look professional, but deep visual changes to match your exact brand style require custom CSS overrides inside their external portal, which can slow things down, especially for dark mode or specific mobile configurations.
When designing your banner, a few key principles help keep conversion rates high and the presentation clean:
- Matches your site typography to maintain a cohesive brand style.
- Adapts to mobile screen sizes with fully responsive layouts.
- Respects dark mode settings on user operating systems.
- Communicates choices clearly using readable contrast levels.
- Displays your privacy policy link prominently inside the layout.
Cookie Scanning and Script Control
For a consent banner to actually work, it must block cookies and scripts from loading until the visitor gives permission. This requires a solid scanner that can find every tracker on your site and group them into logical categories like necessary, preferences, statistics, and marketing.
Here’s how typical tracking scripts behave on a modern website:
- Tracks visitor behavior across multiple sessions.
- Identifies specific user profiles for targeted advertising campaigns.
- Stores user preferences like dark mode or language choices.
- Monitors site performance to find loading bottlenecks.
- Saves items inside a shopping cart during an e-commerce session.
- Measures traffic sources to see which marketing channels perform best.

Cookie Consent handles this by scanning your pages and letting you categorize the discovered scripts directly inside WordPress. Because it’s connected directly to your site engine, it can pause or load scripts instantly based on the visitor’s choice. It keeps things fast because the logic runs directly on your server without waiting for external cloud servers to process the request.
Cookiebot runs its scans on a scheduled cloud basis. It crawls your pages monthly and builds a dynamic manifest of cookies. While this automated cloud scan is thorough, it does mean that if you add a new tracking pixel between scans, you may need to manually run a new scan in your external portal to keep your cookie declaration current. Once scanned, Cookiebot blocks the scripts using its cloud script helper, which handles the categorization on their servers.
Consent Logs and Audit Readiness
Regulators don’t just want to see that you have a banner running; they want proof that specific users gave specific consent at specific times. Cookie Consent keeps those logs natively inside your WordPress installation. Every time a visitor makes a choice, that record is captured and stored in a format you can access directly from your dashboard without logging into another platform.

Who is Each Tool Built For?
Choosing between these two compliance platforms depends on your specific business structure, your website framework, and how you prefer to manage your workflows. Here’s what tends to work best for different scenarios.
When to Choose Cookie Consent
This native tool is designed for site owners who want a clean, fast, and unified dashboard setup. You’ll find it a great fit if:
- You want to manage everything directly inside WordPress without handling external cloud logins.
- You already use Elementor as your primary design platform and want to keep your technical tools under one roof.
- You want a built-in policy generator and geo-targeting without paying extra subscription fees.
When to Choose Cookiebot
Cookiebot remains a solid option for businesses that operate outside of a single ecosystem. You might prefer it if:
- You run complex networks of non-WordPress sites alongside your main blog.
- You need highly structured monthly compliance reports delivered directly to your legal team.
- You need centralized consent management across hundreds of distinct domains from a single external portal.
How to Safely Transition Your Consent Setup
If you’re moving from an older consent solution, a structured transition prevents script loading errors and keeps your Google Analytics data accurate.
- Audit your current active tracking scripts before making any changes.
- Back up your existing database before activating your new consent tool.
- Test in an incognito browser window to verify tags are blocked until consent is given.
Once you complete these steps, you can safely retire your old solution. A regular maintenance routine keeps things clean going forward:
- Maintains active logs of all user consent decisions.
- Reviews active tracking scripts on a quarterly basis.
- Tests consent banners on multiple device types and operating systems.
- Updates your privacy policy whenever you add new marketing tools.
- Documents your legal basis for processing any personal data.
- Verifies that scripts remain blocked until explicit consent is given.
Pricing and Value
Compliance is an ongoing requirement, so you want a solution that scales comfortably as your traffic grows.
Cookie Consent includes an entry-level plan that covers basic consent needs, making it highly accessible for new blogs and small businesses. For growing sites, it’s packaged as part of Elementor One, meaning you get access to a complete compliance toolkit alongside premium design, Image Optimization, and Email Deliverability capabilities without paying for separate, costly subscriptions.
Cookiebot uses a subscription model based on the size and complexity of your website. Their plans are structured around the number of subpages and domains you manage. If your site has thousands of pages, your monthly cost will scale accordingly. To find their current rates and plan details, check the official Cookiebot website. This pricing structure is standard for enterprise SaaS tools, but it’s a key factor to keep in mind if you’re managing costs across a growing portfolio of content-heavy sites.
Choosing the Right Fit for Your Site
Both of these platforms offer reliable ways to protect your business and respect visitor privacy. If you manage a large, multi-platform corporate network and need external cloud-based auditing, Cookiebot provides a solid, dedicated compliance service. But if you’re running a WordPress site and want to keep your setup simple, fast, and beautifully styled, the native Cookie Consent capability keeps everything organized exactly where you already work. It takes the stress out of compliance so you can focus on what you do best: building great content and growing your online presence.
Frequently Asked Questions
What is Google Consent Mode v2, and do I really need it?
Google Consent Mode v2 is a framework that passes visitor consent choices directly to Google tags. If you have traffic from the EU or UK and use Google Analytics or Google Ads, it’s a firm requirement. Without it, your tracking systems won’t be able to accurately measure conversion data or optimize ad delivery.
Can I use these tools to satisfy both GDPR and CCPA requirements?
Yes, both tools are designed to handle multiple legal frameworks. They let you configure opt-in consent for GDPR compliance (the European standard) and opt-out mechanics for CCPA compliance (the California standard), so you’re covered globally.
Does cookie consent affect my website’s page speed?
It can, if the tool relies on heavy external scripts that delay page rendering. Because Cookie Consent is built natively for WordPress, it loads its elements efficiently. External SaaS options may require a brief handshake with external servers to pull the banner configuration, which can add a small delay.
Do I need an external account to use Cookie Consent?
No, you don’t. One of the primary advantages of this native feature is that it runs entirely within your existing WordPress admin area. You don’t need to register on a separate platform or manage extra API connections to get started.
How does geo-targeting work for privacy banners?
Geo-targeting uses the visitor’s IP address to determine their location. This lets you show a strict opt-in banner only to visitors from regions with strict privacy laws, like the European Union, while displaying a lighter banner (or none at all) to visitors from areas with fewer regulations.
What happens if a visitor ignores the consent banner?
If a visitor ignores the banner and continues browsing, compliant tools will keep tracking cookies blocked by default. Scripts are only allowed to load once the user actively clicks the confirmation button, keeping your site safe from compliance violations.
Can I customize the colors and fonts to match my brand?
Yes, but the ease varies. Cookie Consent lets you style every element directly in the visual builder using your site’s existing design system. Cookiebot allows for clean standard layouts but requires custom CSS overrides for deeper visual changes.
What is Global Privacy Control, and does my site need to support it?
Global Privacy Control is a browser setting that lets users signal their privacy preferences automatically. Both of these modern compliance platforms respect GPC signals, which helps your site meet CCPA and modern state-level privacy requirements in the United States.


