Google Fonts or Custom Fonts (for Pro users) may not display correctly on the frontend of your website, even though they appear as expected in the Elementor Editor.
Possible causes
This issue generally stems from two common problems, which can occur independently or together:
- CORS policy violations – When the browser blocks a request to load fonts from a different origin (see MDN – CORS).
- Mixed content – When a secure HTTPS page tries to load resources (like fonts) over an insecure HTTP connection (see MDN – Mixed Content).
Below are the most common scenarios that lead to these issues:
After Migrating Your Website (CORS)
When migrating from a local or staging site, your WordPress and Site URLs usually change. However, Elementor may still reference old URLs for your fonts in its generated CSS files via the @font-face rule. If these font URLs point to your previous domain, the browser will block them due to CORS policy restrictions.
After Installing an SSL Certificate (Mixed Content)
If your site was originally set up without HTTPS, Elementor may have saved font URLs using the insecure http:// protocol. After installing an SSL certificate, your site loads via https://, but those older http:// links remain in place. This causes mixed content issues, and modern browsers will block those insecure font files.
After Changing Your Site URL (CORS)
Changing your domain, adding a subdomain or subdirectory, or switching from HTTP to HTTPS can all result in outdated font URLs being stored in Elementor’s CSS files. These outdated references may be blocked due to CORS violations.
WordPress Settings Still Use HTTP (Mixed Content)
If your Site Address (URL) and WordPress Address (URL) in the WordPress Settings page still use http://, Elementor will also use that protocol when generating font URLs. This creates mixed content errors once the site is accessed via HTTPS.
Logged In via HTTP (Mixed Content)
If you access the WordPress Admin Dashboard via http://, WordPress returns the unsecure protocol for all internal URLs during your session. Elementor will store those insecure URLs in its CSS files, even if your site is actually served over https://.
Preliminary steps
Locate and verify your custom font files are on the server and have the correct permissions:
- Go the folder: /wp-content/uploads/elementor/fonts/.
- Ensure the specific font files (WOFF2/WOFF) exist and match the weights/styles configured in Elementor. For details, see Add custom static fonts.
- If files are missing or corrupted, re-upload the font files and clear caches.
- Check with your hosting company that you have proper file permissions. They should be set to folders 755, files 644.
Solutions
- Always log in using a secure connection.NoteIf your site uses the HTTP protocol, go to step 3.
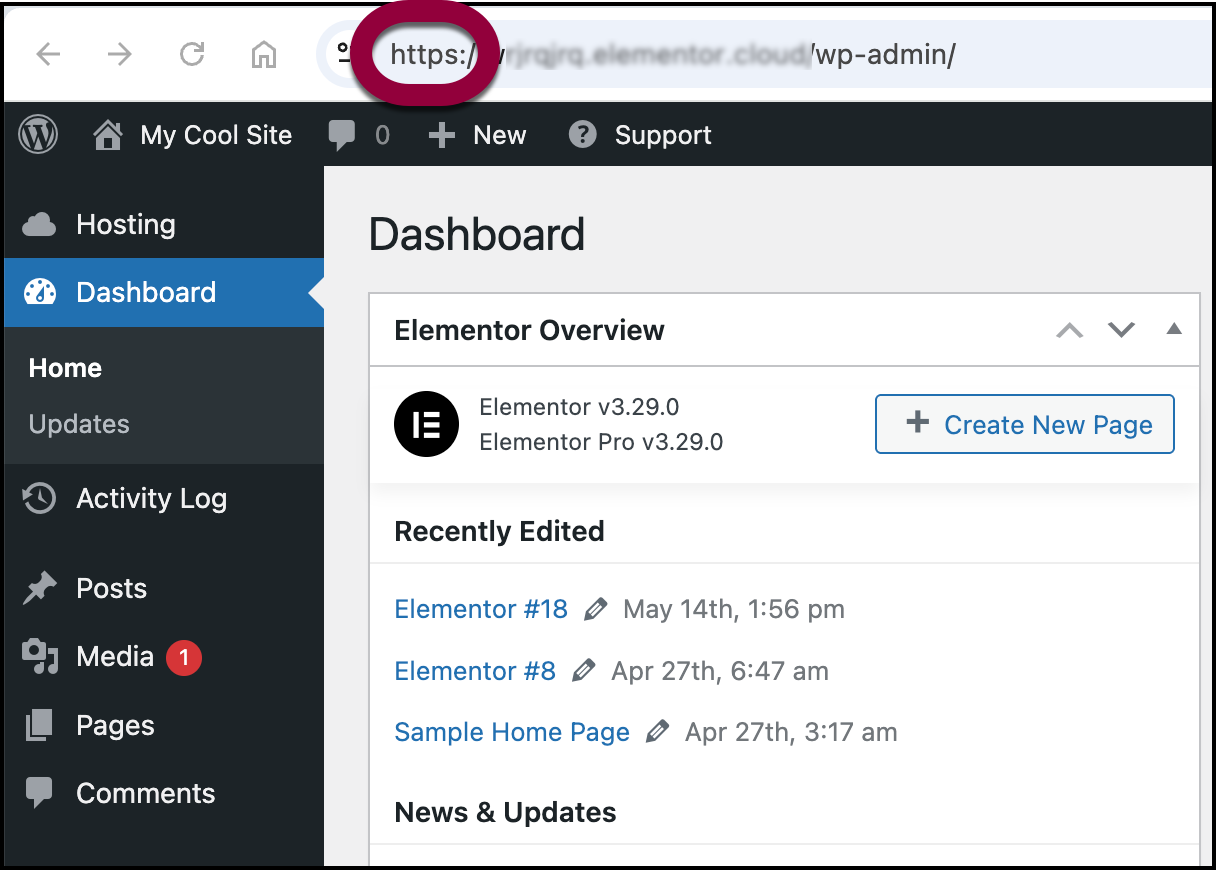
Make sure that when you’re accessing WP Admin usinghttps://and nothttp://. If possible, ask your hosting provider to redirect allhttp://requests tohttps://. - Update Your Site URL to Use HTTPS.
- From WP Admin, navigate to Settings>General.
The general settings appear in the right pane. - Verify that both the WordPress Address (URL) and Site Address (URL) begin with
https://.
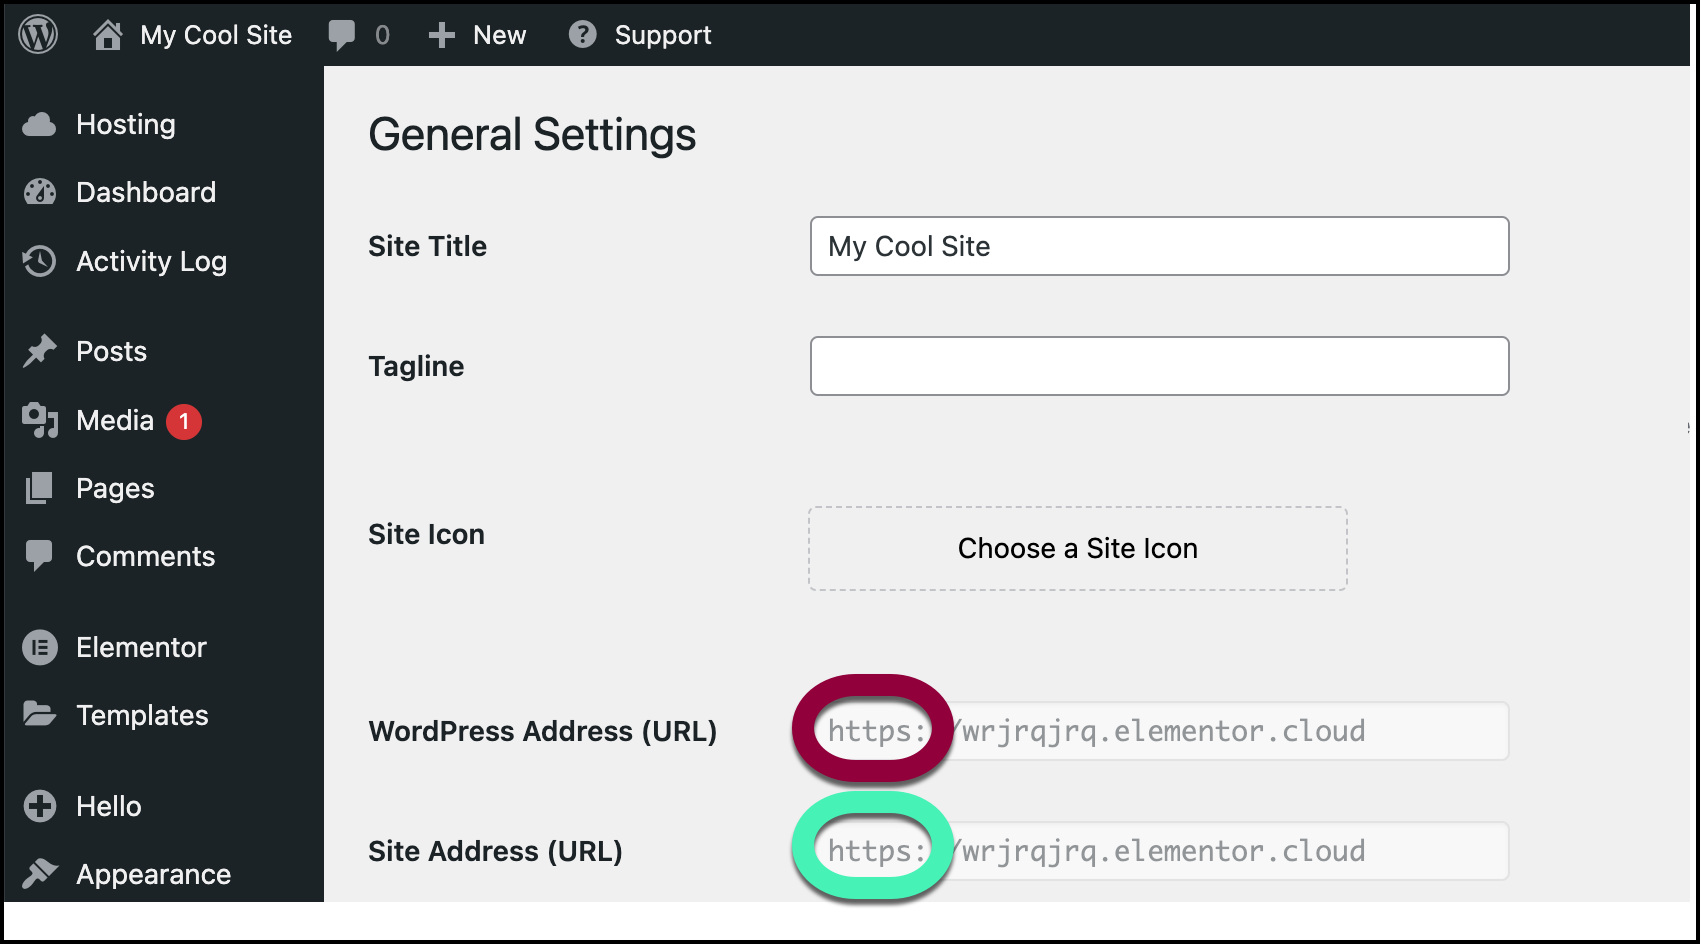
- If they do not begin with
https://, edit them and click Save Changes at the bottom of the screen.
- From WP Admin, navigate to Settings>General.
- Use the Replace URL tool and then clear the files and data. For details, see Use the Replace tool.
- (Optional) Reset the Google fonts load.NoteThis step is optional but can help signal cache layers to regenerate updated font references.
Elementor includes a setting that allows you to define thefont-displayproperty for Google Fonts. Changing and resetting this option can sometimes help trigger automatic cache clearing, especially when using optimization or CDN tools.
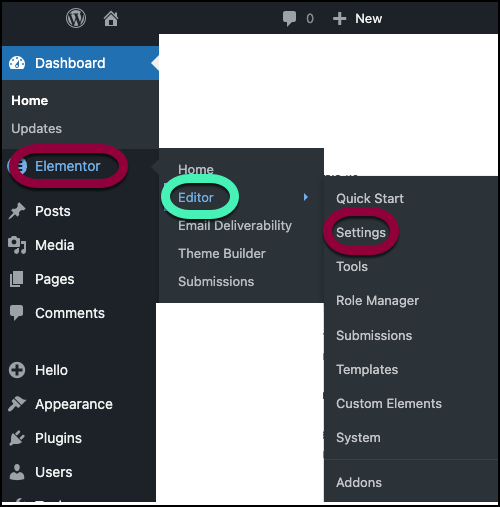
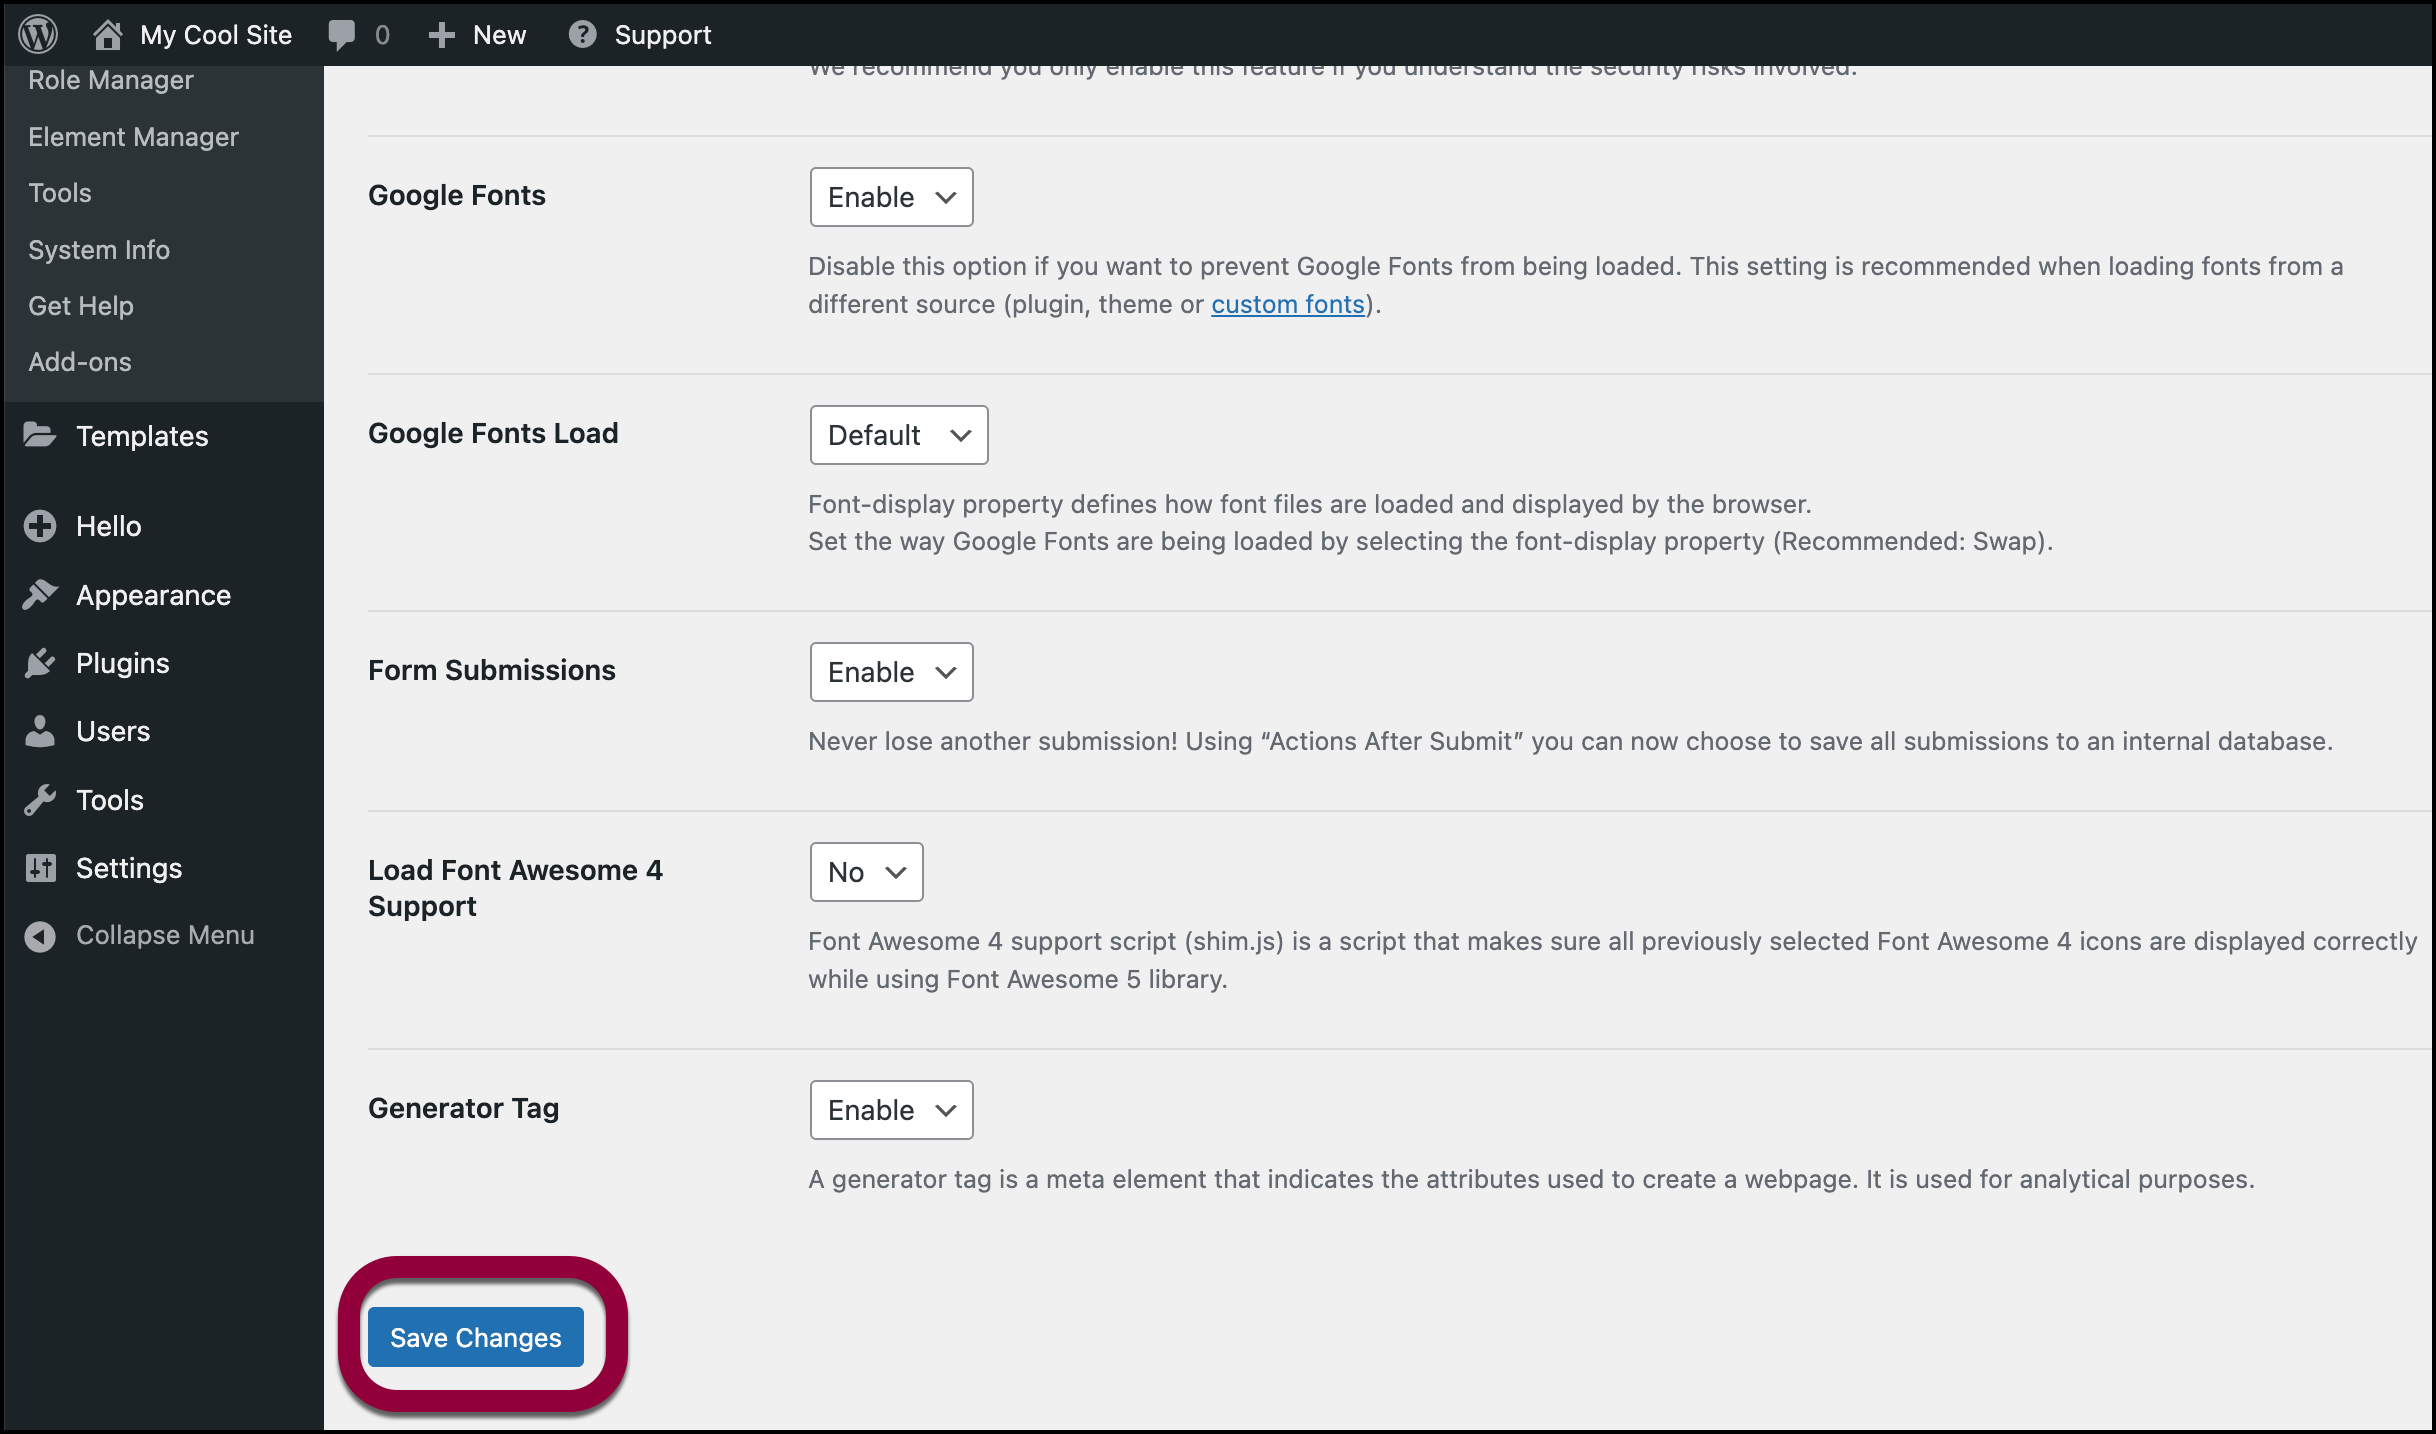
To reset the Google fonts load:- Go to WP Admin and navigate to Elementor>Editor>Settings.
- Click the Advanced tab.
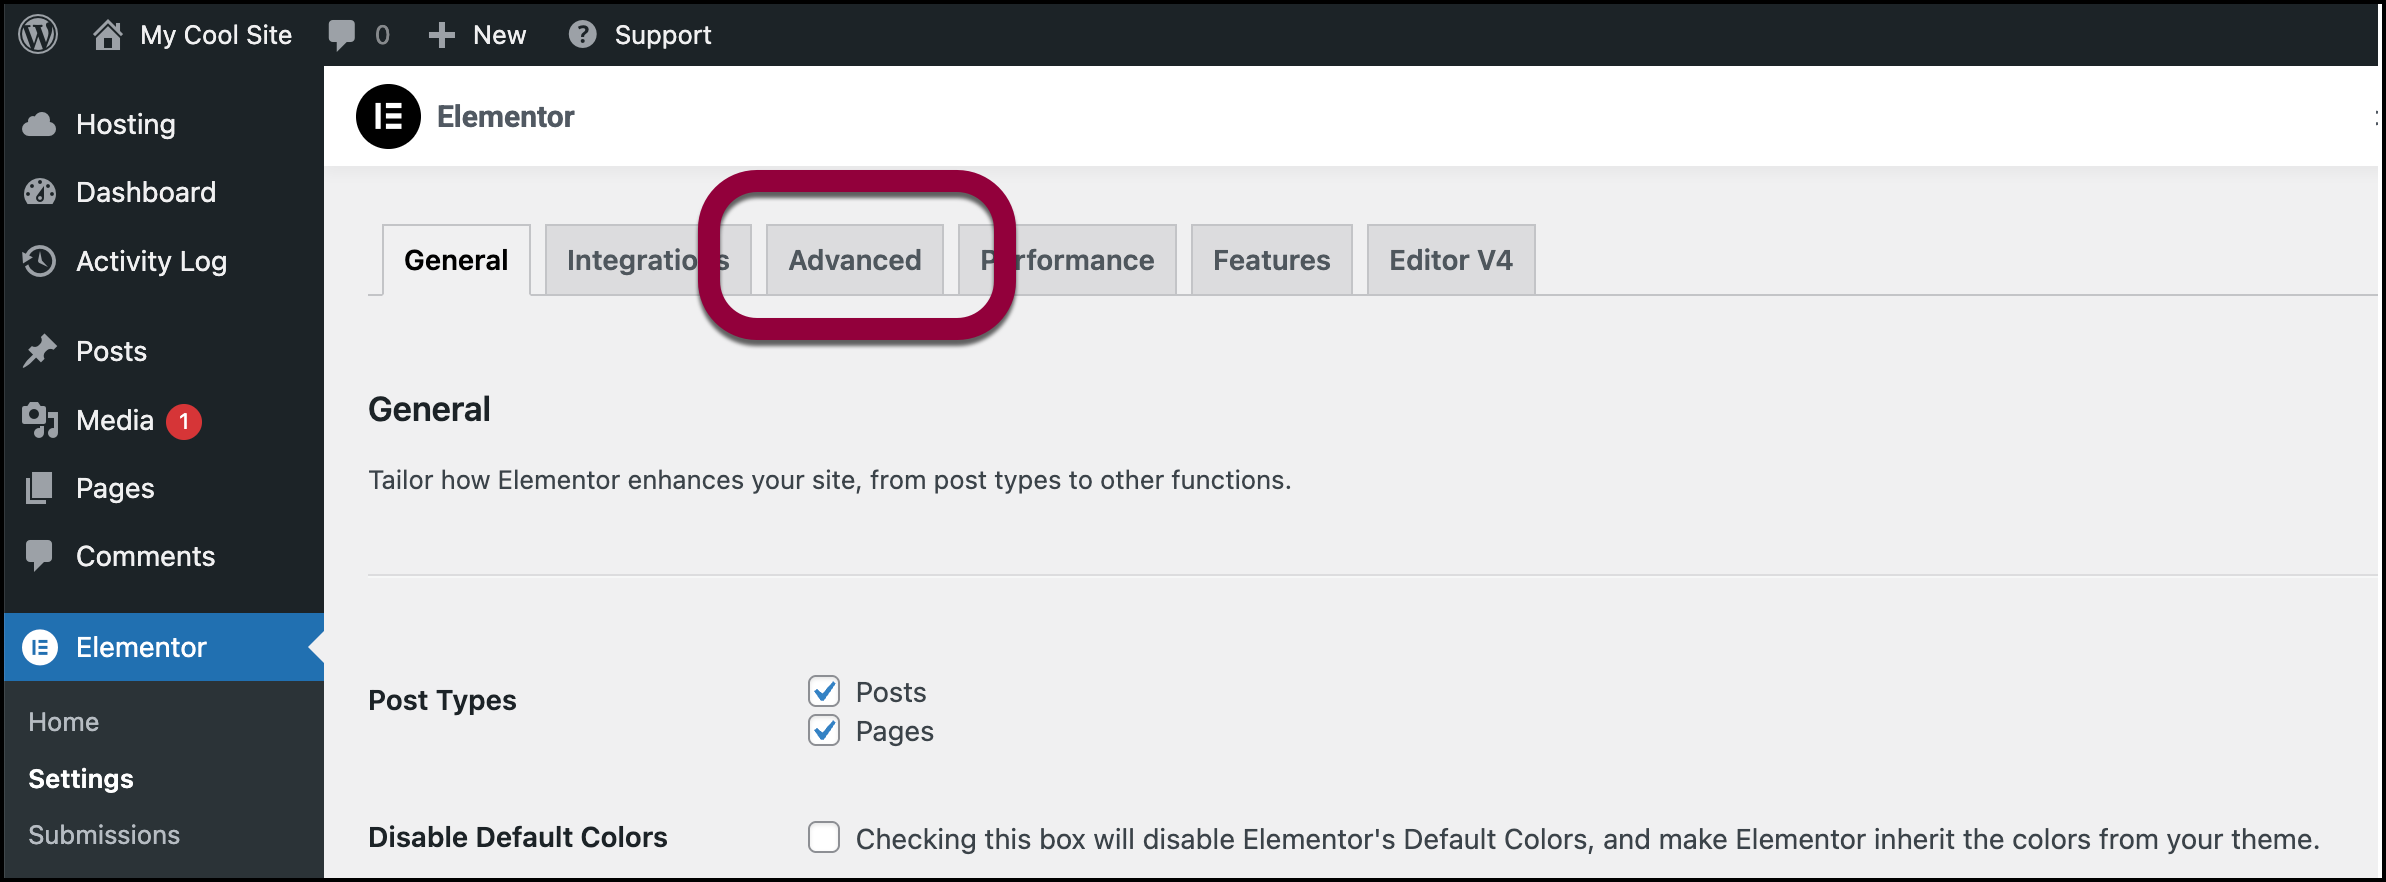
- Locate the Google Fonts Load option and use the dropdown menu to change its value.
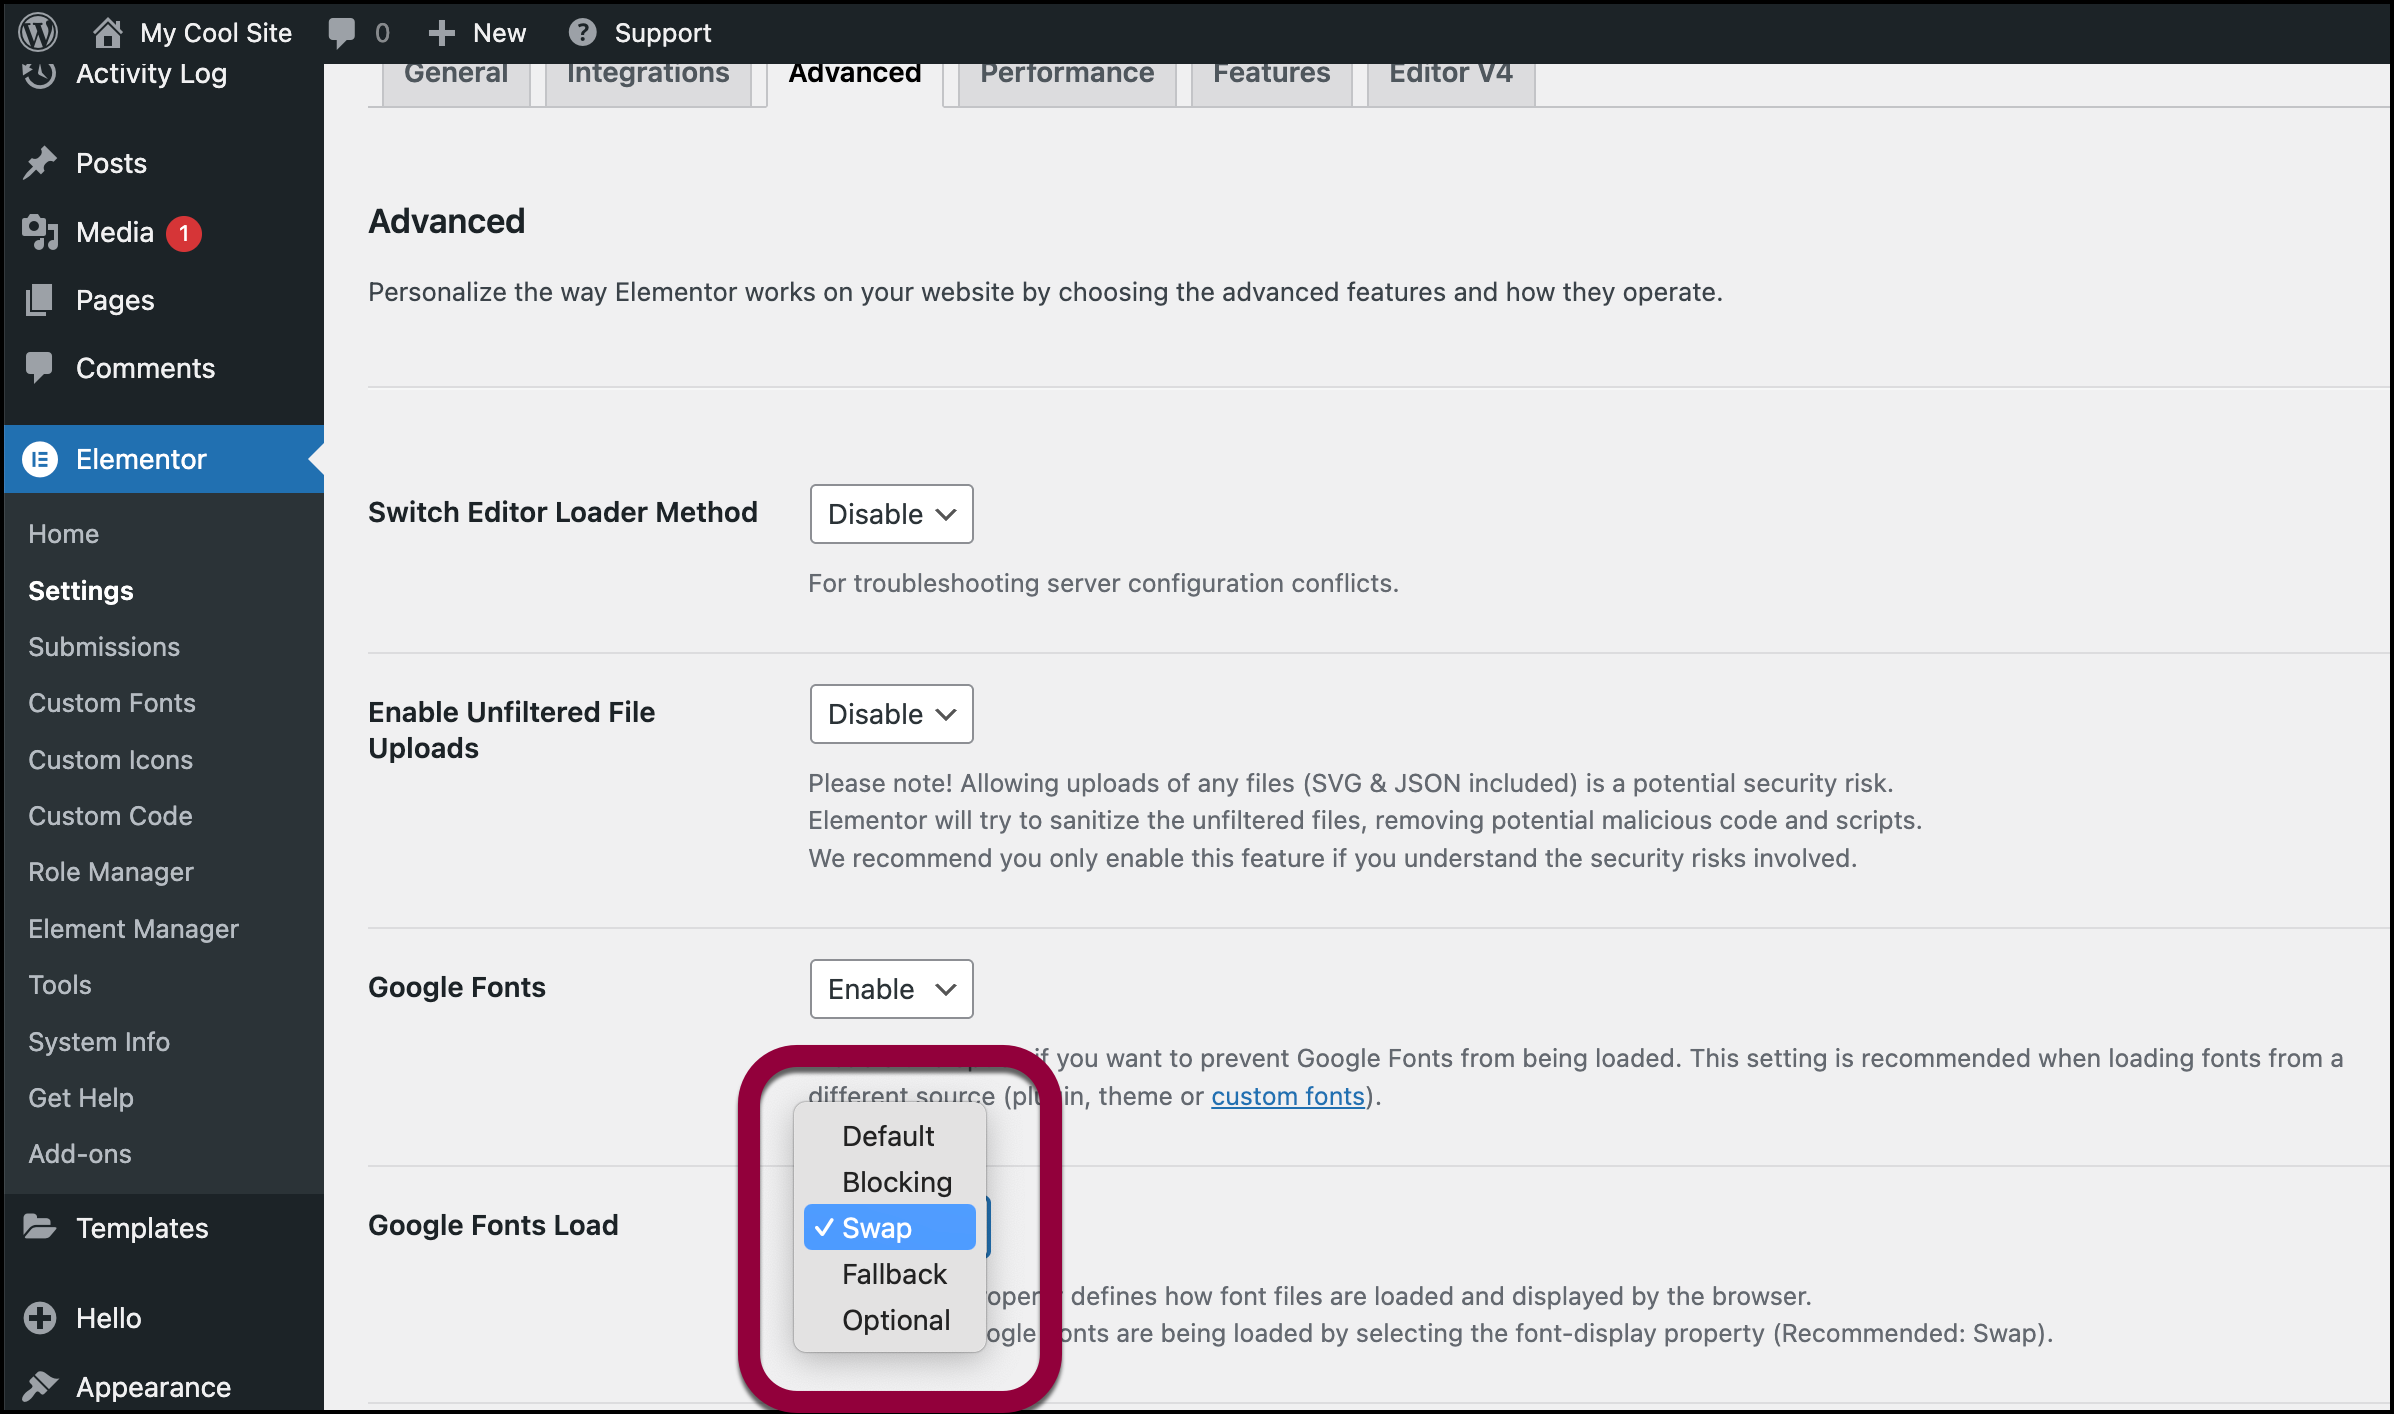
- Click Save Changes.
- After the page reloads, change the setting back to its original value.
- Click Save Changes.
- Go to WP Admin and navigate to Elementor>Editor>Settings.
- Clear the relevant caches.
To see the updated fonts, you should clear various types of caches.
To clear these caches:- Server cache: This is usually managed via your hosting control panel. Contact your hosting company for details about clearing the server cache.
- Site cache – This is often handled by caching plugins.
- CDN cache – Clear through your site, directly on CDN or using the hosting panel.
- Browser cache – Clear after all other caches have been purged. For details, see your browser’s documentation.
If you’re still experiencing issues:
- Deactivate all plugins except Elementor and Elementor Pro. If this solves the issue, try reactivating your plugins to see which is causing the issue.
- Switch to the Hello Elementor theme. If this solves the issue, check with the theme’s author.
Fonts fail after moving from staging to production or changing domains
After migrations, paths often point to the old domain:
Help prevent future font issues
To keep fonts loading reliably:
- Keep the entire site on HTTPS: set WP/ Site Address to https, force HTTPS at the server, and avoid hard-coding http URLs in code or CSS.
- When changing domains or going live, replace and regenerate the URL.
- Minimize aggressive optimization: exclude Elementor CSS/JS from combine/minify if they cause issues, and clear caches after changes.
- Keep WordPress, theme, Elementor, and Elementor Pro updated. Test major changes on a staging site first.

