Queries are requests for information from the website’s database. Queries are often generated by specific visitor requests, such as “Show me all the posts related to European travel”. There are several elements that allow you to use queries.
Common use cases
- A loop grid that displays certain categories of products
- An archive page that displays posts by date
- An archive page that displays posts according to category
Add a query
To create a query:
- Go to the Content tab of a widget that contains queries.
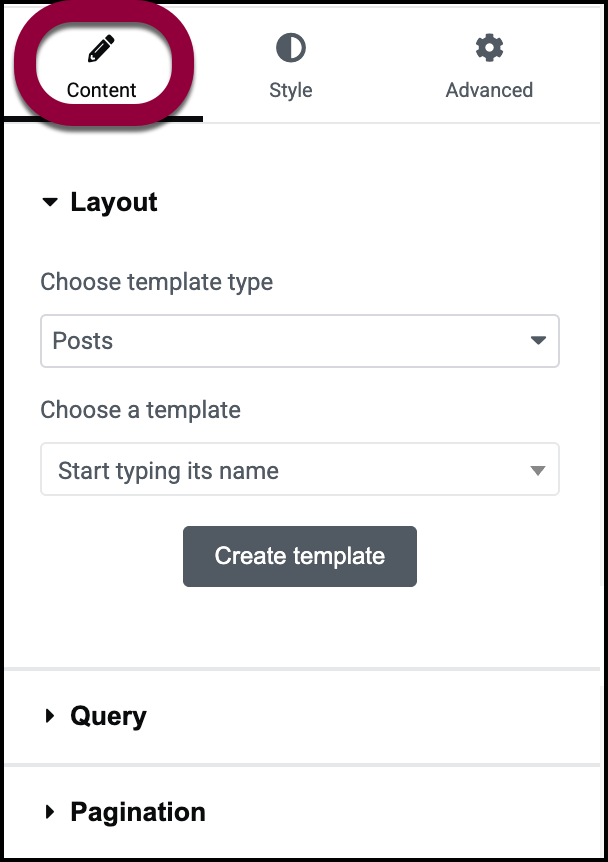
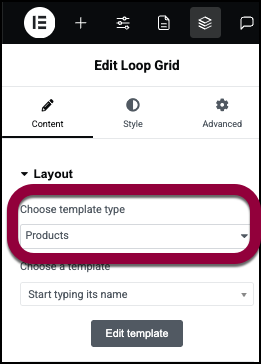
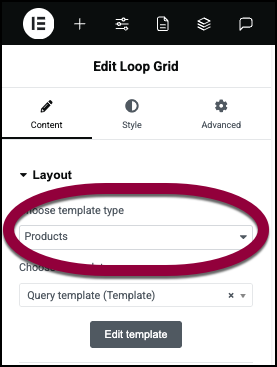
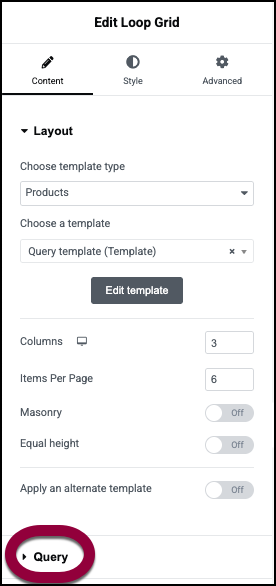
This opens the options in the panel. - Under Layout, choose a template type.NoteTemplate type options will differ depending on whether or not you have WooCommerce installed.
If your site includes a WooCommerce widget, the template types available are:
- Posts: Display data based on your site’s posts.
- Products: Display data based on your site’s products.
- Post taxonomy: Display data based on your site’s categories, tags and types.
- Product taxonomy: Display data based on your site’s product categories, tags and brands.
Post queries
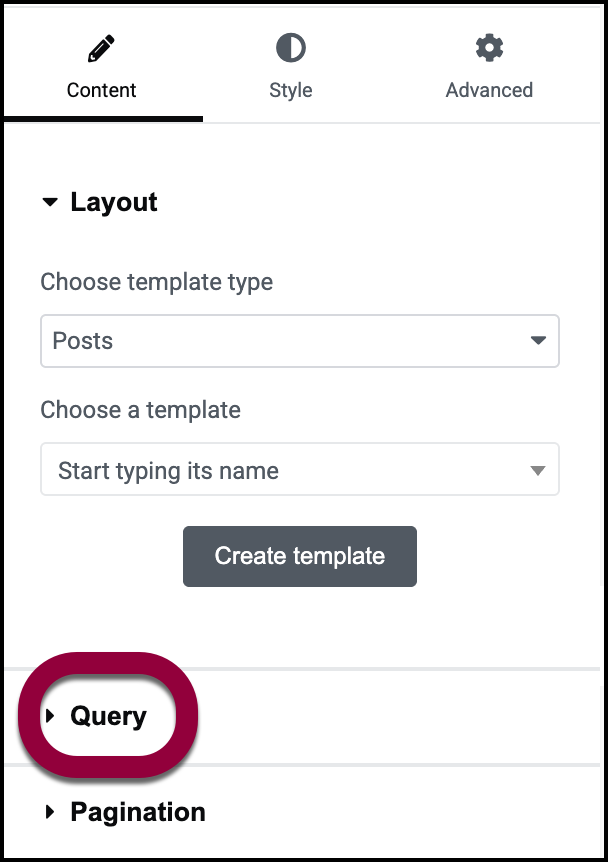
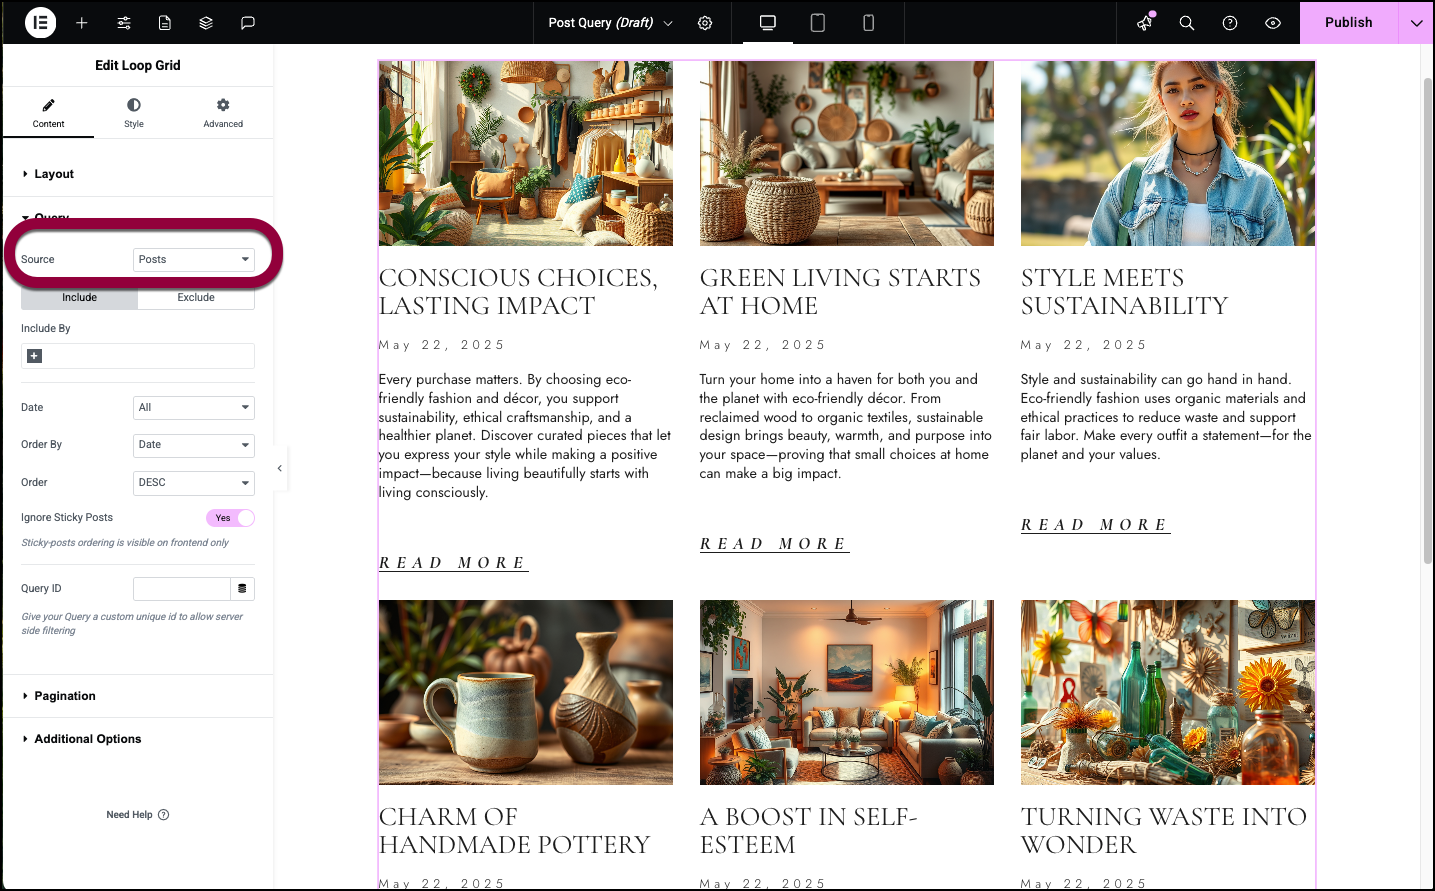
- Open the Query field.
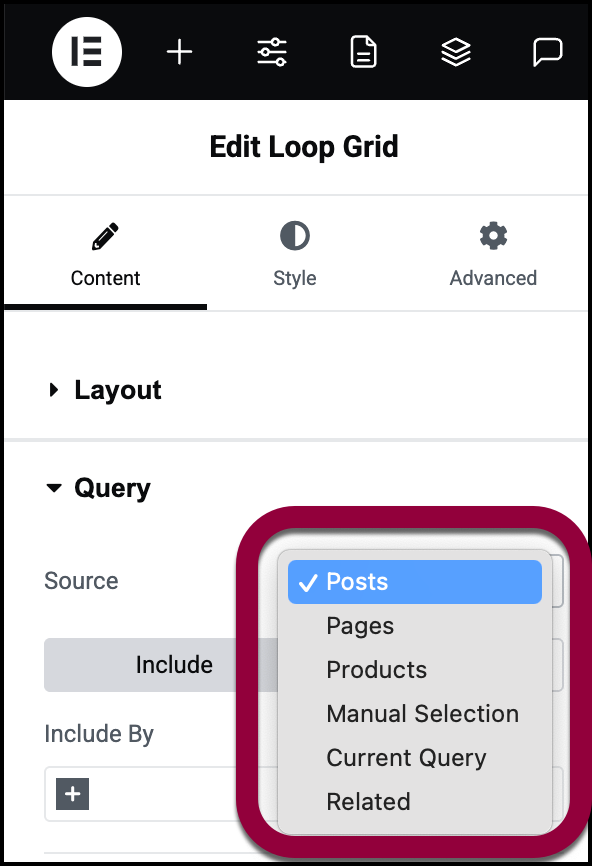
- Use the dropdown menu to determine the source of your query.
The source is what determines what kind of data the query will display. For example, if you want your query to display all your products in the category of pants, you’ll select Products as your source. Sources available are:- Posts: A posts query will display blog posts and other information created as a post, not including products. For details, see What are pages and posts.
- Pages: A pages query will display pages from your site.
- Products: A products query will display your site’s products. This option will only appear if you have WooCommerce installed on your site.
- Manual Selection: A manual selection query allows you to display pages, posts and products that you select.
- Current Query: A current query allows you to filter the results of an existing query and is used for archive pages. For instance, if a query displays all the pants sold by the store, a current query can display all the red pants.
- Related: Shows items in the same taxonomy (such as the same category or the same tag). For example, if you have a single post template with a loop grid showing related posts, a post in the news category would display other news posts. When using a Related query, you often want to add an exclude option to exclude the current post.
- Select whether your Query will Include data or Exclude data. For instance, you could include only products that are on sale.
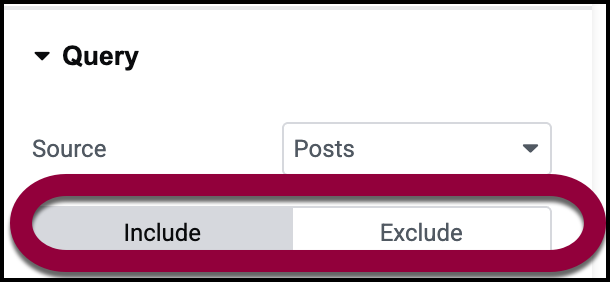
- Make your selection by clicking the relevant tab.
Using pages, Posts, Products, or Related as a source
When you query for posts you can include or exclude posts by: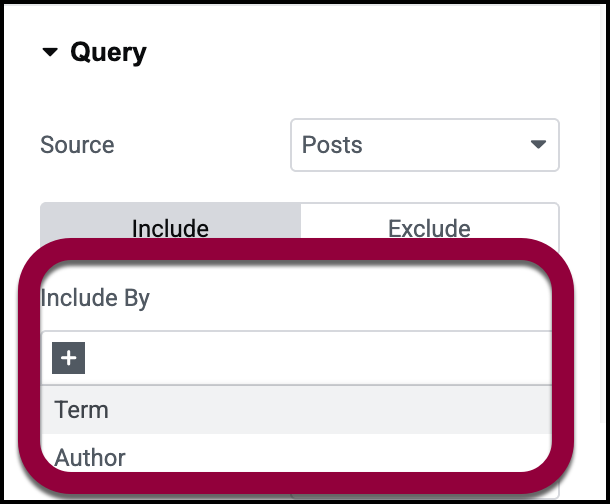
- Terms: Include posts by:
- Categories
- Tags
- Formats
- Custom taxonomies
- Author: Include items by author name.
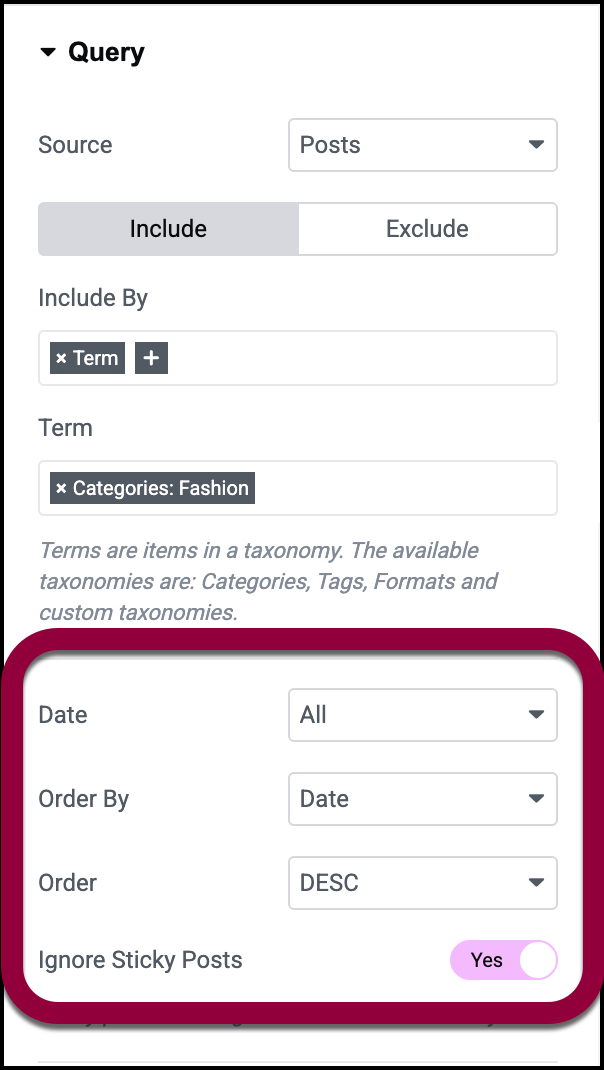
After adding these variables you need to define the following:
- Date: Filter displayed posts by when they were created. Options include:
- Past day
- Past week
- Past month
- Past quarter
- Past Year
- Custom: Allow you to input a date range.
- Order by: While posts are commonly arranged by date, with the oldest or newest showing up first, there are several ordering options:
- Date: Newest to oldest or vice versa
- Title: Display alphabetically by the blog title.
- Menu order: Posts are shown in the same sequence as they appear in the site’s navigation menu.
- Last modified: The most recently changed post to the earliest changed post or vice versa.
- Comment count: The post with the most to the post with the fewest comments or vice versa.
- Random
- Order
- ASC: From the lowest value to the highest value. For example, if you choose to order posts by date in ascending order, the oldest post will appear first.
- DESC: From the highest value to the lowest value. For example, if you choose to order posts by Title, the post that comes last alphabetically will be shown first.
- Ignore Sticky Posts: When creating posts you have the option of making some posts “sticky” so they are always displayed. This setting gives you the option to display or hide these posts.
- Query ID: Allows you to modify the main query and add more advanced filtering. For details about constructing advanced queries, see Custom Query Filter.
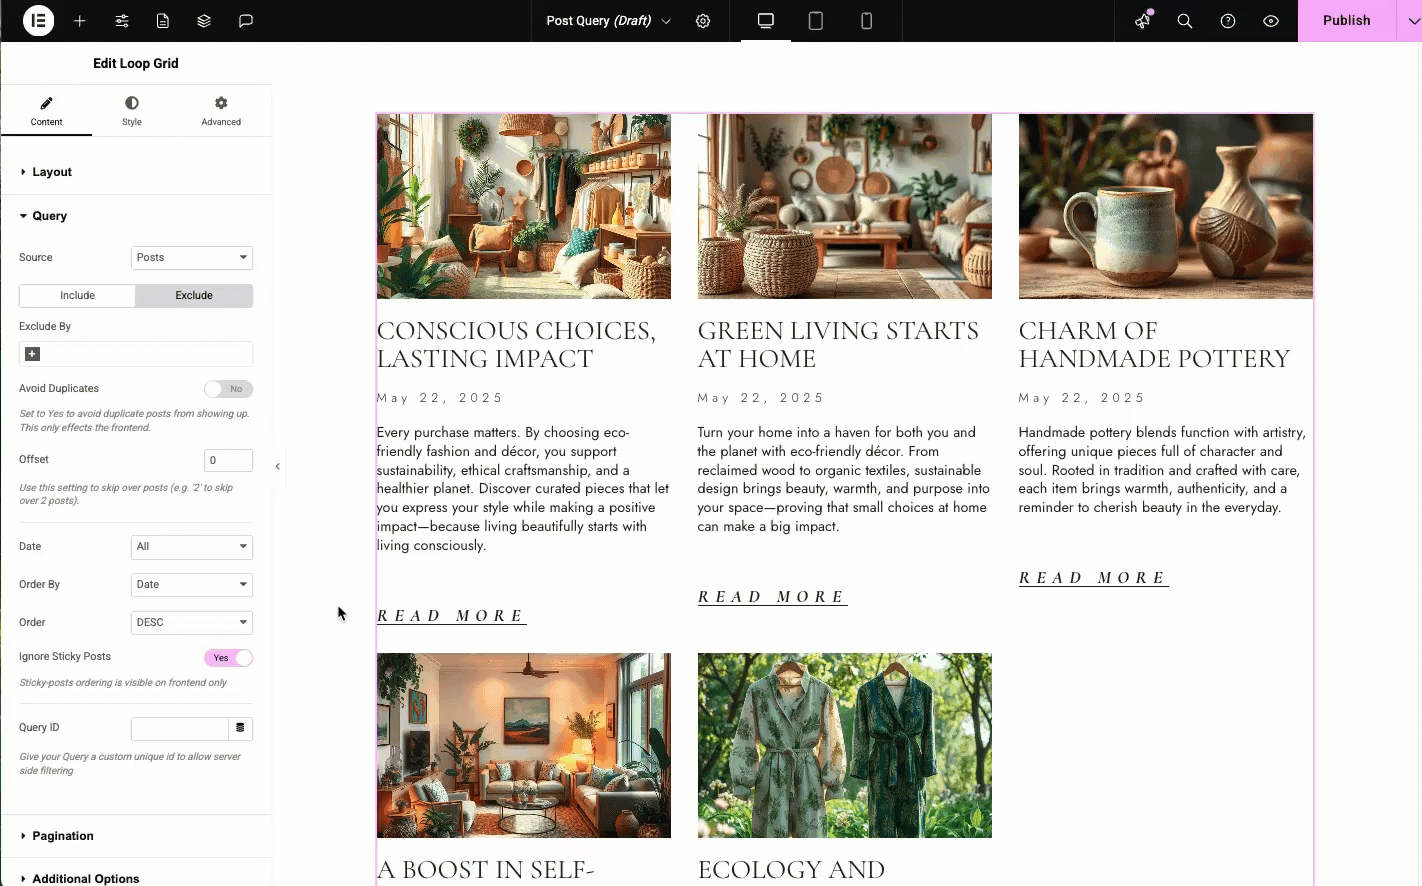
Exclude by options
If you are excluding posts, you have several more options:
- You can choose to exclude the Current post or use Manual Selection to choose posts to exclude.
- Avoid duplicates: If a post fits several criteria it can show up more than once in your query. Toggle to Yes to avoid this.
- Offset: Allows you to designate a number of posts to skip over.
Using Manual Selection as a source
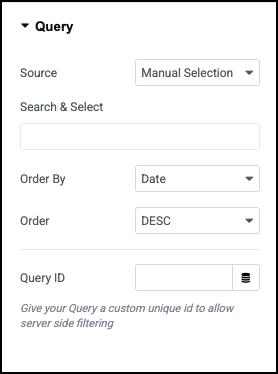
- Search & Select: Enter the name of individual pages, posts and/or products that the query will display.
- Order by: While posts are commonly arranged by date, with the oldest or newest showing up first, there are several ordering options:
- Date: Newest to oldest or vice versa
- Title: Display alphabetically by the blog title.
- Menu order: Posts are shown in the same sequence as they appear in the site’s navigation menu.
- Last modified: The most recently changed post to the earliest changed post or vice versa.
- Comment count: The post with the most to the post with the fewest comments or vice versa.
- Random
- Order
- ASC: From the lowest value to the highest value. For example, if you choose to order posts by date in ascending order, the oldest post will appear first.
- DESC: From the highest value to the lowest value. For example, if you choose to order posts by Title, the post that comes last alphabetically will be shown first.
- Query ID: Allows you to assign a unique number to the query so you can use it for more advanced filtering. For details about constructing advanced queries, see Custom Query Filter.
Example of creating a posts query
In the example below, we’ll create a loop grid that contains all posts in the category of Fashion, except for those with the tag of Green info.
- First we’ll create a loop grid. For details, see Build a loop grid.
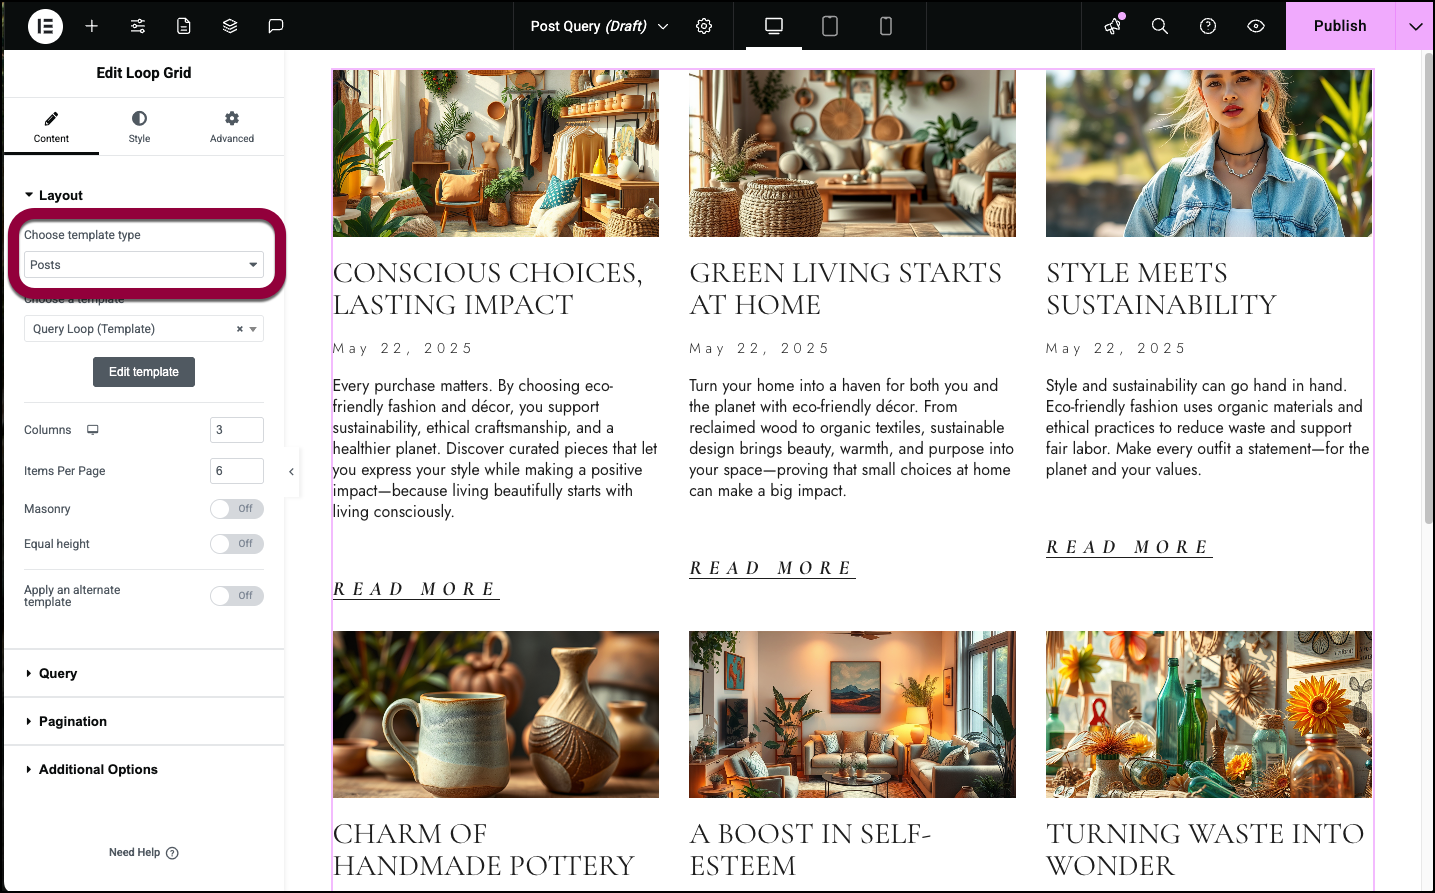
- In Layout, make sure the template type is set to Posts.
- Open the Query section.
The Source should be Posts.
- Select Include by Fashion (blogs in the Fashion category).
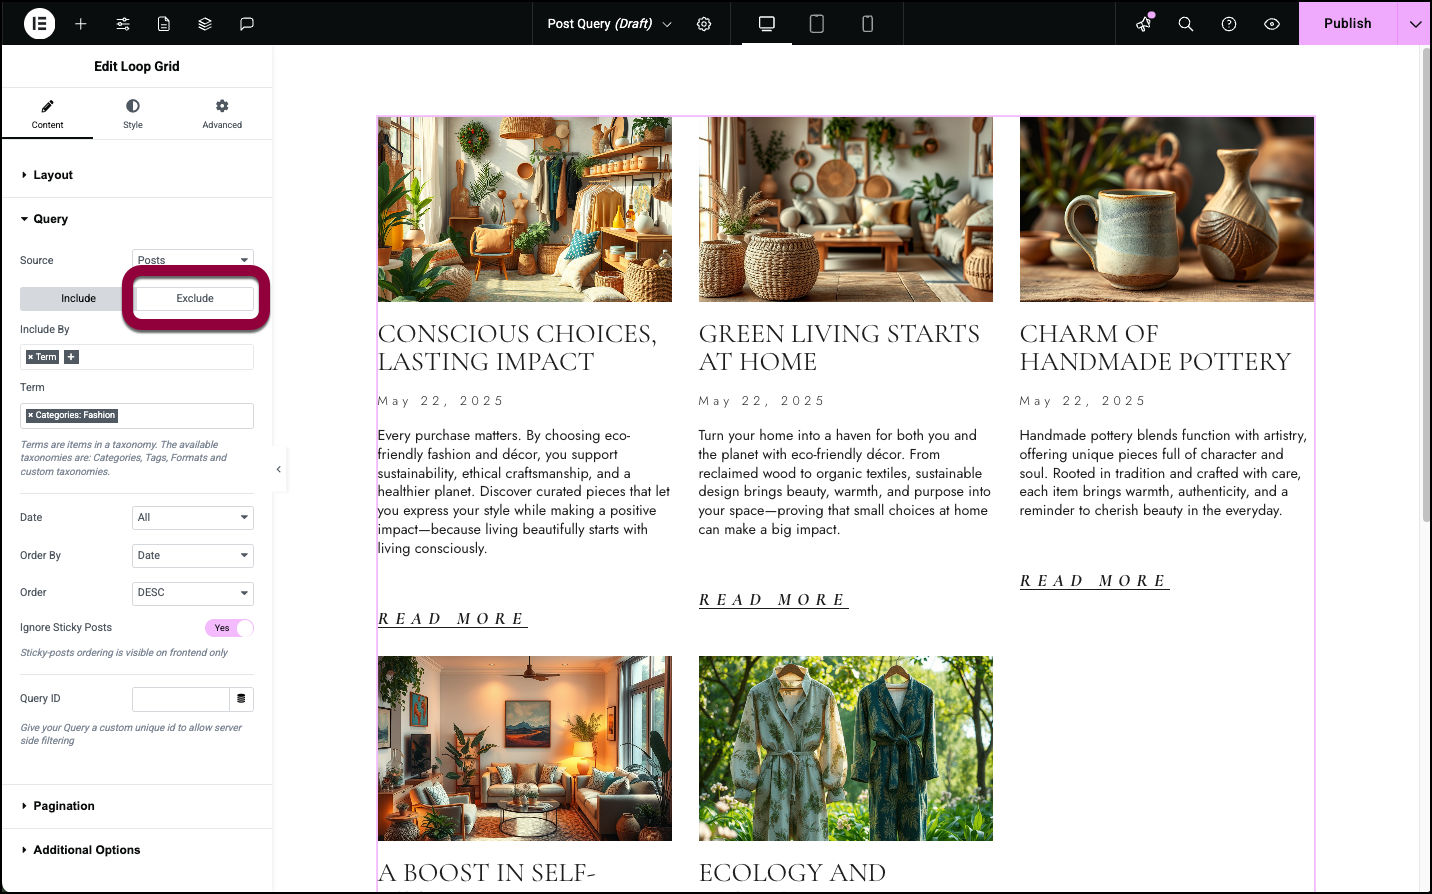
- Click the Exclude by tab.

- Select Exclude by Green info.
Product queries
- In the Layout section, in the Source field, select Products.
 NoteYou must have WooCommerce installed to use product queries.
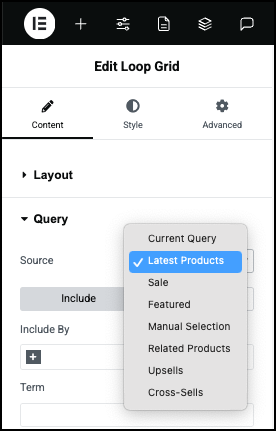
- Use the dropdown menu to determine the source of your query.
The source is what determines what kind of data the query will display. For example, if you want your query to display all your products in the category of pants, you’ll select Products as your source. Sources available for products are:- Current Query: A current query allows you to filter the results of an existing query and is used for archive pages. For instance, if a query displays all the pants sold by the store, a current query can display all the red pants.
- Latest Products: Displays the products most recently added to WooCommerce.
- Sale: Displays products marked with a sale price in WooCommerce.
- Featured: Displays products marked as featured in WooCommerce.
- Manual Selection: A manual selection query allows you to display pages, posts and products that you select.
- Related Products: Shows products in the same taxonomy (such as the same category or the same tag). For example, if you have a single product template with a loop grid showing related products, a product in the pants category would display other pants posts. When using a Related Products query, you often want to add an exclude option to exclude the current product.
- Upsells: Shows products that are linked as upsells in WooCommerce. An upsell is a product you recommend to visitors as a higher-end alternative to the product they’re currently viewing or considering purchasing. You mark upsells in the Linked Products tab of the product page.
- Cross-Sells: Shows products that are linked as cross-sells in WooCommerce. A crossell is a product that complements the product a visitor is viewing or considering purchasing. For example, batteries can be a cross-sell with an electric toy. You mark cross-sells in the Linked Products tab of the product page.
- Select whether your Query will Include data or Exclude data. For instance, you could include only products that are on sale.
- Make your selection by clicking the relevant tab.
Using Latest Products, Sale, Featured, as a source
When you query for products you can include or exclude products by: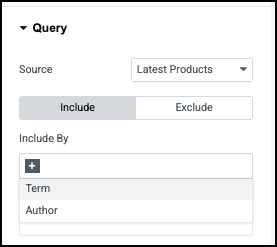
- Terms: Include products by:
- Categories
- Tags
- Formats
- Custom taxonomies
- Author: Include items by author name.
After adding these variables you need to define the following:
- Author: Filter by the author – the person who added the product.
- Order by: There are several ordering options:
- Date: Newest to oldest or vice versa
- Title: Display alphabetically by the blog title.
- Price: Order products by how much they cost
- Popularity: Order products by how many have been sold.
- Rating: Order products by how customers have ranked them.
- Random
- Menu order: Products are shown in the same sequence as they appear in the site’s navigation menu.
- Order
- ASC: From the lowest value to the highest value. For example, if you choose to order products by price in ascending order, the least expensive products will appear first.
- DESC: From the highest value to the lowest value. For example, if you choose to order products by popularity, the most popular products will appear first.
Exclude by options
If you are excluding posts, you have several more options:
- Manual Selection: You can choose to exclude a specific product by using Manual Selection to choose Products to exclude.
- Search & Select: If a post fits several criteria it can show up more than once in your query. Toggle to Yes to avoid this.
Using Manual Selection as a source

- Search & Select: Enter the name of individual pages, posts and/or products that the query will display.
- Terms: Include posts by:
- Categories
- Tags
- Formats
- Custom taxonomies
- Author: Include items by author name.
- Order by: There are several ordering options:
- Date: Newest to oldest or vice versa
- Title: Display alphabetically by the blog title.
- Price: Order products by how much they cost
- Popularity: Order products by how many have been sold.
- Rating: Order products by how customers have ranked them.
- Random
- Menu order: Products are shown in the same sequence as they appear in the site’s navigation menu.
- Order
- ASC: From the lowest value to the highest value. For example, if you choose to order products by price in ascending order, the least expensive products will appear first.
- DESC: From the highest value to the lowest value. For example, if you choose to order products by popularity, the most popular products will appear first.
Using Related Products, Upsells and Cross-Sells as a source
Querying by Related Products, Upsells and Cross-Sells are used when creating a Single Product template. For example, when creating a single template, you can include cross-sell products as part of the template.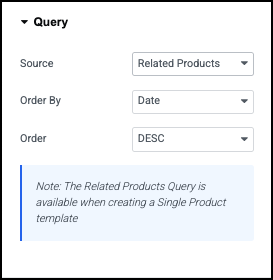
- Source: Change the type of query.
- Order by: There are several ordering options:
- Date: Newest to oldest or vice versa
- Title: Display alphabetically by the blog title.
- Price: Order products by how much they cost
- Popularity: Order products by how many have been sold.
- Rating: Order products by how customers have ranked them.
- Random
- Menu order: Products are shown in the same sequence as they appear in the site’s navigation menu.
- Order
- ASC: From the lowest value to the highest value. For example, if you choose to order products by price in ascending order, the least expensive products will appear first.
- DESC: From the highest value to the lowest value. For example, if you choose to order products by popularity, the most popular products will appear first.
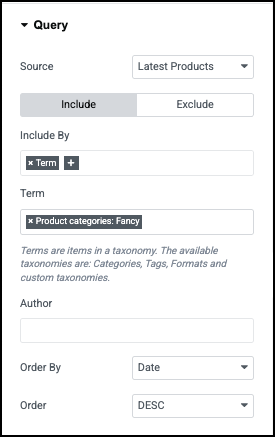
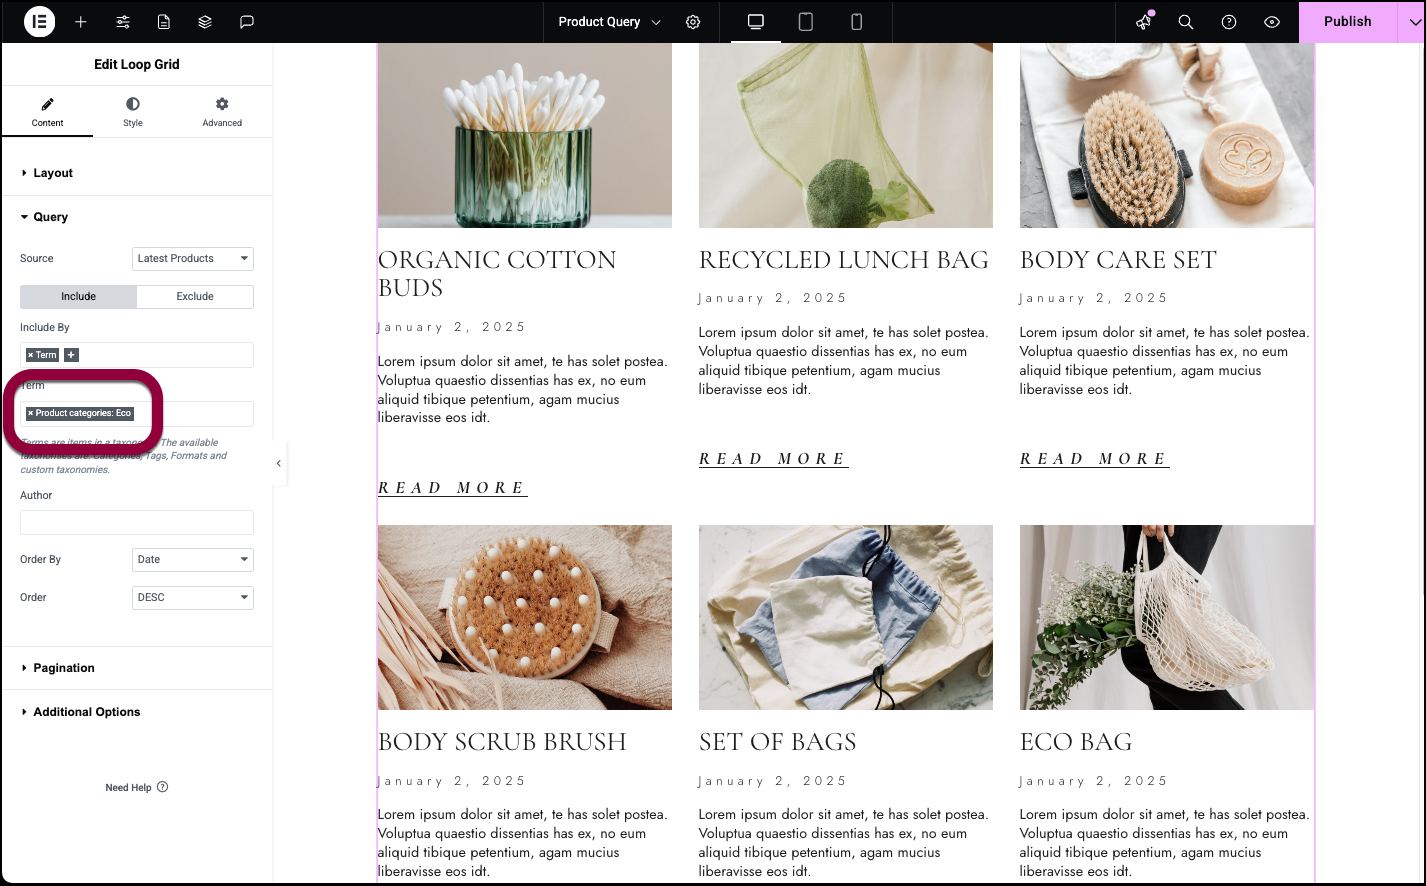
Example of creating a product query
In this example, we’ll have a loop grid display products in the Eco category, ordered alphabetically.
- Create the loop grid. For details, see Build a loop grid.
- In the Layout, use the dropdown menu to display Products.
- Open the Query section.
- Leave the Source as Latest Products.

- In the Include by field, select Term.

- In the Term field, enter Eco.
- In the Order By field, select Title.
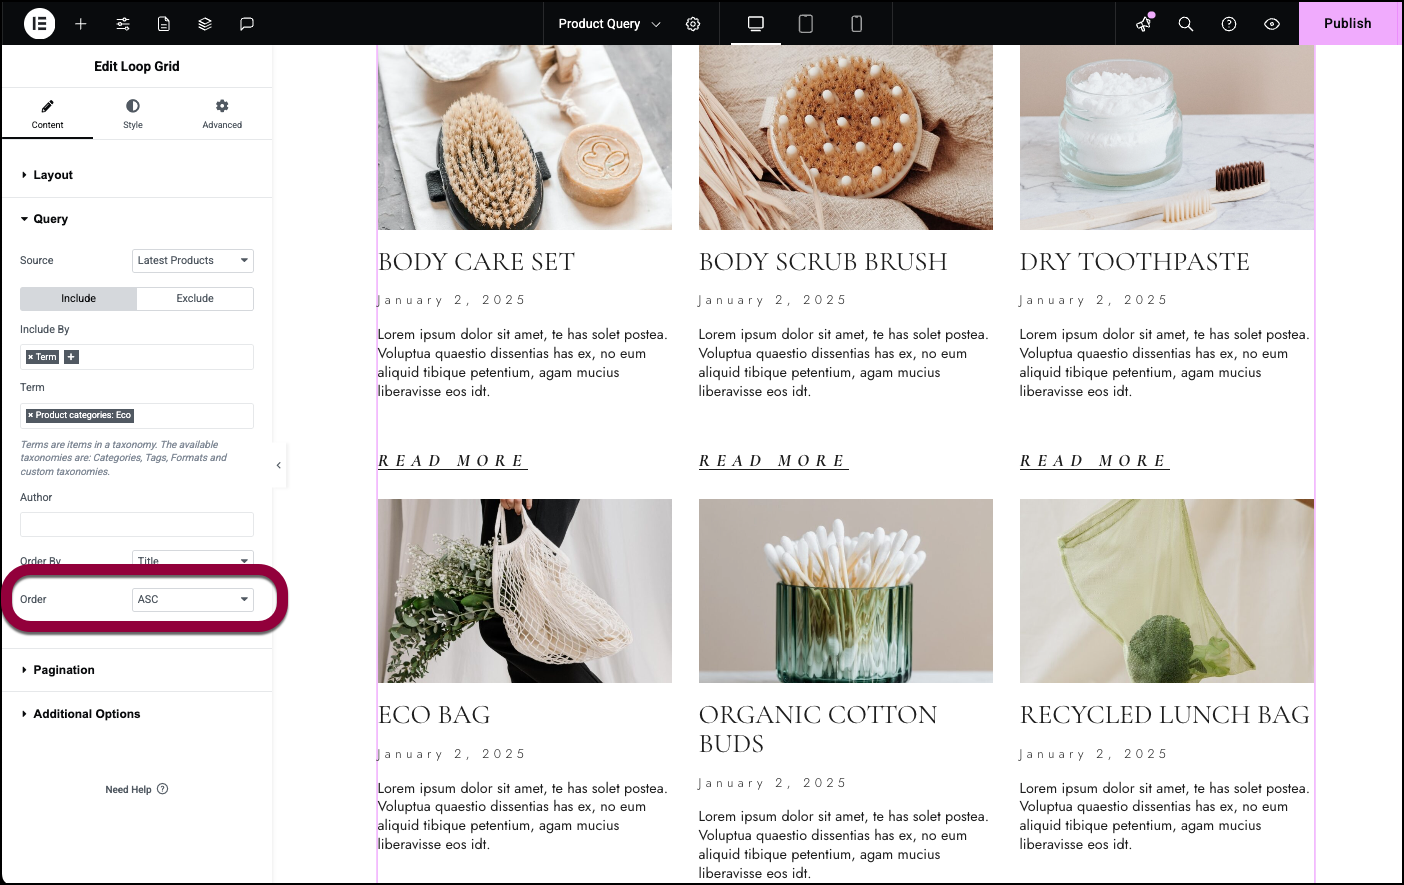
- In the Order field, select ASC.
Your query is done.
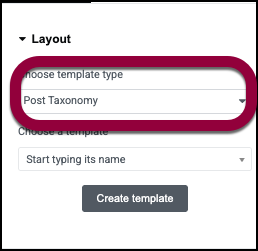
Create Post Taxonomy Queries
Post and Product taxonomy queries allow you to create elements that contain lists of categories and tags.
- In the Layout field, select Post Taxonomy.
 NoteYou must have WooCommerce installed to select Product Taxonomy.
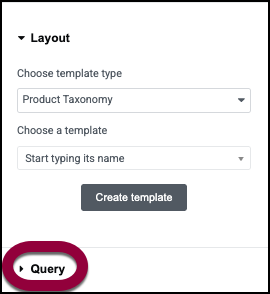
- Open the Query section.
- In the Source field, select:
- Categories: Displays the Post categories.
- Tags: Displays the Post tags.
Category filter
- In the Filter field, choose:
- Show All: Show all the categories.
- Manual Selection: Lets you choose the categories.
- In the Order by filter, choose:
- Name
- ID
- In the Order field, choose:
- ASC: From the lowest value to the highest value. For example, if you choose to order products by price in ascending order, the least expensive products will appear first.
- DESC: From the highest value to the lowest value. For example, if you choose to order products by popularity, the most popular products will appear first.
- Toggle Hide Empty to Yes if you don’t want categories with no content to appear.
- In WordPress, you can create categories, subcategories, subsubcategories etc. Filter by depth allows you to determine how many sublevels your query will display.
- Query ID: Allows you to assign a unique number to the query so you can use it for more advanced filtering. For details about constructing advanced queries, see Custom Query Filter.
Tag filter
- Use the tabs to either Include or Exclude post tags.
- In the Include by field, choose which tags you want to display.
- Show All: Show all the categories.
- Manual Selection: Lets you choose the categories.
- In the Order by filter, choose:
- Name
- ID
- In the Order field, choose:
- ASC: From the lowest value to the highest value. For example, if you choose to order products by price in ascending order, the least expensive products will appear first.
- DESC: From the highest value to the lowest value. For example, if you choose to order products by popularity, the most popular products will appear first.
- Toggle Hide Empty to Yes if you don’t want categories with no content to appear.
- Query ID: Allows you to assign a unique number to the query so you can use it for more advanced filtering. For details about constructing advanced queries, see Custom Query Filter.
If you choose to exclude items, the following options will appear:
- Search & Select: Enter the name of individual tags, that the query will display.
- Avoid Duplicates: If a tag fits several criteria it can show up more than once in your query. Toggle to Yes to avoid this.
- Skip Taxonomy: Enter a number and that number of taxonomies will not be listed.
Create Product Taxonomy Queries
Post and Product taxonomy queries allow you to create elements that contain lists of categories and tags.
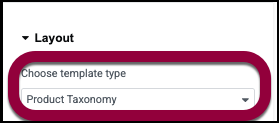
- In the Layout field, select Product Taxonomy.
 NoteYou must have WooCommerce installed to select Product Taxonomy.
- Open the Query section.
- In the Source field, select:
- Brand (for Product taxonomies): Displays the brands available from your site.
- Product categories (for Product taxonomies): Displays your site’s product categories.
- Product tags (for Product taxonomies): Displays your site’s product tags.
Product Category and Brands filter
- In the Filter field, choose:
- Show All: Show all the categories.
- Manual Selection: Lets you choose the categories.
- In the Order by filter, choose:
- Name
- ID
- In the Order field, choose:
- ASC: From the lowest value to the highest value. For example, if you choose to order products by price in ascending order, the least expensive products will appear first.
- DESC: From the highest value to the lowest value. For example, if you choose to order products by popularity, the most popular products will appear first.
- Toggle Hide Empty to Yes if you don’t want categories with no content to appear.
- In WordPress, you can create categories, subcategories, subsubcategories etc. Filter by depth allows you to determine how many sublevels your query will display.
- Query ID: Allows you to assign a unique number to the query so you can use it for more advanced filtering. For details about constructing advanced queries, see Custom Query Filter.
Tag filter
- Use the tabs to either Include or Exclude post tags.
- In the Include by field, choose which tags you want to display.
- Show All: Show all the categories.
- Manual Selection: Lets you choose the categories.
- In the Order by filter, choose:
- Name
- ID
- In the Order field, choose:
- ASC: From the lowest value to the highest value. For example, if you choose to order products by price in ascending order, the least expensive products will appear first.
- DESC: From the highest value to the lowest value. For example, if you choose to order products by popularity, the most popular products will appear first.
- Toggle Hide Empty to Yes if you don’t want categories with no content to appear.
- Query ID: Allows you to assign a unique number to the query so you can use it for more advanced filtering. For details about constructing advanced queries, see Custom Query Filter.
If you choose to exclude items, the following options will appear:
- Search & Select: Enter the name of individual tags, that the query will display.
- Avoid Duplicates: If a tag fits several criteria it can show up more than once in your query. Toggle to Yes to avoid this.
- Skip Taxonomy: Enter a number and that number of taxonomies will not be listed.
Example of a taxonomy query
For an example of a taxonomy query, see Create a category page using the Loop Grid or Loop Carousel.

