Table of Contents
One of the many powerful features that you get with Elementor Pro is the ability to incorporate dynamic content into your Elementor designs. Among other options, dynamic content lets you create unique, personalized pages from a single Elementor design.
In this tutorial, we’re going to show you how you can use Elementor’s dynamic content integrations to create personalized project overview pages for your clients, complete with a custom login page.
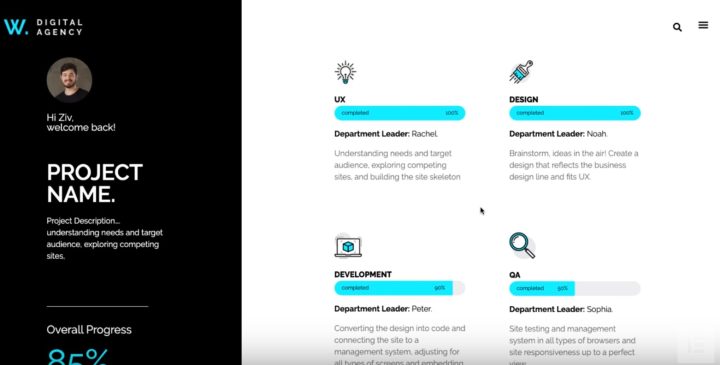
Your overview pages will be able to dynamically include clients’ user profiles, as well as dynamic numbers that clients can use to track the progress of their project. What’s more, you can do this all from a single Elementor page that automatically pulls in the information for each client:
To follow along, you can watch the video tutorial below or keep reading for the text version:
How to Use Dynamic User Profile Pictures & Dynamic Numbers in Elementor
1. Create a New User Account for Your Client
To get started, head to Users → Add New to create a WordPress user account for your client:
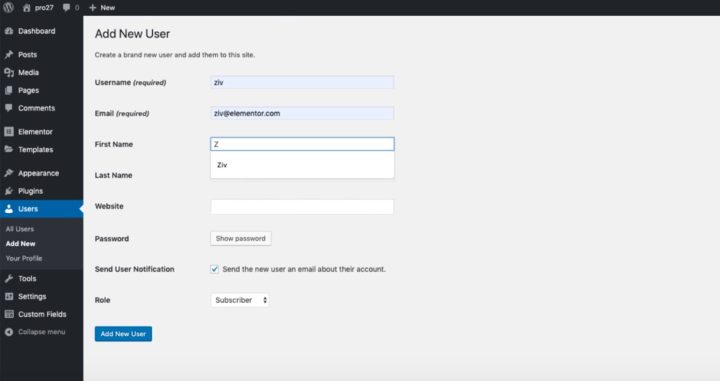
WordPress will automatically pull in a user’s profile picture from Gravatar and you’ll be able to use that profile picture on the project overview page.
2. Create a Custom Login Page
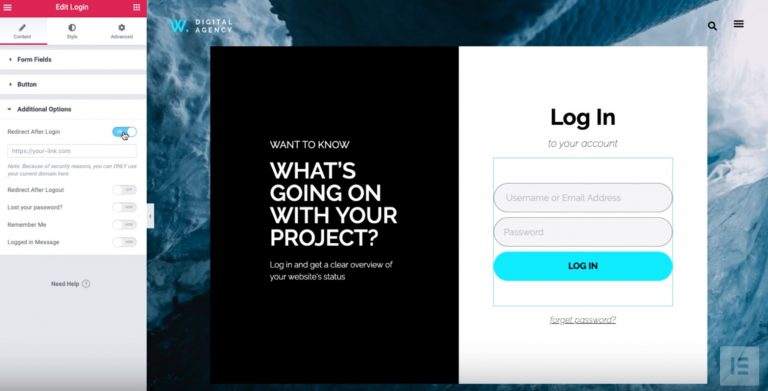
To create a more customized login experience and avoid the default WordPress login page, create a new page and use Elementor’s WordPress login widget to add your login form:
3. Create a Project Overview Page
Next, create the basic design for your project overview page in Elementor. Don’t worry about the dynamic content yet – instead, just set up the frame for how you want it to look.
Here’s our example:
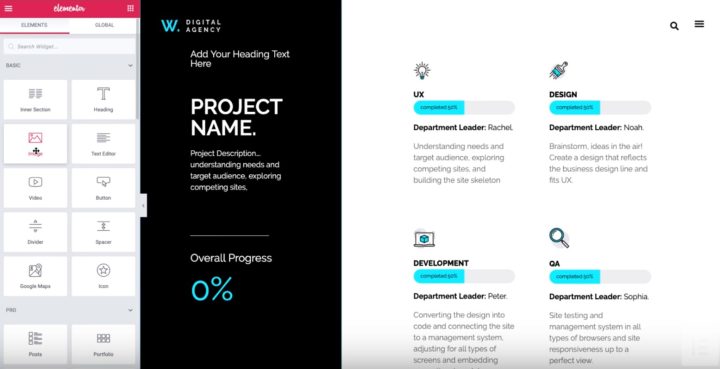
To display the project’s progress, you can use Progress Bar or Counter widgets according to your preference.
4. Add Dynamic Content
Once you’ve built your page’s basic design, you’re ready to make it personalized by adding dynamic content based on each user’s account.
To get started, drag in an Image widget to display a user’s profile picture. Then, click the Dynamic option next to Choose Image:
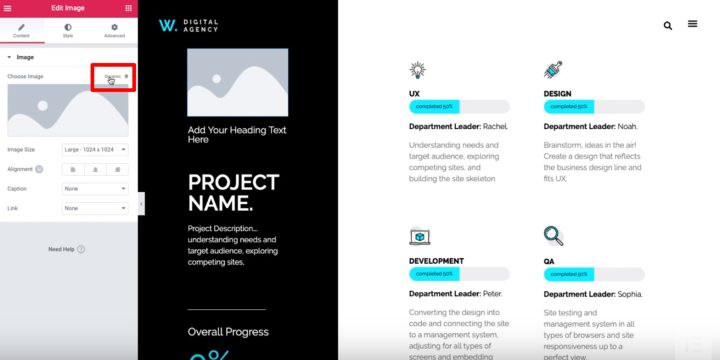
In the drop-down that appears, select User Profile Picture under the Author section.
Now, each client will dynamically see their own profile picture, pulled straight from Gravatar.
Next, edit the Heading widget and choose the Dynamic option. In the drop-down, find the Site section and select User Info. Then, edit its settings and set the field equal to First Name to display the user’s first name:
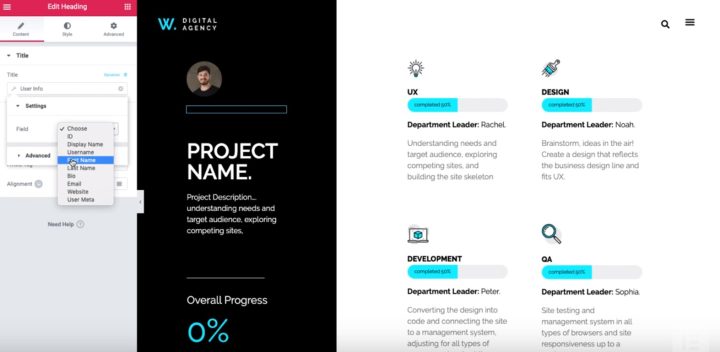
You can use the Advanced options to add static text before and after the client’s name.
5. Create Custom Fields to Track Progress
On the project overview page that we’re building, clients will be able to track the progress of their project by each department.
Rather than manually adding this information to your Elementor design, your design will dynamically pull in this progress for each department.
But in order to do that, you’ll need to create custom fields to store the progress numbers using a plugin like Advanced Custom Fields.
Here’s what it should look like – you can see how there are six number fields – five for each department and one for the overall progress:
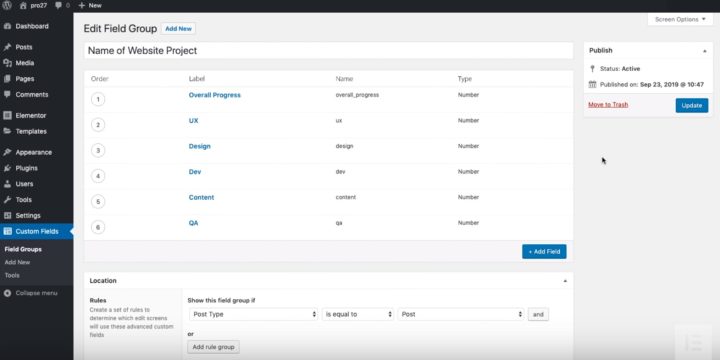
Once you’ve created your custom fields, go back to your Elementor design and edit the Progress Bar widget for each department.
Click Dynamic. Then, find the ACF Number Field option in the ACF section of the drop-down. Then, click on the wrench to enter its settings and choose the relevant number field from the drop-down:
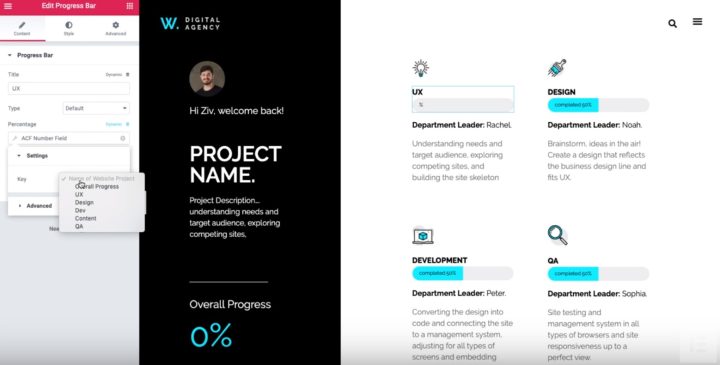
Repeat the process for all the counters and progress bars.
To dynamically update the progress for each client, you can have ACF import the data via third-party plugin or custom code. Or, you can also manually update the ACF fields in the backend.
You can also use this custom script to have ACF automatically calculate the overall progress based on the progress for each department.
6. Redirect Users to Project Overview Page After Login
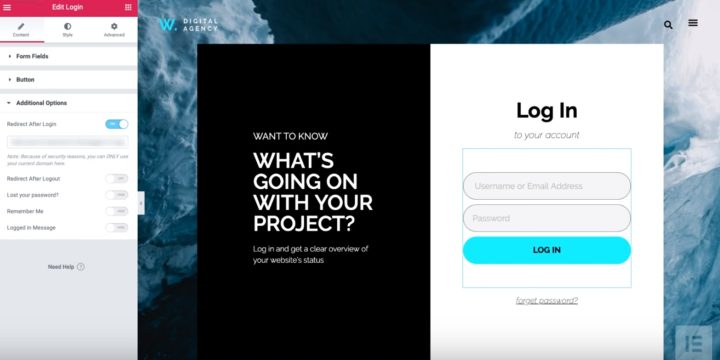
To finish things out, you can set it up so that your site automatically redirects clients to the project overview page after they log in using the custom login page that you created in Step 2.
To do this, edit your custom login page. Then, edit the Login widget and use the Redirect After Login setting under Additional Options to send people straight to the project overview page that you created:
And that’s it!
With the Dynamic feature in Elementor Pro, you can dynamically create custom project overview pages for each client from a single Elementor design.
Play around with this feature to create pages that match your business and help keep your clients in the loop.
Looking for fresh content?
By entering your email, you agree to receive Elementor emails, including marketing emails,
and agree to our Terms & Conditions and Privacy Policy.
