How to export and import variables and classes

Last Update: March 30, 2026

This post has been translated using machine translation, which may result in minor inaccuracies or differences in wording compared to the original. We apologize for any errors or ambiguities. Please feel free to contact us if we can clarify anything for you.

To import and export classes and variables, simply follow the standard import or export process, and turn off all options except classes and variables.

By default, classes and variables are exported or imported along with the rest of the website. However, you do have the option to only the classes and variables.

To only import or export classes and variables:

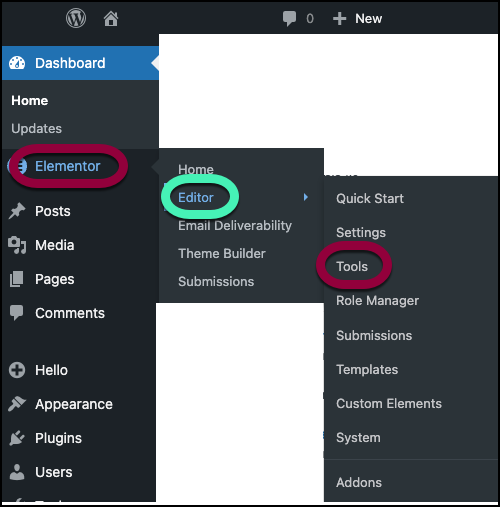
  1. From WP Admin, navigate to Elementor>Editor>Tools.
    The Tools section of the elementor Editor menu
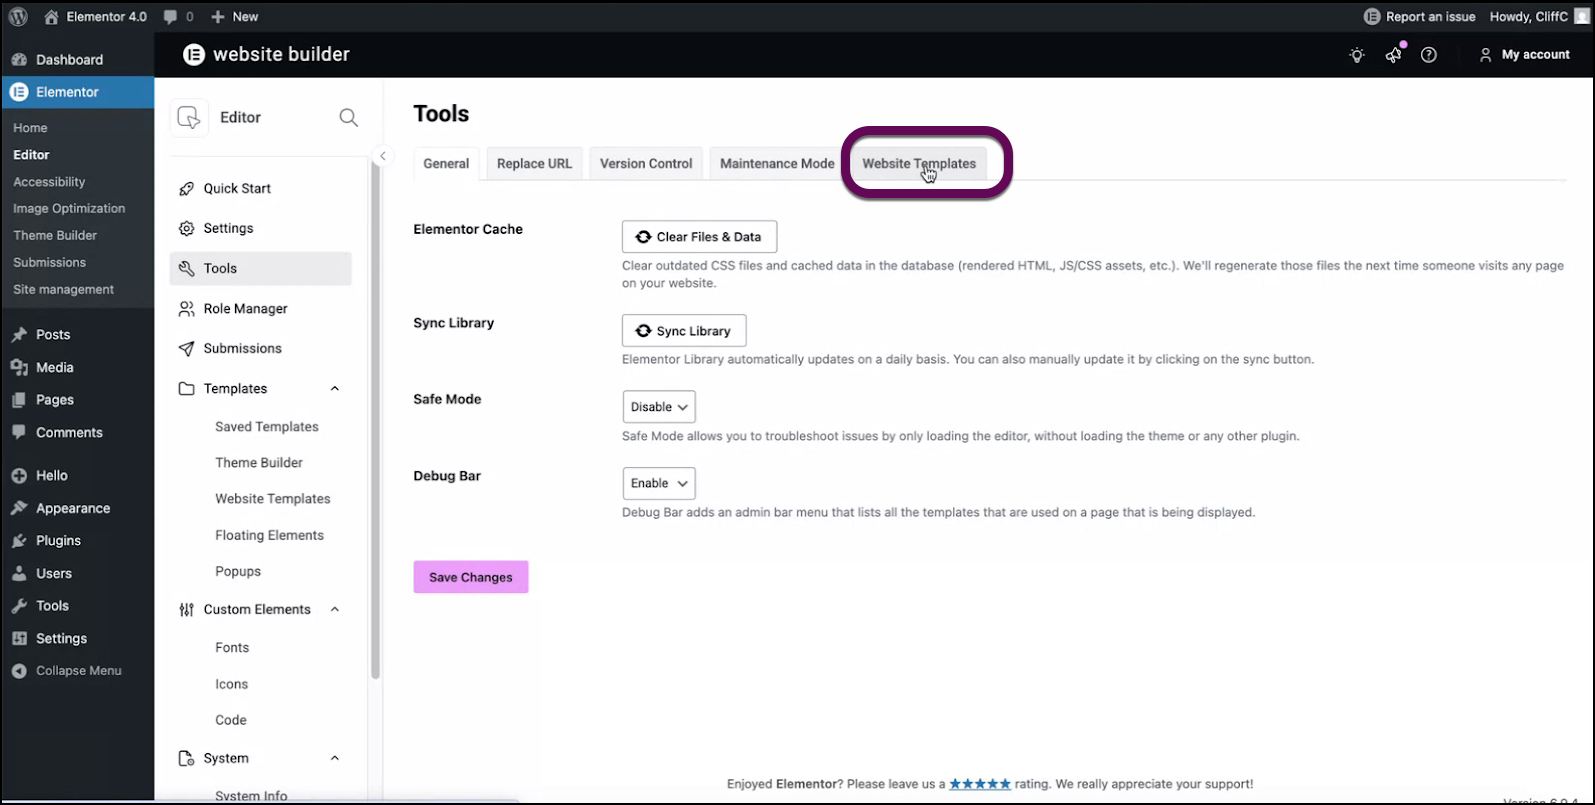
  2. Click the Website Templates tab.
    Select website templates to start importing or exporting.
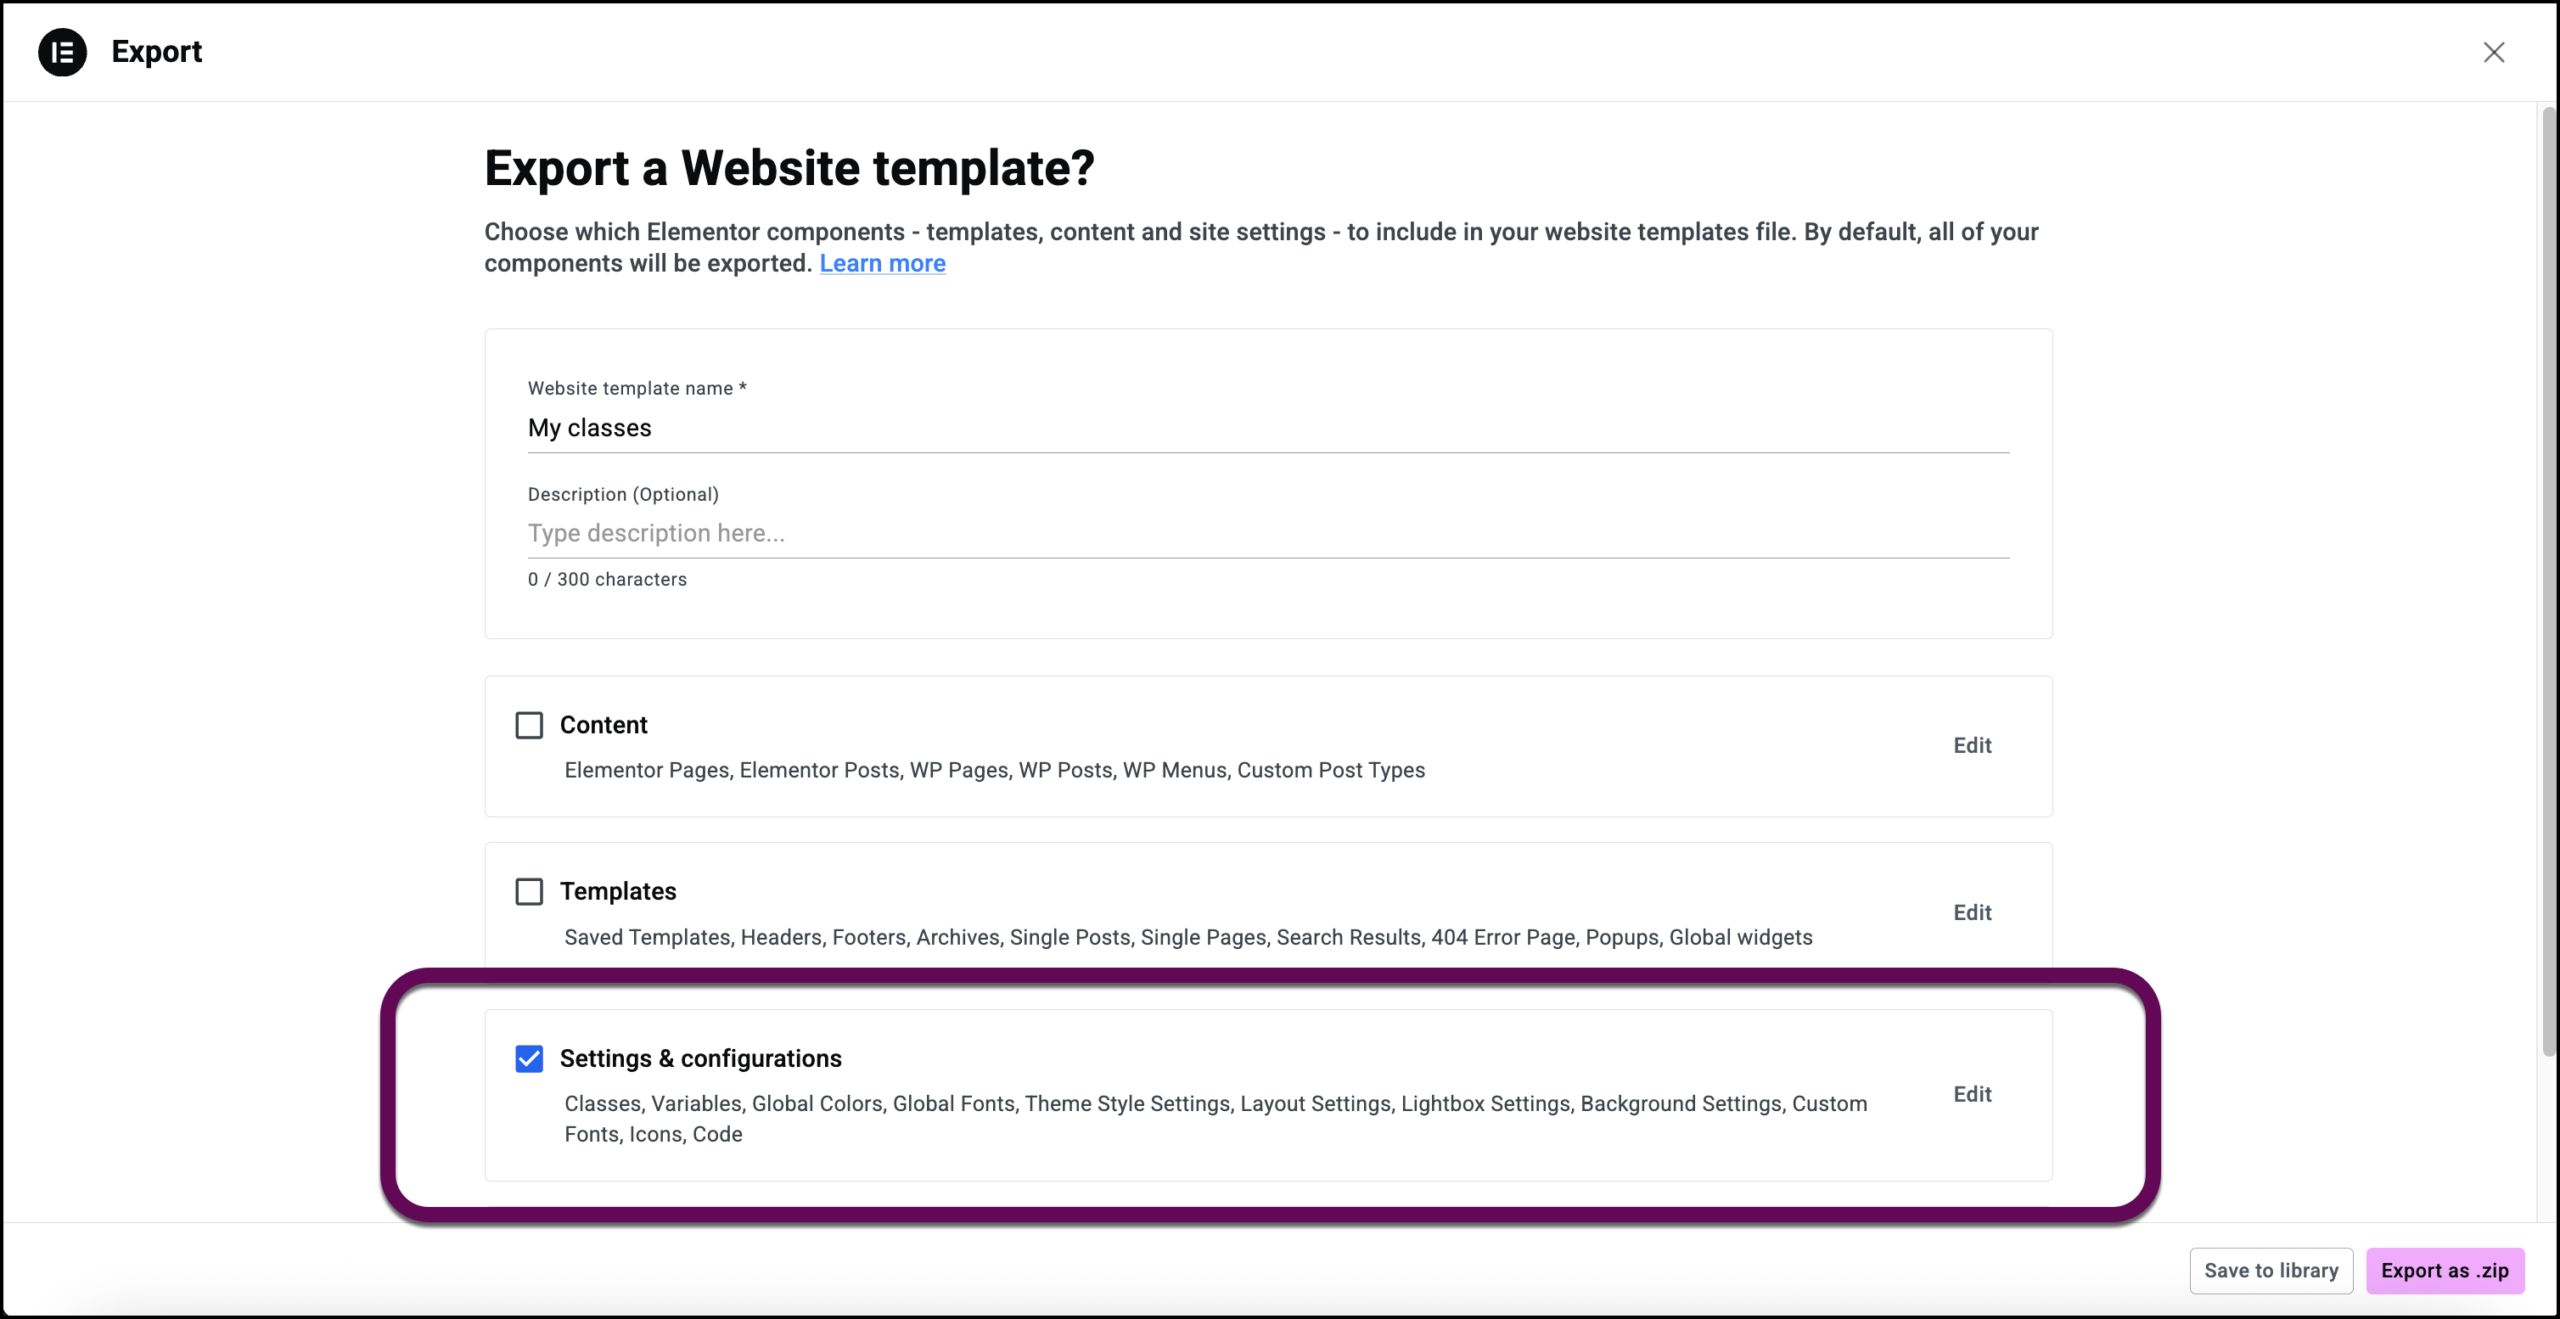
  3. Turn off all options except for Settings & configurations.
    The export button to export the classes and variables.
  4. Name the template.
    Enter a name in the text field.
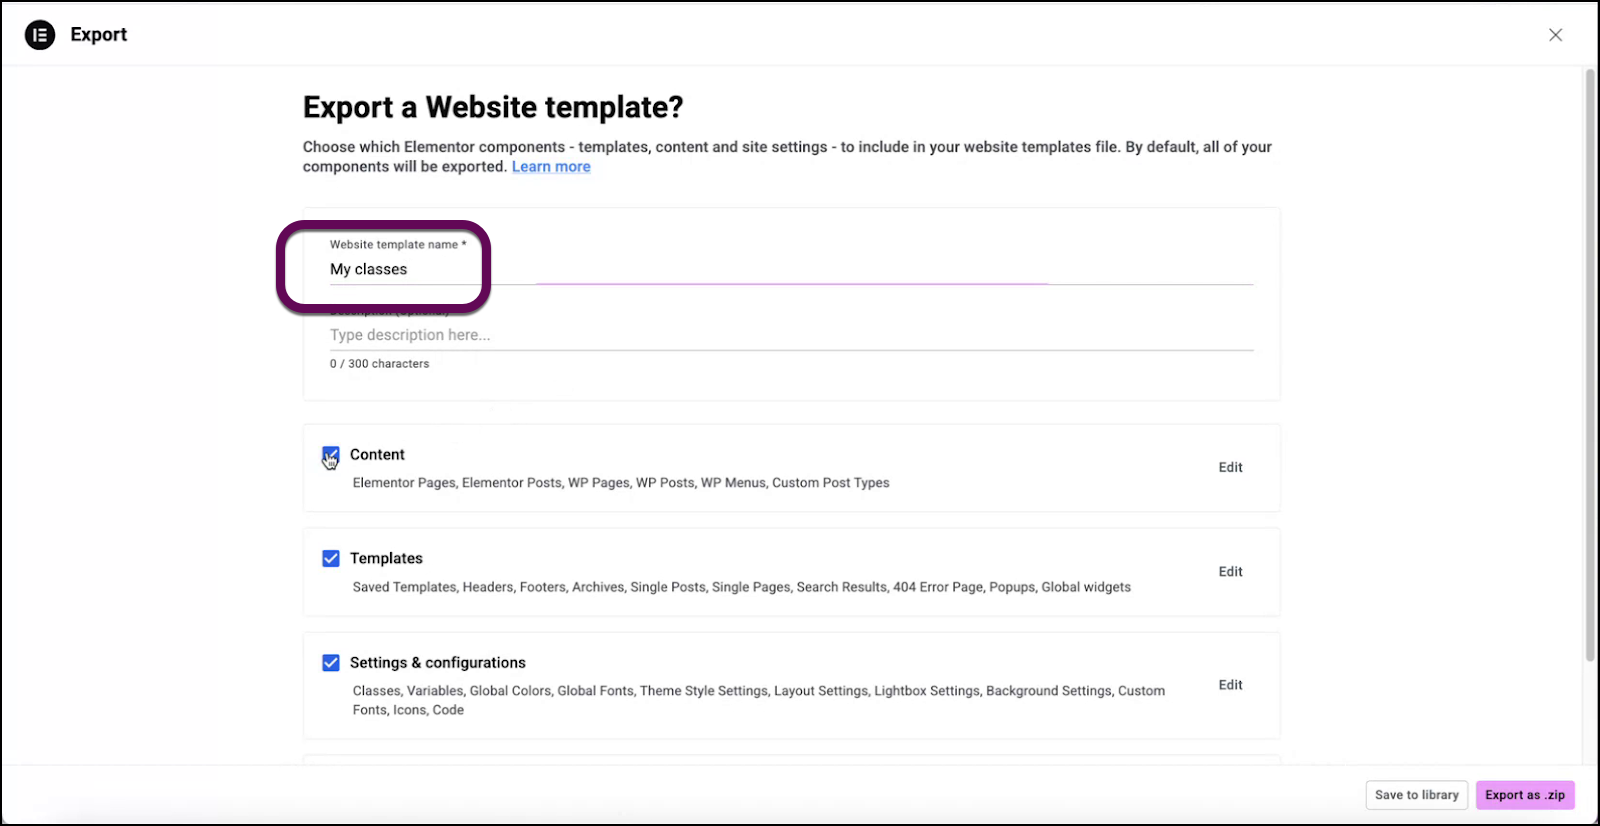
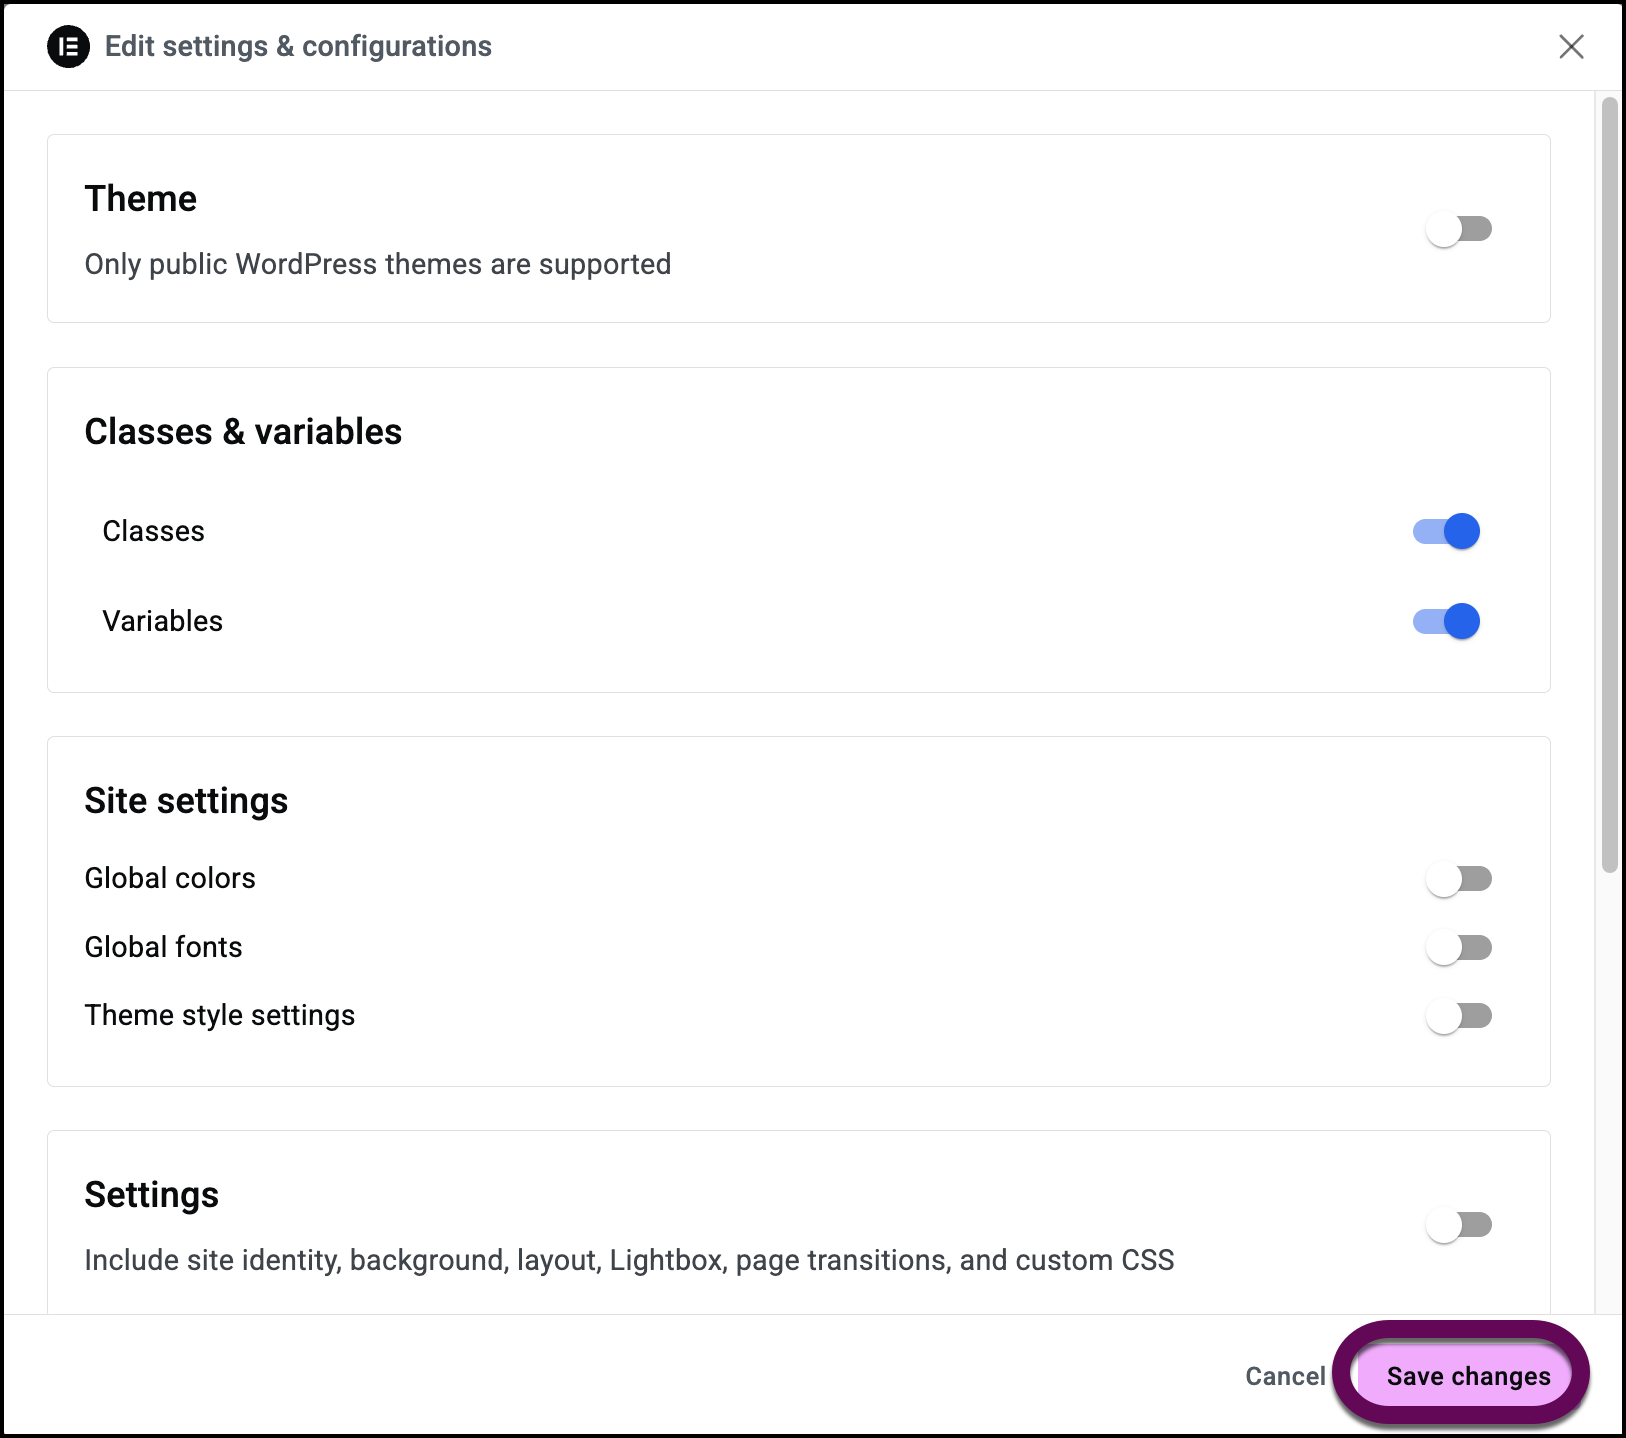
  5. Toggle off all options except for Settings & configurations.
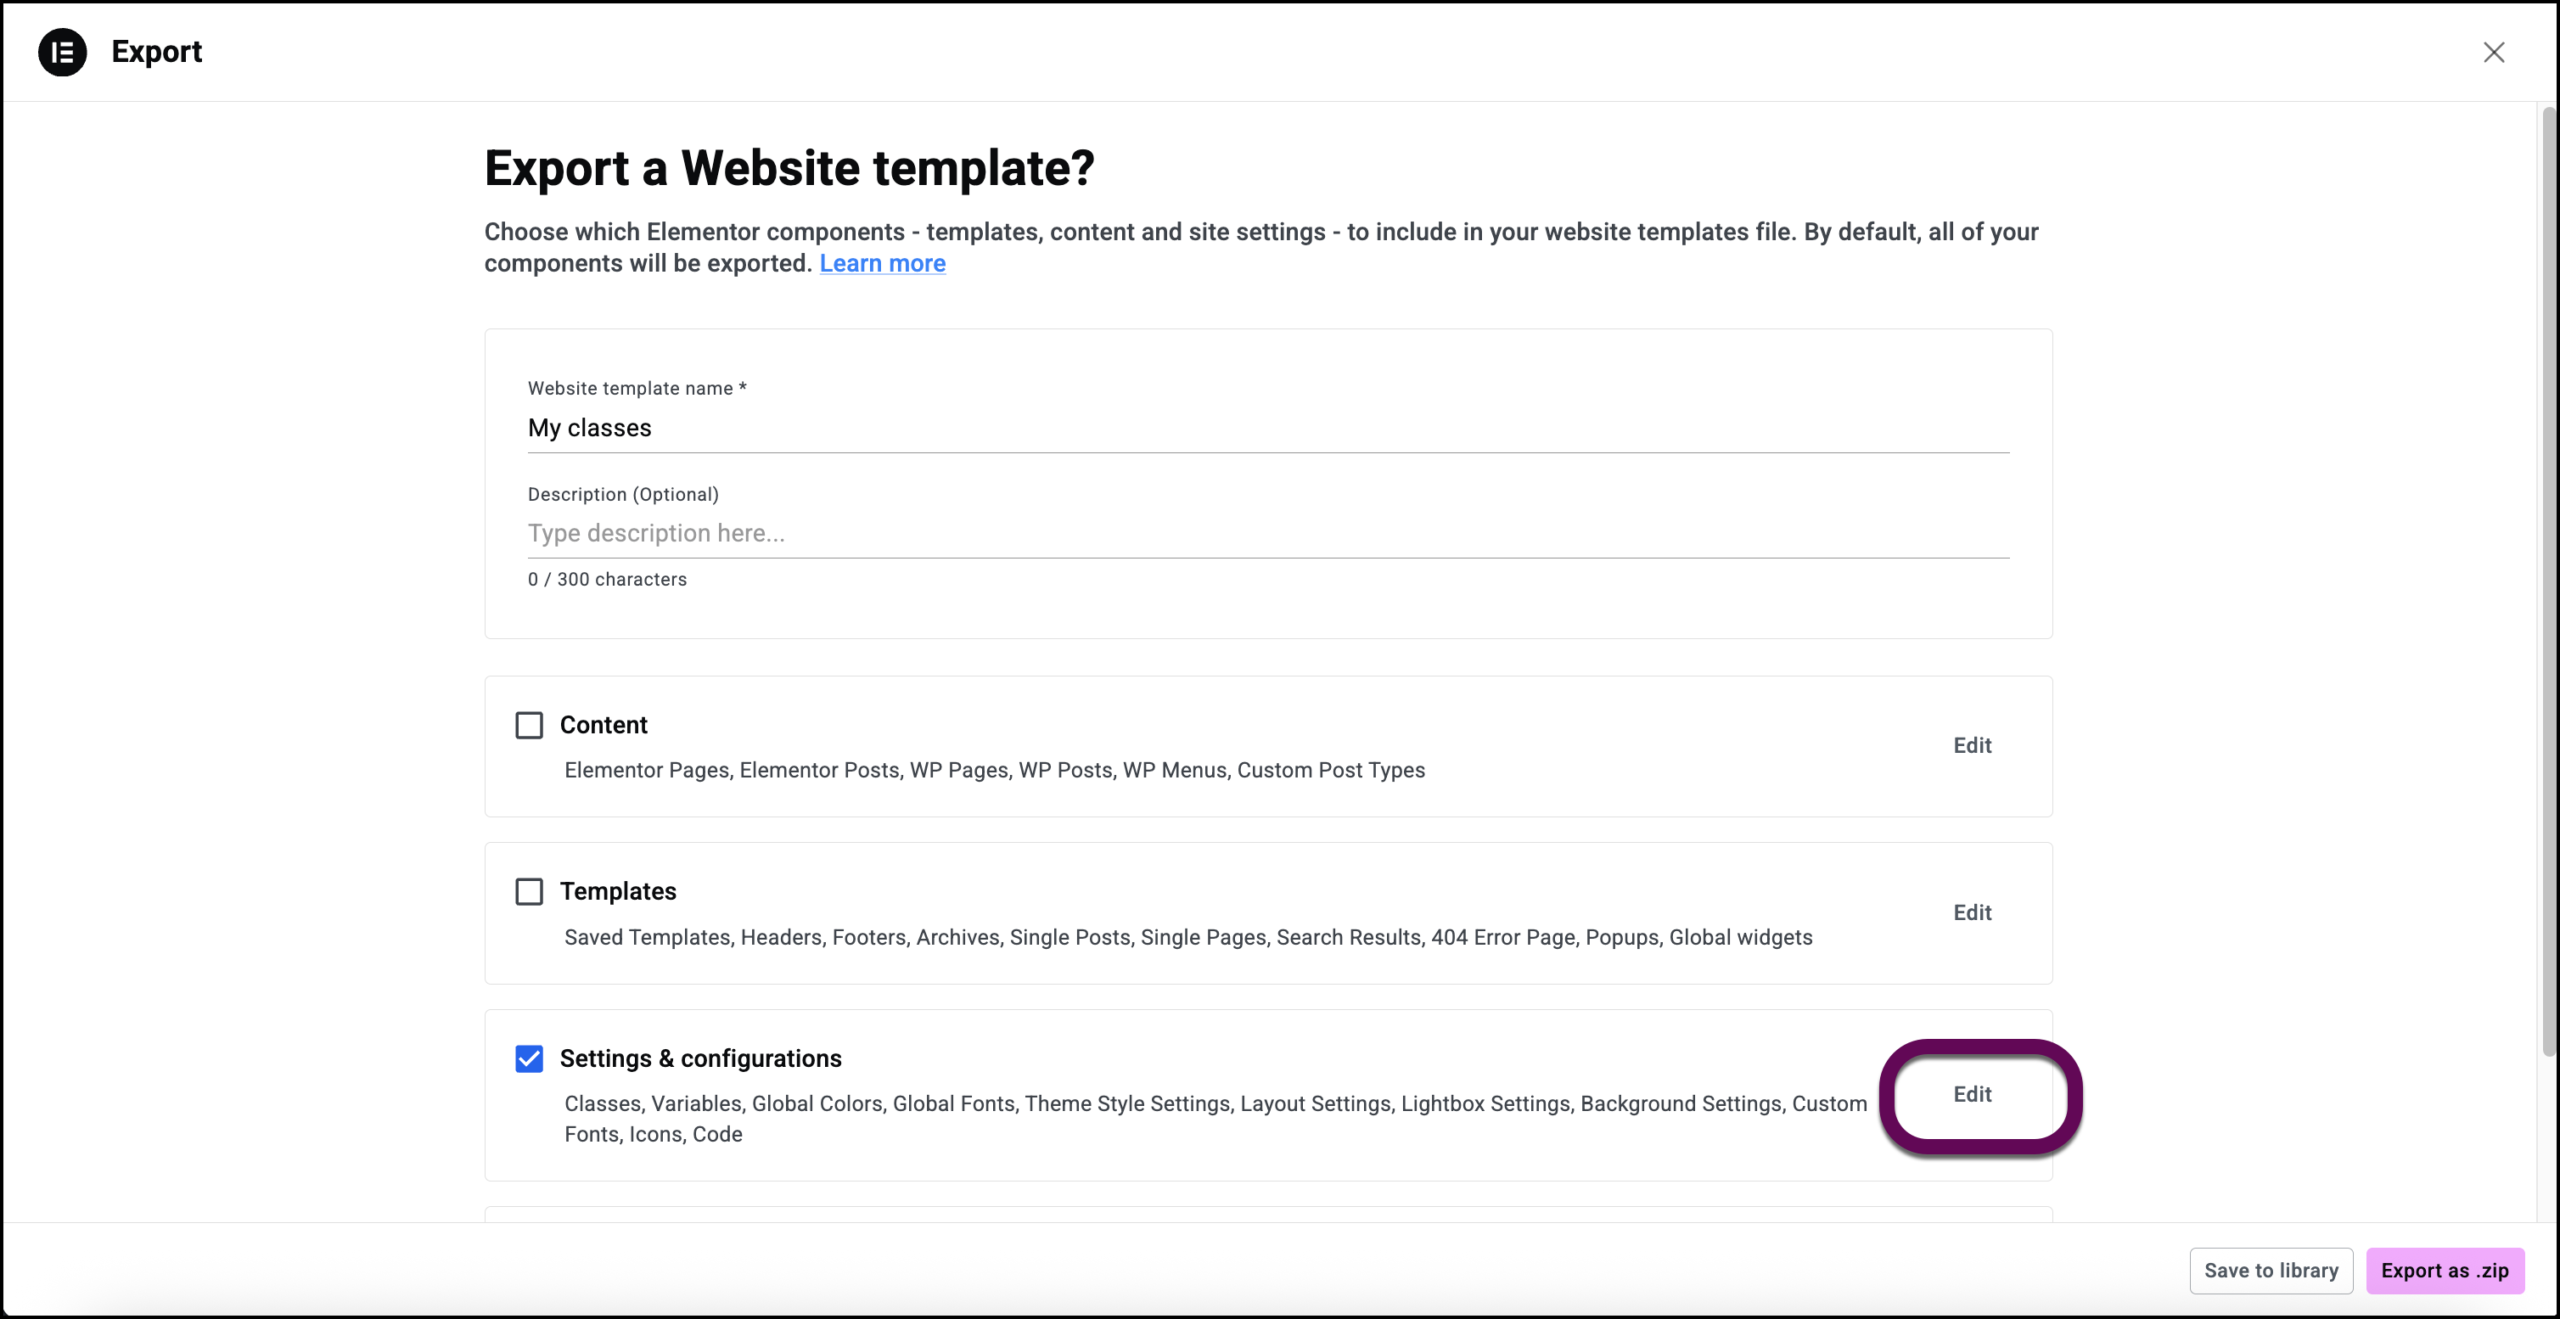
  6. Click Edit.
    The edit button lets you customize the Settings and configurations options.
  7. Toggle everything off except Classes and Variables.
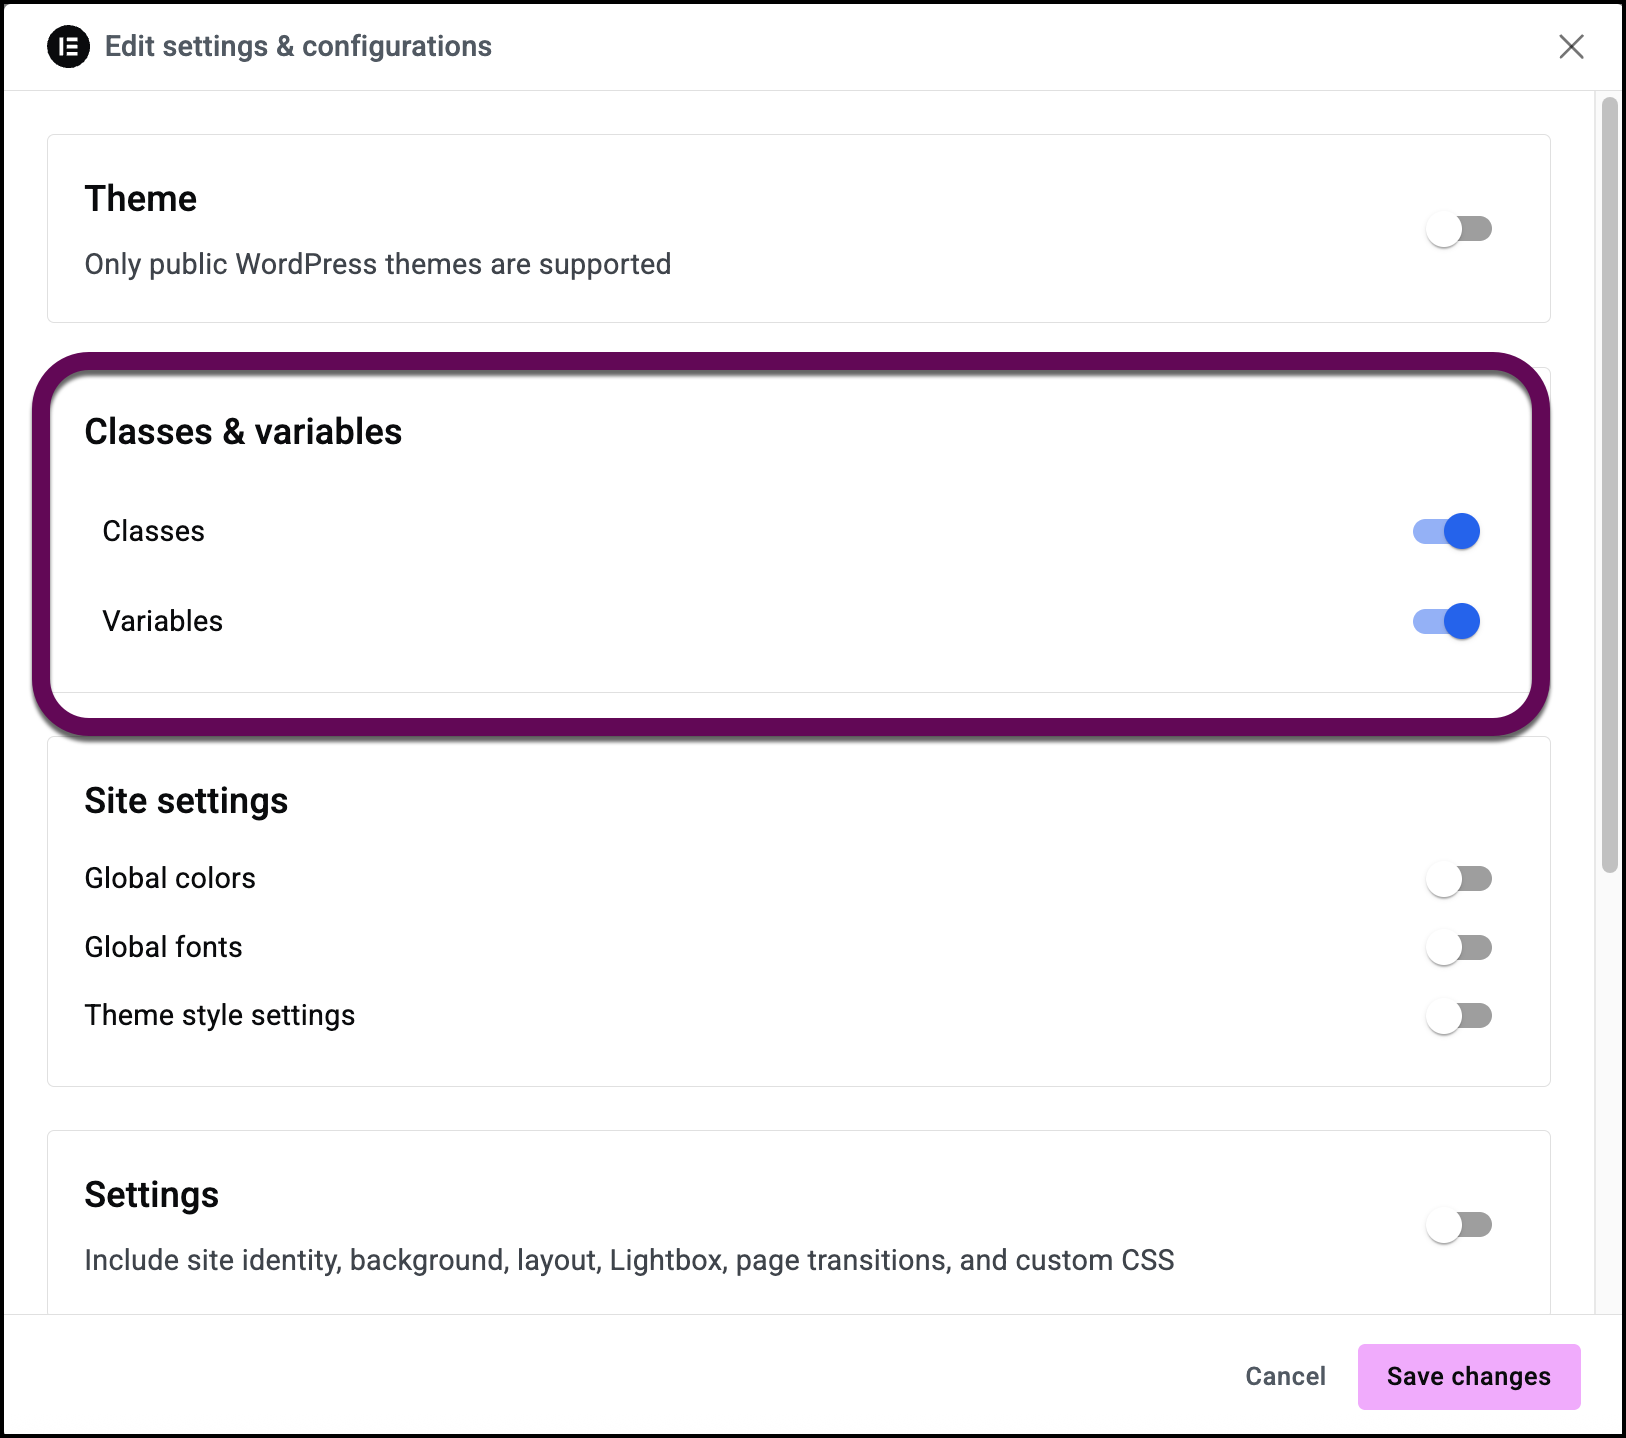
    The toggles that let you select Classes and variables
  8. Click Save Changes.
    The Save changes button
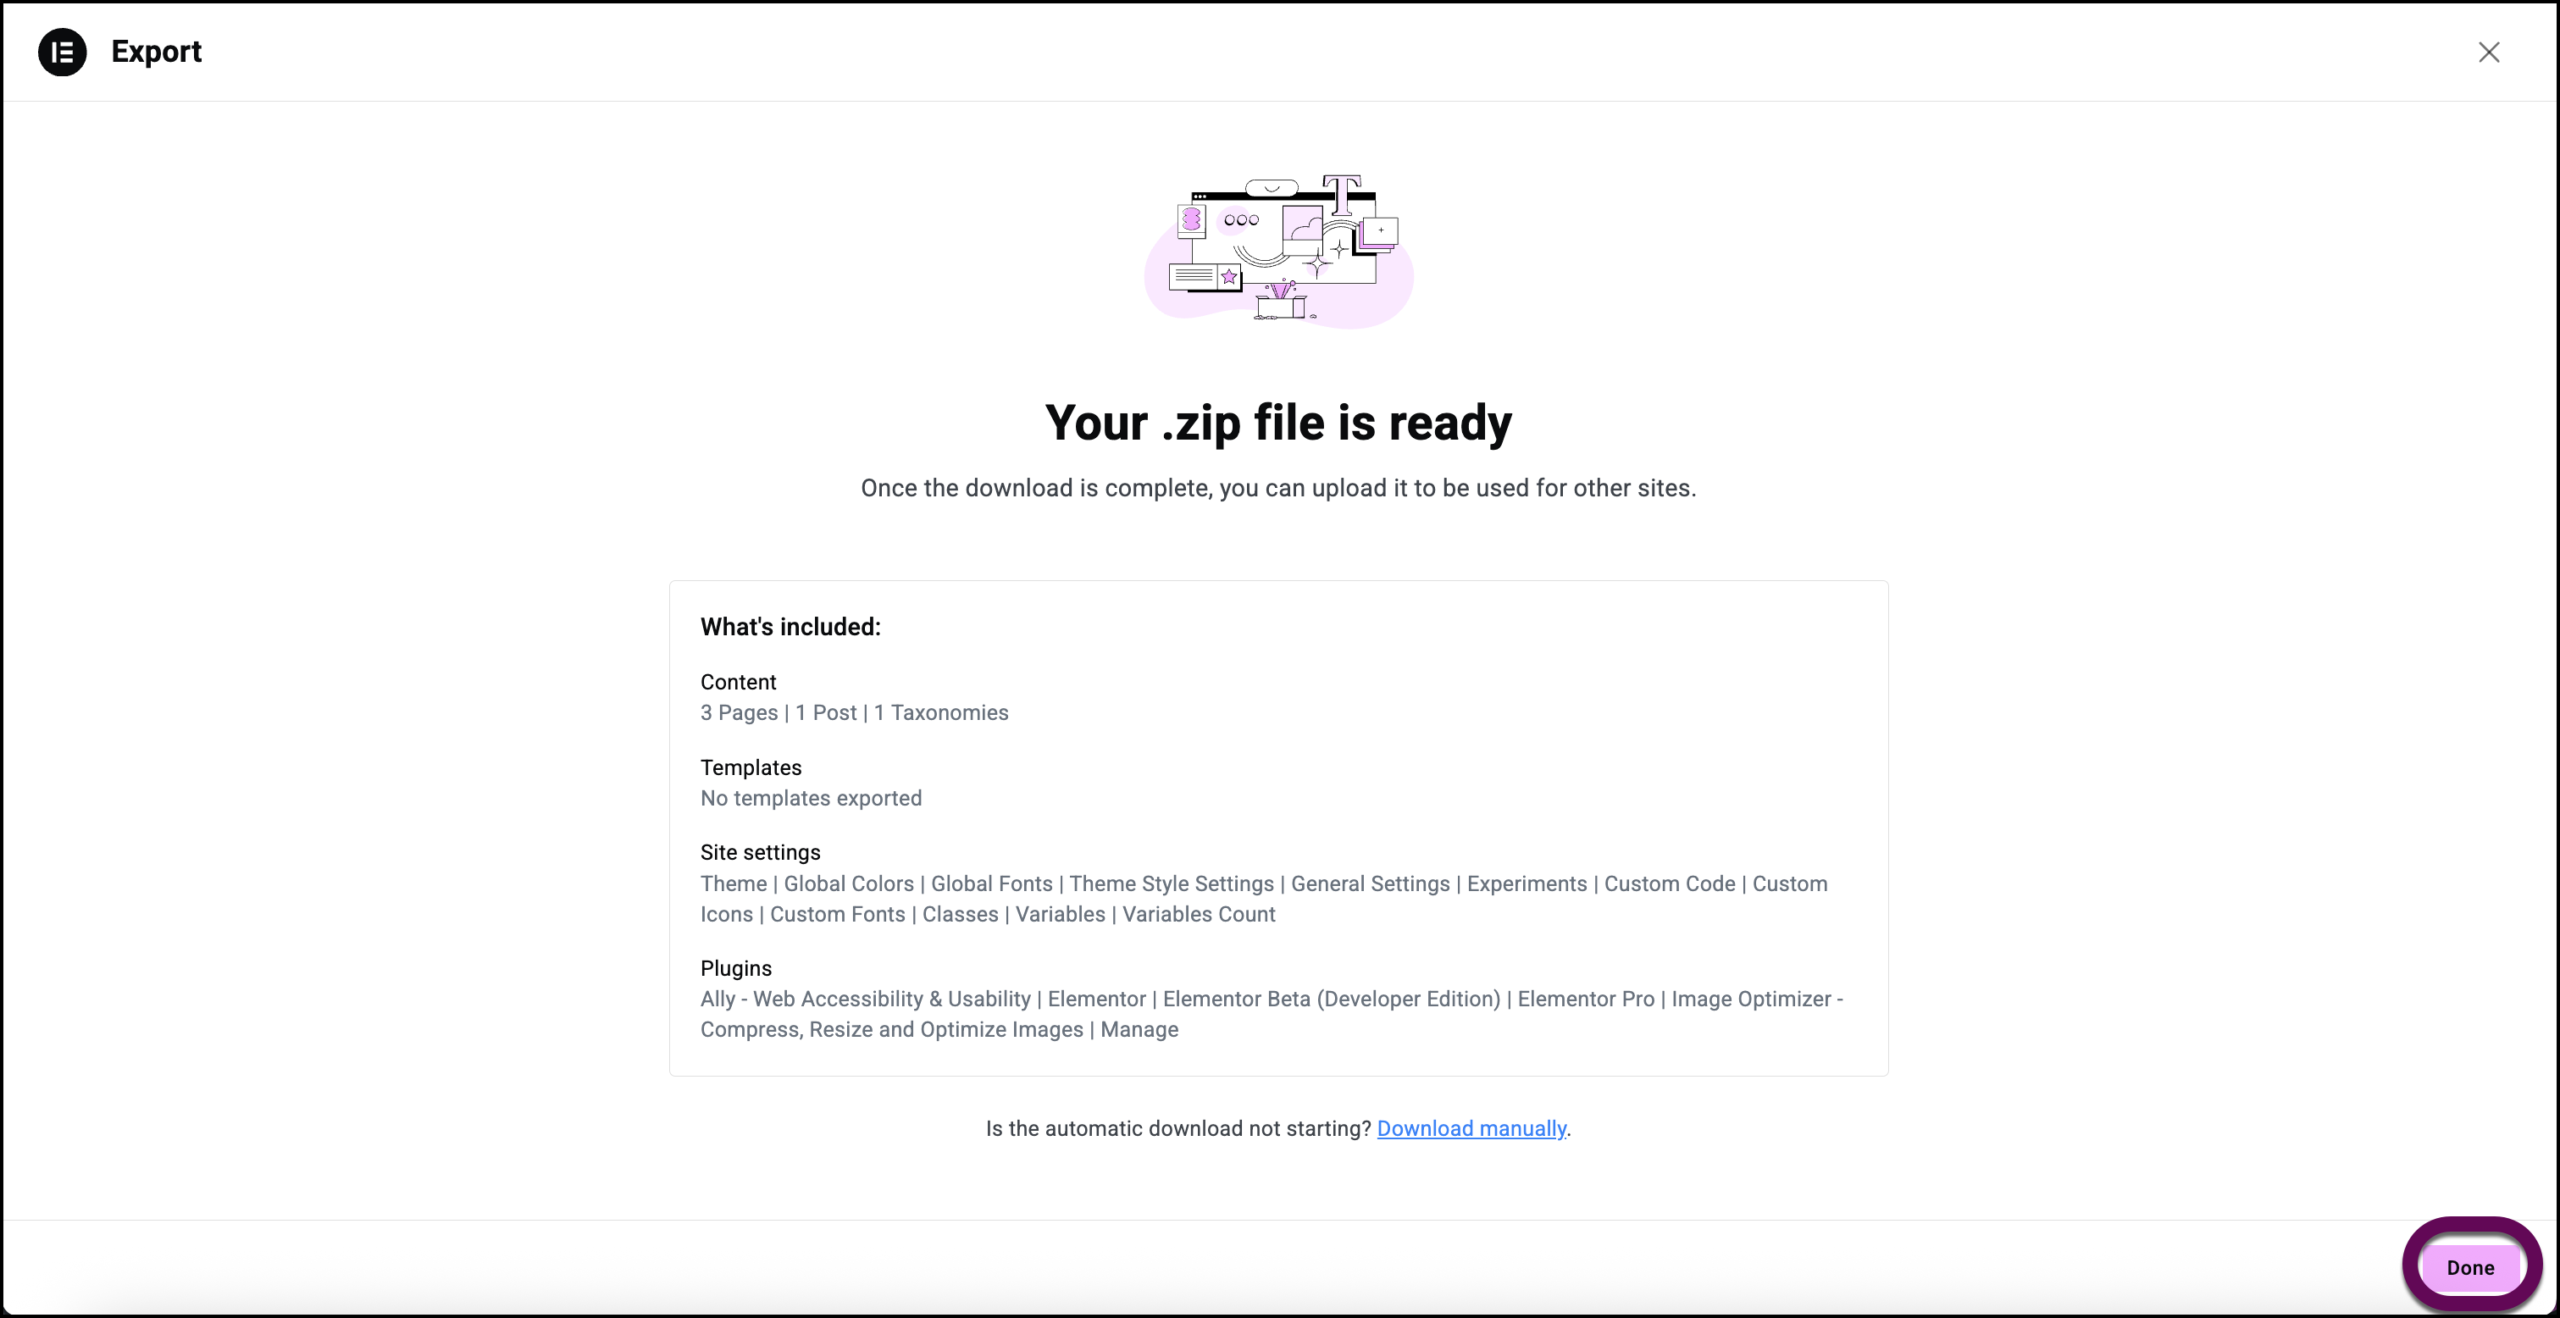
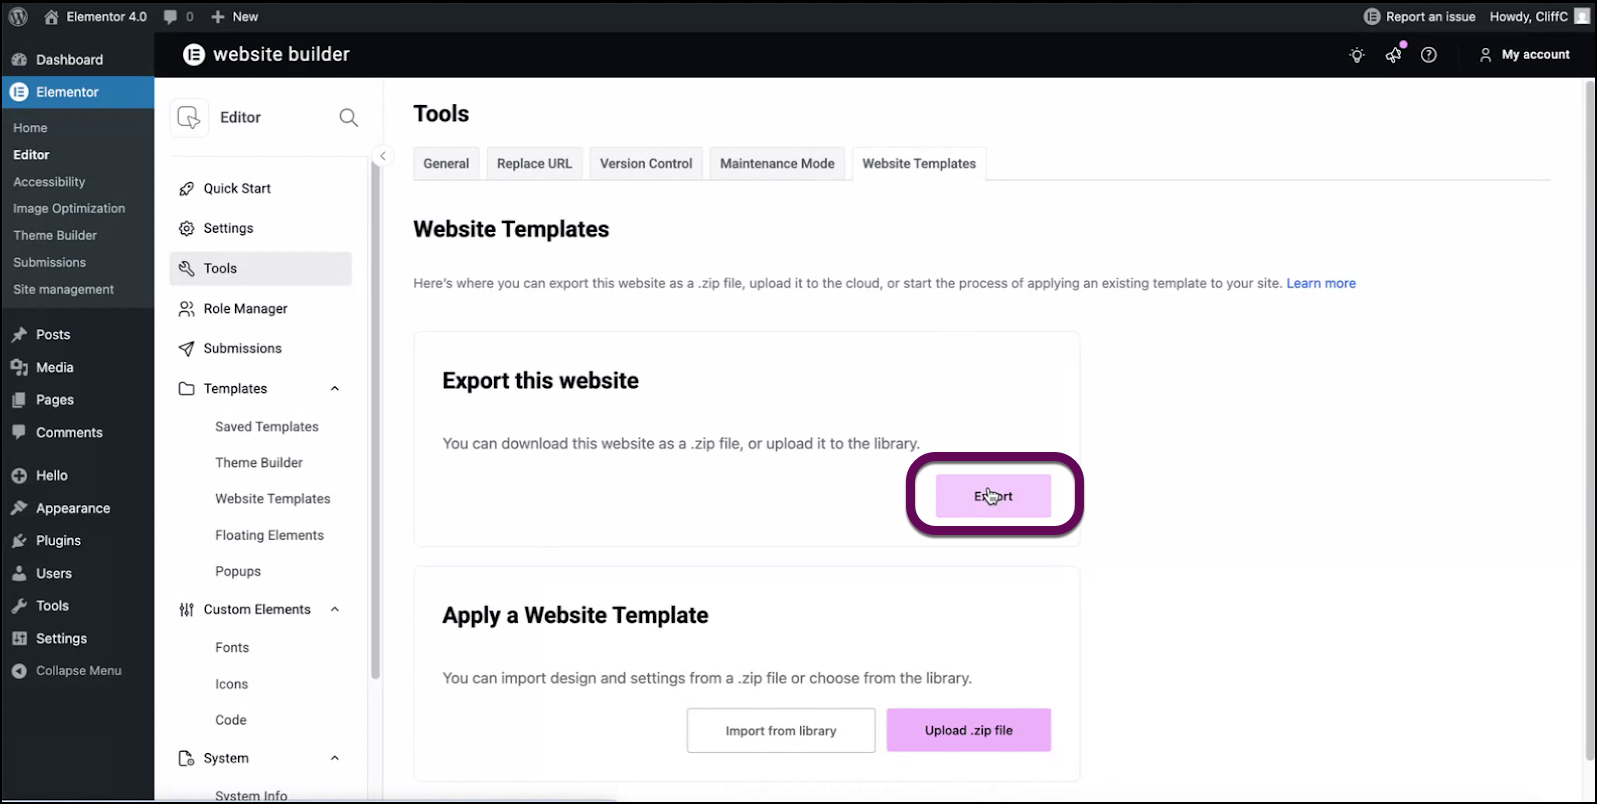
  9. Click Save to library to save the classes and variables to the template library or Export as zip to create a file that can be imported into another site.
    The buttons that let you export the file as a zip or save it to your library
  10. Click Done.
    Click Done to finish the process.
On this page

Share this article

Hosted with