Note: As an AI tool, Angie provides context-sensitive results. Therefore, the results you get may differ from the examples in this article, even if you enter the same prompts.
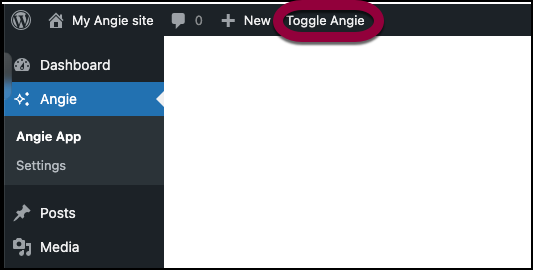
After installing Angie, the Angie panel accompanies you on the left side of your screen.
- From anywhere in the WP Admin, toggle Angie on.
- Prompt Angie to add a new user. Be sure to include as many details as possible. If you don’t include a detail, Angie will choose a default condition. For example, make sure to include:
- First name
- Last name
- Username
- Email address
- Password
- Role (Administrator, Editor, Author, Contributor, Subscriber)
- Any other important details
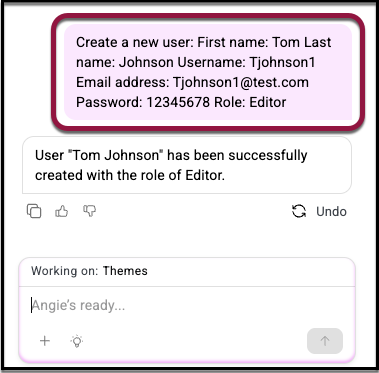
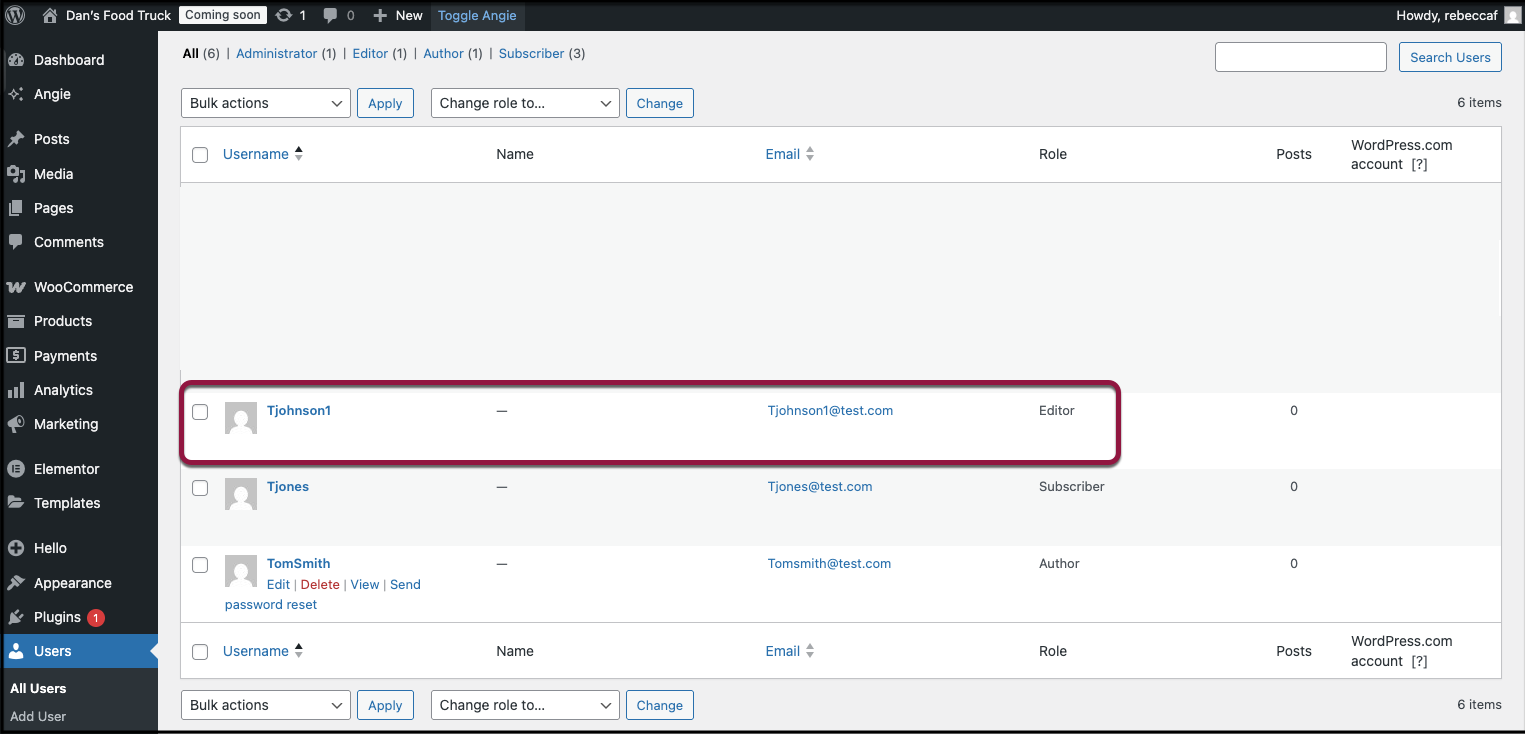
- Angie will confirm that a new user has been added. Go to WP Admin > Users > All Users to confirm the user appears in your list.
Tips
– Assign the least privileged role necessary. For example, give “Editor” access instead of “Administrator” unless full access is required.
– Angie can also help you update user roles later (“Change Sarah Johnson’s role to Author”).
– Always double-check the email address before confirming to ensure the new user can log in.

