Forms FAQ

Last Update: October 29, 2025

This post has been translated using machine translation, which may result in minor inaccuracies or differences in wording compared to the original. We apologize for any errors or ambiguities. Please feel free to contact us if we can clarify anything for you.

With the Elementor Form Submissions feature, you can backup your form submissions data, access it whenever you want, and manage it all from one place. Having your submission’s info allows you to gather insights, analyze a campaign’s data, or manage your submissions from within WordPress Admin.

Uploaded files are saved in a dedicated directory under ‘uploads/elementor/forms/’.

File names are set randomly, for security reasons (we don’t want users uploading ‘yo_mama.jpg’ now do we?).

This setting does not override your host’s server setting. This option limits the number of files that can be uploaded from the form itself, but only if this limit value does not exceed the PHP’s “max_file_uploads” value. If you need more, contact your Hosting support to have the “max_file_uploads” value raised for your site.

The Date and Time fields can be styled using Custom CSS. On mobile, the browser’s native HTML5 design is used. You can switch on Native HTML5, so the browser’s design is used on all devices. Once you choose Date or Time, you’ll see the Native HTML5 switch.

The labels for date/time inputs are not properly supported by all browsers, especially browsers on mobile devices. This is why the placeholder may not always be visible.

There is a workaround outlined in our article, Troubleshooting – Date and Time placeholders do not appear on mobiles.

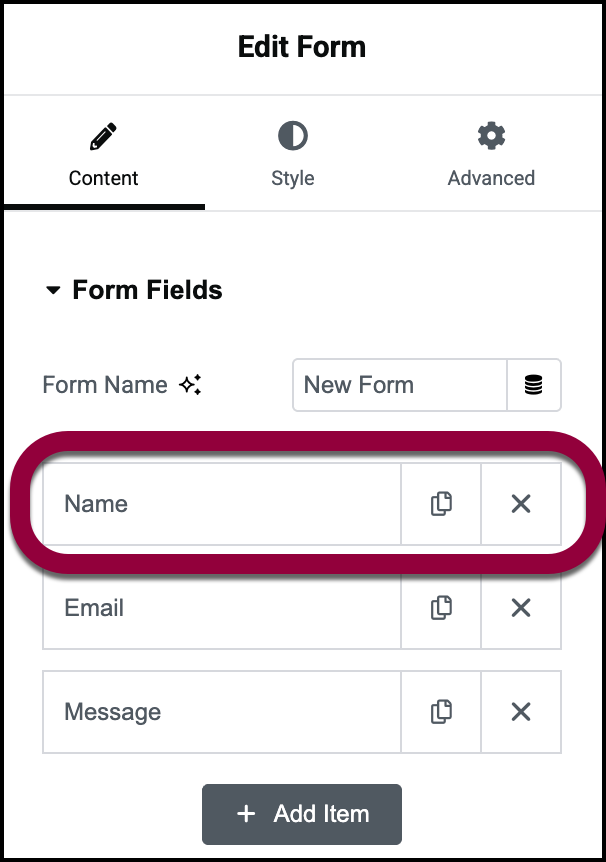
  1. In the Content tab, click the form field you want to edit.
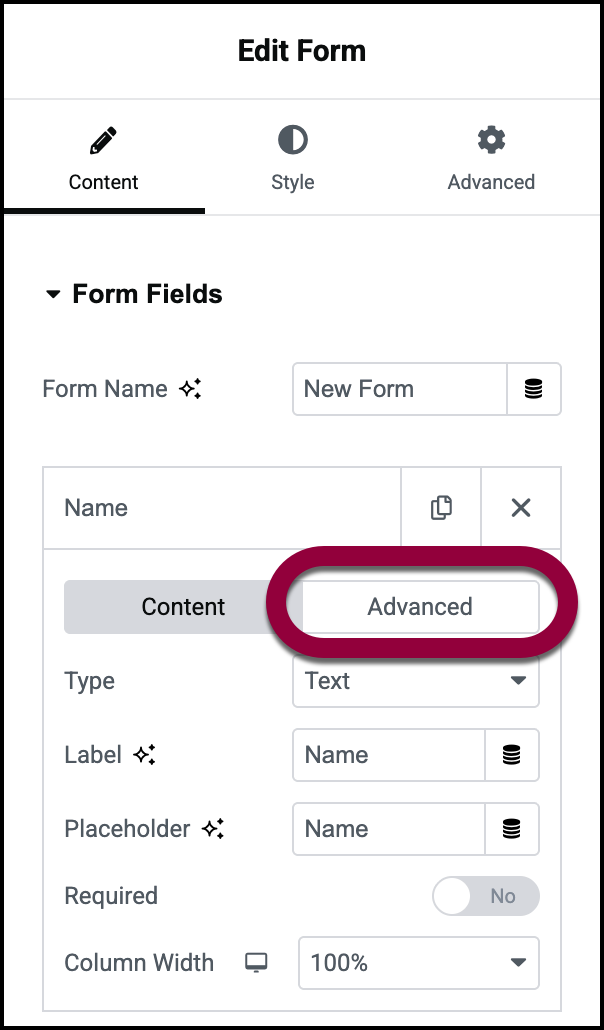
    The form field opens.
  2. Click the form field’s Advanced tab.
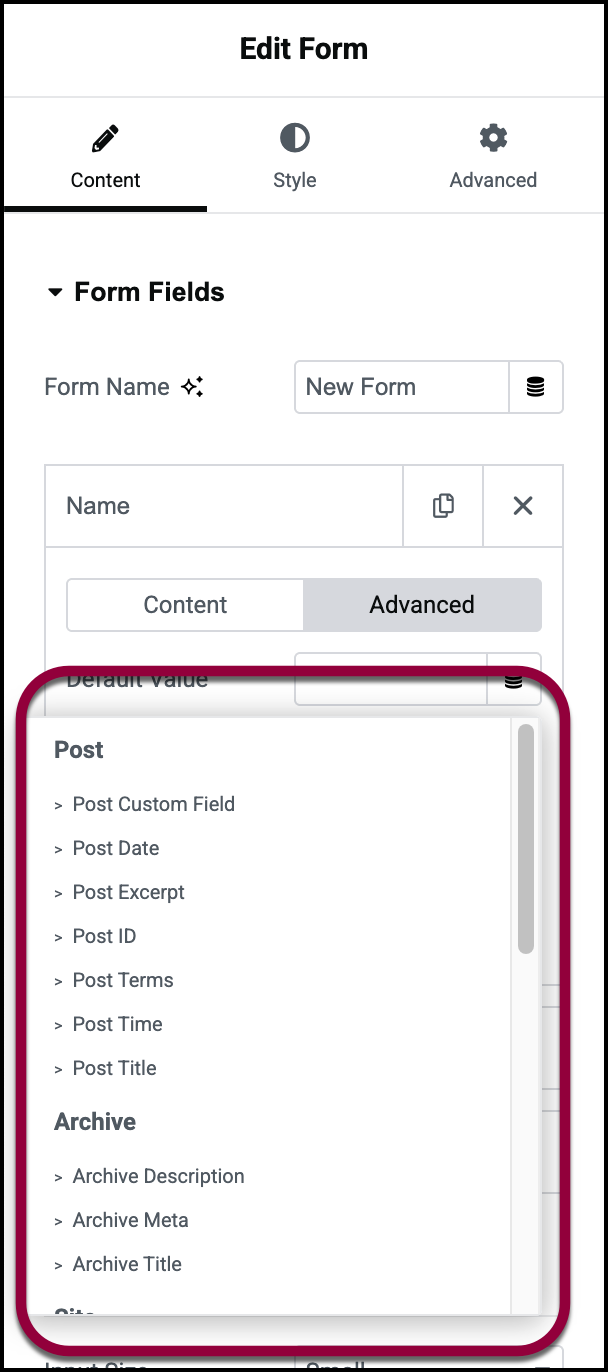
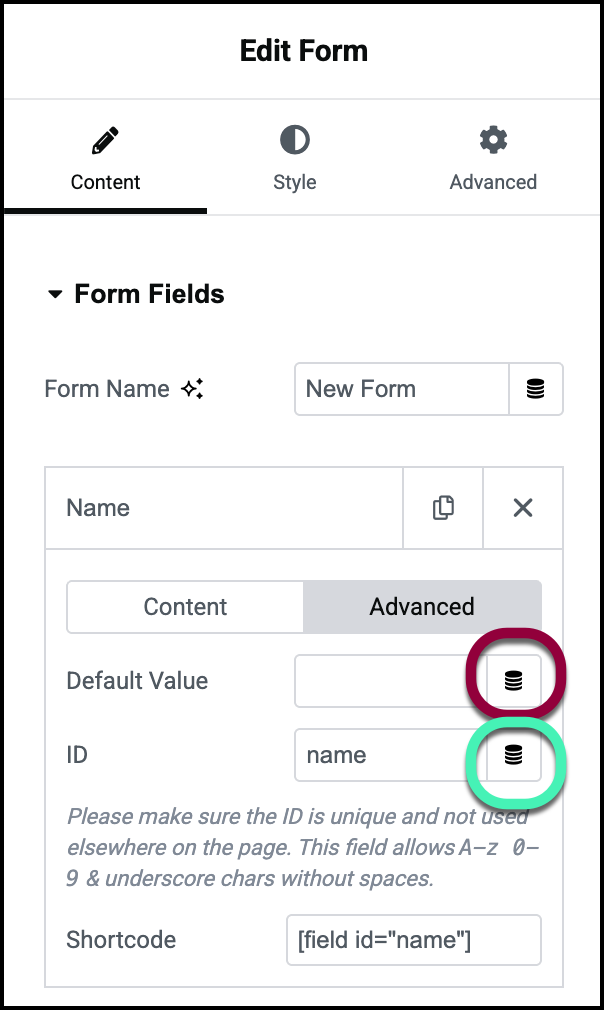
  3. Click the dynamic icon to the right of the Default Value field. 
  4. Select the desired metadata from the dropdown list.

Redirecting the user to a designated Thank You page is always a good idea. It takes them to the next step, enabling you to upsell, track user funnels, and give a good experience.

To activate Redirect: Go to Actions After Submit, add Redirect, and paste the full URL of your Thank You page.

For details, see Redirect visitors after they submit a form.

If your redirect didn’t work, try these troubleshooting steps:

  • Make sure you didn’t paste in an empty character by mistake.
  • Be sure you pasted the full URL and not a Relative URL. (‘/thank_you/’)
  • Remove any JavaScript from the page and try again. You can check for JavaScript errors in the developer tools.
  • Deactivate other plugins and try again.

Forms include 3 different types of messages:

  • Browser messages – These are sent from the browser and can not be customized. For instance, if you don’t enter a correct email address, you receive a message saying “Please include an @ in the email address”. These messages appear if the form was not filled in correctly before the form is sent.
  • Server messages are sent from the server. You can format as you need, using custom CSS. These messages appear after the form is sent. There are a few custom options including Success, Error, Invalid, etc. ExampleThe form was sent successfully! You can always alter the content of the custom messages by going to Form > Additional Options, switch-on Custom Messages and locate the relevant message.
  • Third-party servers. Error messages from Email Marketing service companies such as MailChimp cannot be modified. Please note that some error messages sent by these third-party products are shown to the admin only (you and not the subscribers) and this is not something Eleemntor can control.

Add your tracking code to a thank you page and redirect your form to that page after submission.

There is also a JavaScript event that the form triggers automatically after submission, which can be used to add to your custom tracking code. These are added externally to Elementor, using functions.php for example.

Here is a base snippet you can build on:

//The event is submit_success so you can catch it for example:
jQuery( document ).ready(function( $ ){
	jQuery( document ).on('submit_success', function(){
		// form has been submitted do your tracking here...
	});
});

Make sure you replace the comment above “// form has been submitted, do your tracking here … ” with your custom tracking code. Otherwise, the snippet won’t do anything.

Elementor has a webhook option under Actions After Submit. By default, our webhook sends each field with the label as a name, or all fields in a single array when Advanced Data is on.

To control the field names, give your form fields a custom ID and use the following snippet. 

Be sure to update the form name and your webhook URL.

Below is an example of customizing your webhook, where field IDs are sent instead of names.

add_action( ‘elementor_pro/forms/new_record’, function( $record, $handler ) {
//make sure its our form
$form_name = $record->get_form_settings( ‘form_name’ );
if ( ‘MY_FORM_NAME’ !== $form_name ) {
return;
}
 
$raw_fields = $record->get( ‘fields’ );
$fields = [];
foreach ( $raw_fields as $id => $field ) {
$fields[ $id ] = $field[‘value’];
}


wp_remote_post( ‘HTTP://YOUR_WEBHOOK_URL’, [
‘body’ => $fields,
]);
});

This happens generally because of server errors or fields not properly mapped. For troubleshooting tips, check out this guide.

If you receive an error message such as “There’s something wrong. The form is invalid”, it could be that the form has been added as a widget inside another widget via a shortcode. This is an unofficial and unreliable method of adding a form to a page, so this should be avoided.

MailChimp integration with the Elementor form widget only acts as a ‘sign up form’. Re-subscription via an Elementor form widget is not possible as the MailChimp API does not allow this. Re-subscription to a list is only through MailChimp hosted signup forms. This same situation may apply to other services that integrate with forms.

To handle these types of users, put a note somewhere below the form that mentions that if they were previously signed up to the list, then they cannot resubscribe this way. Give them a link to redirect them to the MailChimp hosted signup forms instead, so they can resubscribe there.

On this page

Share this article

Hosted with