For any number of reasons you may need to add, delete or edit DNS records. For instance, you may need to add an MX DNS to handle emails.
Access you DNS records
To access your DNS records:
- Go to your My Elementor dashboard.
- In the top bar, click Domains.
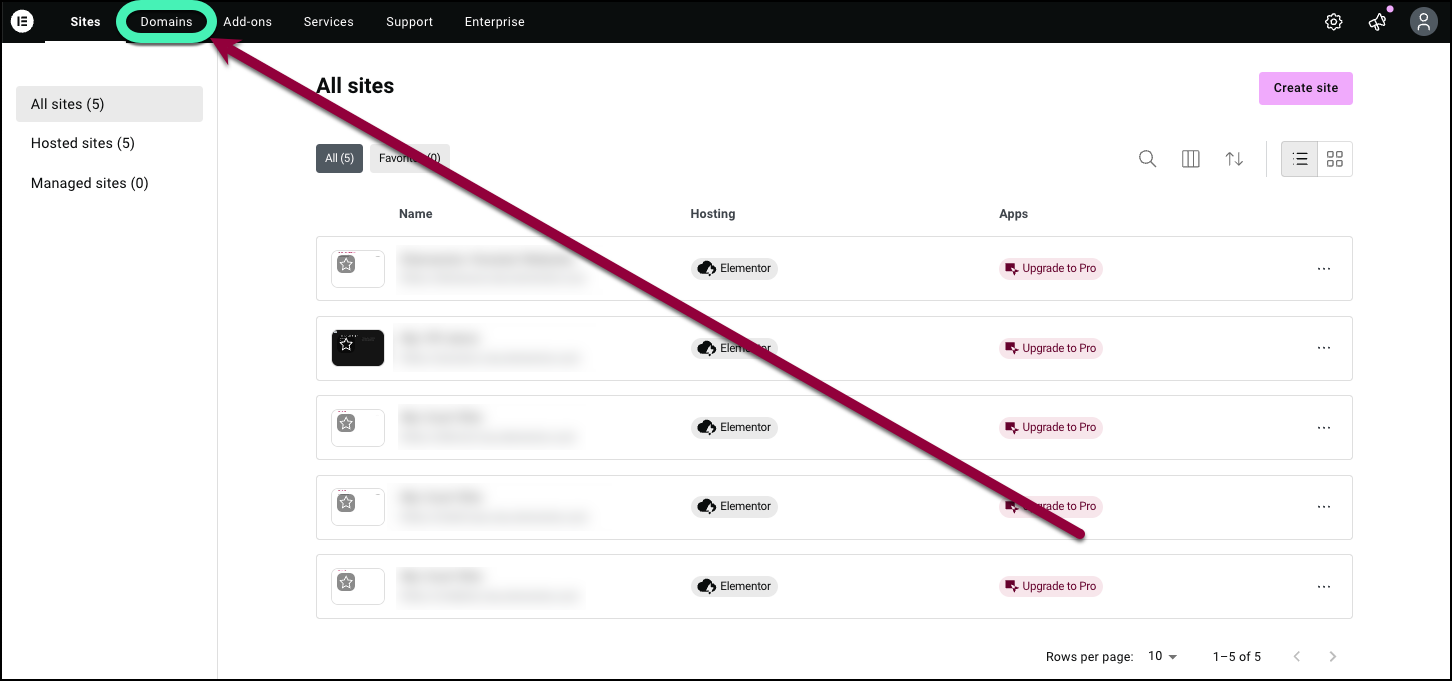
A list of your domains appears.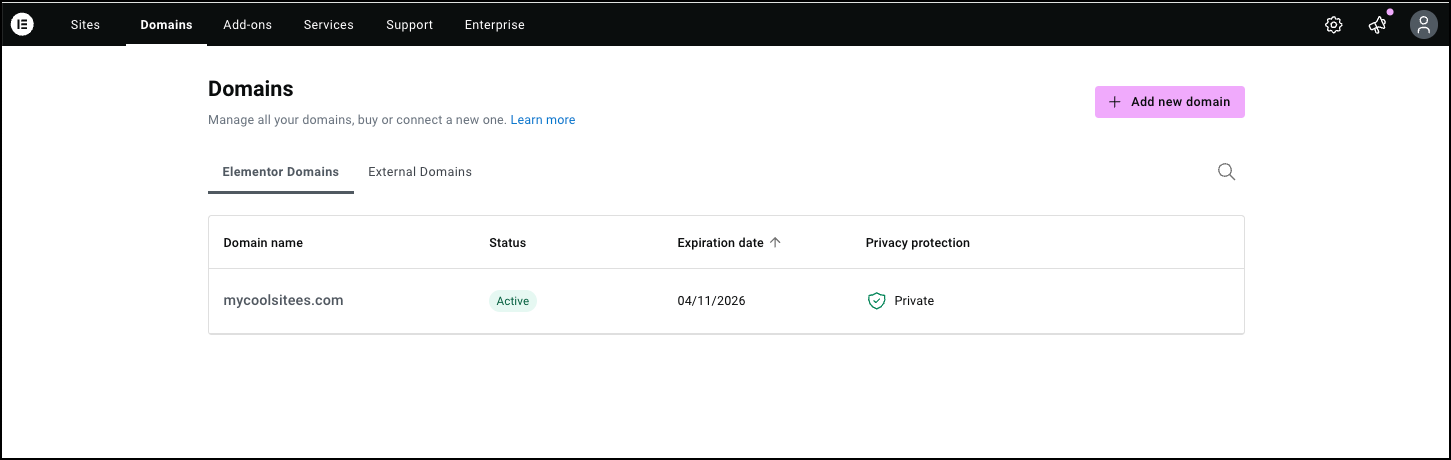
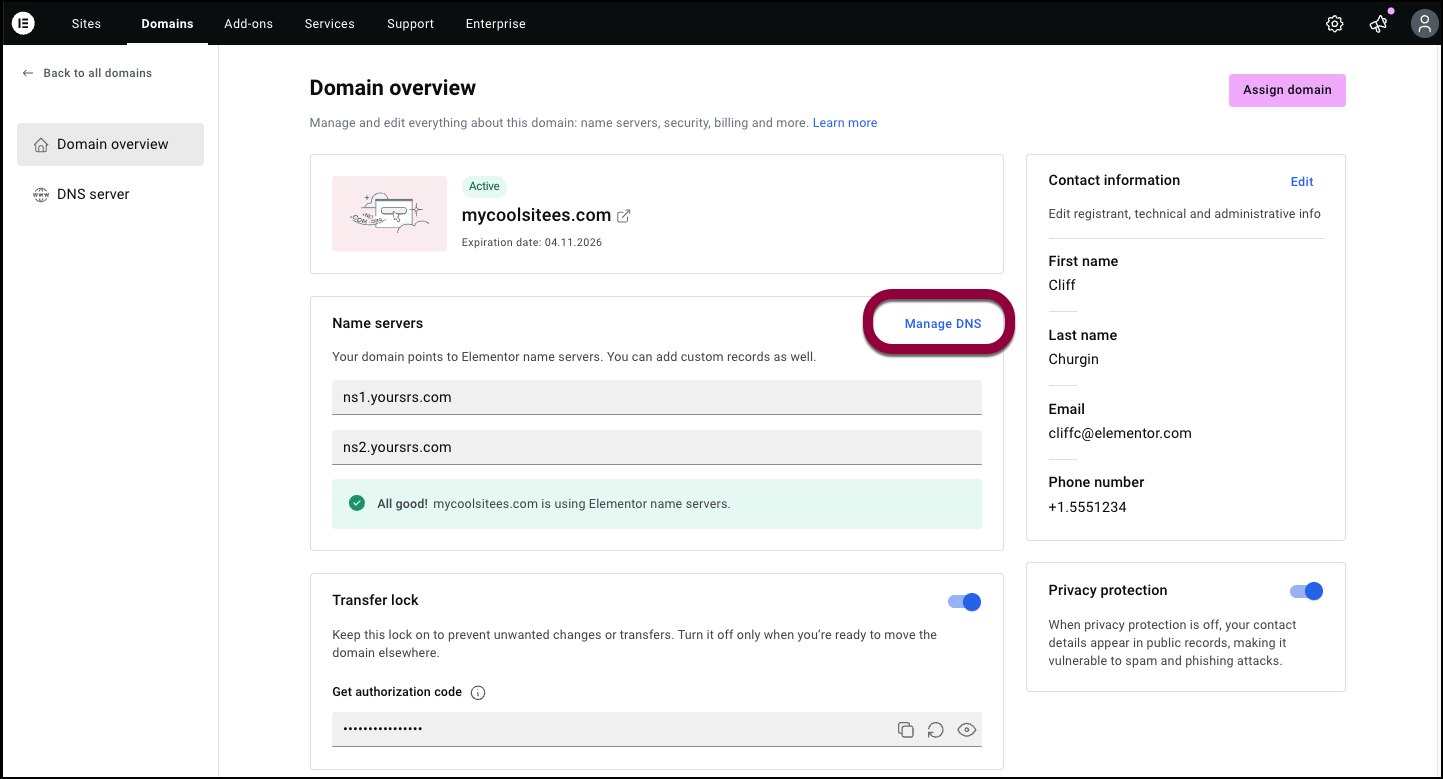
- Click the domain name associated with the DNS records you want to access.
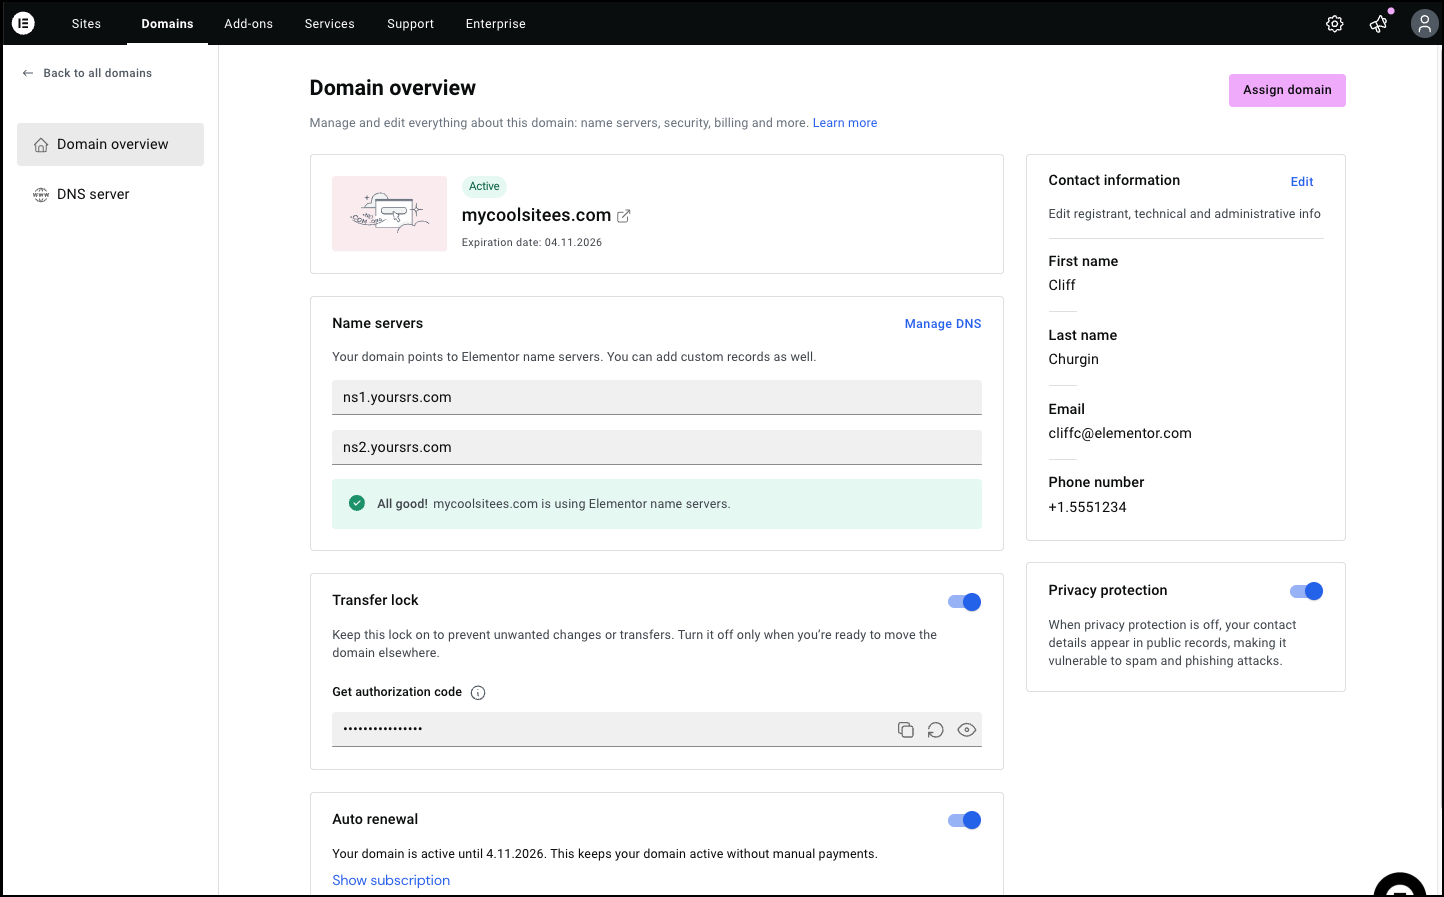
- The Domain overview screen appears.
Note
You can also access the DNS records by:
- Hovering over the domain name you want to access the DNS records for.
- Click the ellipses next to the domain name.
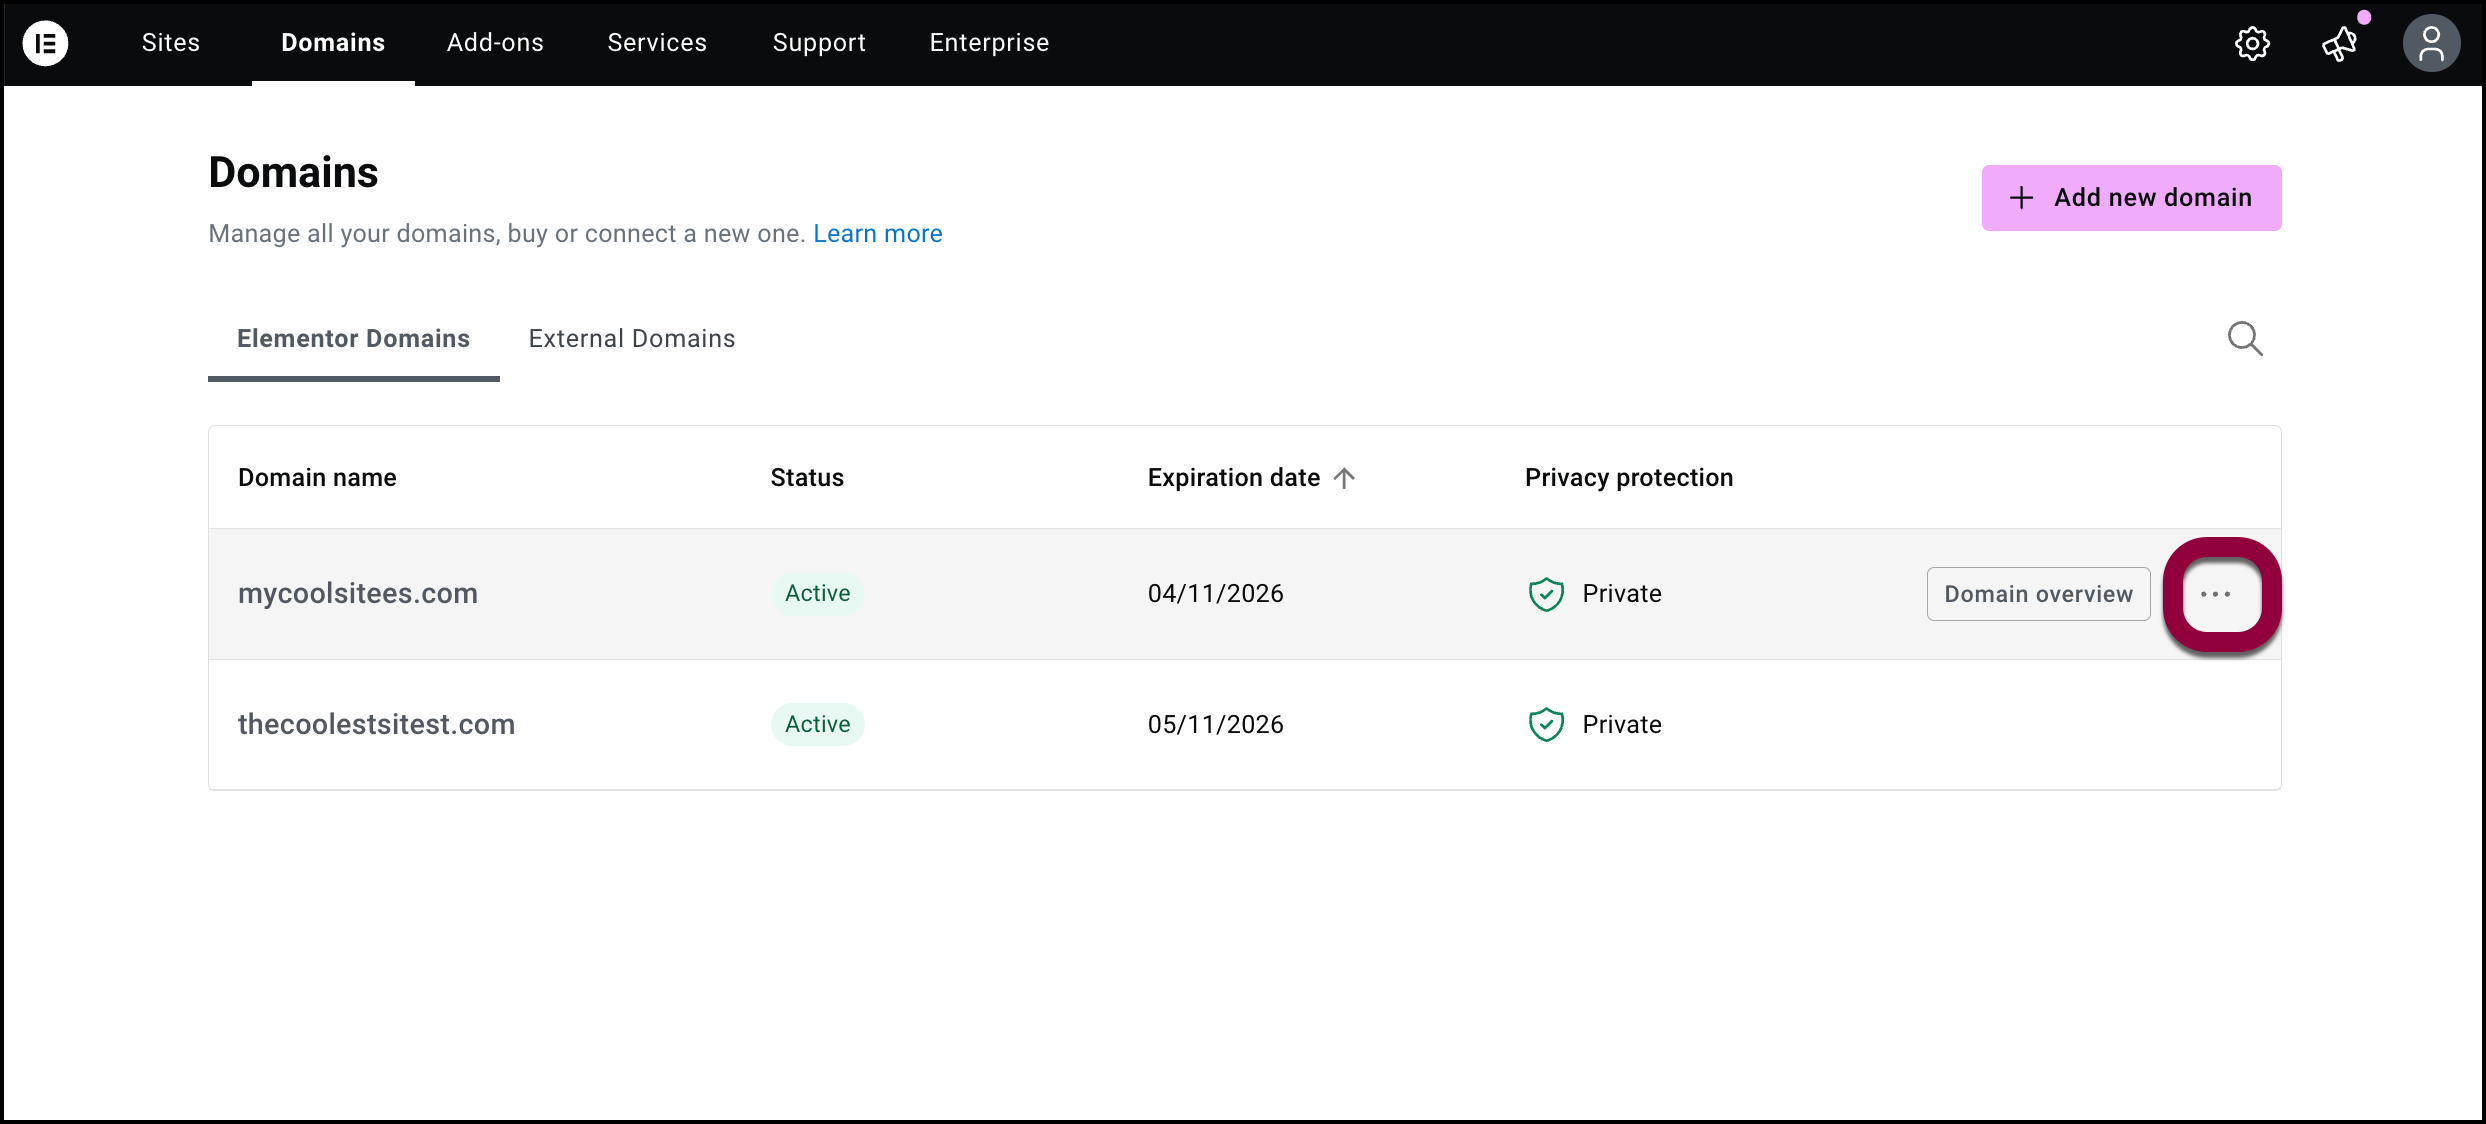
- Select DNS servers from the dropdown menu.
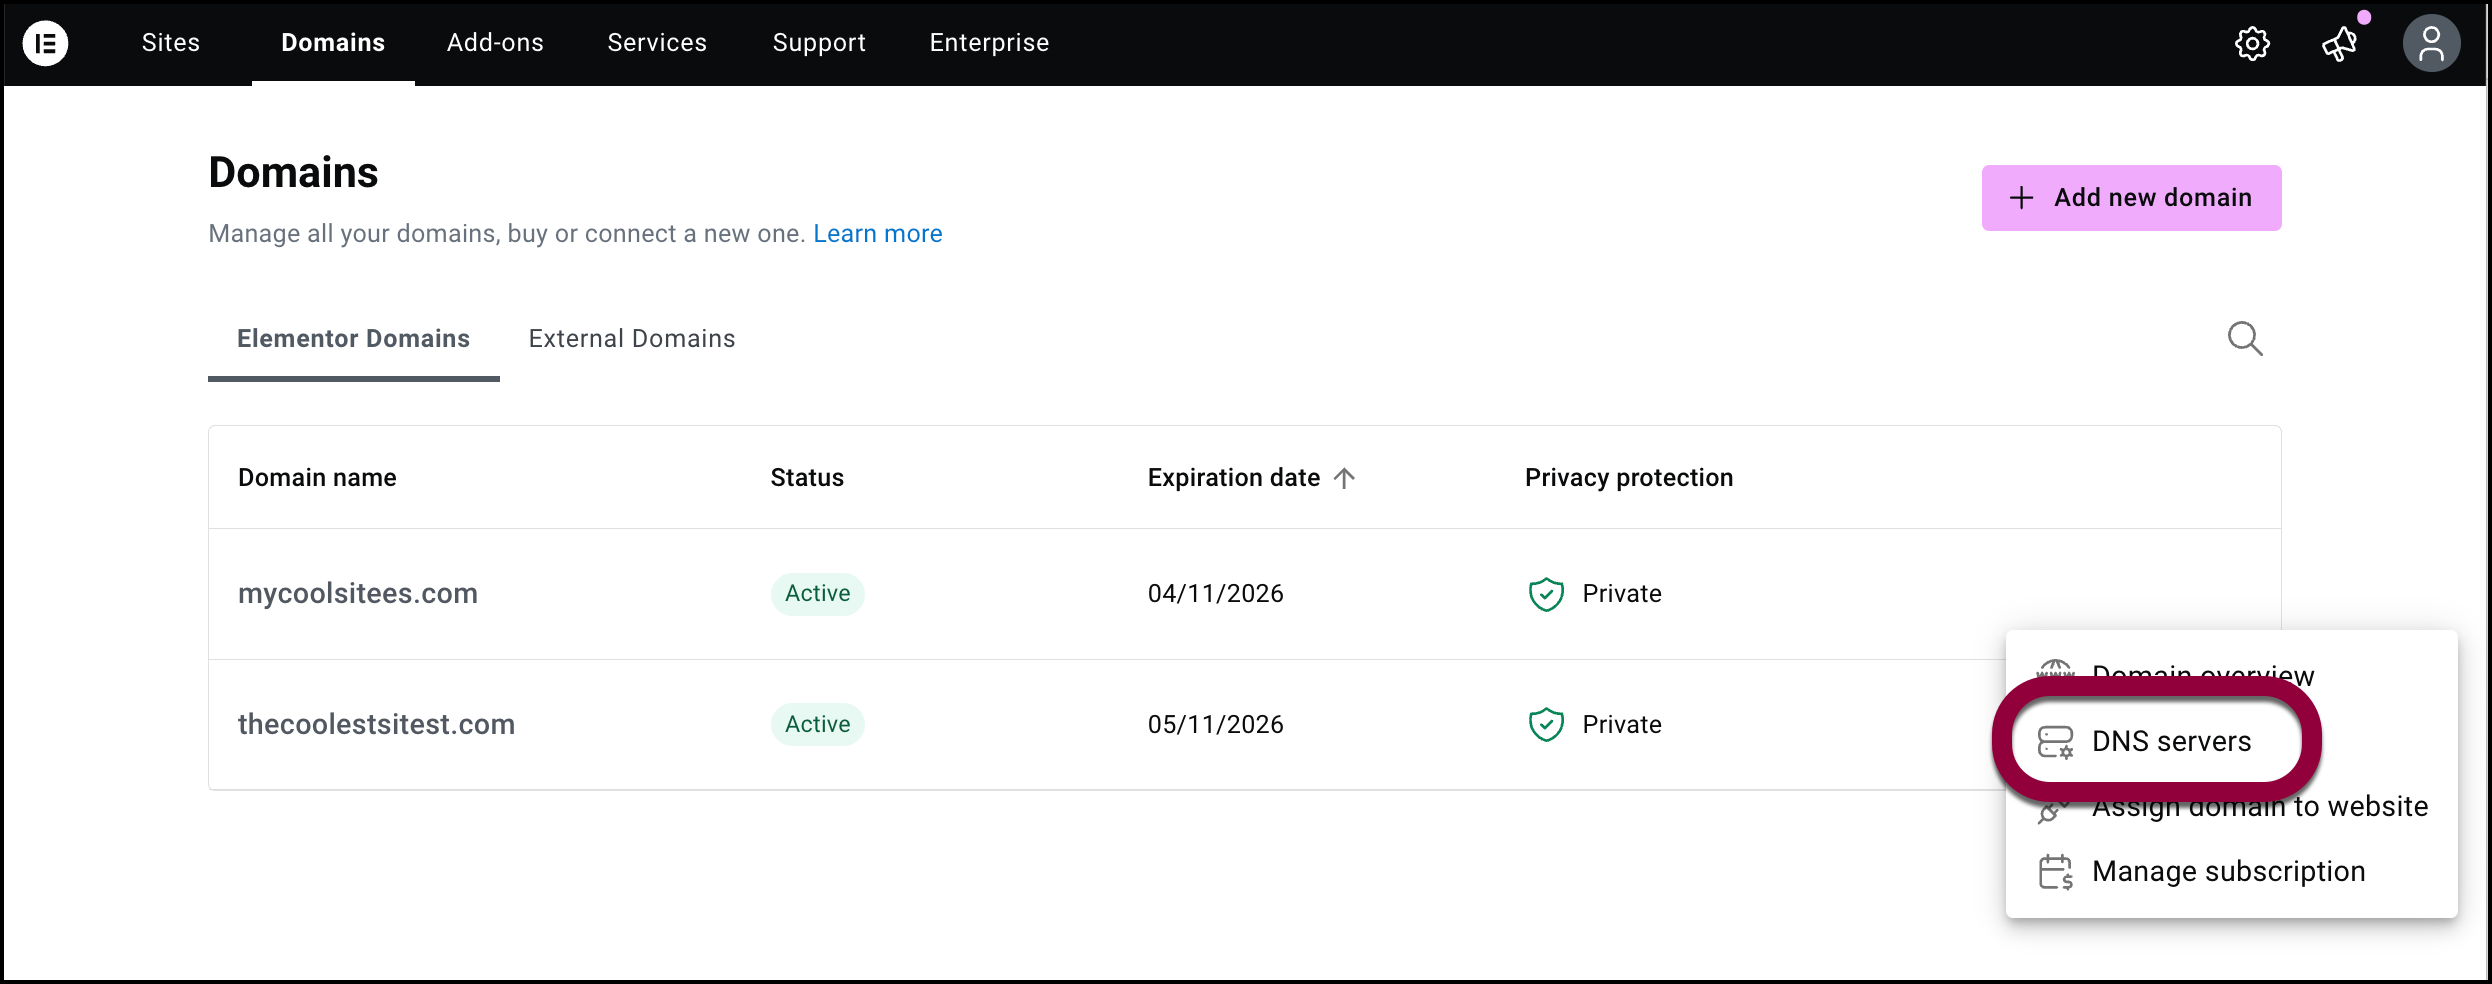
This takes you directly to the DNS servers screen.
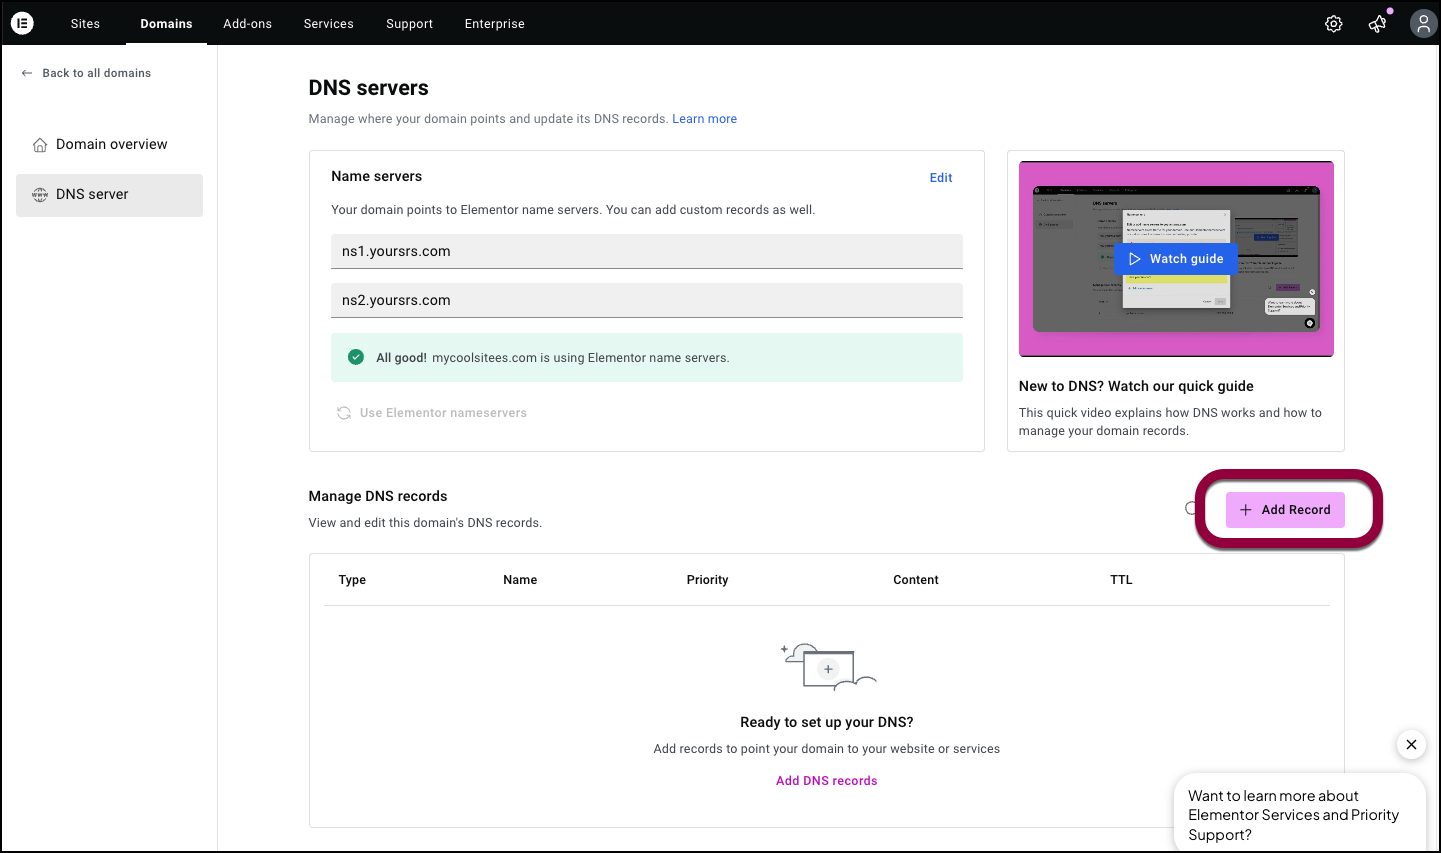
Add a DNS record
You can add a number of different DNS types to your domain:
For details about these DNS types, see What is a DNS record?
To add a DNS record:
- Go to the Domain overview screen as described above.
- Click Manage DNS.
- Click Add Record.
Edit or delete a DNS record
You may need to edit a DNS record, for instance if you need your domain to point to a different server.
To edit or a DNS record:
- Go to your My Elementor dashboard.
- In the top bar, click Domains.
A list of your domains appears. - Click the domain name you want to edit or delete.
The Domain Overview appears. - Click Manage Domains.
The DNS servers screen appears. - Scroll down to the Manage DNS records section.
- Click the ellipses to the right of the domain name.
- Select Edit from the dropdown menu to edit the record.
- Select Delete to delete the record.
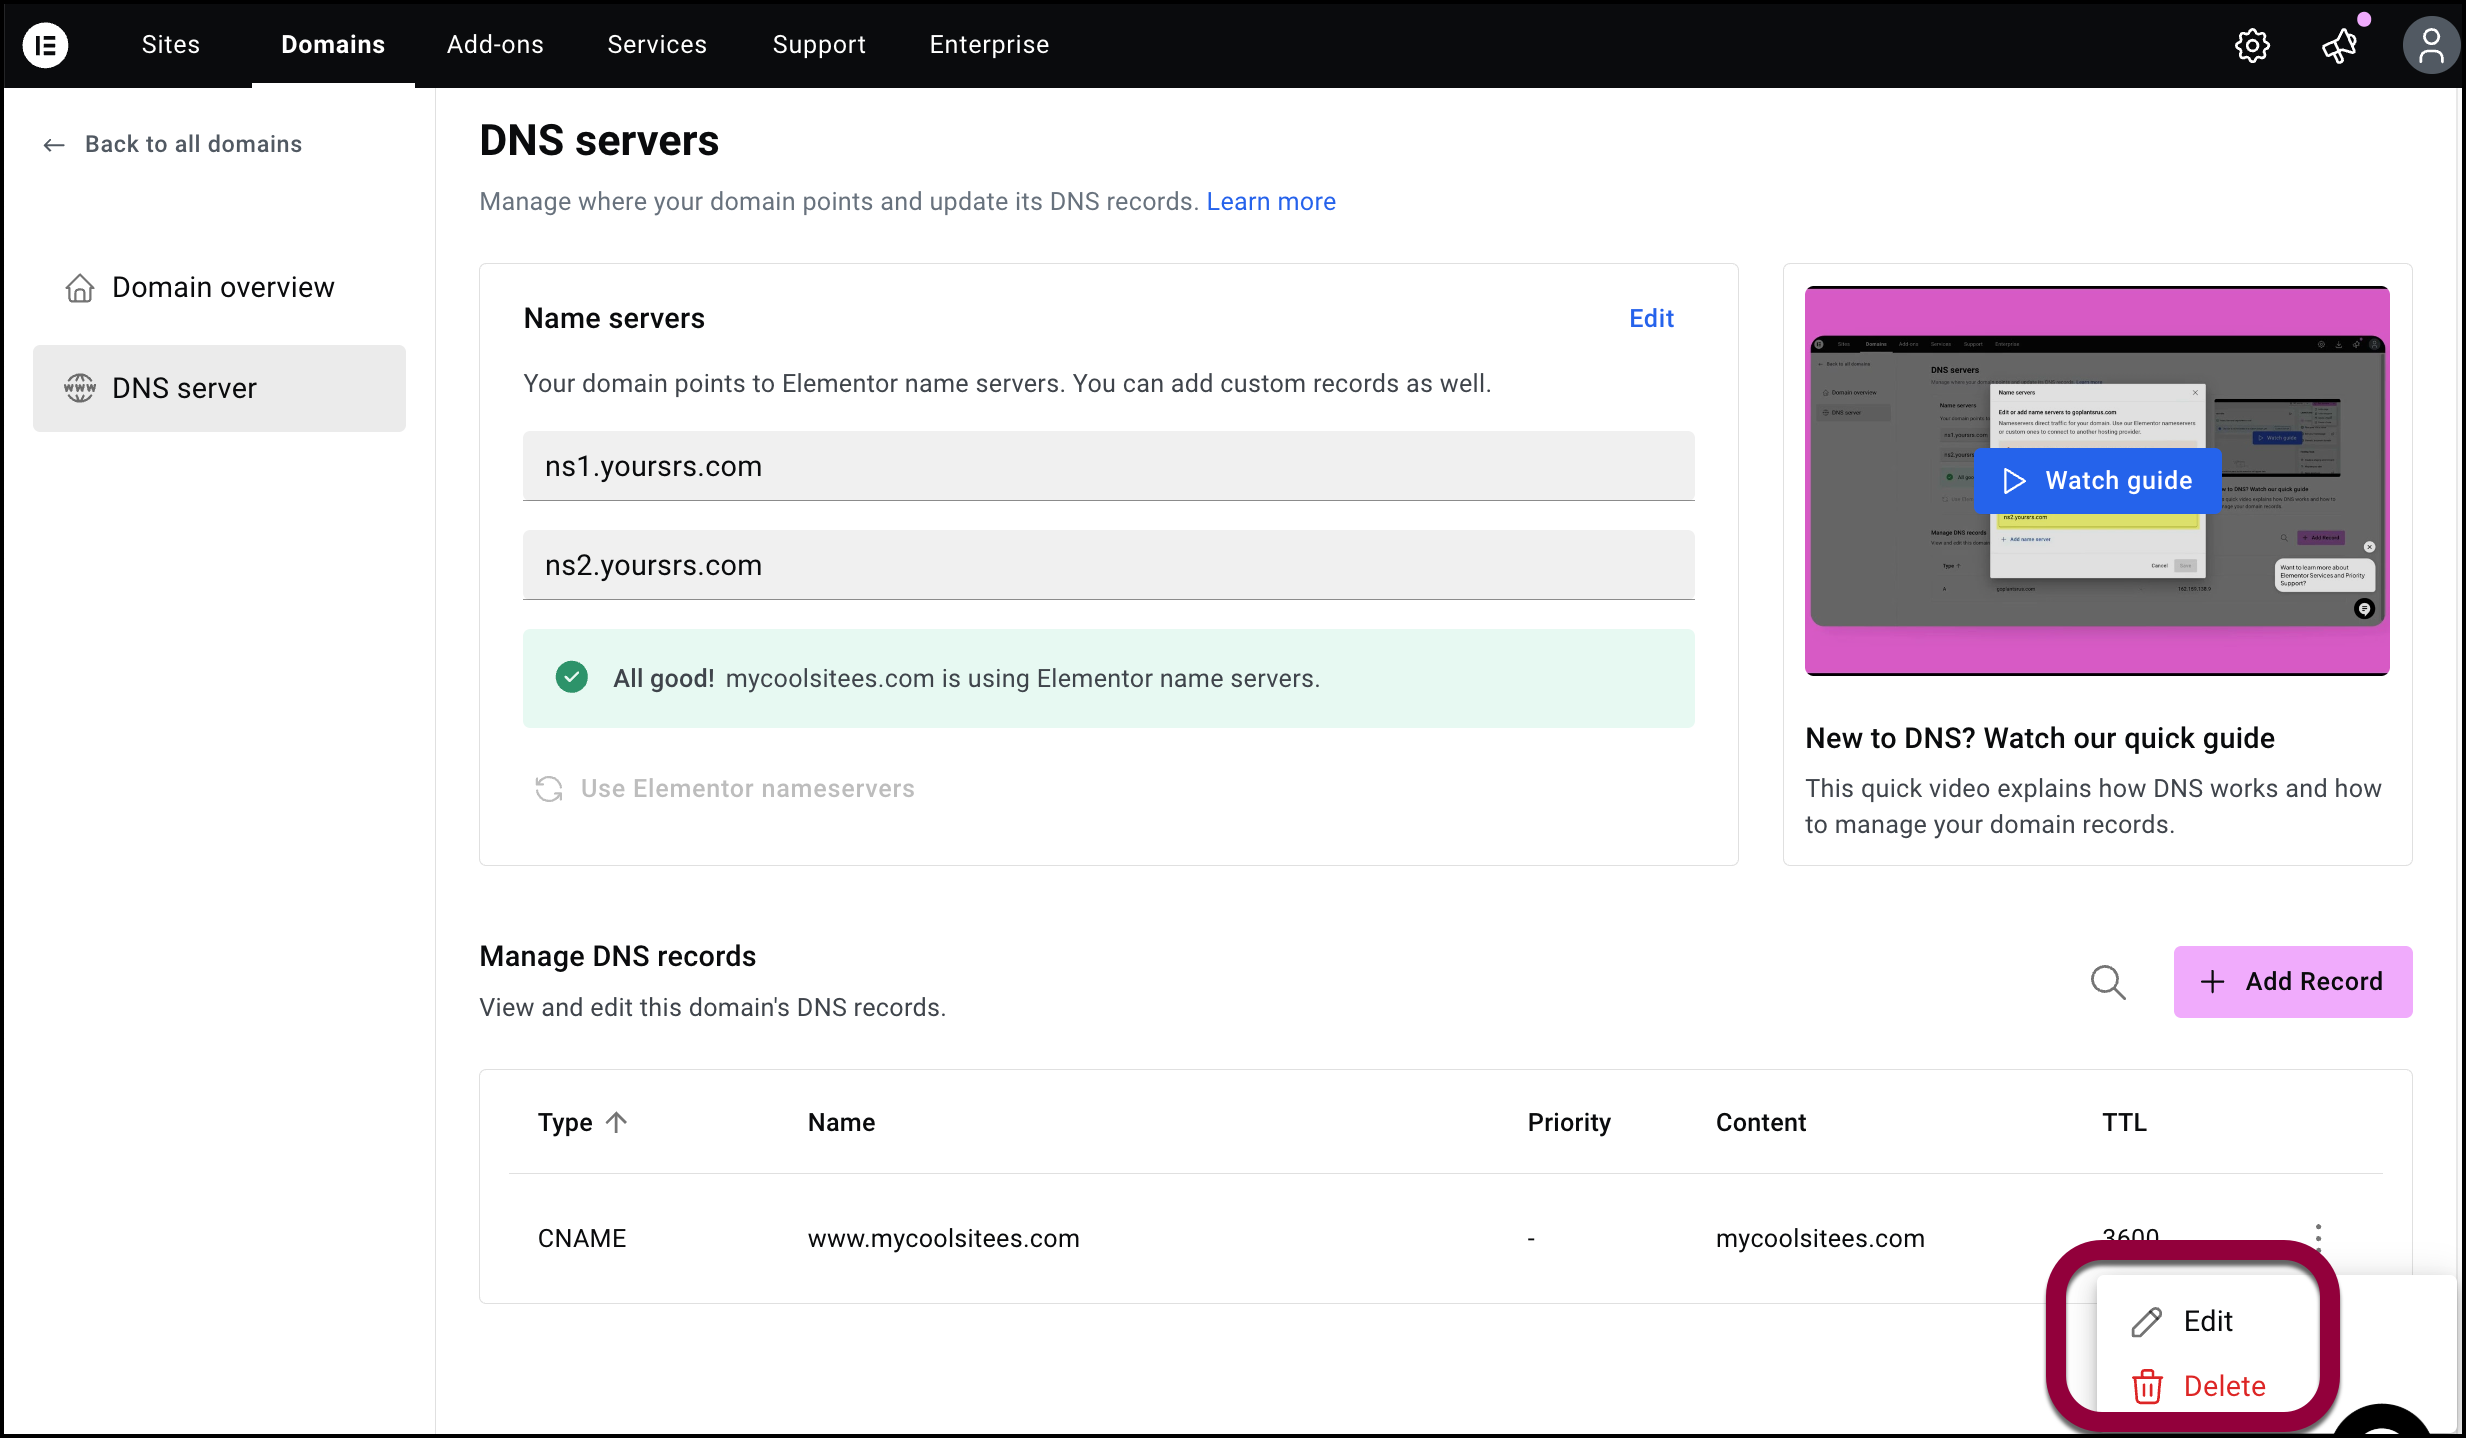 NoteIf you’re deleting a record, you’ll need to confirm your selection.