Want to grow your email list with popups? Until recently, you had to use different 3rd party plugins but these days are over. In this post, we’ll show you how to create a flexible email capture popup using the Elementor Popup Builder.
Step 1: Create Your Popup
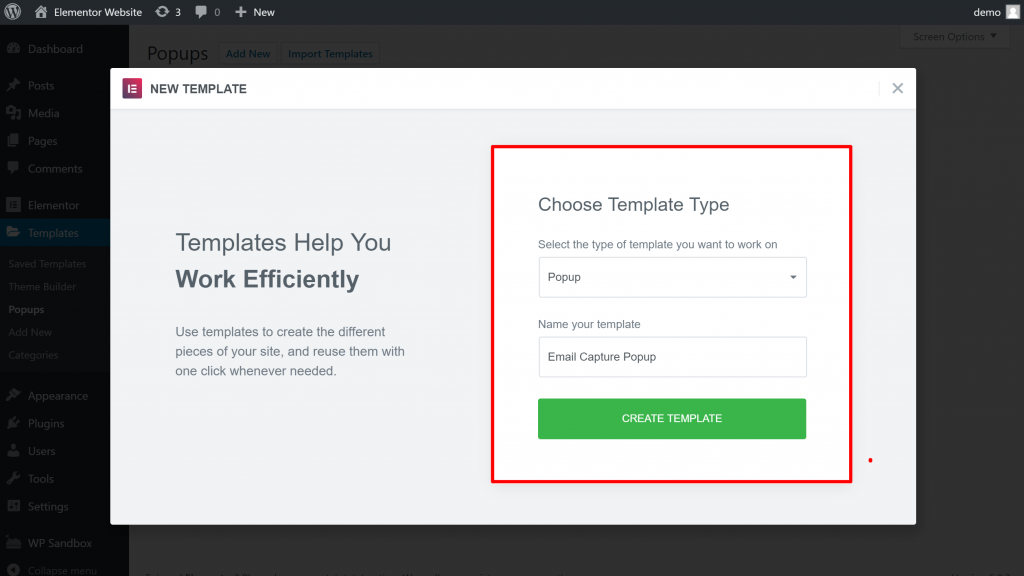
To get started, you can use Finder to open the Popup Builder (or just head to Templates → Popups → Add New).
Give your email capture popup a name, then click Create Template:
Next, you can choose from one of the hundreds of pre-made popup templates that come with Elementor Pro. Or, you can opt to create your own from scratch.
If you browse through the templates, you’ll find tons of options for email capture popups in a variety of locations.
For this tutorial, I’ll choose a modal lightbox popup with a CTA, but feel free to pick a different placement option (like a notification bar) – the choice is yours!
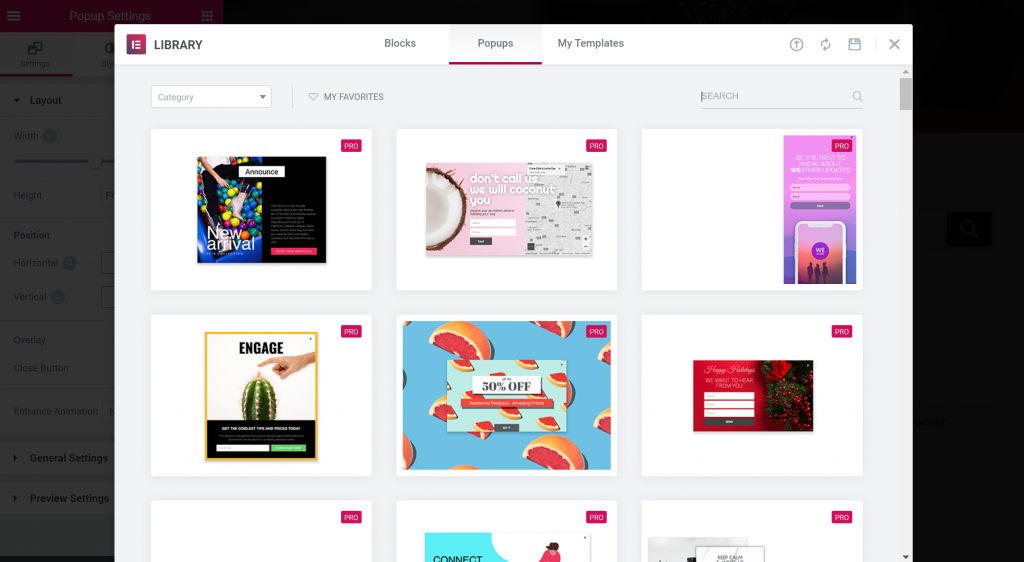
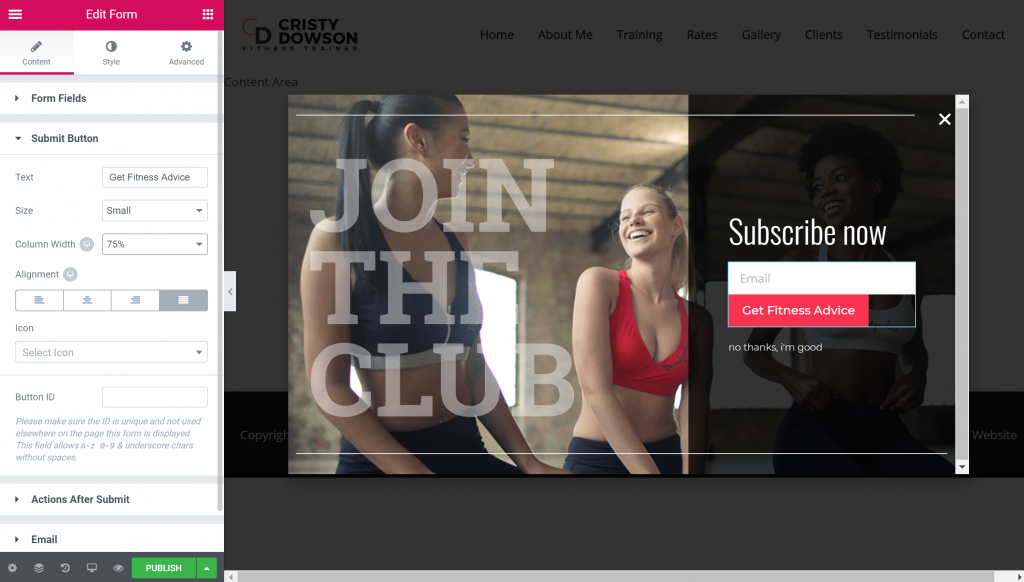
Once you’ve imported the template, you can use all the regular Elementor controls to edit content and change styling (or, you could also use those controls to build a popup from scratch).
For example, you could edit the CTA on the submit button:
Step 2: Add Actions to Close Popup After Interaction
You’ll probably want to automatically close your popup after a user submits their email address and avoid showing them the email capture form in the future.
To add this functionality, edit the Form widget. Then open the Actions After Submit toggle.
In addition to letting you connect directly to your favorite email marketing service (learn how here), these actions also let you automatically close the popup and stop it from showing again.
To automatically close the popup after a user submits the form, add the Popup action:
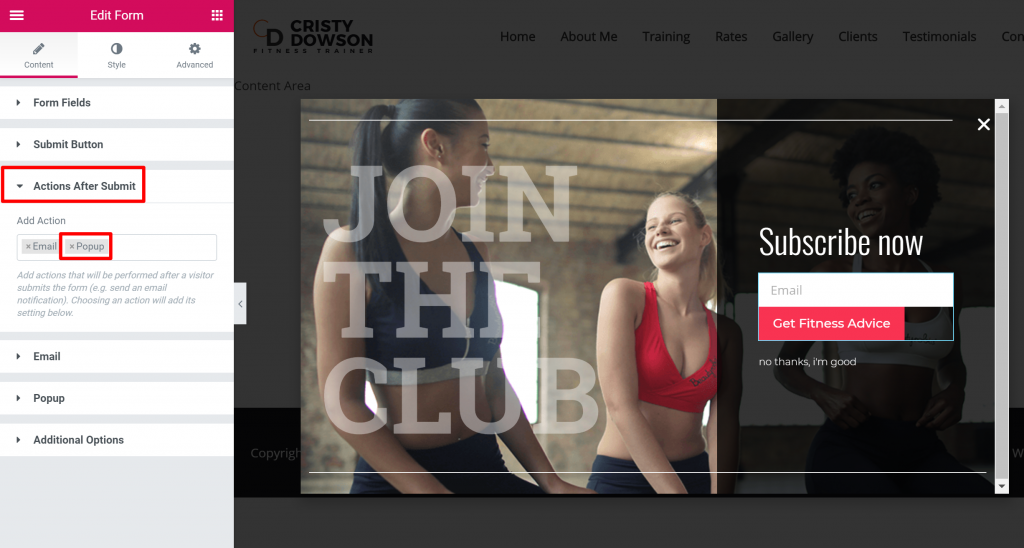
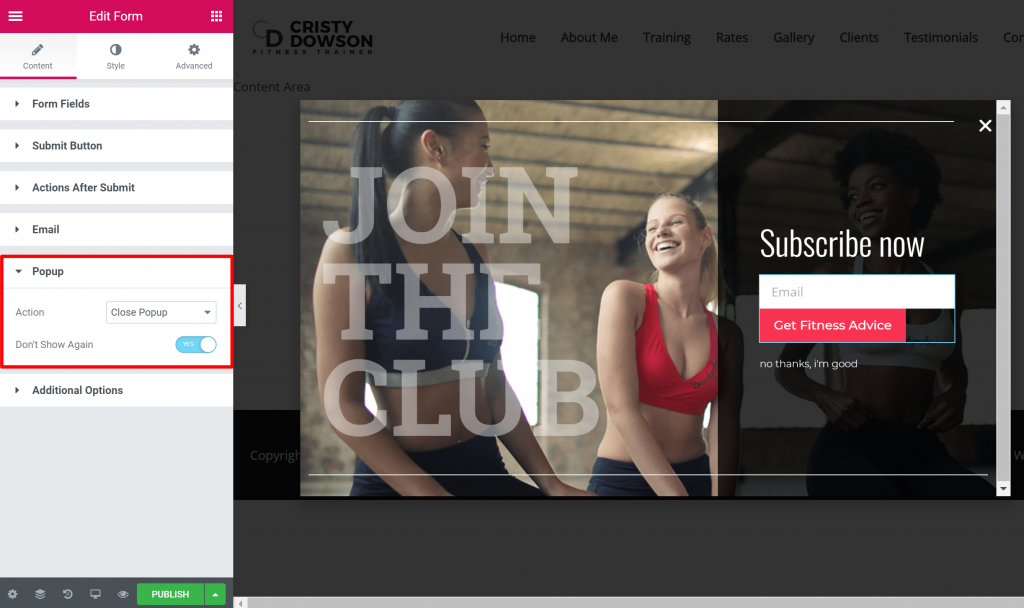
This will add a new Popup section to the sidebar where you can select Close Popup from the drop-down.
You’ll also want to enable the Don’t Show Again toggle so that you don’t show your email capture popup to someone who’s already subscribed:
If you want to add a negative opt-out that lets users click a button to close the popup without submitting their email, you can also use a button or text to link to the Dynamic Popup option:
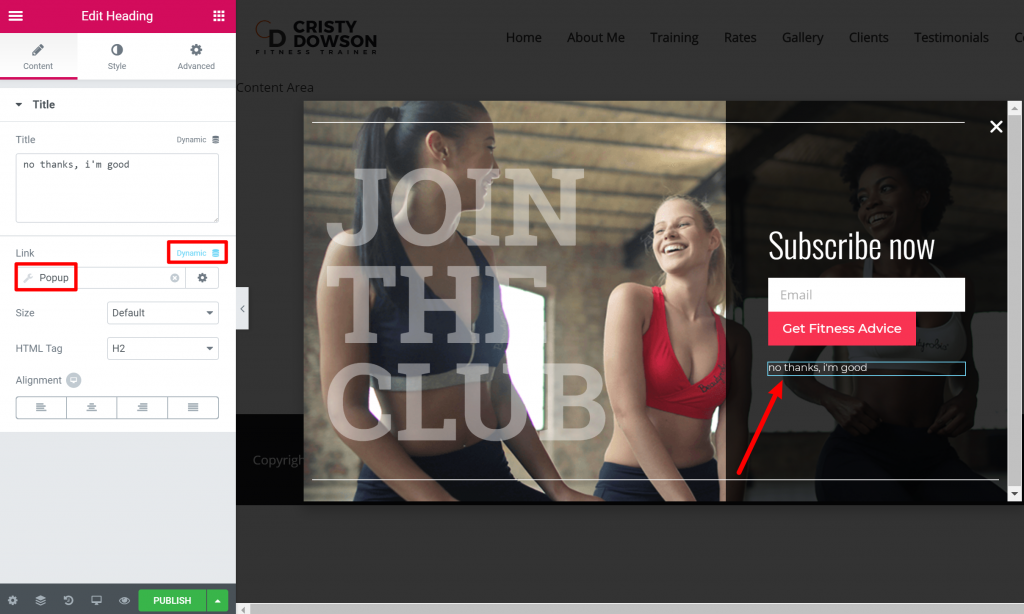
Then, you can use the Wrench icon to choose Close Popup from the drop-down:
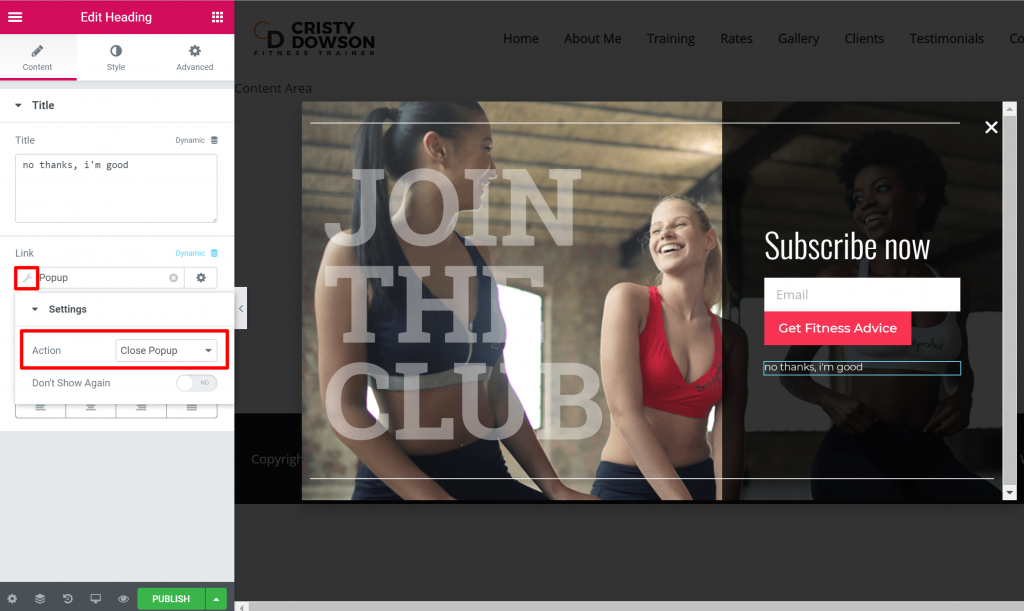
You don’t necessarily need to enable the Don’t Show Again option for a negative opt-out because you can use the Advanced Rules to control how often your popup displays (more on these later).
Step 3: Choose What Content Your Email Capture Popup Will Appear On
Once you’ve finished building out your core popup itself, you’re ready to get into the behind-the-scenes options that control when, where, and how often your popup displays.
To access these options, click the Publish button. That will open the Publish Settings for your popup.
To get started, you’ll want to choose what content you want your popup to be eligible to display on. I say “eligible”, because this won’t guarantee that your popup displays. For example, if a user has already submitted their email, they wouldn’t see the popup even if they visit one of these pages.
Click Add Condition to add your first display condition:
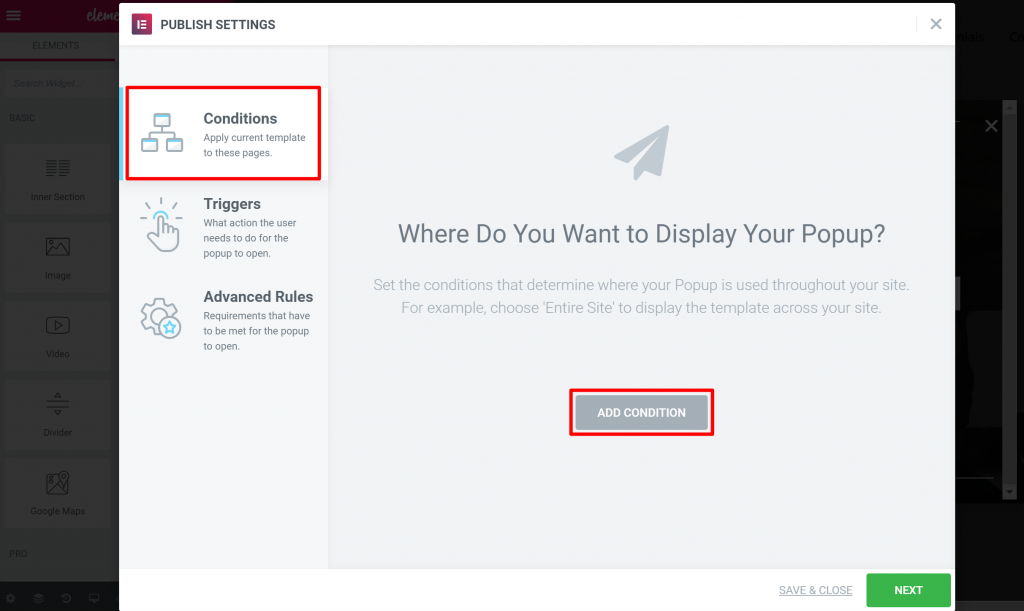
You can use both Include and Exclude conditions to target your:
- Entire site
- Specific archives
- Singles – this is the most flexible – you can target specific content, posts in certain categories, posts from a specific author, etc.
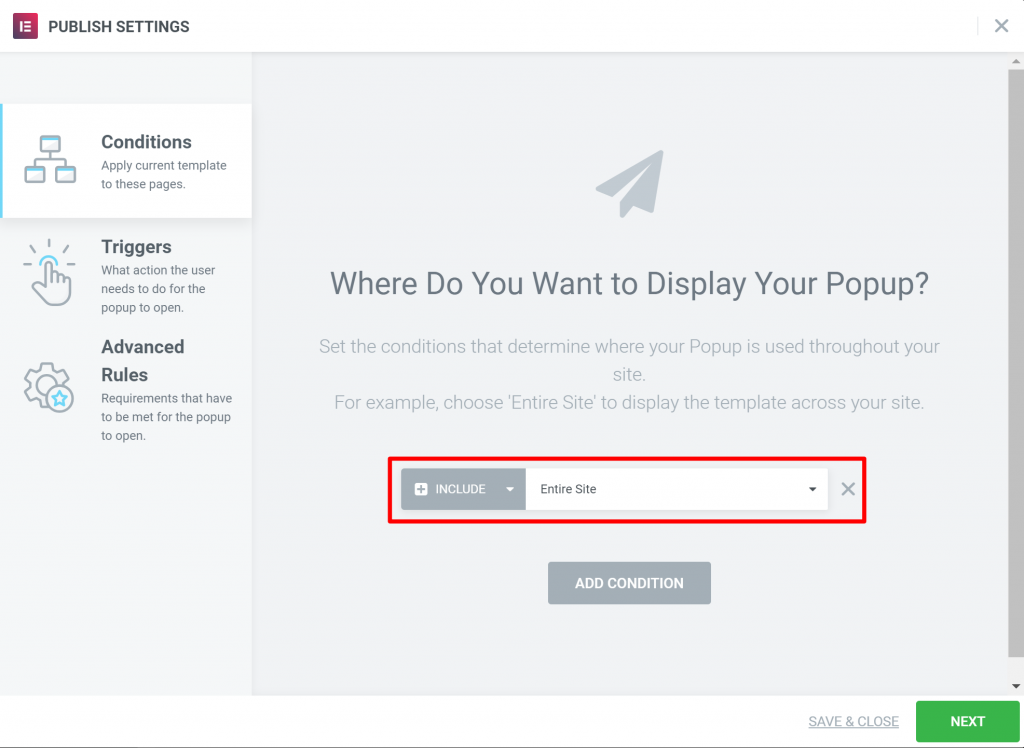
For this popup example, I’ll just target it sitewide – but feel free to get creative with where you target your popup:
Step 4: Choose When to Trigger Your Popup
Next, you can use the Triggers options to control when your popup displays on the content you chose in the previous step.
You have a lot of options here…
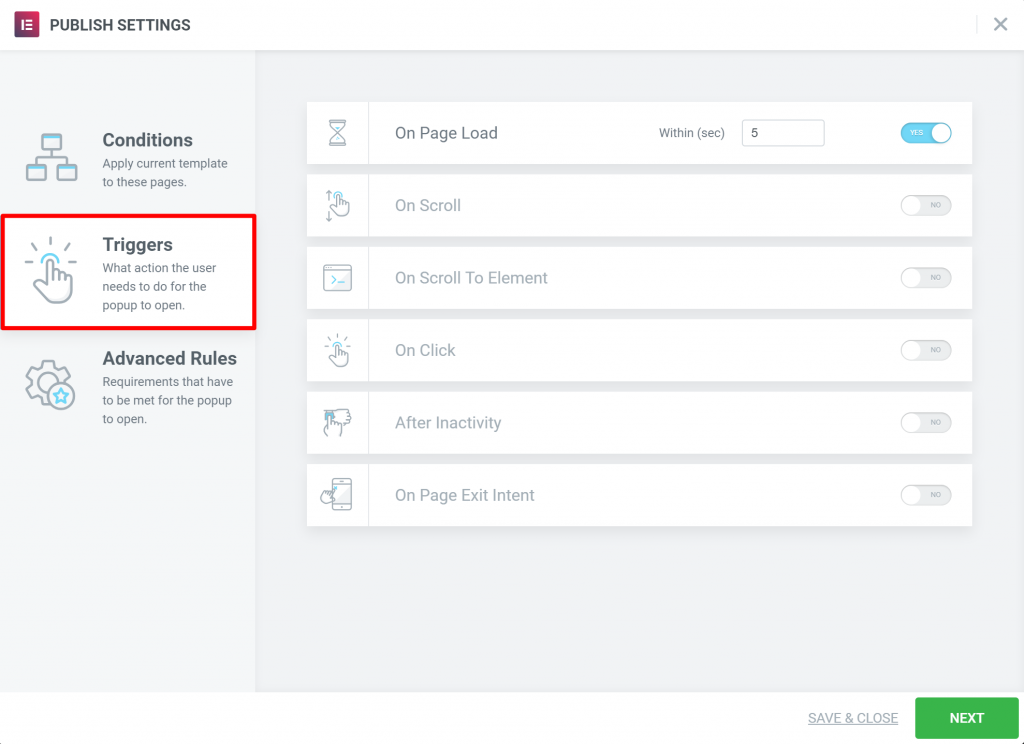
The simplest is to choose On Page Load. With this one, the popup will display right away, or after a certain number of seconds.
However, for an email capture popup, you might want to wait a little bit to make sure your visitor is engaged before you show the popup. To do that, you can use one of the other options:
- On Scroll – displays after the user scrolls up or down a certain percentage.
- On Scroll To Element – displays when the user scrolls to a specific element. For example, you could display the popup when a visitor reaches your blog comments section.
- On Click – displays after a user clicks X times.
- After Inactivity – displays after the user has been inactive for X seconds.
- On Page Exit Intent – displays right before a user leaves the page (great for a last chance to capture departing visitors)
Step 5: Choose Conditions That Must Be Met for Popup to Display
At this point, you’ve chosen which pages your email capture popup can display on and what will trigger it to display.
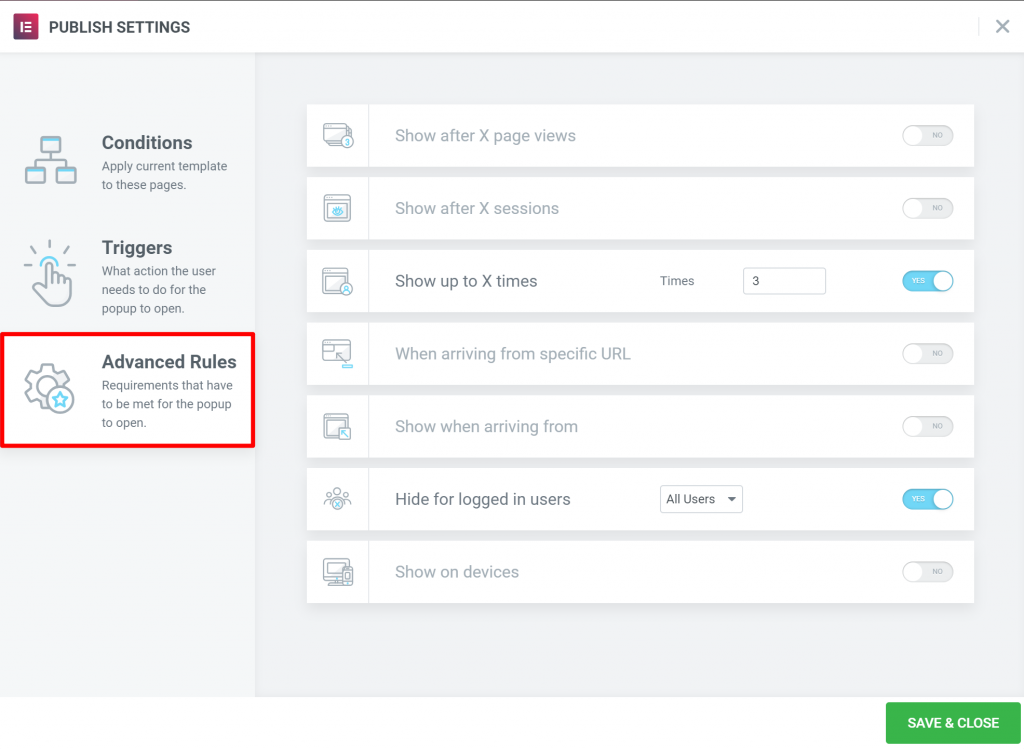
Now, you can use the Advanced Rules tab to add some restrictions to when or how often your popups display.
For example, if you want to limit how many times your email capture popup displays to individual users to avoid annoying repeat visitors, you could use the Show up to X times option.
Or, if your registered users are already subscribed to your email list, you could choose the Hide for logged in users option:
Step 6: Publish Your Email Capture Popup
Once you’ve finished adding rules for your popup, click the Save & Close button in the bottom-right corner to make it live.
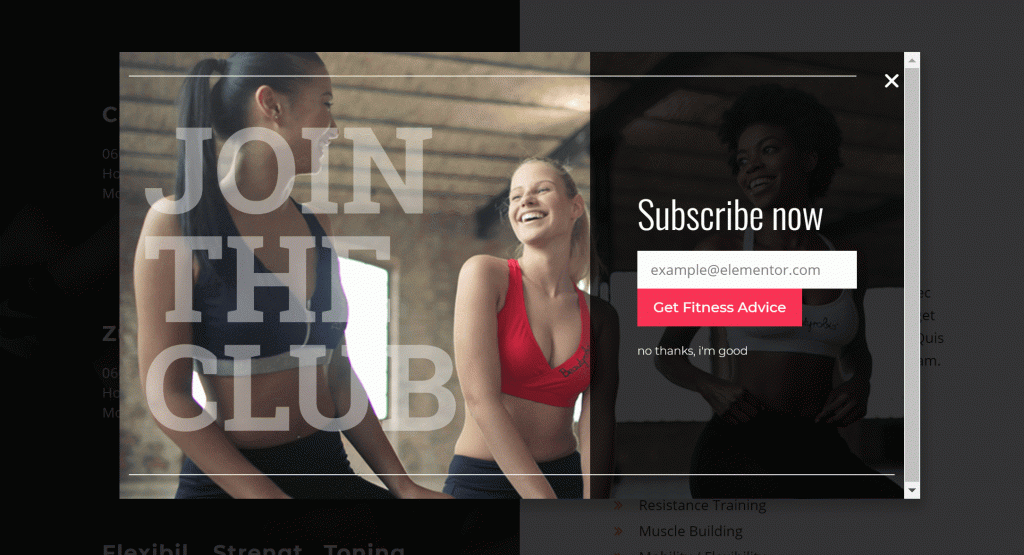
Now, you can go to your site and check out your popup! Here’s how our example looks – notice how it automatically closes after a visitor submits their email:
Bonus: Create Two-Step Opt-In Email Capture Popups
In the example above, I showed you how to create a single email capture popup. However, you can also use two-step opt-in popups to capture emails.
This approach works especially well with notification bars – you can create one notification bar with a yes/no prompt to join your list, and then display a second notification bar with the email opt-in form if a user chooses “yes”.
To use this approach, you’ll create two separate popups.
The first popup includes “yes” and “no” buttons. You can then use a Dynamic link to have the “Yes” button open a second popup that includes your form, and the “No” button closes the popup:
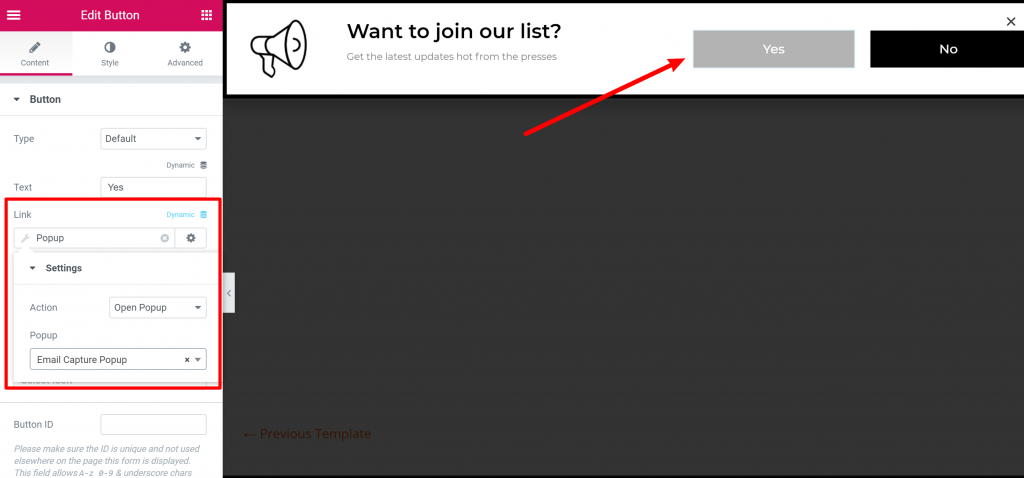
You can then follow all the other steps to create your email capture popup. The only difference is that you won’t need to add any rules to the email capture form popup because those rules are already determined by your yes/no popup.
Summary
Popups are an efficient method to increase your email subscribers and customers. We hope this post will help you reach the best results when creating your own email capture popup.
Looking for fresh content?
By entering your email, you agree to receive Elementor emails, including marketing emails,
and agree to our Terms & Conditions and Privacy Policy.
