Want to develop the best workflow for building websites?
Creating your own website without learning how to code or hiring a developer used to be near impossible. However, thanks to platforms like WordPress and plugins like Elementor, what once was mission impossible is now a reality.
In this tutorial, we’ll show you how to use WordPress and Elementor to create a new website and walk you through the entire process step by step. We’ll cover the tech setup you’ll need, show you how to create the pages, and guide you through the process of customizing your site. Let’s dive in!
Making a WordPress Website
WordPress is a powerful content management system that can be downloaded and used for free and it allows you to create any type of website; from simple personal blogging and small business websites to large corporate sites and feature-rich applications. Elementor, on the other hand, is an easy-to-use but robust page builder that makes it easy for anyone to create their website, no matter how complex it is.
For the purposes of this tutorial, we’ll be creating a simple four-page website for a small business. To follow along with the tutorial, you will need:
We’ll start off with the TwentySeventeen theme as our base and then we’ll use pre-designed templates from Envato Elements plugin to create the pages. Once the pages are set up, we’ll customize them with our own colors, fonts, images, and content.
Once you are done with this guide, you might want to check out our other guides and tutorials for more specific pages.
- For a tutorial about creating an eCommerce website, we recommend that you take a look at our WooCommerce tutorial.
- If you’d like to learn more about how to create a blog on WordPress, then we have an excellent guide about it here.
- And we also have a guide if you are looking to learn more about how to create a landing page in WordPress with Elementor.
With these guides, you will be able to improve your website and make the most of it.
Technical Setup
The first step to creating your own, new site with WordPress and Elementor is to make sure we have everything in place. In this part of the tutorial, we’ll cover getting your own domain name and web hosting, show you how to install WordPress, Elementor, and Envato Elements as well as how to install the TwentySeventeen theme.
1. Get a Domain and Webhosting

When you set out to create your own website, the first thing you need to do is get a domain name and a web hosting service. Your domain name will allow visitors to access your website.
If you’re creating a personal website such as a blog or a resume, you might want to consider using your own name for the domain name. This will help you build a personal brand, and your domain name is most likely to show up in search results when someone decides to Google your name.
Alternatively, if you’re building a website for your business, then the most obvious choice is to use your business name for the domain name. There is a variety of extensions you can choose from, but keep in mind that.COM is the most popular one and what most people type in the address bar by default. However, if you find that your desired domain name is not available with a .COM, try opting for .ME, .CO or .NET which are also very popular.
If you’re absolutely stuck on a domain name and can’t think of anything, consider using tools such as Namemesh or Panabee to come up with a name.
While you can buy your domain name separately from your hosting plan, the easiest way to start is to combine the two as this allows you to manage everything in one place.
The hosting plan will allow you to house all the files that make up your site. Your hosting server is where you will install WordPress and the add-ons mentioned in this tutorial.
As far as hosting plans go, they range from affordable shared hosting plans to more expensive managed WordPress hosting and premium dedicated servers. A shared hosting plan is a great choice if this is your first website and you’re just getting started. There are numerous web hosting companies out there, like Bluehost, SiteGround, and others for you to choose from.

There is no shortage of recommended WordPress Hosting providers but for purposes of this tutorial, we’ll be using SiteGround. To get started, follow the steps below:
- Visit SiteGround and click on the Get Started button
- Choose the hosting plan that’s appropriate for your site.
- Enter your desired domain name to see if it’s available
- Review and complete your order by entering your contact and payment information.
Once you’ve signed up for your hosting plan, you will receive a welcome email from Siteground that will have all the details related to your account. Find the login link to your hosting account area and use the username and password to log into your account.
2. Install WordPress
Before we proceed with the installation, we would like to point out the difference between wordpress.org and wordpress.com, since they often cause confusion, and are used interchangeably.
WordPress.org is where you should go to install wordpress, for this guide. It is where you will find the free version of the WordPress software. A key point here, apart from the fact that it’s free, is that you will have to host the site through a third-party hosting service.
WordPress.com offers more services and options, and is, therefore, a paid subscription. Here you will have the option to get a website, with hosting in a manner of minutes, with no additional, third-party services.
wordpress.org | wordpress.com |
It’s open source and is free to use. The only downside to this, is that you will require a third party hosting plan, the cost of which varies, but can be around $40 annually. | Has five pricing plans, including free where the most expensive plan is around $45 per month. |
The main benefit of wordpress.org, is the fact that you own the website and that you have full control of it, even though it’s free. | While wordpress.com has a free plan, it is very limiting in terms of ownership and control. For example:
To remove these limiting factors, you will have to upgrade to a more expensive plan (not necessarily the next least expensive). |
The user’s full control of the wordpress.org website can also be measured in the fact that it allows to:
| WordPress.com, on the other hand, does not allow to upload custom plugins, as the free version comes with pre-installed Jet Elements. In addition, while there is a selection of free themes as well as premium ones, it pales in comparison to the myriad of themes that wordpress.org has to offer directly, or via third-party addons. |
Another great benefit for this one is that you can place ads on your website, and earn money directly, without sharing the profits. | WordPress.com does not allow to place ads, and utilizes a system called WordAds, the revenue of which has to be shared with wordpress.com via a commission.. |
Additionally, wordpress.org allows you to utilize an important analytical tool like Google Analytics. | The free plan does not allow the use of Google Analytics, and in fact, in order to use it, you will have to sign up for the premium plan. |
Beginners should be aware, that with wordpress.org, users are responsible for updating the software and creating backups | WordPress.com takes care of these issues, and users will have to worry about updates and backups. |

After you have logged in to your hosting account, click on the My Accounts tab and then login to your cPanel. In cPanel, click on the WordPress icon in the auto-installers area and follow the steps to install WordPress.
You’ll need to enter a username and password that you will use to log into your site along with some other information. Then, click the Finish installation button and wait for WordPress to be installed.

After WordPress has been installed, go ahead and visit your WordPress site. Enter the name and password you’ve set up and click Log In to access your WordPress dashboard.

In your WordPress dashboard, navigate to Plugins > Add New. Search for Elementor and click Install. When Elementor has been installed, click Activate.
You’ll also need Elementor Pro to take full advantage of Elementor’s capabilities. Visit Elementor.com and purchase the Pro version of the plugin then install and activate it in the same manner as above. Once Elementor Pro has been installed, you’ll need to enter your license by going to your WordPress dashboard and navigating to Elementor > License.
4. Install Envato Elements

Envato Elements is a free WordPress plugin made by Envato, the parent company behind ThemeForest. The plugin is still new but it already has an impressive collection of templates made specifically for Elementor.
Each template can be imported into your individual Elementor template library and you can find it under My Templates. You can also immediately create a live web page that will be saved as a draft so you can start editing it. We’ll use a number of templates from Envato Elements to speed up the website design and creation process and make it as user-friendly as possible for new WordPress users.

To install Envato Elements, go back to Plugins > Add New, search for Envato Elements, and click Install. Once installed, activate the plugin.
5. Install TwentySeventeen
The last step is to install the TwentySeventeen theme. In most cases, this WordPress theme will come preinstalled with your WordPress installation but in the event it’s not, follow these steps to install it — it’s a free theme.
In your WordPress dashboard, go to Appearance > Themes. On that screen, click Add New button. Search for TwentySeventeen, and then click Install. When the new theme has finished installing, click Activate.
Creating Site Pages
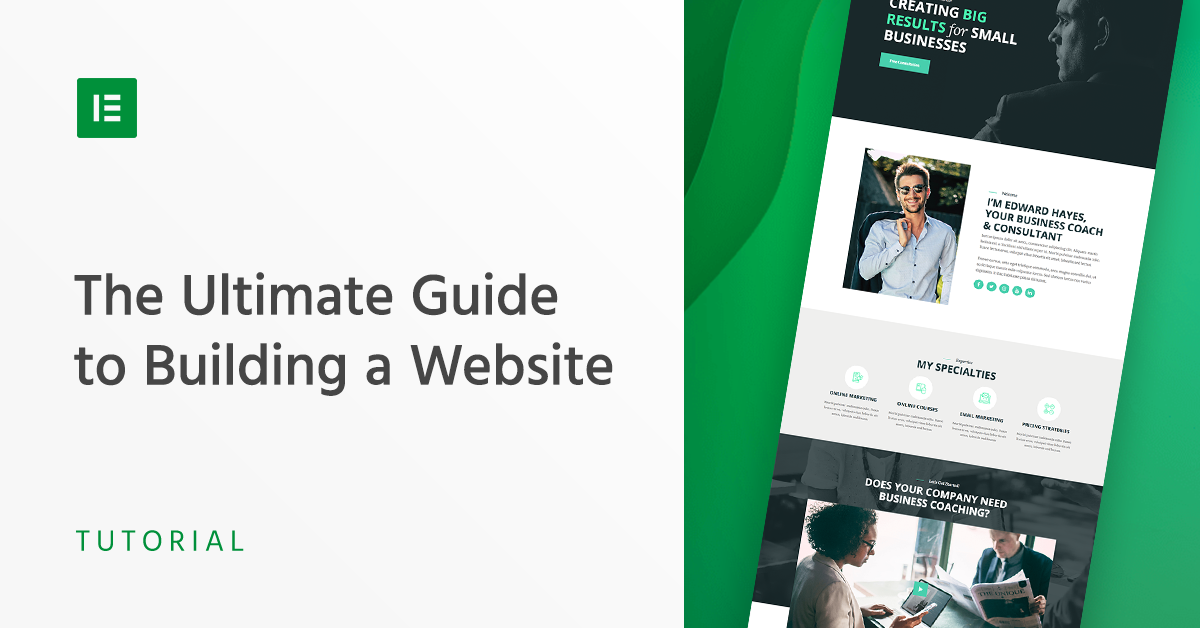
Now that we’ve covered technical setup and you have everything in place, it’s time to start working on your site. In this tutorial, we’ll be building a 4-page website consisting of a homepage, a menu page, an about page, and a contact us page. We’ll be using the Juice Bar template for the rest of the tutorial. Let’s begin.
1. Create the Homepage

In your WordPress dashboard, go to Elements. Click on the Food and Drink link at the top, and then scroll down to find the Juice Bar template. Click on the sixth template named Home 6 and then click the Import Pro template button.
When the template has been imported, enter a page name and click Create New Page that will be saved in your drafts so you can go back and edit the template once all the pages have been created.
As you create the page, you have the option to click on the page link in the message that appears after successful page creation. You can also edit the imported template.
Now that all the pages have been created, it’s time to customize your site and make it your own. We’ll start by getting familiar with how Elementor works, and then we’ll dive into tweaking the visual styles such as colors, fonts, and layout.
2. Create the Menu Page
To create the Menu page, choose Menu 5, and click Import Pro Template. You can then follow the same steps as above to create a draft of your menu page with this Elementor template.
Name the page Menu and press the Create page button. The plugin will do its magic and the template will be waiting for you in the Drafts section.
3. Create the About Page
Create your About page in the same fashion as above, only this time choose the About 1 template.
4. Create Contact Us Page
Lastly, create the Contact Us page by following the same steps as before. Select Contact Us 2 template and import it, then create the page by entering the name for it and clicking the Create New Page button.
Customizing Your Site
Getting Familiar With Elementor

The best way to get familiar with Elementor is to see it in action. Start by going to Pages > All pages. Find the homepage you’ve just created and hover over the page name. When the menu links appear below, click on Edit with Elementor.
Once the page loads, you’ll see two sections on the screen. On the left, you’ll notice the editing screen for Elementor while the right side shows you how your page looks and allows you to edit the structure and the contents.
Elementor uses sections, columns, and widgets to create the layout of any page. Sections are the largest building blocks and you’ll add columns that are called inner sections inside them. Inside inner sections or columns, you will be able to add widgets which are content blocks that add text, images, buttons, and other elements to your page.
Working With Sections

When you hover over a section, you’ll notice a blue border appear with a handle that lets you edit the section, add a new section, or entirely delete a section of the page. You can also right-click on the handle and access section controls from there, as you can see from the screenshot below.
Clicking the + icon allows you to add a new section above the existing section. You’ll then have to click the pink + or the folder icon to create the structure for your section or choose a premade template.
Working With Inner Sections or Columns

In a similar fashion, you can click the grey border and the corresponding handle to edit inner sections. You can modify the width of the columns and change the spacing between columns.
Right-clicking on the handle, allows you to add more columns, duplicate existing ones, delete them, and more.
Working With Widgets

Lastly, you can edit existing widgets by clicking the Pencil icon in widget handle or by right-clicking it. You can change the contents of it as well as access style controls, duplicate widgets, delete them, and more.

You can also add new widgets with a simple drag-and-drop from the left-hand side of the screen and dropping them onto your page.
Customize Colors

One of the first customizations you’ll probably want to do is to tweak the colors that the template is using. This will allow you to integrate your business or brand colors and personalize the template with your own style.
You can modify the colors on a global level and on the individual widget level. Editing colors on a global level means that any new page you create with Elementor will inherit those styles so all you have to do is create the structure and enter the content. To modify global color settings, click the left hamburger menu on the page editing screen. Then, click the Default Colors link under the Style menu.
As you can see, you can tweak the default color scheme by entering your own hex color codes or you can apply a pre-made color scheme if you don’t have a color scheme of your own.
Global style settings can be overridden by customizing each widget separately. To customize the colors of individual widgets, select the widget you want to style and then click the Style tab on the widget editing screen.
Customize Typography

Similarly to colors, you can edit the typography of your site on a global level and on the individual widget level.
Globally, you can set font families and font weights for primary and secondary heading, body, and accent text.

To style the typography of individual widgets, click on the widget you want to edit and then click Style. From the drop-down menu next to Family, you can choose among hundreds of Google Fonts or you can select Default and default fonts you’ve set under global settings will be applied.
Customize Images

Once you’ve customized the colors and fonts on your site, it’s time to replace the stock images with your own. To do this, click on a section that you want to work with. In this case, I want to change the image in the Featured Menus section. I clicked on the Kiwi Bliss column and then go to the Style tab.
First, you’ll need to delete the existing image by clicking Delete and then click the + sign to upload your own image. Once the Media Library loads, click on Upload files and then click the Select files button.
You’ll then select the image you want and click the Insert media button. If you’re working with background images like in the example above, you can also change their position and control their size. You also have the option to change the background overlay or remove it completely as well as set the colors for image text.
If you’re working with regular images instead of background images, you’ll have slightly fewer options. For example, to change and customize the images in the Meal Pricing section of the homepage, you’ll follow the same steps of deleting the existing image and then uploading your own. You can then change the image opacity and add various CSS filters such as Blur, Brightness, and more.
You can apply different styles for the image hover state and those styles will be visible once a visitor hovers over the image with their mouse.
To customize the rest of the images on your site, simply repeat the steps above and then click Publish to save them.
Customize Page Layout

Once you have all the styles configured to your liking, it’s time to start tweaking the layout. For example, the homepage we’re working with features 3 columns but what if your business has 4 services? In that case, you’ll want to add another column.
To do this, right-click on the inner section handle and select Add column. A new column will be created and you can then proceed to add the widgets that you want. Alternatively, you can duplicate an existing column to save time. Once you’ve duplicated the column, replace the content with your own.
You can also add another section to your page, as we’ve mentioned earlier. Here’s a step by step process to add an example About section:
- Click the + icon in the section handle below the Menu pricing.
- Set the structure to one column
- Adjust the column to full-width
- Drag a Heading widget and type in your heading
- Drag Inner section widget and choose two columns
- Add an image to the left column and add a text widget to the right column
- Choose an image from your computer and upload it to the Image widget
- Enter a brief description of your business in the Text widget
- Drag over a button widget below the text widget
- Set the button to link to your About page.
When you’re done making the desired changes, click the green Publish button and your changes will be live on the site.
Add Social Media Links
As you can see, the template we’re working with comes with social media links in the footer. You can easily edit them by clicking on the icons and replacing them with icons that link to your preferred social media profiles.
You can add more links by clicking the Add Item button. Customize the icons by changing the shape and then click the Style tab to control the icon color, size, padding, and more. As you can see from the screenshot below, I’ve added a Pinterest icon and changed the icons to a square shape with blue color.
It’s worth mentioning that you can add social icons anywhere on the page by dragging over the Social Links widget. You can then choose which icons you want to display and configure the way they are displayed by changing the shape, size, colors, and more.
In this example, I’ve added the icons to the About section created in the previous step.
Once you’re done modifying your homepage, click Publish and then click the Exit to Dashboard button.
Customize Contact Form

So far the majority of your customizations happened on the homepage. Let’s take a look at how you can tweak other elements such as the contact form on the contact us page. Start by going back to Pages > All pages and selecting your Contact us page. Click Edit with Elementor.
Click the form widget and then start modifying the information. You can click individual form elements to add fields for email, phone number, date, text, website, and more. You can also add more fields by clicking Add item button.
In this example, I’ve added a field for the seating options so potential customers can choose an indoor or an outdoor table.
The form also allows you to choose an email that will receive form submissions as well as what should happen once the form is filled out. You can choose to receive an email notification, redirect the visitors to a special thank you page, add them to your email list, and more. When you’re done, click the green Publish button and your changes will be live on the page.
Customize Copy

The next task on your list is to customize the copy on the templates. To do this, you will be editing the widgets directly and replacing the text with your own. You can start with any page by going to Pages > All Pages and then hover over the page you want to edit. Click on Edit with Elementor. In the example below, I am editing the About page copy.
Once the editing screen loads, click on the text you want to edit. You’ll notice a text editor appear on the left-hand side that looks like a regular WordPress post editor. You can then change the text, add images, forms, links, format the text, and more.
To edit other text areas on your site, all you have to do is repeat the steps above. Click the text, delete the existing copy, and enter your own. As always, when you’re done, click the green Publish button and your changes will be live on the page.
It’s worth mentioning that as you’re editing text, you can still make adjustments to the typography and adjust the color of the text as we’ve described earlier in the article.
Add the Header and Footer Templates Using Blocks
Using Elementor and the blocks feature, you can add custom or premade header and footer templates and use them on every page of your site or you can create different headers for each page.
Adding Headers

To create a header, click on the + icon on the topmost section on any page and then click the Folder icon. Once the template library loads, click on Blocks, and from the drop-down menu choose the Header category.
Choose a header block you like and then click the Insert button. Then, click the Section Settings and under Layout settings set the HTML tag to header. You can also set the width to full-width, adjust the spacing between widgets, add more widgets to it, and more.
As you can see in the screenshot below, I’ve removed the search icon and replaced it with social icons. When you’re done tweaking the header, right-click on its handle and select Save as a template. You can then reuse the header across all pages on your site.
Adding Custom Footers

In a similar fashion, you can create footer sections for your pages. Start by clicking the folder icon below the last section on the page and choose Blocks, then Footer from the drop-down menu. Choose a footer block you like and click Insert.
You can then style the footer element in the same fashion as any other section and widget on your page. When you’re done designing your footer, click on its handle and press Save as a template. Name it and click Save, then feel free to re-use it on any page on your site.
When you’re done adding and styling header and footer elements, simply click the Publish button on the left-hand side of the screen and your page will be completely customized and live on your site.
Once you’ve saved the header and the footer, you can go back and apply them to other pages. To do that, go to Pages > All pages and select a page to Edit with Elementor. Then, click on the + icon above the topmost section, click the folder icon and go to My Templates. Find the saved header section and click the Insert button.
To add the footer, scroll to the bottom of the page and click the folder icon at the very bottom. Click My Templates and then choose the saved footer block. Click Update to save your changes.
Customizing Your WordPress Website
Once you are done making all the changes on your pages, there are a few last customizations that you need to make in WordPress itself. You need to upload your logo, create a menu so visitors can navigate your site, and finally set the homepage for your site.
Upload a Logo
Let’s start by uploading a logo. To do this, in your WordPress dashboard go to Appearance > Customize. Once the customizer loads, click on Site Identity and then click Select Logo.
When the media library loads, click on Upload files, select the logo file from your computer and click Select. Then, click Publish to save the changes.
Create A Menu

Once you’ve uploaded the logo, go to Appearance > Menus and enter a name for your menu. Then, click Create Menu. From there, check the pages you’ve created and customized above to the right side of the screen.
You can then drag the pages to customize the order they display in and select the position for this menu. When you’re done customizing the menu, click Save Menu.
Set the Site's Homepage

The last WordPress customization step is to set the page that will serve as the homepage for your site. To do this, go to Settings > Reading. Next to the line that says “Your homepage displays” select A static page and select the homepage you’ve created. Click Save changes and then visit your site to see how it looks.
SEO Settings
Once you add a page or a post, you will have access to SEO settings, like meta titles, descriptions, slug formats, and more. We encourage you to make sure that these are adequately filled.
Meta Titles
The meta title (also known as the title tag) summarises the content that is found on the specific page. This title appears in the browsers, results on search engines, and other sites like Twitter or Facebook. You should include relevant keywords in the title.
Meta Description
The meta description allows you to write a short summary of the page and its content. This also appears on the search results page.
Slugs/URL
Slugs are, in essence, the last part of the URL. They should be short and to the point and capture the essence of the page or post.
These are some of the SEO you can change without downloading additional plugins, and you should make sure that you optimize them for the benefit of your website.
How to Create Dynamic Elementor Templates

Before we wrap up this tutorial, let’s go over the steps you need to create a post template for your blog as well as a custom layout for your blog page. This will allow you to create a single post and blog page layout that matches the rest of your site.
While your theme does supply these templates out of the box, they won’t look like the rest of your site when you use a premade template or create one from scratch using Elementor. This can cause confusion with your visitors and blog readers so creating your own template for these two pages is highly recommended.
Create a Single Blog Post Template
To create a single blog post template, go to Elementor > My Templates. Click on Single and then Add New Single button. From the dropdown menu, select Single, and then under Select Post Type select Post, and enter a name that will make it easier to find the template later on. Click Create template .
Once the library loads, browse through the templates to find the one that you like and that matches the rest of your site. Then, click Insert template. You can also create your own from scratch by adding sections and widgets to the template. Make sure to set the page layout to Elementor Canvas and then insert your saved header and footer block.
Once you’re done designing the template click Publish. You can then choose whether this template is used for all posts or only for certain categories, and more. Set the conditions to your liking and then hit the Publish button.
Create a Blog Archive Template
A blog archive template is nothing more than a page that displays all your blog posts in reverse chronological order. Creating a template for your blog page with Elementor allows you to apply the same styles as the rest of your site as well as to make the blog page have the same look and feel as the rest of the pages on your site.
To create a blog archive template, go to your WordPress dashboard and navigate to Elementor > My Templates. Click on Archive and then the Add New Archive button. This time, you’ll choose Archive from the drop-down menu and then enter a name for it. Then, click the green Create template button.
This time, make sure the Archive is selected in the drop-down menu when the library loads and select the archive template that you want. Click the Insert button or create one from scratch. Set the page layout to Elementor Canvas and then add your saved header and footer.
The last step is to click Publish when you’re done designing the archive template. Similarly to the Single Post template, you’ll be able to choose whether this should apply to all the archives or certain categories, tags, or other taxonomies. Click Publish and your custom blog archive is done.
Final Words
The task of creating a website on WordPress could be hard, daunting and maybe even intimidating for people who are new to website building. With Elementor, however, this task becomes exceptionally easy and simple.
Elementor offers everything you need for website building. From a great visual builder — where you can visually edit your website with a simple drag and drop (including your header and footer), to numerous widgets — which enhance your website’s functionality and allow it to stand out from the competition, and much, much more.
Start building your website with Elementor — it’s free.
Looking for fresh content?
By entering your email, you agree to receive Elementor emails, including marketing emails,
and agree to our Terms & Conditions and Privacy Policy.
